Did you get a new Chromebook and are unsure what to do next? Don’t fret. Our curated guide on setting up a new Chromebook in 2022 will show you everything you need to implement to get started with this flashy operating system immediately. So keep on reading to unravel a step-by-step guide teeming with helpful instructions.
ChromeOS as an operating system is utterly simplistic. It doesn’t take an IT degree to learn how to work with a Chromebook. Perhaps this is why these sleek devices are so eagerly picked up in various domains, such as the education sector and the enterprise space. Devices such as the HP Chromebook c1030 Elite and the Lenovo Chromebook Duet prove that.
Anyway, let’s get on with the raison d’etre of this guide and show you how exactly you can organize everything on a brand-new Chromebook.
- Recommended by Chrome Ready: Master guide – How to choose your Chromebook.
Setting up a new Chromebook in 2022 explained
We’ll be breaking down the setup process of a new Chromebook in multiple sections, so you’ll find it easier to implement them on your end. Let’s get started right away.
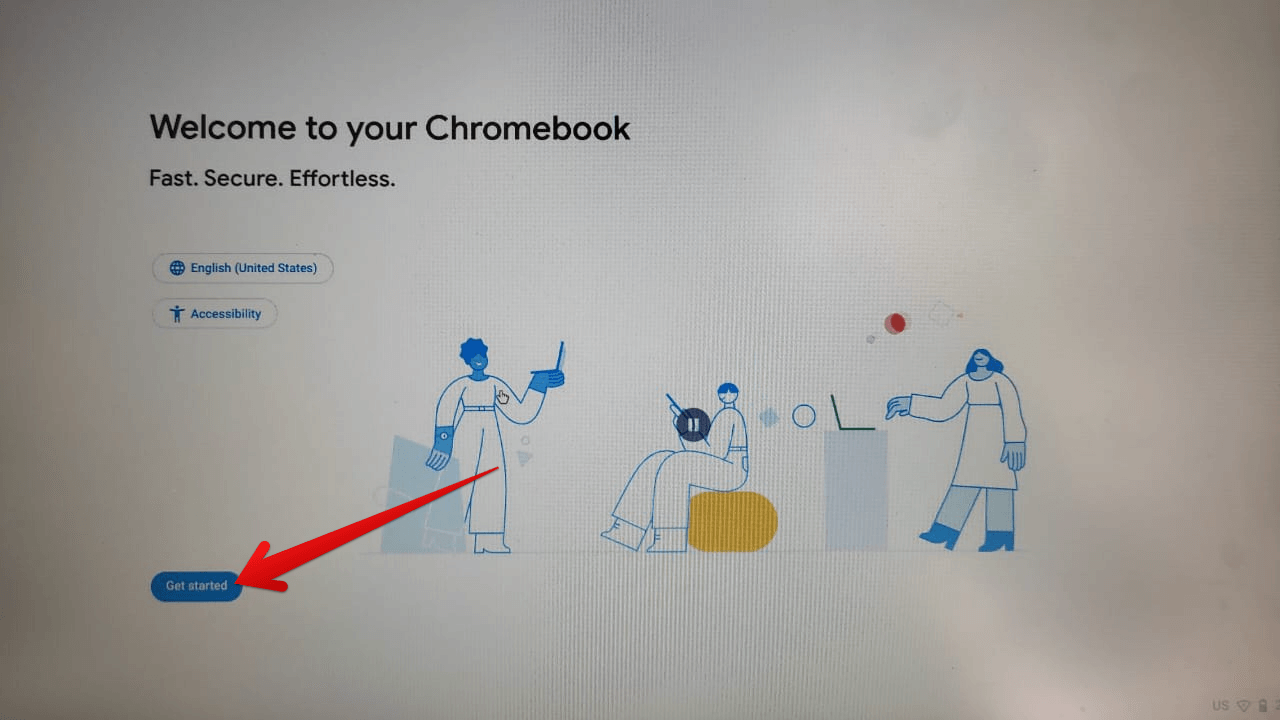
Getting started with the setup
The very first step is simple to go forward with. What you see in the image above is the primary thing you’ll be seeing on the screen of your Chromebook as soon as it boots up for the first time. Click “Get started” here, and you’ll take the next step painlessly.
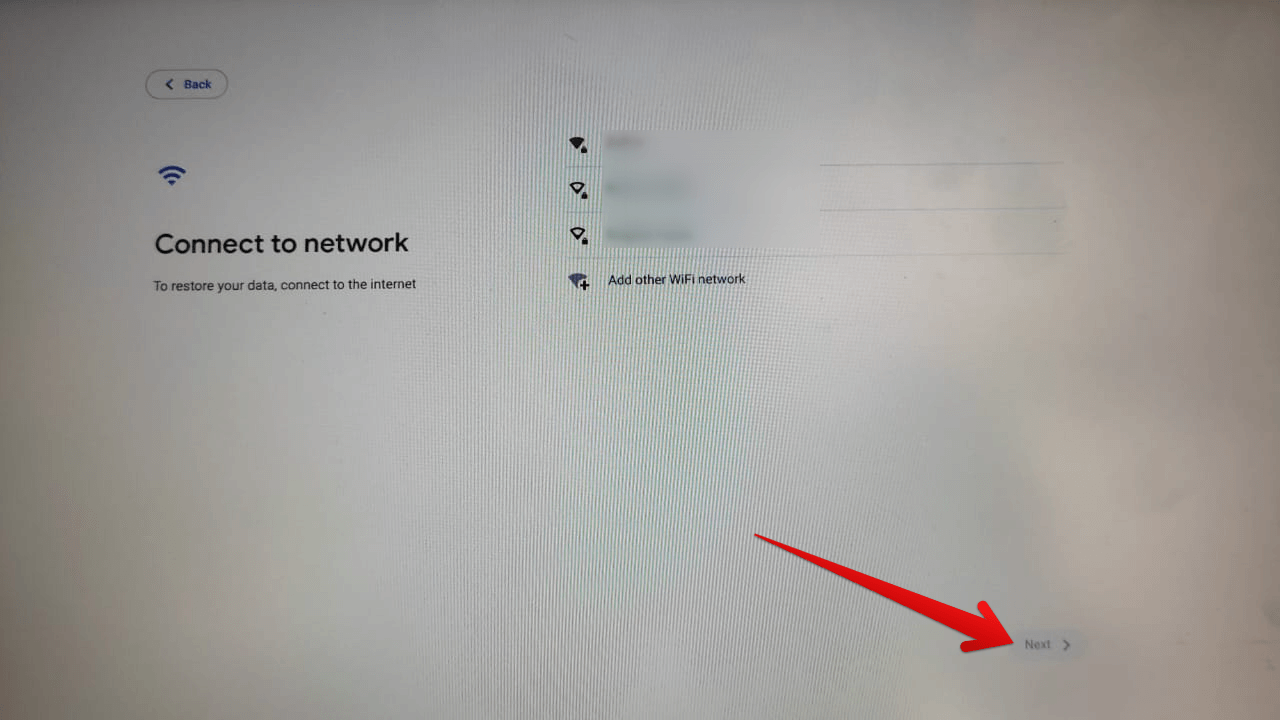
Choosing the preferred network
After clicking “Get started,” you will need to choose a network to further the Chromebook setup. Connect to Wi-Fi here to move forward. On the other hand, you may as well plug in an Ethernet cable if your Chromebook supports that kind of functionality.
For instance, you’ll find the Dell Latitude 5400 Chromebook comprising a terrific selection of ports where you got three USB Type-C 3.1 Gen 2 ports and an HDMI port for effective video conferencing. Connect to the internet and click on the “Next” button to go forward.
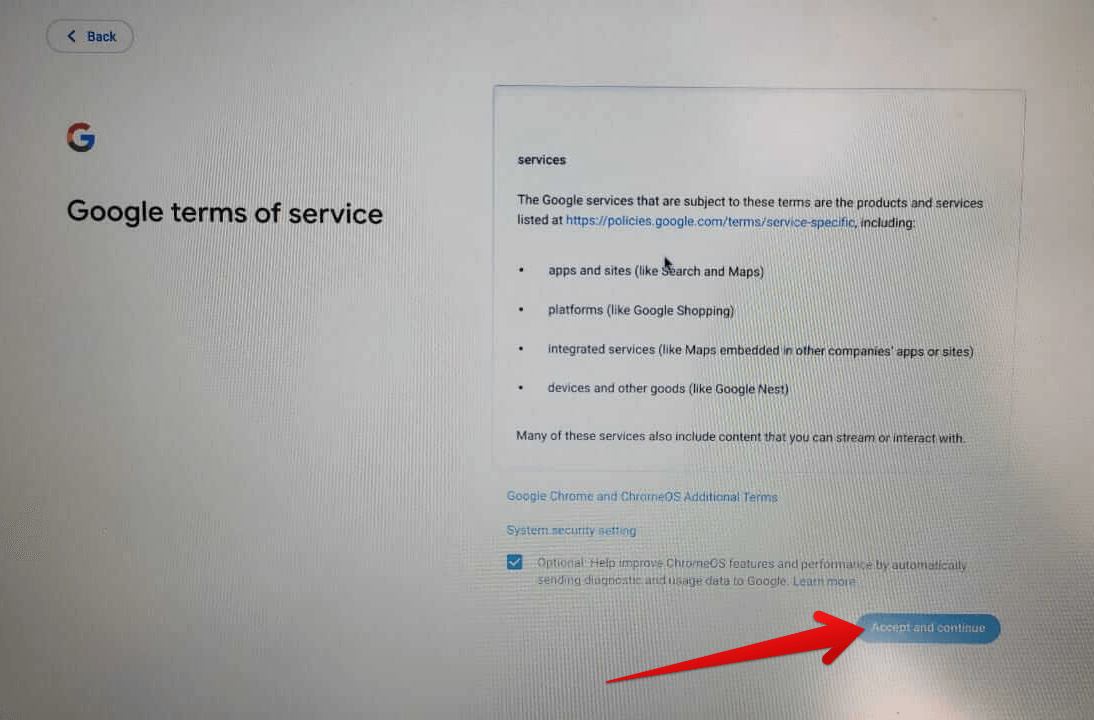
Conforming to the terms of service of Google
As soon as you conform to the services of Google, you’ll need to ascertain the person using the Chromebook. If you’re a parent looking to set up ChromeOS for their little one, you’ll select “A child.” However, if you’ve purchased the device for personal use, you’ll need to click on “You.” Select “Next” to get to the next step afterward.
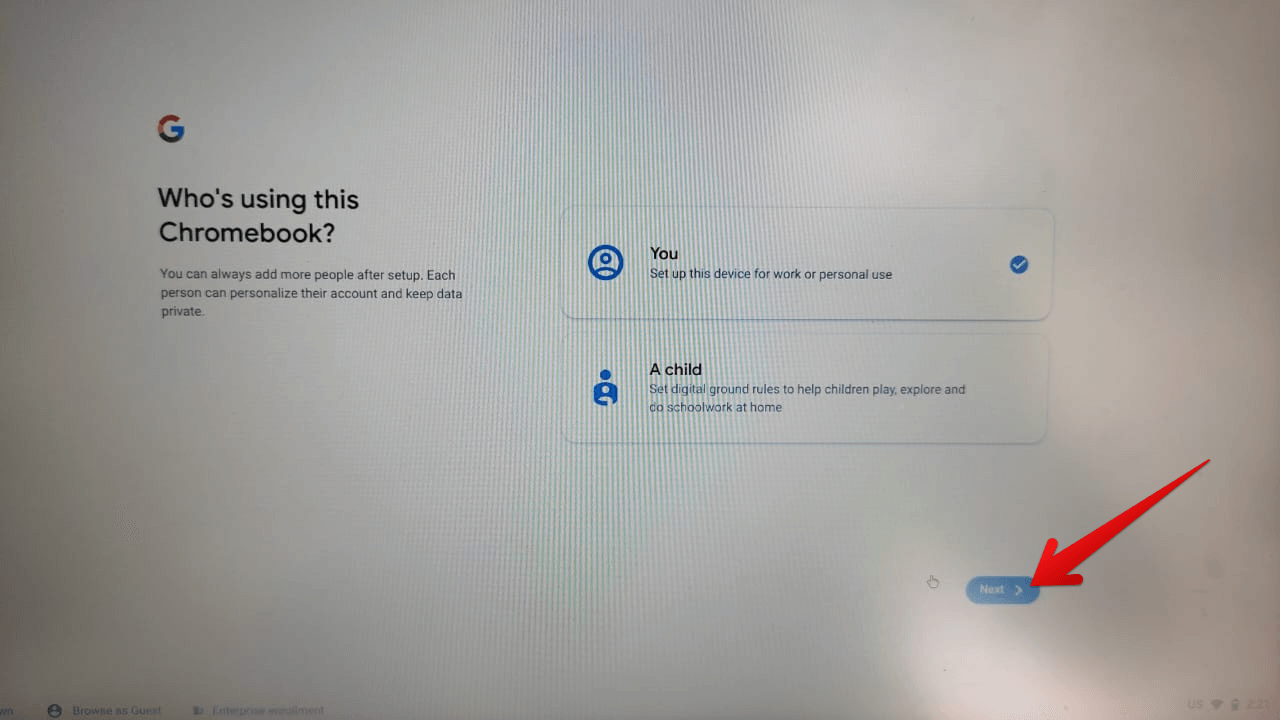
Choosing the right option for the Chromebook
Things are going to get straightforward from here on out. The next step is utterly crucial for you to go through. You must now sign in to your Chromebook with your Google email address. Select an email address that’s properly active and known to be working.
In addition, if you have used a Chromebook before, try using an email that you have used previously. That way, all saved data will sync over, and you’ll pick up your browsing right where you left it off. Note that you will also have to enter your password right after entering the email address.
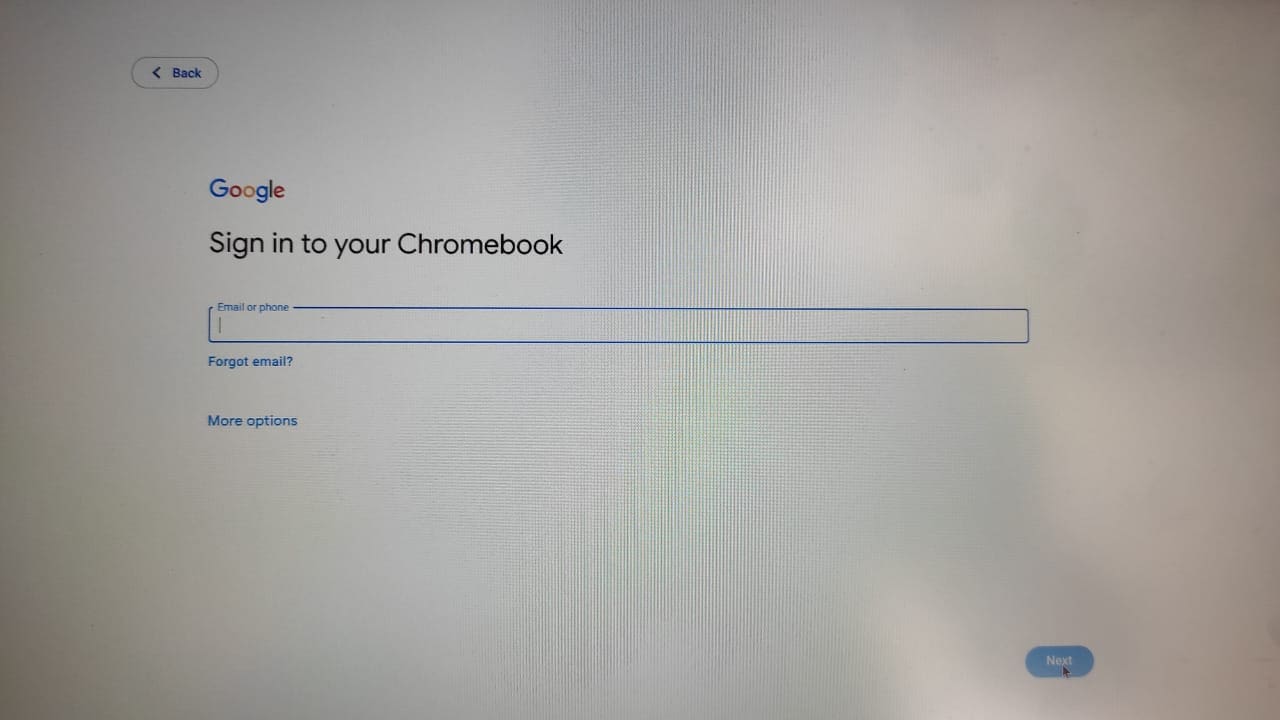
Signing in with your email address
You’ll need to go forth with the sync procedure on your Chromebook. This is a highly recommended step to take into account when you’re setting up your Chromebook. Not only does it help you get your stored preferences back, but it also makes it possible to boost productivity and ensure you don’t skip a beat in working with your Chromebook.
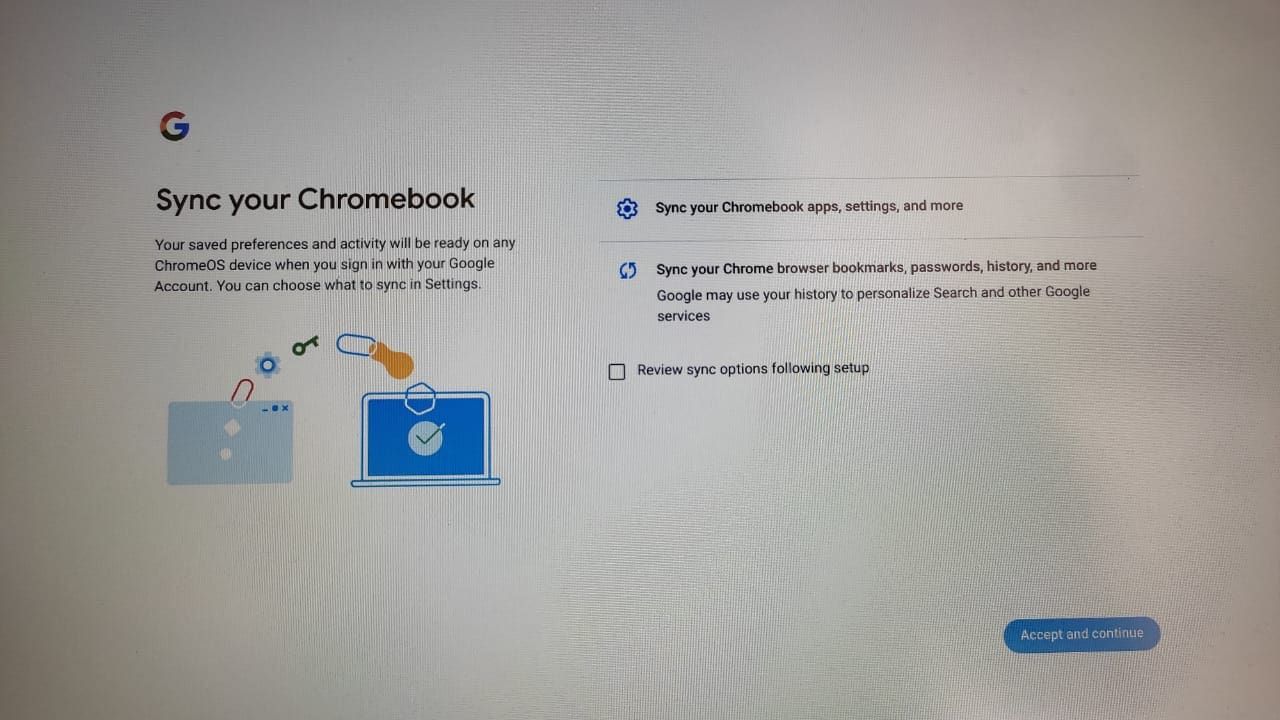
Syncing the device for your stored data
After clicking “Accept and continue,” the next step will pertain to the Google Play Store. You will now agree to the terms of service of the famous Android marketplace and continue from here on out. Next, click the “More” button to scroll down and read all the terms and conditions. As soon as you’re done, click on “Next,” which will now be in place of the “More” button.
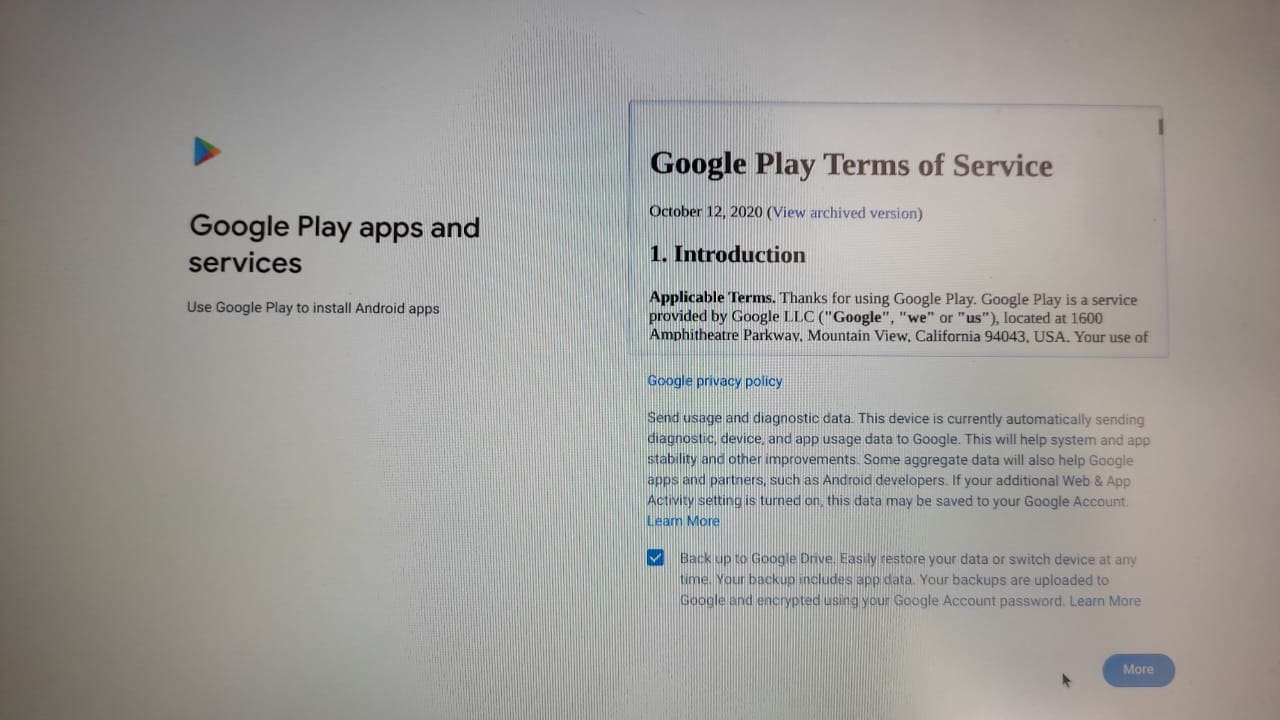
Agreeing to Play Store services
To further the process, you have to enable Google Assistant too. The latter is your secretary willing to get tasks done for you on the fly and unlock the entirety of your Chromebook’s functionality for you. On a side note, if you’re in the mood to see what this nifty piece of functionality can do for you from top to bottom, check out our curated Google Assistant guide for much more information.

Setting up Google Assistant
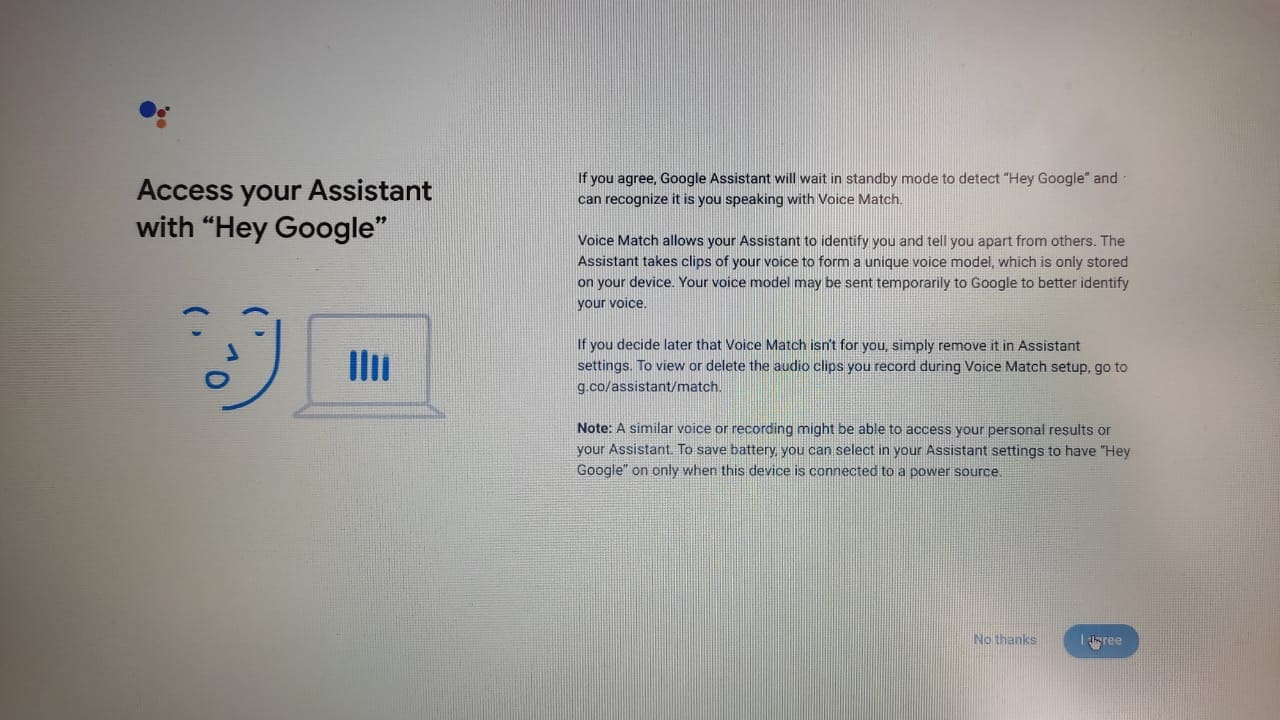
Agree to turn on the “Screen context” feature for Assistant on your Chromebook to further the process. The “I agree” button down below will help you achieve this.
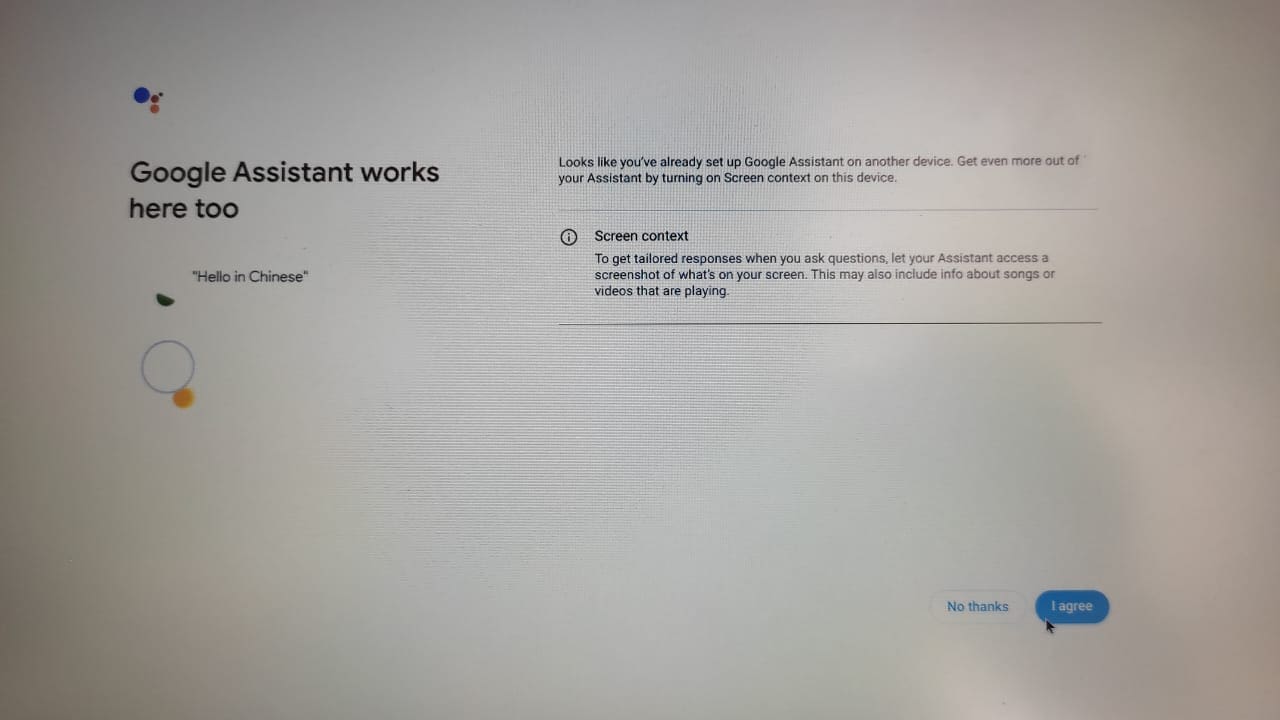
Finalizing the Assistant setup
The device will now show you instructions on using Google Assistant with your voice. Again, this is something that we’ve already gone over in a highly detailed manner in our Assistant mentioned above guide. Sift through the information provided in this step and click on “I agree” yet again.
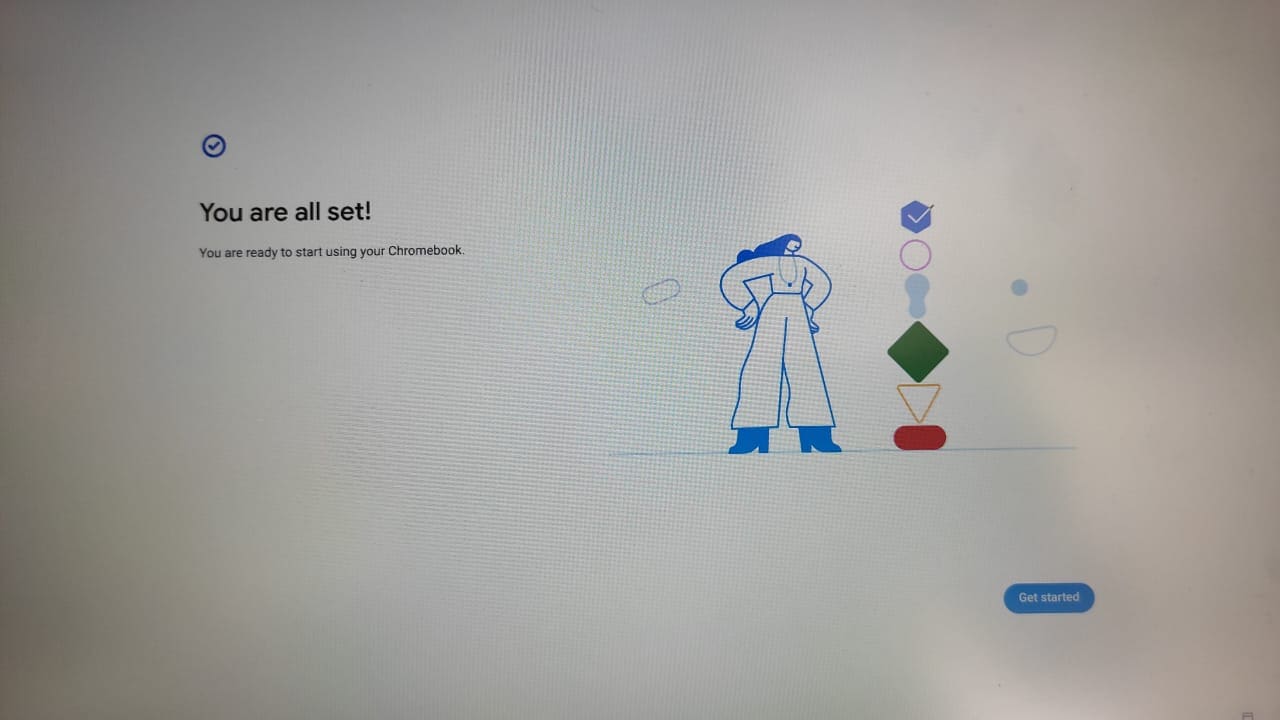
That’s about it for setting up a new Chromebook in 2022. You’ve finally arrived at the last step, where the system will inform you of your completion. Just click on “Get started” to be taken to the main ChromeOS interface and prepare to utilize all the bells and whistles that Chromebooks ever so gracefully come with.
Finishing up
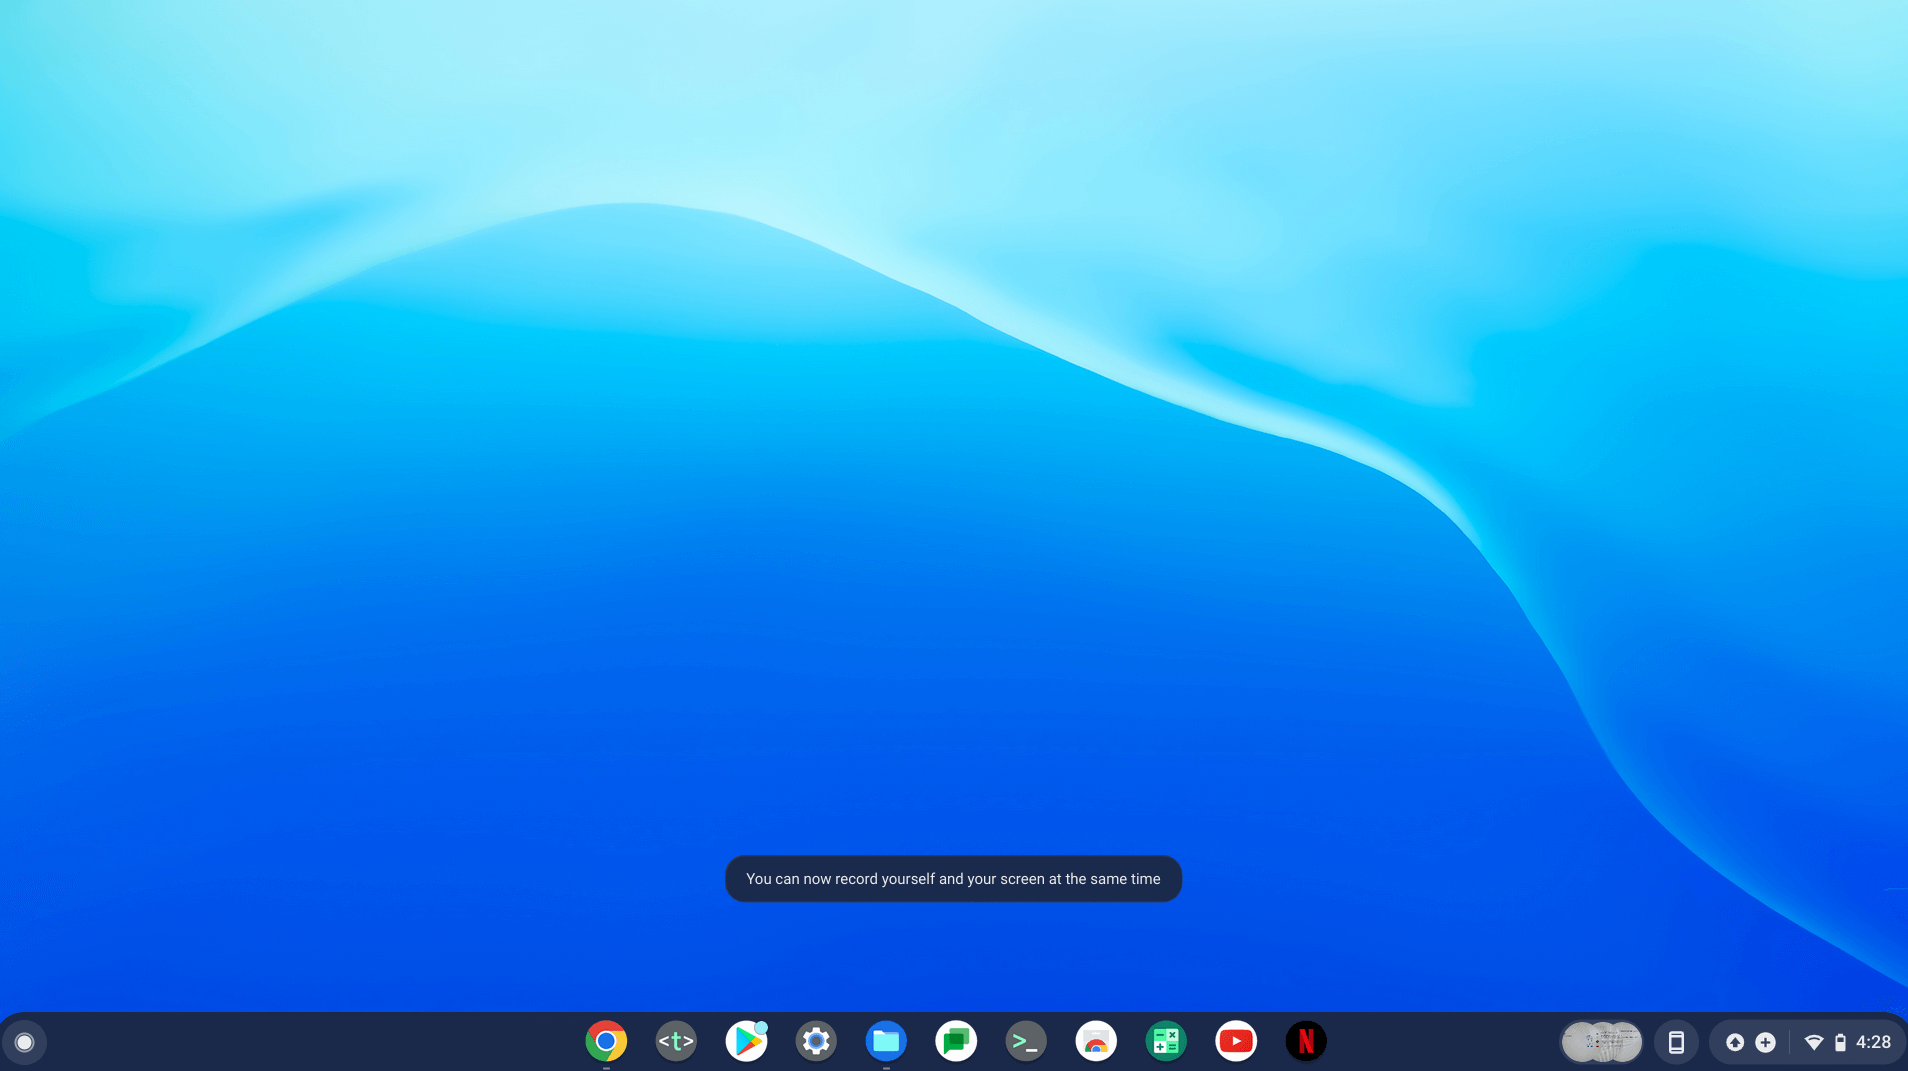
What you see below this text is the main graphical user interface of ChromeOS in all its glory. Notice how there are multiple different Android apps on the shelf already, even though we didn’t download them ourselves yet. This is the functionality of the sync feature of the Google ecosystem, not letting you indulge in any hassle of manually recovering your stored data, settings, and preferences. Everything carries over by itself, making the transition nothing but seamless.
ChromeOS interface
Now that we’ve shown you the setup of a new Chromebook in the ripe tech-forward age of 2022 let us shed some light on what to do next. The following section will tell you all you need to know about making your device stand out like never before.
What to do next after setting up your Chromebook
Chromebooks have come a long way from where they first started their journey. Today, the sleek and minimalistic operating system these devices sport is loaded to the brim with functionality, although in its typical uncomplicated manner.
After fully setting up your Chromebook and going through the initial tweaks, we recommend working with the machine and personalizing it to your heart’s content.
The following, therefore, is a cherry-picked list of everything you should do with your device as soon as you set it up for nothing but the best results.
Enable Linux
First off, let’s talk about Linux. Chromebooks come with their very own Linux container. To put it in simple words, this is excellent news for the operating system in question. The feature improves the operating system and makes the device more robust.
Prepare yourself to download some of the best Linux applications for your Chromebook. If you need to know what are some of the most worthy Linux software to get for ChromeOS, check out the specialized guide on the top 20 Linux apps.
Anyhow, it’s pretty easy to get Linux up and running on the device. A distinct section is available right within the “Settings” section of your Chromebook. Continue down to the “Developers” section of the “Settings” app to eventually find the option to enable Linux on your Chromebook.
For step-by-step instructions on how to get this done, look at how to configure and install Linux apps on ChromeOS.
Download Play Store games
Thanks to their integration with the Google Play Store, Chromebooks can let you download the best Play Store games in the business. Feel free to explore the famous Android marketplace for some high-quality games and apps.
If you’re packing a high-end machine like the Asus Chromebook CX9, you will enjoy experiencing the top 10 fun games on ChromeOS.
Adjust the ChromeOS shelf
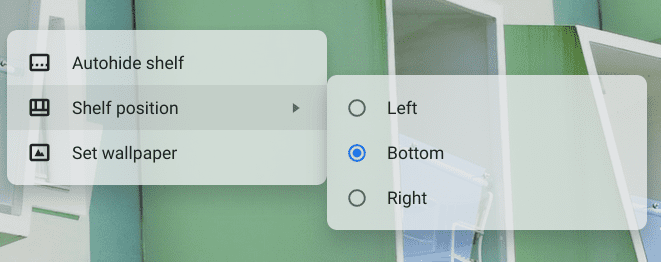
The shelf at the bottom of the ChromeOS interface can be taken to either side of the screen. Double-tap the ChromeOS home screen and hover over “Change shelf position.” Once done, select the direction where you want the shelf to be placed, and that will do it promptly.
Changing the shelf position
Use keyboard shortcuts
Chromebook users can do well if they know all the keyboard shortcuts this terrific operating system encompasses for aspiring power players. As it happens, keyboard shortcuts on ChromeOS provide users with the speed and skill they require to achieve their work goals consistently.
For more information, check out our detailed write-up on how to see keyboard shortcuts on a Chromebook. A separate window pops up on the desktop interface when you get to that section on the device. It’s where all usable shortcuts are grouped in different categories. Check them out, and you’ll see how much of a boost you receive in your overall productivity.
Change your wallpaper
Another essential facet you should tweak after setting up your Chromebook is changing that mundane wallpaper for something unique and fresh—time to say goodbye to that standard ChromeOS desktop screen and slap on something different for a change.
Chromebooks are adept at providing users with an exhaustive array of pre-installed wallpapers. In addition, it’s wholly effortless for one to apply new wallpaper to the Chromebook desktop, providing an easy-to-use interface. However, there’s a lot more to personalization than just changing the main home screen image of ChromeOS.
To take things to the next level, you must customize Google Chrome for the best results. The good news is that it’s pretty painless to modify the Chrome browser on your device. Open a new tab on the famed web crawler and tap on the “Customize this page” button in the lower-right corner of the screen, as comprehendible from the screenshot below.
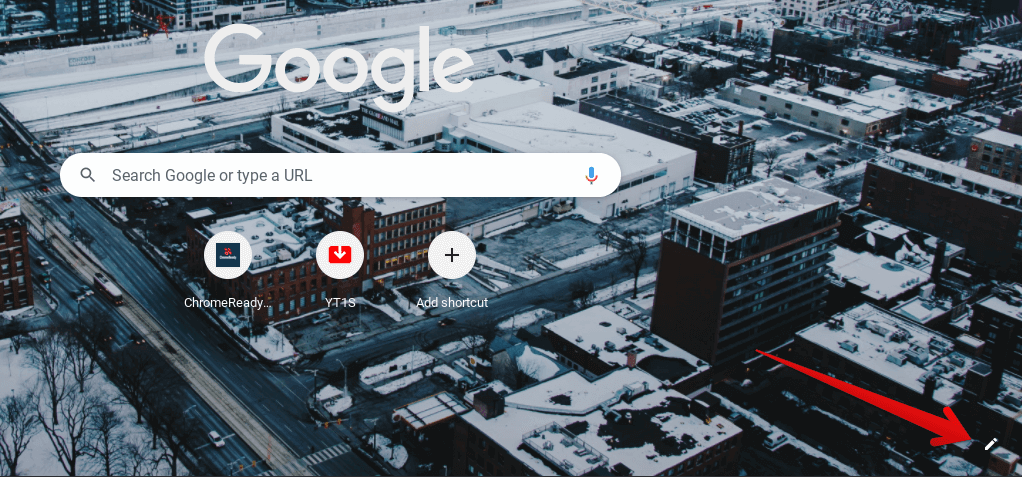
Customizing the Google Chrome browser
Once done, a small-scale window will appear on the screen, allowing you to personalize the home page and the overall theme of Google Chrome. Look at our curated guide on giving ChromeOS a new look using these tweaks if you’re looking for further instructions.
Use cloud storage
Here, we have one of the best unconventional ways of saving up storage space on ChromeOS. Cloud-focused solutions have amassed their fair share of popularity in the world we reside in. A substantial amount of the networking world depends on the technology of cloud computing for a variety of different processes.
The idea is to keep local data off your Chromebook so it never slows down or exhibits too much of a burden for optimal functioning.
Fortunately, there are plenty of top-tier options in this respect, so don’t worry about finding enough programs. If you want to check out the best cloud storage options in the business, look at pCloud.
The cloud-oriented software starts you off with 10 GB without paying anything. From there on out, it’s up to you to upgrade to higher subscription plans and enjoy the benefits that come in the wake of them. If pCloud doesn’t make the cut, feel free to check out some of the other top cloud-based storage offerings we’ve got lined up for you.
Switch up the cursor’s size
The size of the ChromeOS can be changed following your preference. Different individuals have different preferences in this regard, so it’s worth checking out what cursor size suits you the best.
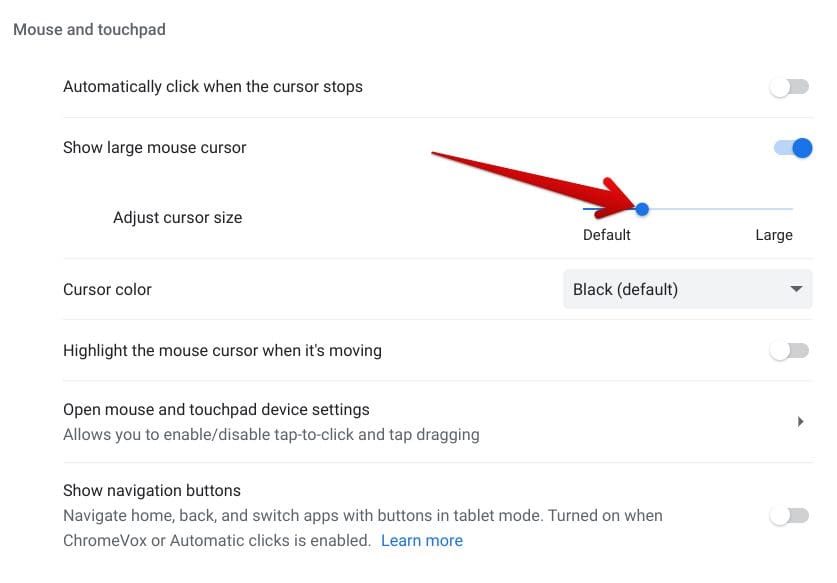
To switch up this setting, go into your Chromebook’s “Settings” app and head to the “Accessibility” section. Once you’re within the “Manage accessibility features” area, go down until you find “Show large mouse cursor.”
Click on the toggle beside it and adjust the size until you’ve found your preference. Check out the following screenshot if you’re after more information on the matter at hand.
Conclusion
Chromebooks follow a pleasant, clean setup process that takes nothing but a couple of minutes to finish up, as we’ve detailed in this guide. You don’t have to confuse yourself while performing any unnecessary steps. Thankfully, the tech giant has kept things concise with the initial ChromeOS setup, and we love this about the operating system.
We do hope that you’ve been able to impart helpful information from the tutorial at hand. We divided the swath of instructions into multiple phases so you’d find it easier to follow them step-by-step. Let us know down in the comment section whether you found the article helpful for your cause. Chrome Ready wishes you good luck!
- Recommended from Chrome Ready: How to maintain your Chromebook and extend its life.
