From managing extensions to sporting the top 15 Google Chrome extensions, the world’s most famous internet browser is adept at hosting add-ons. All of the efforts are to provide a more fabulous user experience and offer the best computing standard that a net surfer possibly can. Adding to the list of Chrome’s praiseworthy points is how performance, reliability, and speed are at an all-time high on the program.
One particular software makes it easy to host calls and get in touch with someone. This, of course, is done right from the browser and doesn’t require any third-party interference. That is why Chrome extensions are regarded so well in online communities simply because of their convenience. Anyhow, the add-on we’re talking about refers to itself as Google Voice, and there’s no other extension we’d rather have for voice calling other than this one.
This article will guide you on adding Google Voice to Chrome so you know the exact methodology and are confident in replicating the process on your end. Let’s dive right into the tutorial without wasting any further time.
What is Google Voice?
Google Voice is a free caller application that allows you to connect with different websites and their representatives through voice calls. It’s simple, dependable, and highly effective in getting the job done. Google offers this extension officially on the Chrome Web Store. On the famous Chrome marketplace, this extension boasts a hefty majority of positive reviews and an excellent 4.0/5.0 overall rating.
More than 1 million users utilize the features of Google Voice daily, so you know this application is well worth the time and effort. Moreover, there’s appreciable flexibility introduced within the extension as well. It has a functionality where the extension transforms the website’s phone number into a link and lets you call with just the touch of a button. However, some users might not prefer that, so Google has also implemented a setting to turn this feature off.
People who have used Google Voice all agree that it’s a high-quality working application. The extension has been through some rough patches, but the developers have always quickly updated the add-on for fast fixes and other improvements. Now that you’re well aware of what Google Voice truly is and what convenience it brings aspiring users let us get on with installing the software on Google Chrome.
Adding Google Voice to Chrome
To install Google Voice on Chrome, you have to follow some simple steps, and you’ll be done in no time. The following guidelines are going to take it from here.
- Before we get started, make sure you know how to update the Chrome browser to minimize any errors you might experience along the way.
1. The first step is to use this direct link and get straight to the official Google Voice page on the Chrome Web Store. As soon as you’re there, click on the vividly apparent “Add to Chrome” button to get to the following process.

Adding Google Voice to Chrome
2. After clicking on “Add to Chrome,” a prompt will appear from the top of the screen, asking you to confirm the installation of the extension. Proceed to the next part by clicking on the “Add extension” button, as shown in the screenshot below.
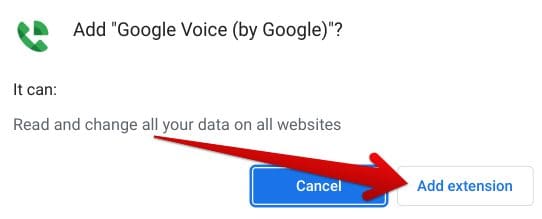
Confirming the installation
3. Completing the last step will lead you to the following prompt on your device. The small-scale window will say that the extension has been successfully added to your device, so you can now start using it on the fly.
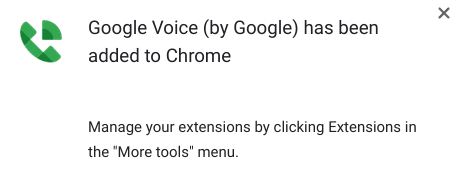
Google Voice added to Chrome
That’s for installing Google Voice on your Windows PC or Chromebook. If you wish to learn how to utilize this extension effectively, keep reading toward the next subtitle. That way, you will acknowledge the working mechanism of Google Voice.
How to use Google Voice
After installing Google Voice on your Windows PC, pop it up using the extensions toolbar in the top-right corner of the Chrome browser’s screen. Once done, you will be able to see the characteristic Voice icon that’s shaped like a literal telephone. Click on it, and you’ll shortly open a new tab on the browser.
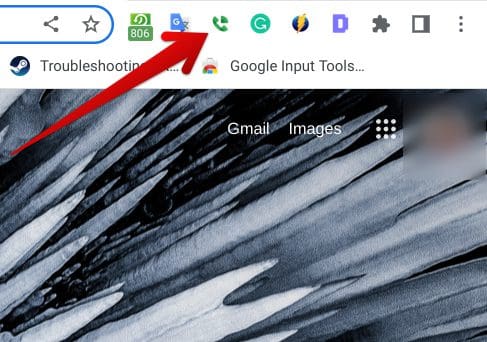
Clicking on the Google Voice extension
As soon as you click on the extension mentioned above icon, you will be taken to a new tab. This tab will be all about Google Voice, prompting you to set up your account or register for a new one if you haven’t already. Start by clicking on “For personal use” to get going with the diverse offerings of Voice.
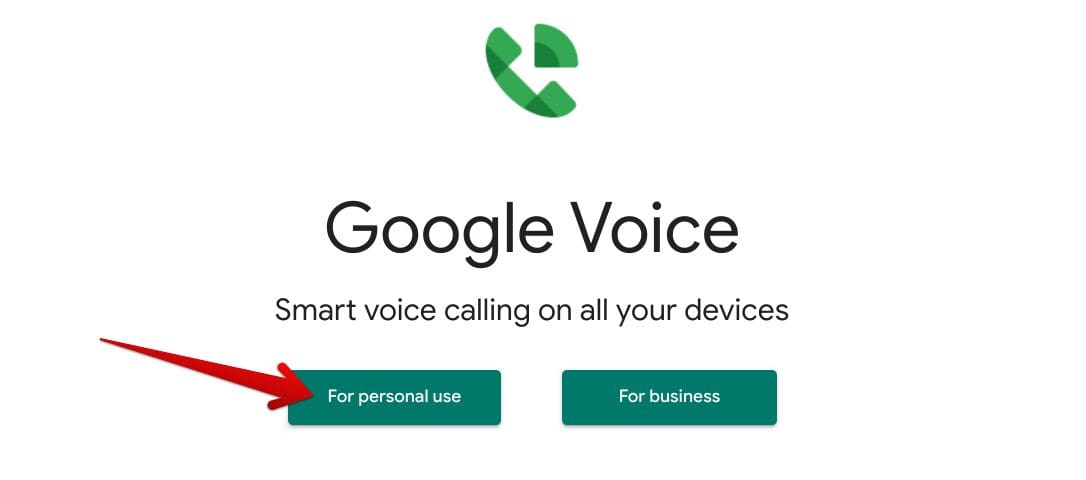
Google Voice for personal use
After clicking on “For personal use,” you will be prompted to select the type of device, you’d like to have Voice on. Please select “Web” here to start using Voice on your Windows PC or Chromebook.
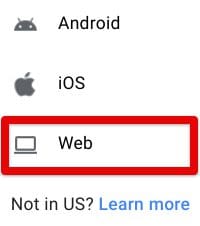
Selecting the “Web” option for Voice
Do note that if you’re not situated in the United States, you won’t be able to employ Google Voice’s functionality. After clicking on “Web,” you will be introduced to the working interface of Voice on the web. Feel free to navigate and make discoveries to manifest the extension in full flight.
Conclusion
Google Chrome takes pride in having a ton of extensions to power up its base functionality. When you have the correct type of extensions making strides for you, it’s possible to become more productive than ever. For instance, the top 6 Chrome extensions to view and organize your browsing history are optimal if you want to become proactive in the content you consume and its manageability.
Moreover, other types of add-ons exclusive to Google Chrome can help you overcome communication gaps and establish effective back and forth between two specific parties. In this guide, we have talked about Google Voice’s significant impact in this domain and enabling the realm of smart calling for users on the go. We’ve talked about its installation and usage in this curated guide, so here’s hoping that you’ll find it useful for your ventures.
Do let us know down in the comments section in the case that you got good help from this tutorial. We would love to read your feedback!
