Google Chrome is one of the world’s fastest internet browsers ever developed. Not only is it super popular, but as time has gone by, Google has made their front-running internet surfer better than ever with a constant barrage of updates, improvements, and minor tweaks. However, there are some instances when Google Chrome can potentially bog down your system and utilize a ton of crucial system resources.
This article will discuss why Google uses so much RAM in certain situations and how to optimize it for better performance. Keep on reading until the end of this guide for favorable results. In the meantime, we urge you to read our tutorial on installing BlueStacks on Chromebook.
Why does Google Chrome use so much RAM?
First, you should know how to check when Google Chrome is using up RAM in excess amounts. If you’re on a Windows PC, you can press the “Shift,” “Esc,” and “Ctrl” keys together to fire up the Task Manager. With that said, Chromebook users will have to press “Search” and “Esc” in combination to do the same. The Task Manager is a system utility that details the different processes in the background and foreground.
In some cases, you might have an awful lot of applications, Chrome tabs, and other programs running all the same time concurrently. When that happens, you can painlessly expect Google Chrome to use up a ton of internal memory of your Windows PC or Chromebook. Another reason is that you’ve got several extensions installed on the Chrome browser, all of which are taking up RAM on the device.
Usually, people have this in combination. This snowballs eventually and causes a lot of RAM usage on the system. Browsing history, cache, and data that hasn’t been cleared up in over a year or more might also be collectively slowing your PC down. Therefore, all these factors must be watched for if you intend to browse smoothly on your device. Now that you know how the Chrome browser is influenced to use a lot of RAM let us get to the next section.
We will now talk about the best ways to optimize your Chrome browser and make it capable of browsing smoothly. By the time you’re done implementing the guidelines outlined in the next section, you’ll see a significant improvement in Google Chrome from a before-after perspective. Without wasting any further time, let’s dive right in.
How to optimize Google Chrome
The following is our round-up of the best ways to optimize Google Chrome, so it doesn’t use too much memory.
Clear your browsing history and data
Clearing the cache and browsing data of your browser can give birth to your PC’s smooth functioning. To do that, you must go to Chrome’s “Settings.” If you want a shortcut to get this done, please press and hold the “CTRL.” “Shift” and “Backspace” keys together to get straight to your browsing history settings.
When you are there, you’ll be met with several options. First, you have the time frame to help you determine the time you’ll pick for wiping your browser’s data. Configuration ranges from “last hour” to “all time.” You can even erase saved passwords and auto-fill data, not to mention other sign-in credentials in the advanced settings portion.
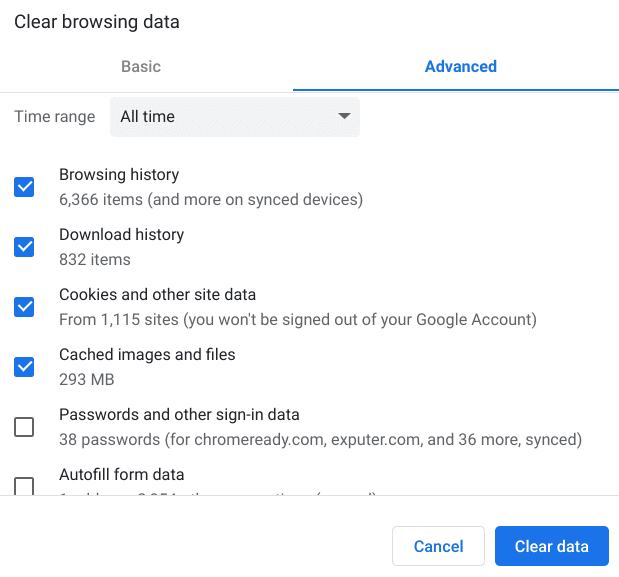
Clearing advanced browsing history and Chrome data
The cache enables Chrome to start up pages with fewer loading times. This means that it saves the relevant information, for that matter. When you save RAM, you’ll have to compromise on a few more seconds and clear the cache. The same goes for the rest of the browsing data.
Use RAM-friendly extensions
The Chrome Web Store features a sea of different extensions. Not all are up to scratch, but some are terrific in various aspects of the computing world. For instance, many wouldn’t know priorly that there are specialized extensions on the famous Chrome marketplace that allow you to save RAM instead of using it more often. Let’s take a look at these below.
OneTab

OneTab
OneTab helps crucially decrease the clutter of Chrome tabs and save RAM. The extension has over 2 million downloads on the Chrome Web Store, so you have proof of authenticity here. The developer claims that this extension saves you a colossal “95%” of memory and helps profoundly boost your computer.
Other than that, it compiles all your opened tabs into a singular list where you can restore them one by one or almost instantly. In this case, you are not keeping any tabs open, but instead, you are just shifting them to OneTab to take the load off your chief processor. This extension is especially for those who multitask and always find themselves working on several things at once.
Get OneTab on the Chrome Web Store.
The Great Suspender
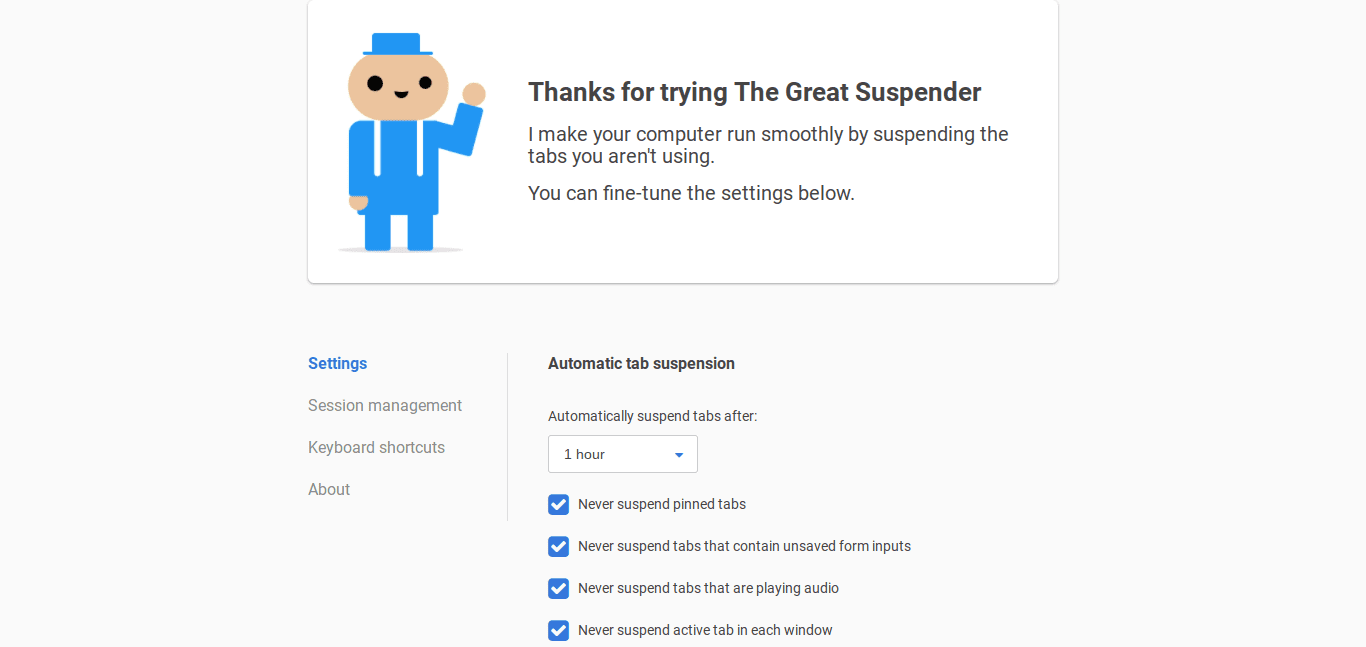
The Great Suspender
As the name depicts, this lightweight Chrome extension makes your Chromebook run much better by inactivating the tabs that aren’t in use. After a specific time, The Great Suspender will suspend tabs and free up RAM and CPU alike in question by that particular tab.
It has many top-tier features to make itself stand out as well. Some of these include a screenshot of the tab before the effect takes place, recognition of audio-playing Chrome tabs, automatic feature incorporation during low battery, and allowing particular tabs that you want to keep running.
Get The Great Suspender on the Chrome Web Store.
Shut down tabs that you don’t need
The subtitle is pretty self-explanatory. When you find the Chrome browser hoarding up too much internal memory, evaluate the number of tabs open inside it. There’s a good chance that you will have many tabs fired up, with some of them even being graphically intensive. That is where you need to pull out the hammer and shut down all those processes that no longer need your attention.
This is the most robust method of optimizing Google Chrome to reduce RAM usage, not to mention the simplicity offered here. Besides, it is good practice to keep your desktop clutter-free to be the most productive. You never know when you’ll require your computer to be at its best for your workspace functioning, so keep this in mind and only have those tabs opened that demand anything from your side.
Uninstall unwanted Chrome extensions
Over time, you are bound to download many Google Chrome extensions. Let’s face it—these are helpful and convenient for our networking experience. At least, this is what can be said about the top 6 Chrome extensions to view and organize your browsing history. However, the fact is that if you’re a prolific downloader that has kept a bevy of Chrome extensions in their catalog without tending to them, the chances are that your browser is getting bogged down.
This is why you need to get to the “Extensions” section of your Windows PC or Chromebook immediately and evaluate what type of these add-ons are running and which ones you no longer need. To do this, click on the “Customize and control Google Chrome” button located in the top-right corner of the Chrome browser’s interface. Once done, hover over the “More tools” area and click on “Extensions” to get to the next step.
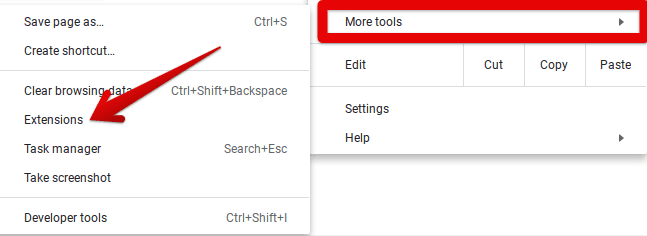
Clicking on “Extensions”
Right after that, you’ll be taken straight to the main “Extensions” page of Google Chrome. Here, please take a close, hard look at what can be removed from the browser. Click on the “Remove” button below each entry to uninstall the add-on effortlessly from the browser. This is how you can free up Google Chrome’s memory usage part.
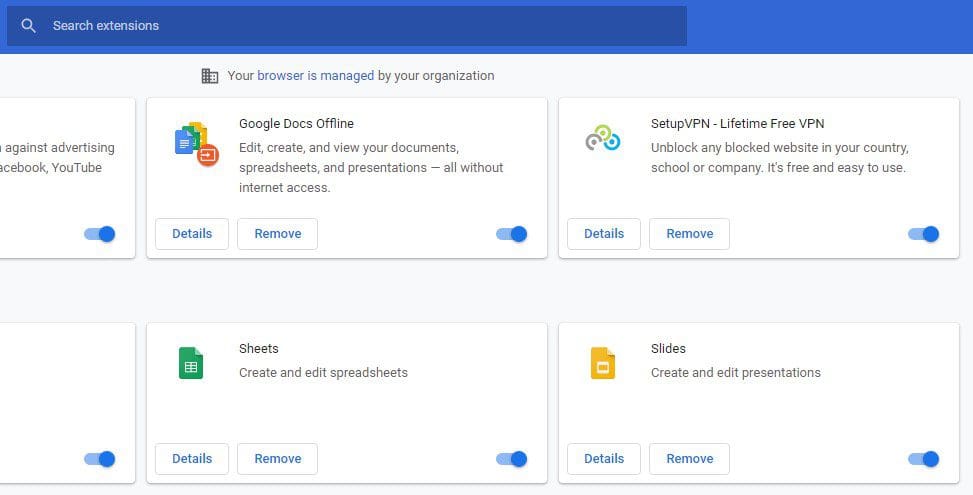
Extensions page
Toggle on the “Hardware acceleration” feature
Hardware acceleration is a nifty little feature in Google Chrome, perfect for those who want to utilize as little RAM as possible and still manage to get their work done without breaking a sweat. It does lend a graphically challenging process to another component of your PC that’s not occupied at the moment. By bringing in help this way, the central processing of the browser isn’t pushed to its limits, and therefore excessive RAM is not used.
This is why we recommend you enable hardware acceleration on your device if you find yourself watching YouTube videos of high quality or playing online games on your device. Doing so will significantly affect your internal memory usage and allow you to multitask with different processes. To get started with toggling on this robust piece of functionality, go into your “Settings” section and scroll down until you see “System.” You may also need to click on the “Advanced” button.
Once done, you’ll see a functionality called “Use hardware acceleration when available.” Click on the toggle beside it to enable the feature easily. That’s about it for this one.
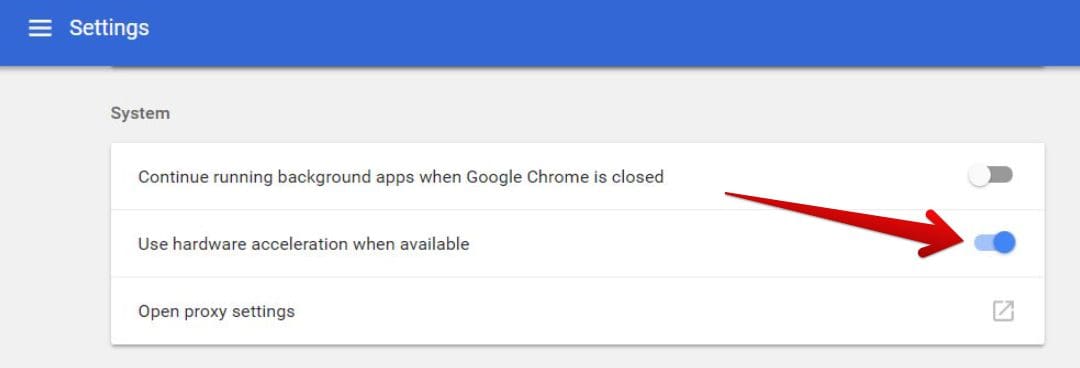
Enabling hardware acceleration
Conclusion
The case where Google Chrome starts using so much RAM is quite undesirable. You begin experiencing prolonged performance levels and the inability to multitask. You should always know how to optimize the Chrome browser so that significant control stays within your hands. Please let us know in the comments section if this guide proved helpful.
- If you’re after a master guide on keeping Chrome OS from having adequate RAM all the time, check out our curated guide on how to free up RAM on Chromebook.
