Unlike Microsoft in a competitive light, Google has its suite of productivity applications to boast to the world. The tech giant has formulated a whole workspace ecosystem, and billions of people across the spectrum are exhibiting their dependency on it. One of these dedicated applications includes Google Docs, one of the world’s most effective word processors ever to come out, strongly rivaling Microsoft Word, which is part of Microsoft Office.
Now, if you’ve been meaning to utilize the functionality of Google Docs to the full, there’s something unique that you should know of. There is a way to switch up fonts in Google’s word processor and replace them with newer ones for the better. Presentation matters a lot when you’re trying to create a document and what better way to make a striking impression than picking a top-class font to write with.
This article will describe all there is to know about how to add fonts in Google Docs, including the correct utilization of existing fonts in the famous word processor. Let’s start without wasting any further time.
Adding fonts in Google Docs
Fonts in Google Docs are widespread. A handsome collection of different fonts is already present in Google’s front-running productivity application. Still, the good news is that you can even add your custom fonts. This can be done painlessly, and we’ll get to the matter in detail moving forward. Let us break down all the different ways you can view, change, and add fonts in Google Docs in the following subtitles.
Changing fonts in Doc
The following steps will explain how you can change fonts in Docs using the in-built options provided. We have deemed it better to include this section in the article because many individuals do not know the vast catalog of Docs fonts already present inside the app.
1. The first step is to open a Google Docs document on your internet browser. If you’re unsure about this, please click on this direct link to open a new document. Note: You may sign in with your account once you’re on the web page.
2. To continue, please click on the “Fonts” button present in the toolbar of the Docs interface. Check out the following screenshot for a visual explanation of this step will be completed.

Clicking on the “Fonts” button
3. After clicking the “Fonts” button, you can get to the next step by selecting “More fonts.” The latter will appear in a dedicated column that will only surface after clicking on “Fonts.” You should be able to visualize the former pretty painlessly. Check out the following screenshots for more detail.
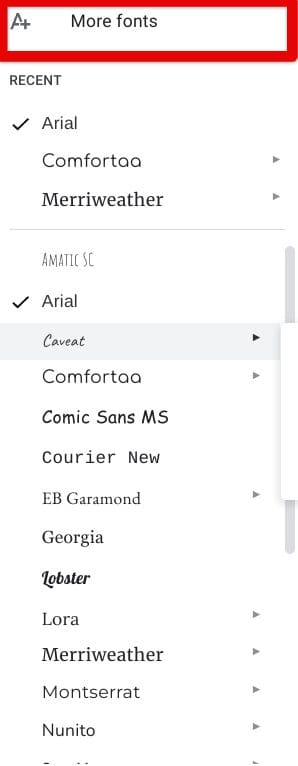
Clicking on “More fonts”
4. After clicking on “More fonts,” you’ll be taken to a section within Google Docs where all of the default fonts you already have in Google Docs have been installed. Feel free to sift through them and spot any of the ones that will spark your interest. Once you’ve selected a particular font, click on “OK” to finalize the process. That specific font will be saved to your “My fonts” section, as you can comprehend from the screenshot below.
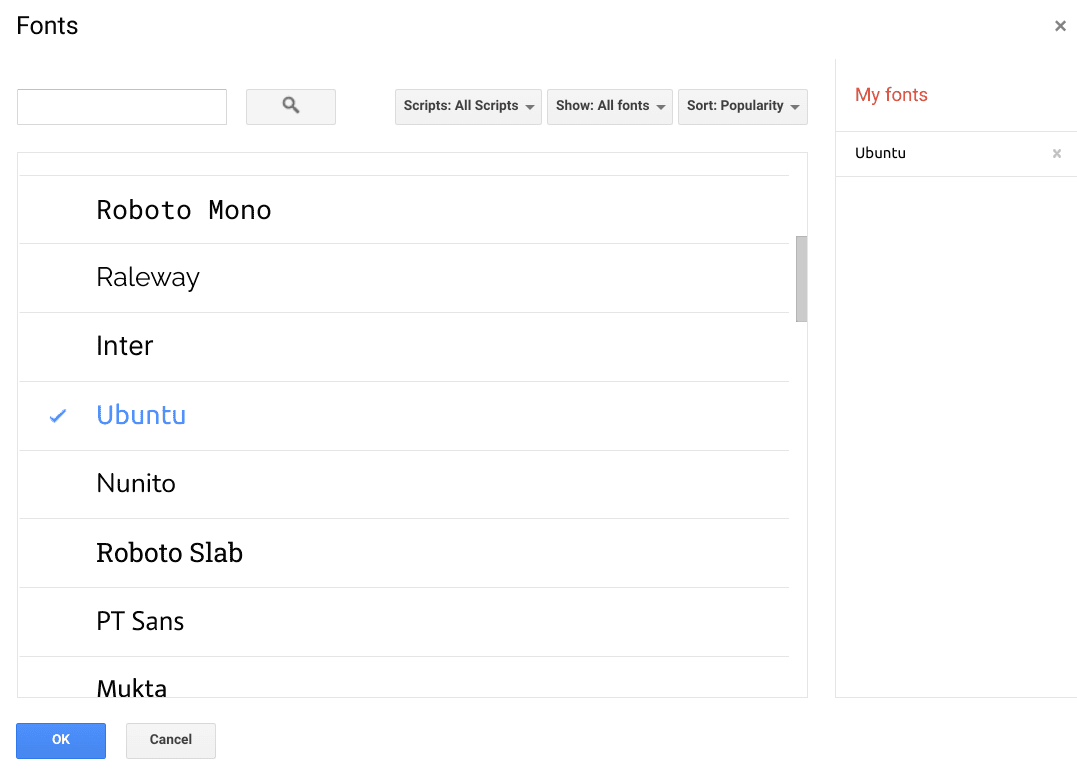
Selecting a new font in Google Docs
That’s about it for viewing and changing existing fonts in Google Docs. Let us further this guide and discuss adding more fonts to the famed word processor.
Adding new fonts to Google Docs
You read that subtitle right. A way to add new fonts to Google Docs revolves around installing an app called Extensis Fonts. The latter is only available on the Google Workspace Marketplace. If you haven’t heard of this before, keep on reading to find out what this place is and how you can revamp your Google Docs experience by adding more fonts to it. The following steps are going to take it from here.
1. In the first step, we urge you to click on this direct link and get straight to the official app page of Extensis Fonts on the Google Workspace Marketplace. Click on “Install” to begin the process as soon as you’re there.
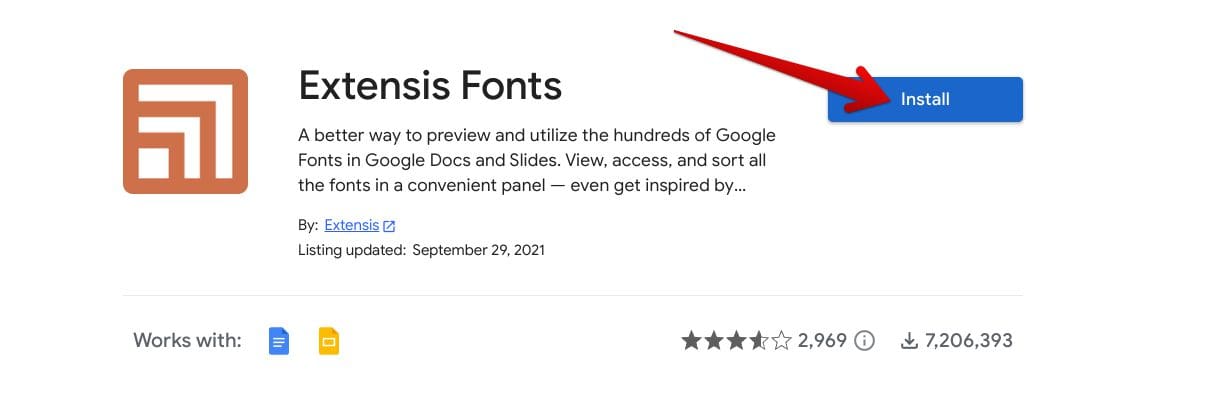
Installing “Extensis Fonts” for Google Docs
2. After clicking on “Install,” a confirmation prompt will appear on the screen asking you for the required permissions to install Extensis Fonts. Click on “Continue” to get to the next step of this process.
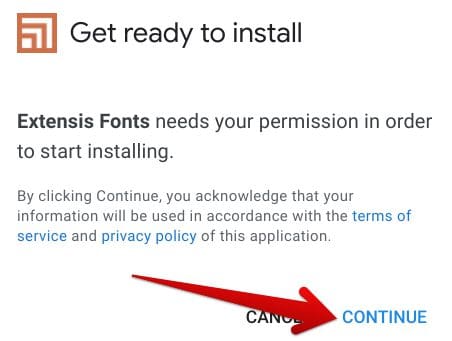
Confirming the installation
3. You now have to permit the Extensis Fonts add-on to extract some information from your Google account and relevant applications. This is going to be a simple process yet again. Click on “Allow,” and that’ll be it.
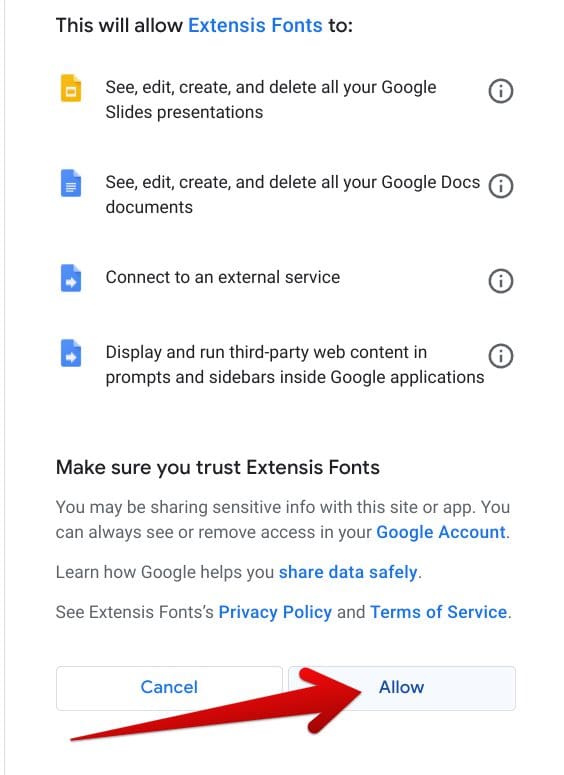
Allowing the app to use your Google account
4. You don’t have anything complicated left to worry about. That is because after clicking on “Allow,” the application will quickly be installed on the Chrome browser. All that’s left is to go through the initial setup, where the extension will tell you the working mechanism of the implication of its functioning. Click on “Next” to continue.
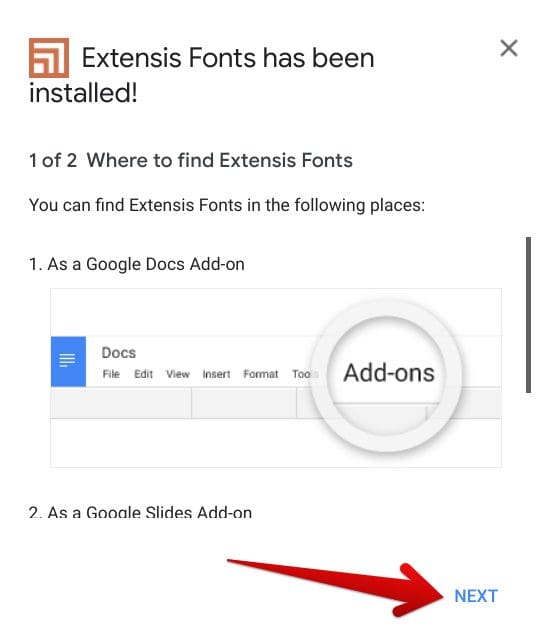
Completing the setup of Google Docs
5. All you have to do now is select “Done,” and you can resume your optimal working, given that Extensis Fonts has been installed on Google Chrome.
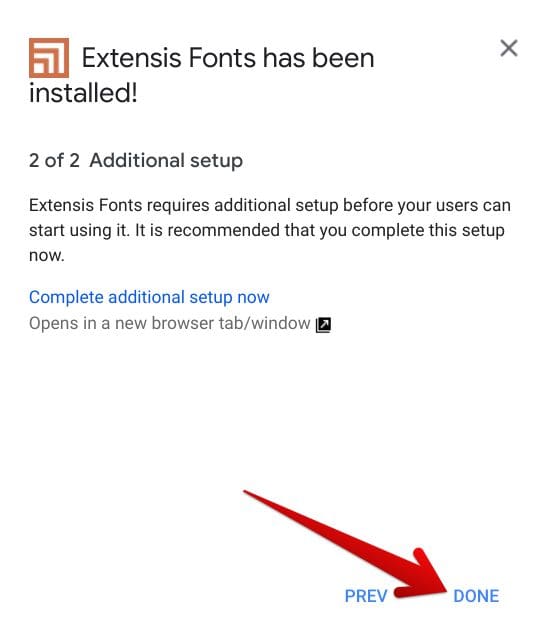
Finalizing the process
6. Now that you have installed Extensis Fonts, we have to go straight to Google Docs and add this application to our trusty word processor. This can be done simply if you use this direct link again. As soon as you’re within the text editor’s working interface, click on “Extensions” and follow it up by hovering the cursor over “Extensis Fonts.” You should see a “Start” button beside the “Extensis Fonts” button. Click on it to continue.
- Tip: If you don’t see the “Start” button on your end, please restart the browser for a quick fix.

Clicking on the “Start” button in Docs
7. After clicking on “Start,” a new panel will appear on the right side of the screen, taking you to the major Extensis Fonts user interface. This is where you can choose from over 900 different fonts. Take it from us; this is a colossal figure. Likely, you won’t ever need another font-centric extension again on your end. There’s even an option to sort your selection alphabetically or use other metrics. Enjoy!
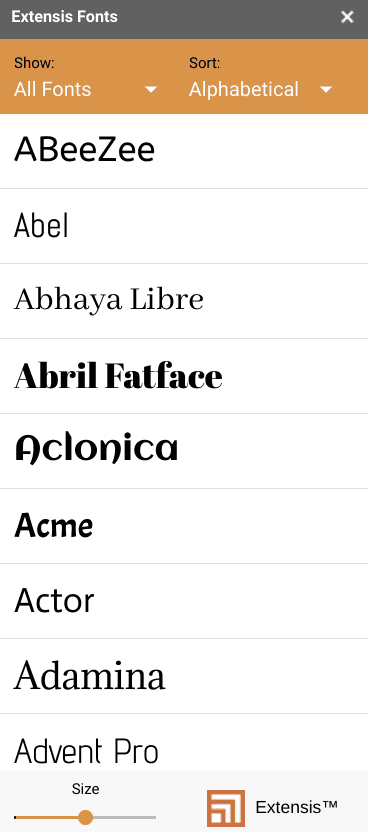
Extensis Fonts working interface
Conclusion
Congratulations! You’ve just learned to add more fonts to your Google Docs typing experience. Feel free to sift through the collections and discover the ones that suit your style. The Google Workspace Marketplace is a novel platform that accommodates websites exclusive to Google’s suite of productivity applications.
We’ve utilized it to achieve the purpose at hand and have downloaded Extensis Fonts easily from it. That is why you can painlessly get a ton of fonts in Google Docs without paying a single cent. We hope you’ve enjoyed this guide as much as we wrote it down. Do let us know down in the comments section if that happened to be the case.
We would love to read your feedback!
