Although things are going digital, there are instances where one needs to still print documents on a paper, and it’s not going to end anytime sooner. In this tutorial, we shall discuss the best possible ways of printing the documents from your Chromebook. We cover a wide range of printing options including printing from a classic printer, cloud printing, and connecting via USB printing cable.
How to print documents from a Chromebook
Adding a modern wireless Printer
If you have a newer model wireless Inkjet or Laserjet Printer, your Chromebook can connect quickly and get you started printing documents without much effort. After making sure that your Chromebook and the wireless printer are on the same network, follow the below steps:
Step 1) Click on the clock and then on the Settings icon.
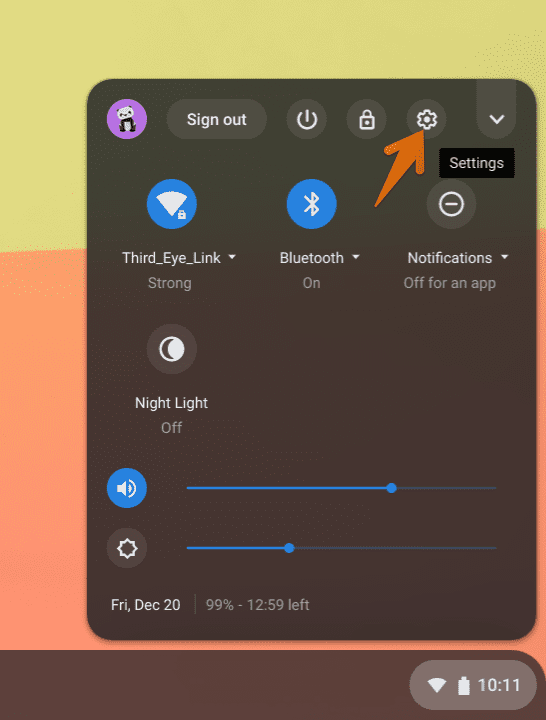
Launch Chrome OS Settings
Step 2) In the Settings app, click on Advanced > Printing > Printers.
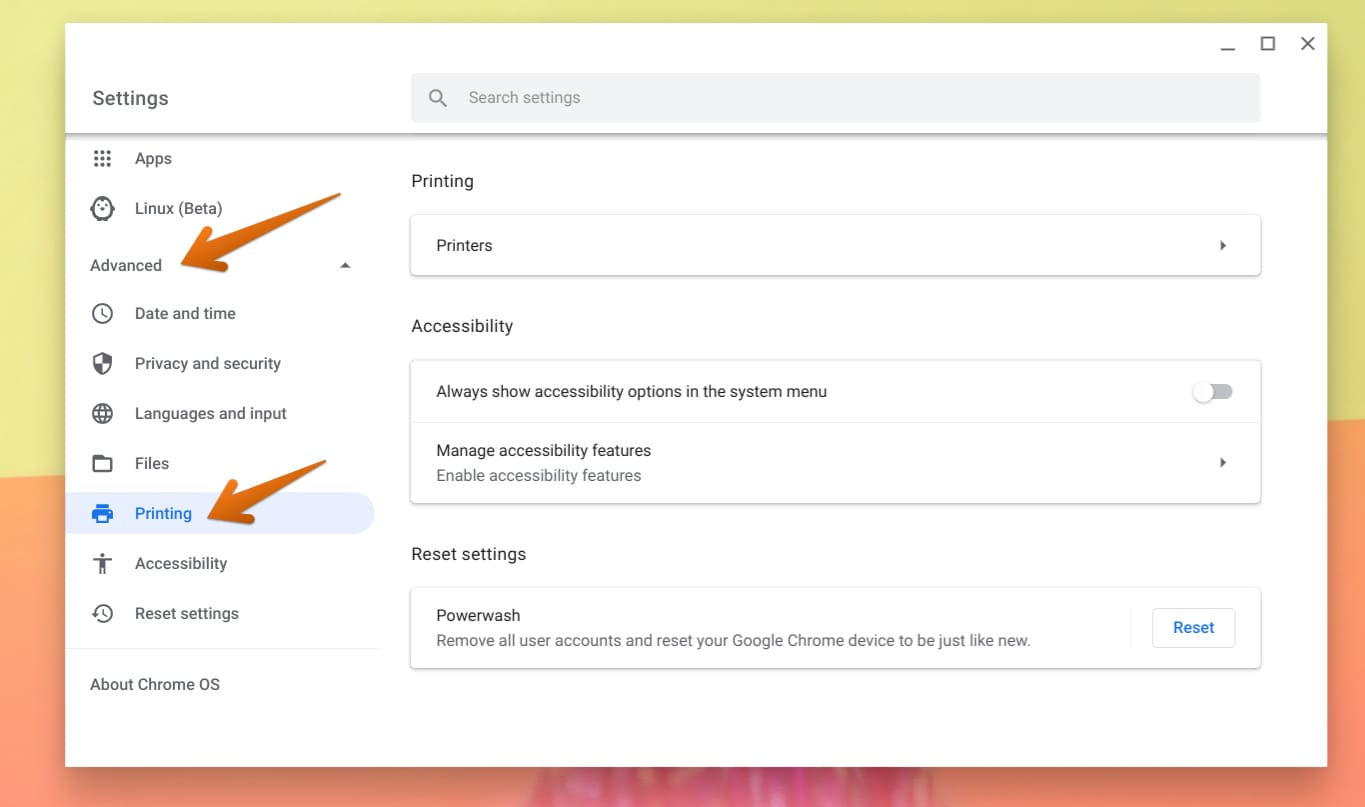
Settings – Printing
Step 3) Click Add Printer.
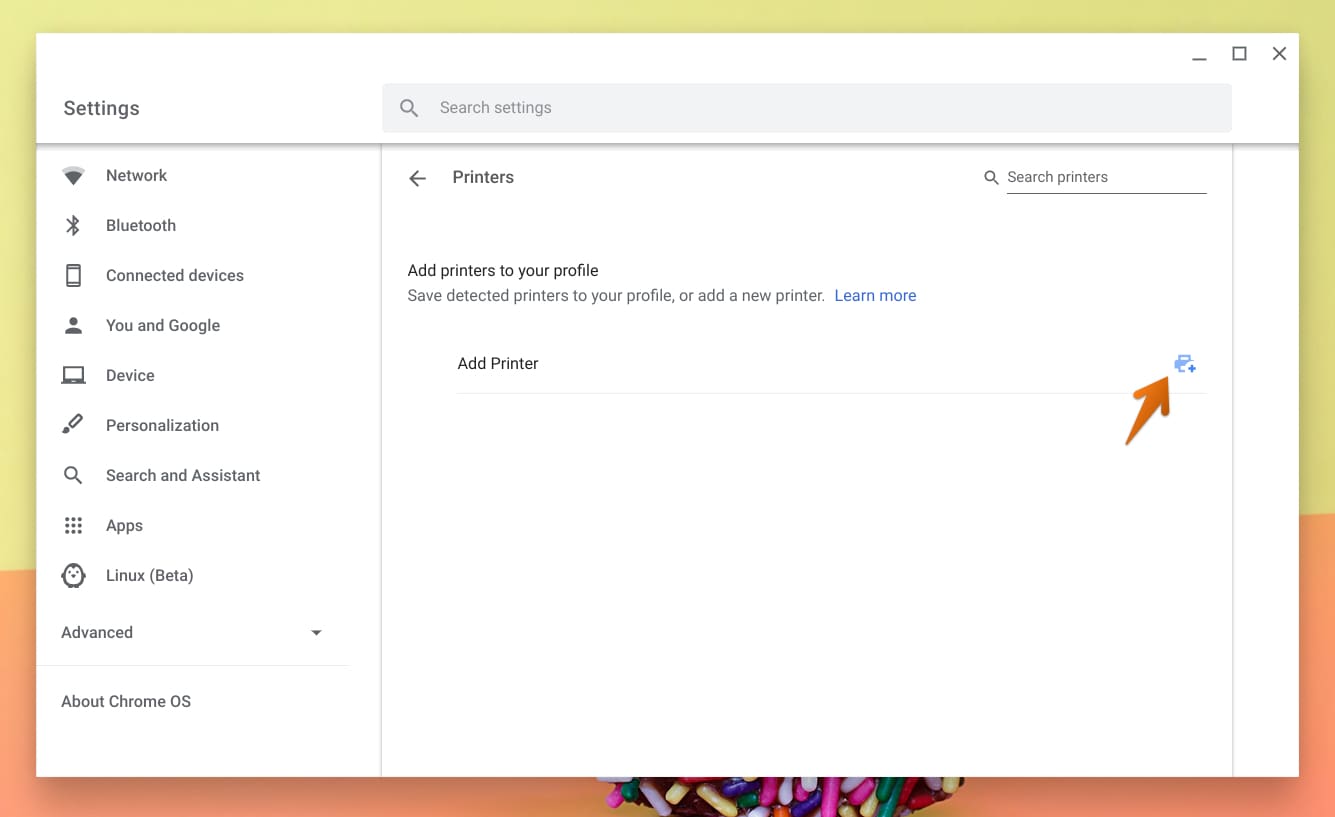
Add Printer
Step 4) Enter your preferred name of the Name field. It can be anything. The IP address should be exactly the same as that of your printer. You can find that from your Printer if it has a display or you can find out from your Router. Set the Protocol as AppSocket (TCP/IP). When done, click Add.
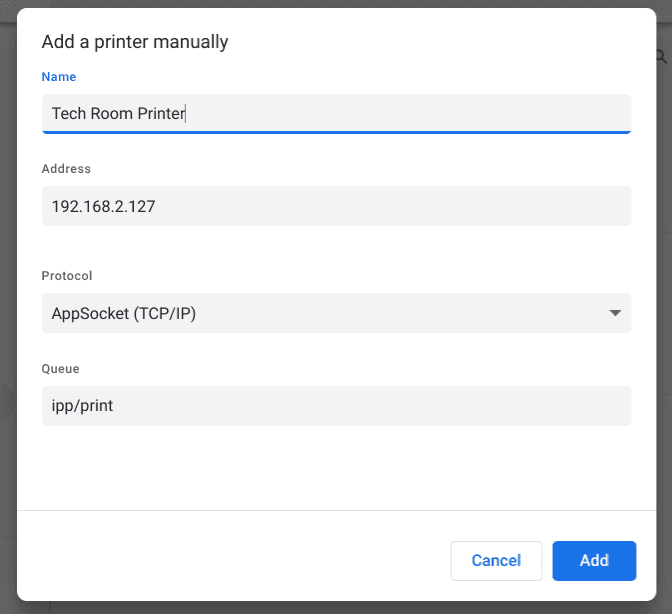
Add a printer manually
Step 5) Select the appropriate Manufacturer and Model from the drop-down menu. The list contains almost all popular modern printers. Click Add.
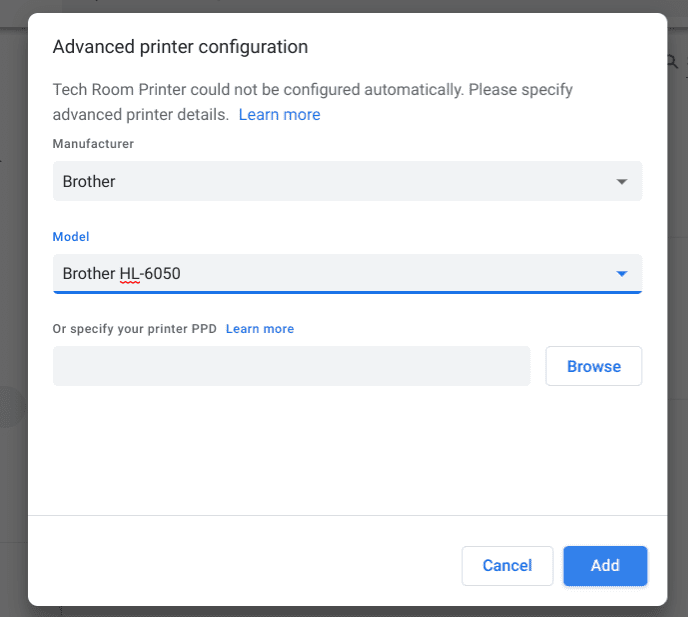
Advanced configuration
Step 6) That’s it! Your printer should get added to the saved list. You are all set to start printing.
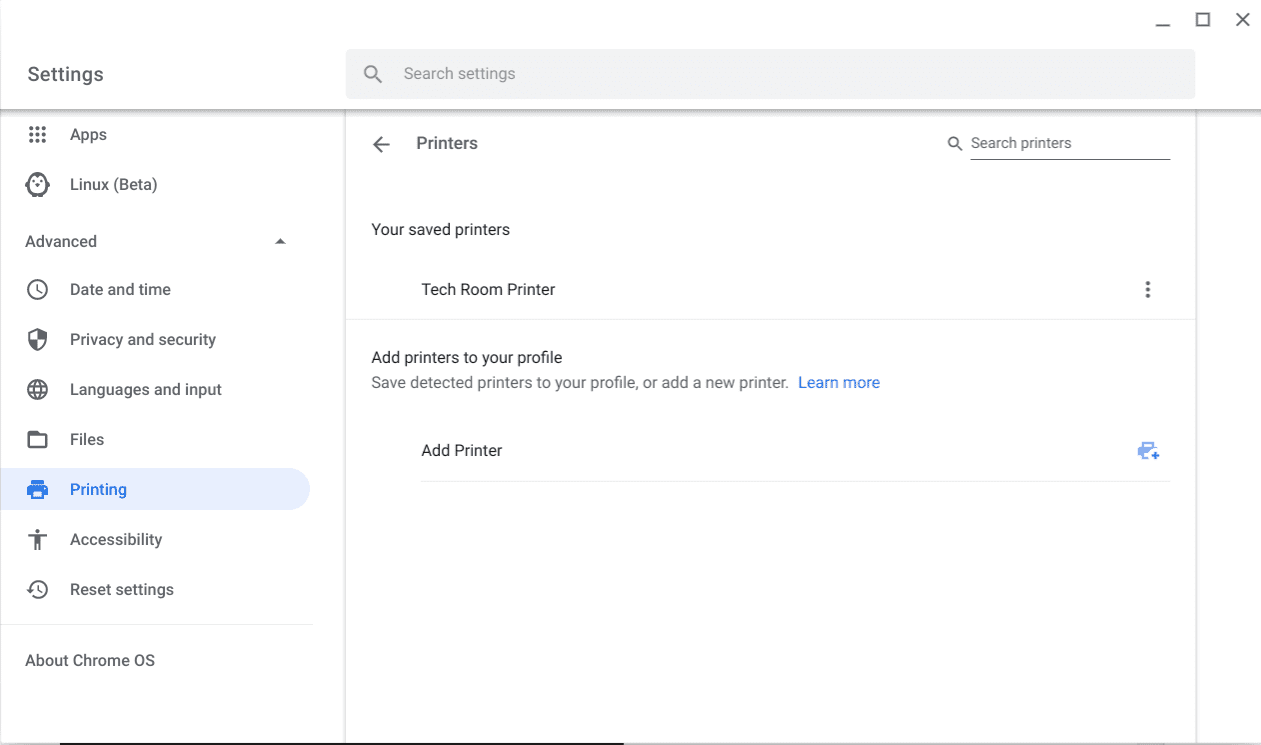
Printer Added Successfully
Step 7) When you want to print something, use Ctrl + P keys combination to invoke the print function and select your newly added printer from the drop-down list.
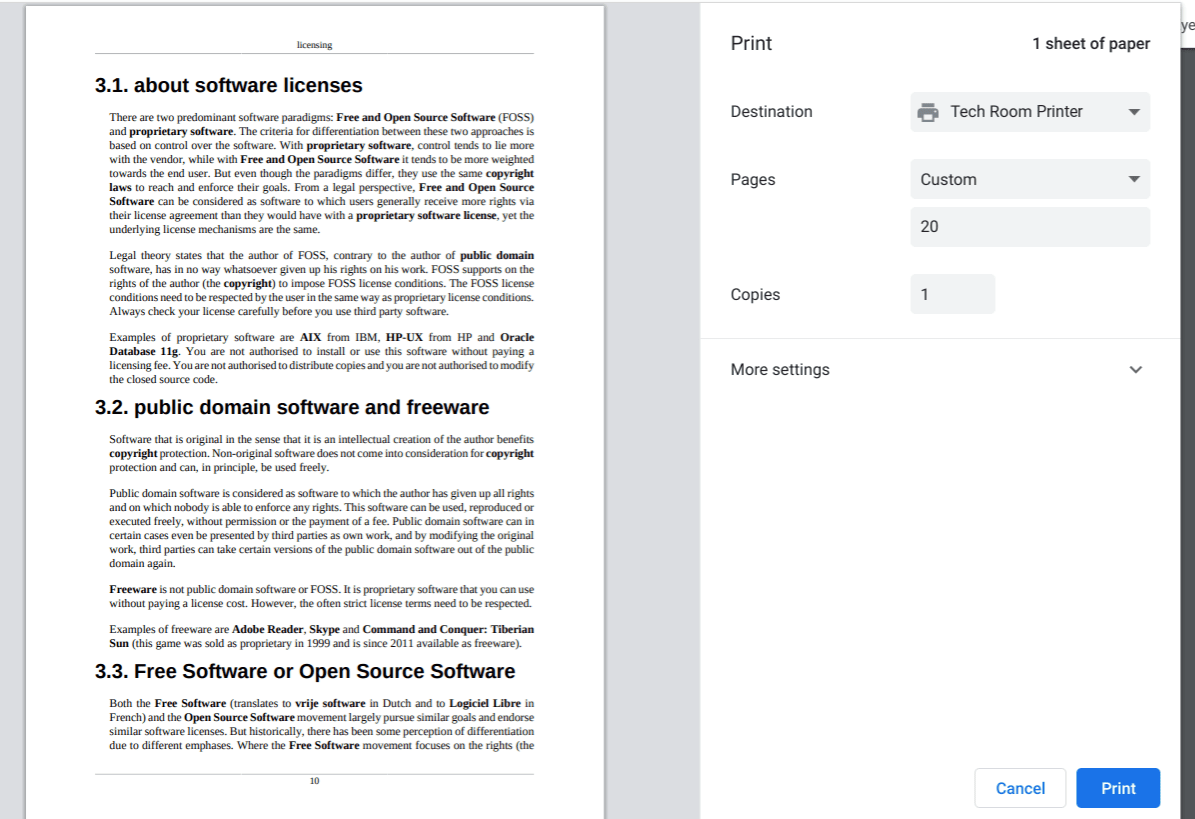
Start Printing!
Connect Printer to your Chromebook using Android Apps
If your Chromebook supports Google Play Store, you have a greater chance of a successful printer connection. Since Google Play Store is used by millions of Android smartphone users, every major printer manufacturer have their official apps in the Play store to make sure the smartphone users can print right out of their phone. If your Chromebook has access to the Play store, you can tap into these Android apps for printing and scanning.
Step 1) The first thing you need to do is to find out the maker of your Printer. This is obviously a no brainer. You don’t need the model name as the manufacturer typically provides one app for their entire models. For example, we want to connect our Dell
Adding an older printer
Those who have an older wireless printer might not find their Printer model listed in the Chromebook’s printer settings. The chances of a successful connection although it is bleak, you can still try a couple of things before trading it off for a newer model.
First of all, connect your printer to the USB of your Chromebook. If you have a Pixelbook or some other light-weight Chromebook, chances are you may not find a USB port. Instead, you will have to buy a USB-C to USB adapter. You can find these on Amazon for less than $10. Here is one made by Amazon Basics.
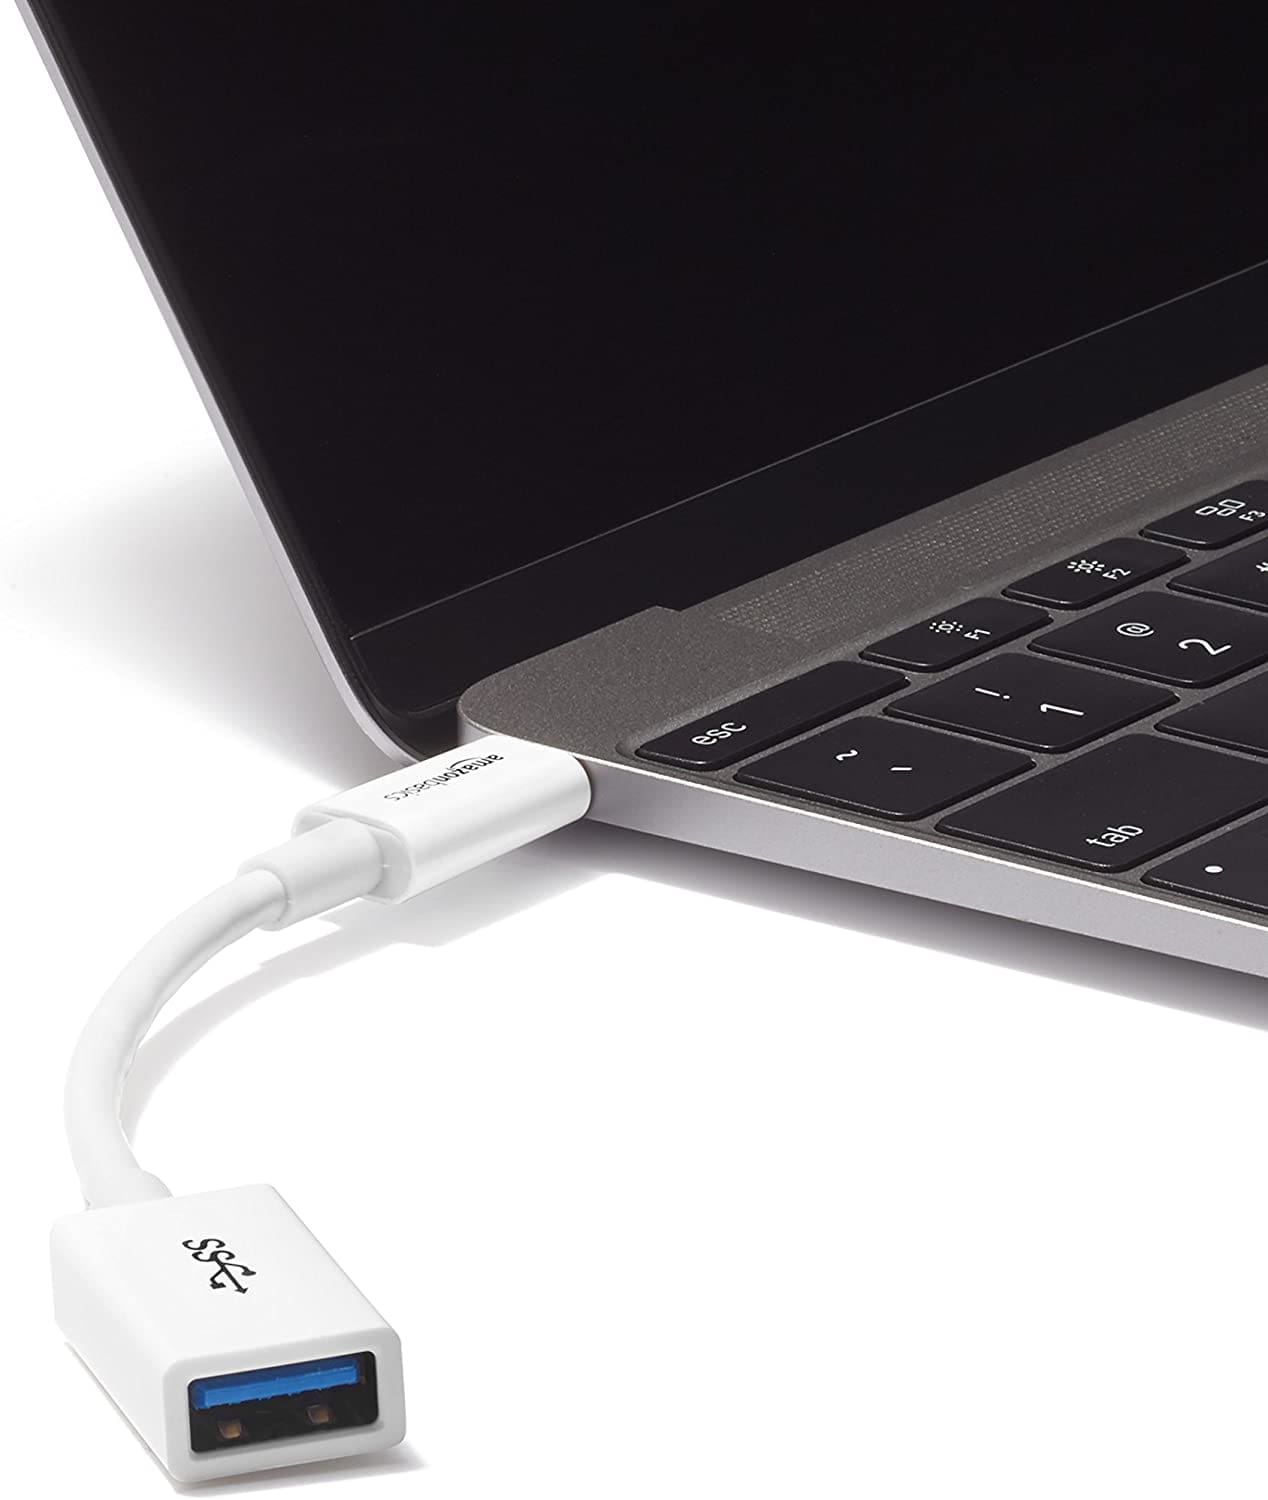
USB-C to USB Adapter (Amazon Basics)
Step 1) Click on the clock and then on the Settings icon.

Launch Chrome OS Settings
Step 2) In the Settings app, click on Advanced > Printing > Printers.

Settings – Printing
Step 3) You should see your printer model here, but it needs to be setup. Click Setup on the one that says USB against your Printer name. If it shows only one setup button, go ahead and click on that one instead.
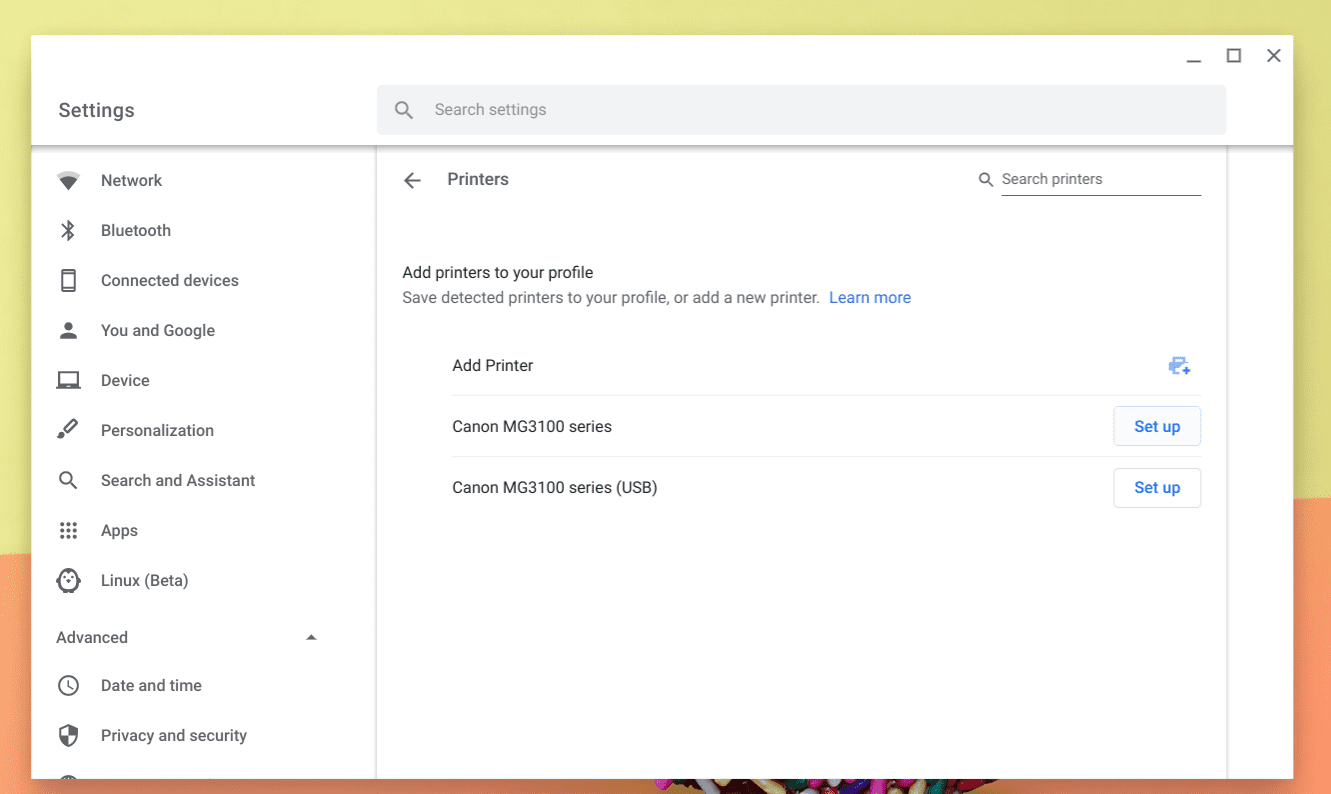
Setup Older Printer
Step 4) You need to now download your printer’s PPD file from the internet. Most of the manufacturers provide this file. Sometimes there is a community made version too. The downloaded file typically come in either .ppd extension or with .gz extension. When you have this file, go ahead to the next step.
Step 5) In the Advanced printer configuration dialog box, click Browse.
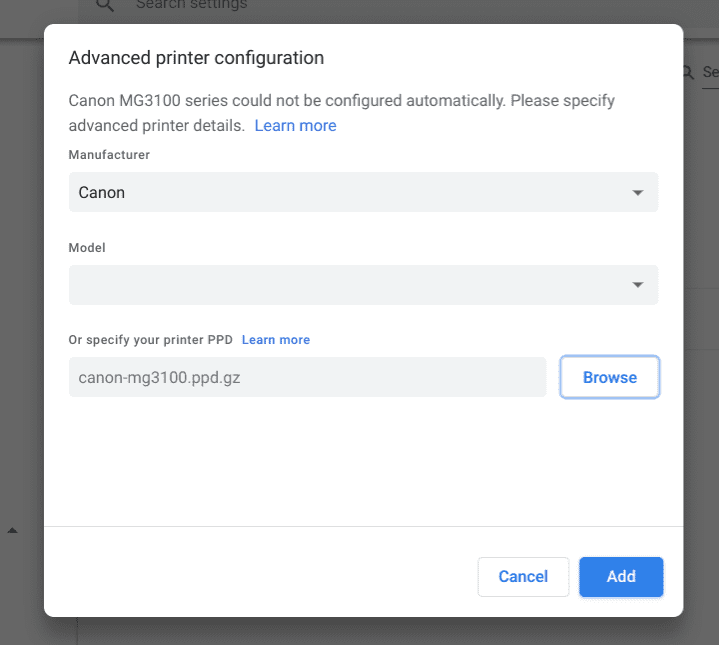
Upload the printer PPD
Step 6) If your download PPD was in .gz file, make sure to select the GZ file from the drop-down menu to see the file.
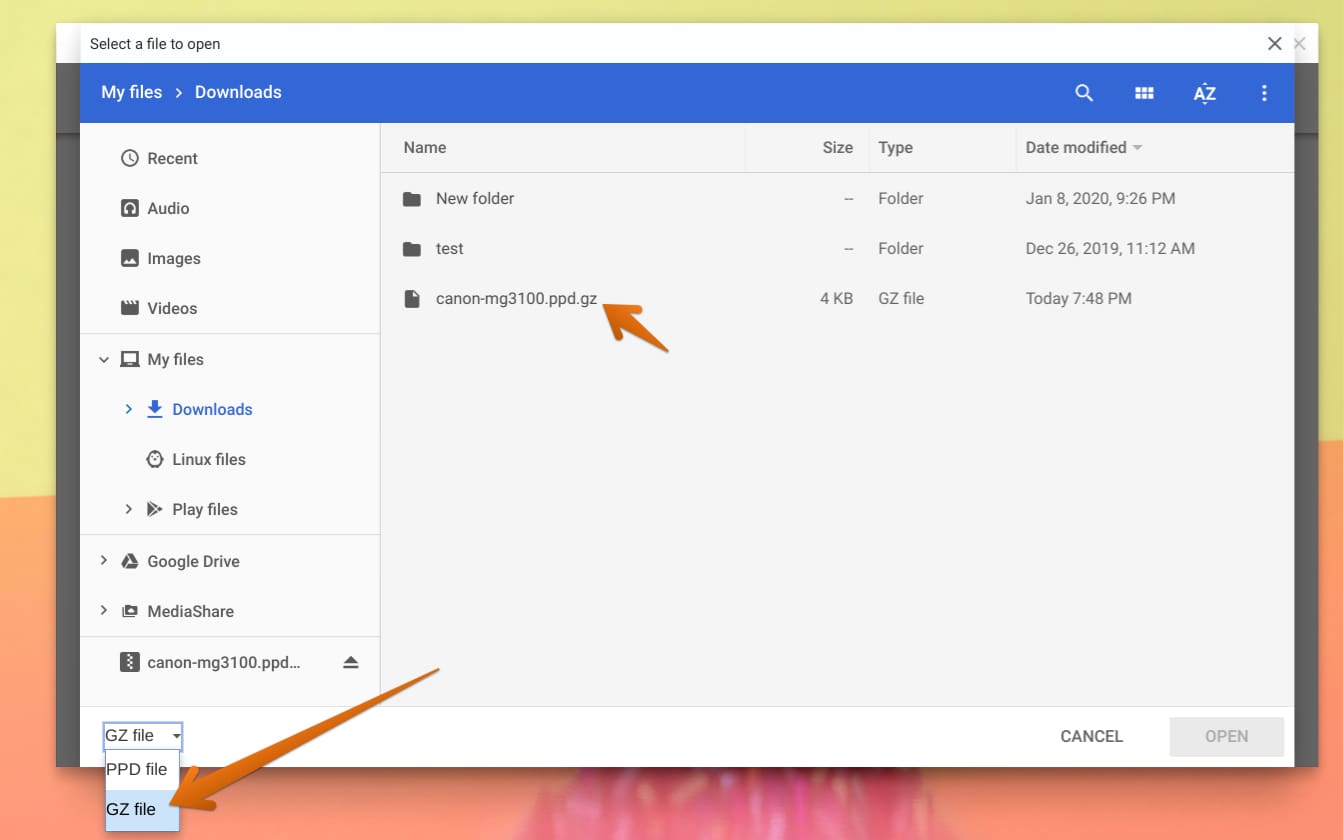
File Options – PPD and GZ
Step 7) Click Open and then Add.
That’s it! If you came this far, you should have your printer connected to your Chromebook.
Connecting your Printer to Chromebook via Android App
If your Chromebook supports Google Play Store, then you can also use the Android apps released by the printer manufacturer. Since Play Store is the largest app store on the planet, the makers keep their app updated with the latest models and also offer excellent support to its smartphone users.
For example, we will show you how to connect to the Dell C1760nw laser printer, which is still in production.
Step 1) Launch the Play Store.
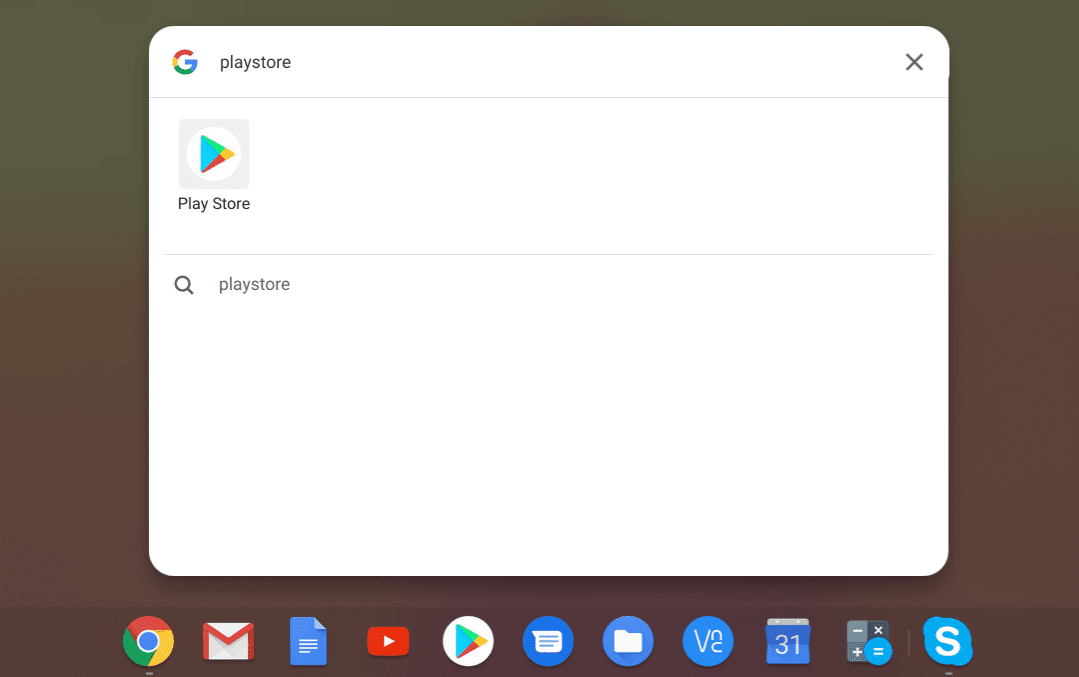
Launch Play Store
Step 2) Since our printer is Dell make, we will have to look for their app in the Play store. The easiest way to find the official app is to go to the play store and look for “Dell Printer”. The first app from the search result is Dell Document Hub released by Dell Inc. We will go ahead and install it. Similarly, if you have HP, Ricoh, Lexmark, Canon, Brother, etc., look for their app and make sure the developer of the app is OEM.
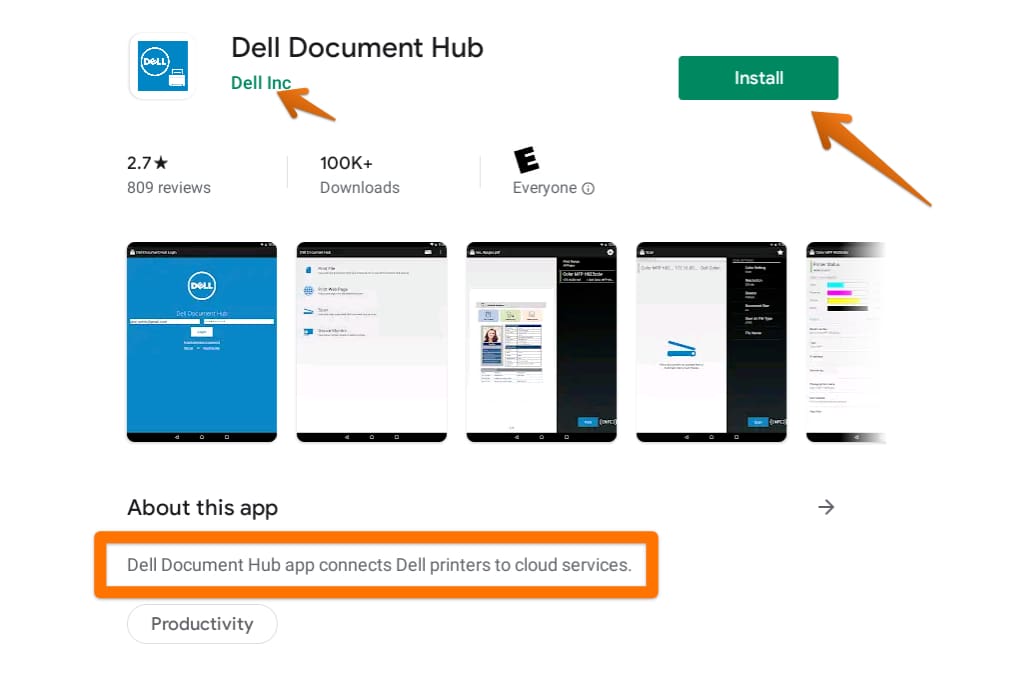
Dell Document Hub Official App
Step 3) After the installation is complete, go ahead and launch it.
Step 4) Make sure your printer is connected to the same Wi-Fi network as your Chromebook. Most printers these days have a built-in display that lets you directly connect to the Wi-Fi network without the need for a configuration via PC. Every OEM app is different, but more or less they try to offer the same functionality – print and scan. After launching the app, you may have to signup to access the app features.
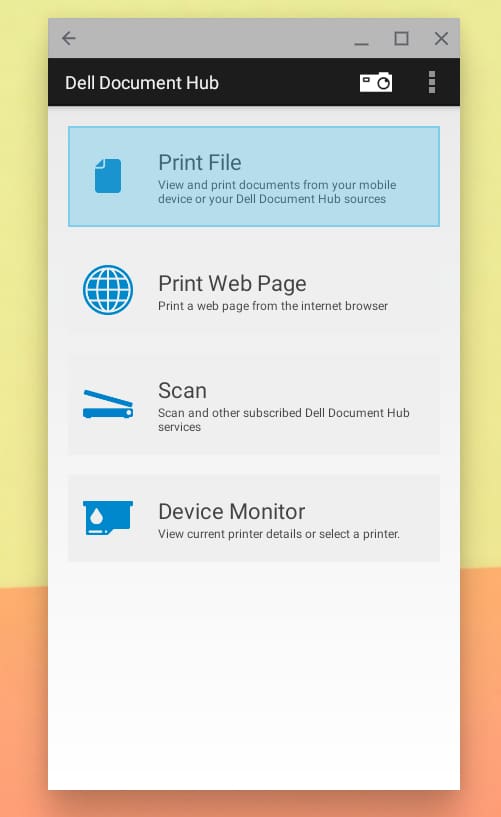
Dell Document Hub App
Step 5) In the particular app we have, the “Device Monitor” tab automatically picks up the Dell printer that’s connected to the Wi-Fi network.
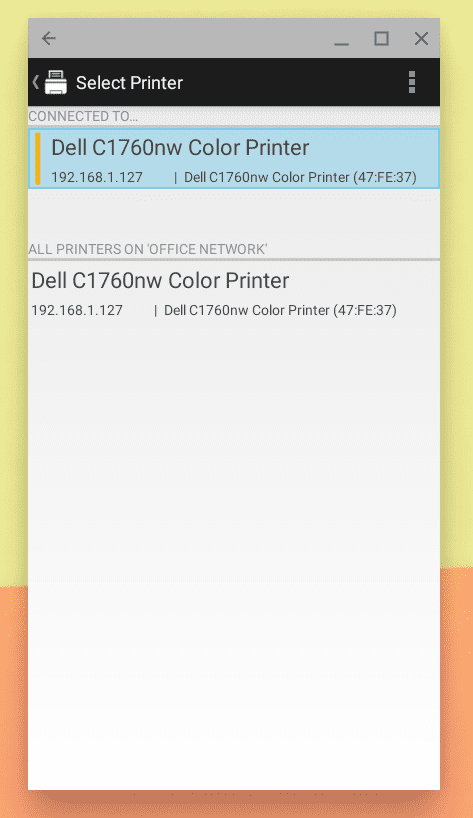
Printers connected to the same network
Step 6) It’s that easy! Go ahead and start printing.
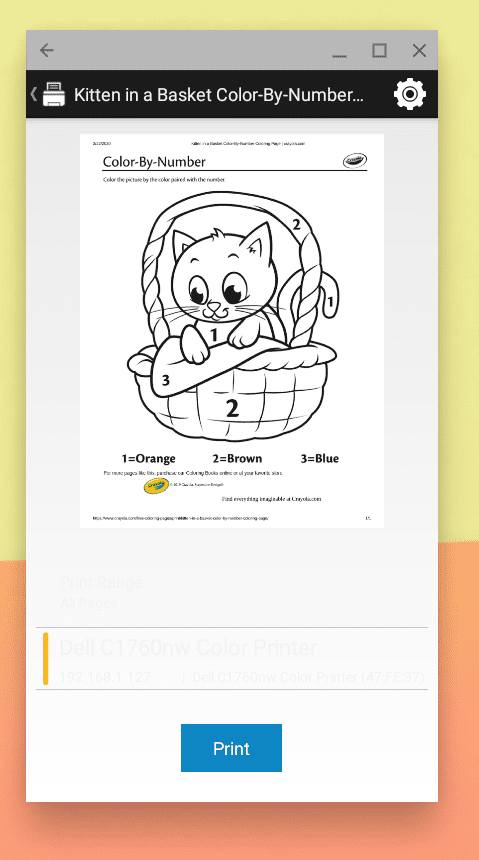
Start Printing!
Connecting to a Cloud-Ready Printer
This is the easiest part if you already have a Cloud-ready printer. Google Cloud Print works with thousands of modern printers, and more are getting added regularly. These connect directly to the Google Cloud Print server and you can send print jobs from anywhere using your mobile devices or computers.
To check if your printer is compatible with Google Cloud Print, head over to this link and enter the maker’s name. For example, Canon. The webpage then displays the list of models.
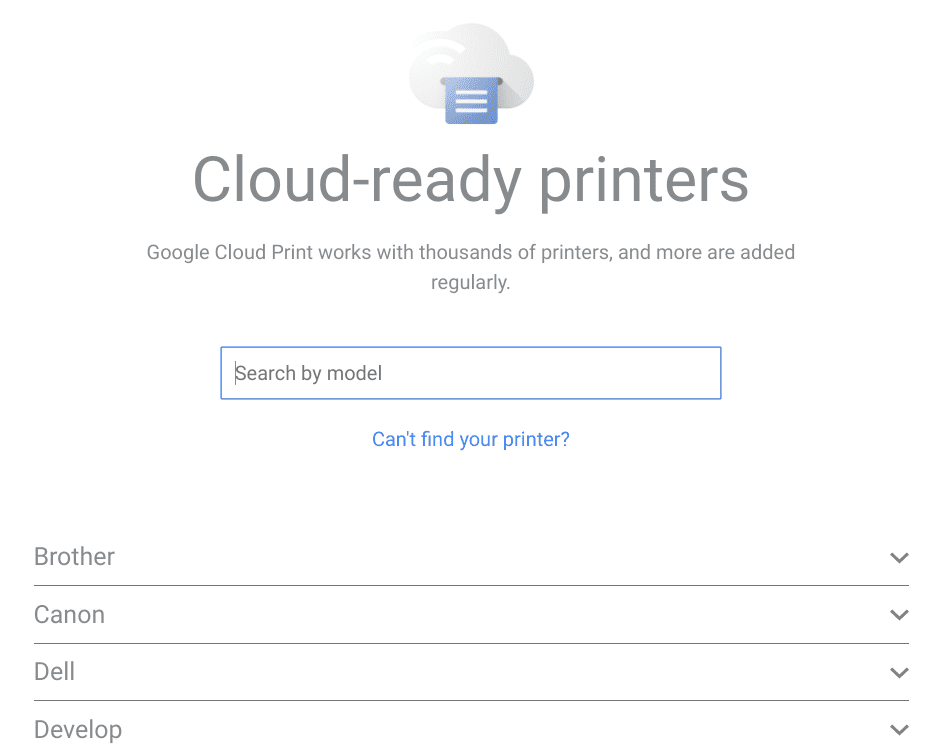
Cloud-ready printers
If your model is in the list, scroll down to the bottom of the page and click on the “English” link to show the instructions for that particular model.
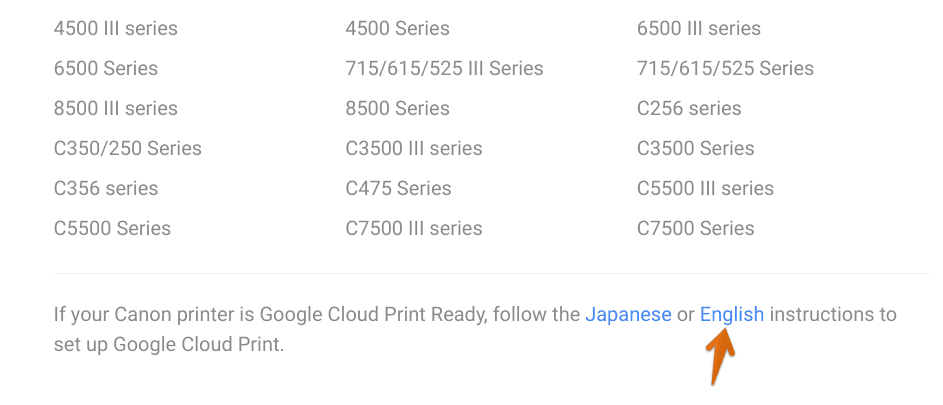
Setting up Cloud Printer
After you follow the instructions, you should be able to see your printer in the list.
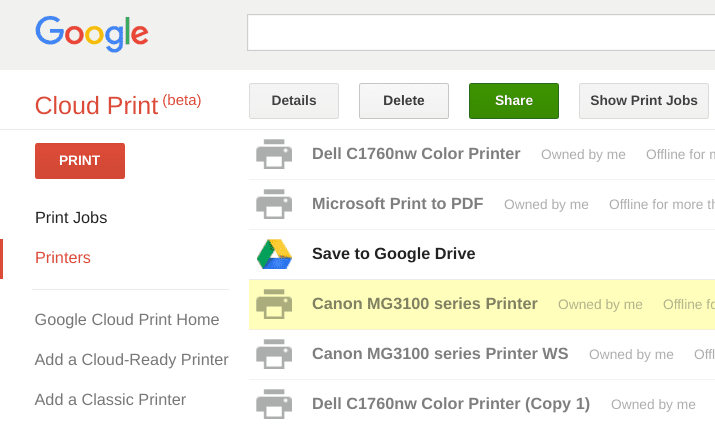
Google Cloud Print
If you have any old printers listed in this window, you can simply right-click and delete it.
Conclusion
That’s all about how to print your documents on a Chromebook. I hope you found the guide useful in configuring your printer. Having a cloud-capable printer is great so that you can print from anywhere in the world. Android apps are also a great way to find documents if your Chromebook has Play Store support.
