Since it was first launched, Google Photos has been rolling out new updates and features that keep on excellent us. Around five years ago, Google announced releasing a new tool in Google Photos, shared libraries, during its annual developer conference. Before this update, Photos was renowned for being a platform with excellent connectivity and collaborative features. Though, shared libraries took this entire setup to the next level.
Shared libraries enable you to share photos and videos with your loved ones faster and easier. Once you specify a particular library to be shared with an individual, all contents will be automatically synced regularly. It is like having the same folder or library in two different accounts. The following article will discuss how you can set up and use these shared libraries in Google Photos.
Shared libraries in Google Photos
Currently, a shared library is available under the wide flag of partner sharing in Google Photos. It lets you transfer photos and videos with customized filters, such as people in those pictures or sharing files from a particular day onwards. What’s great is that once you have completed the setup, there is no need to authorize these transfers ever again manually. All files are automatically shared as soon as they get uploaded to your account.
Shared libraries are handy if you send pictures to a particular person all the time. With these, you can forget about dealing with manual uploads and downloads. If you do not want someone to have access to the entire library, this is where the sharing filters come in. You can configure partner sharing to sync specific files only. Moreover, there is an option to stop sharing the library or even change the Google Photos partner to another person in your contacts. Here is our detailed article on uploading your entire photo library to Google Photos.
Set up and use Shared Libraries in Google Photos
Setting up a shared library on the desktop
Before setting up a shared library on your account, please note that you can only share your library with one person. There are limitless options for sharing albums and photos otherwise. But you cannot select more than one individual in partner sharing. However, you can undoubtedly change the partner role and assign it to someone else as many times.
Step 1: Launch your preferred internet browser and go to “Google Photos.” Log in with your account.
Step 2: On the Google Photos homepage, you will notice some menu options in the top right corner next to your profile picture. Click on the gear icon to open the settings.
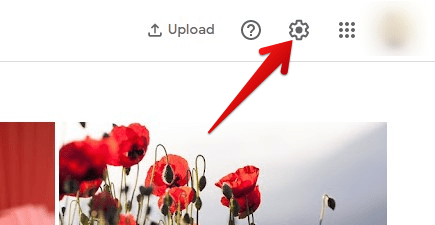
Opening Google Photos settings
Step 3: On the settings page, you will find all sorts of options related to your Google Photos account. Scroll down to see the “Partner sharing” tab and click on it.
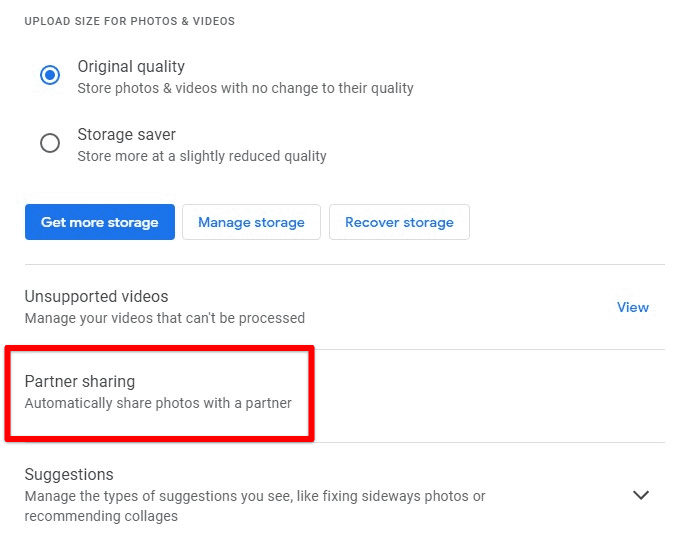
Partner sharing tab
Step 4: A new window will pop up on your screen. Click on the “Get started” button to proceed.
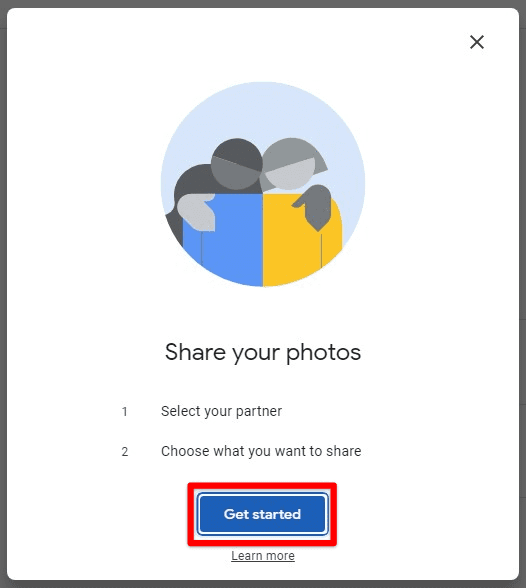
Get started button
Step 5: Now, you will be asked to select a partner to share the library with—type in the name or email address of your intended partner in the tab at the top. You can also select one of your contacts from the list displayed below. Click on “Next” to proceed.
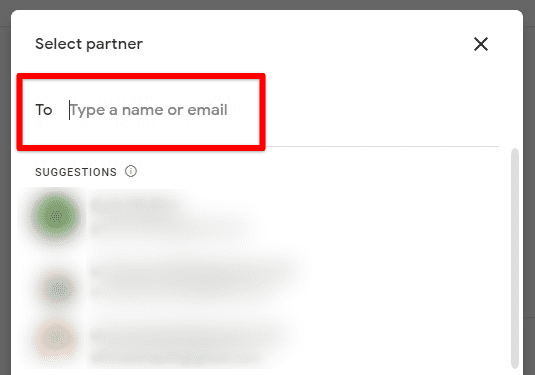
Selecting partner
Note: You can only share your library with someone having a Google account.
Step 6: Choose a suitable option for granting access. Select “All photos” or “Photos of specific people,” depending on who you share the library with. We will be discussing filtering the files by face groups or date in an upcoming section. Click on “Next.”
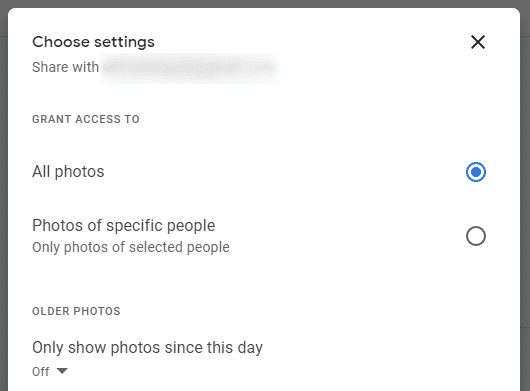
Choosing access settings
Step 7: A confirmation screen will appear in front of you. Make sure that everything looks fine. Click on “Send invitation” to complete the process.
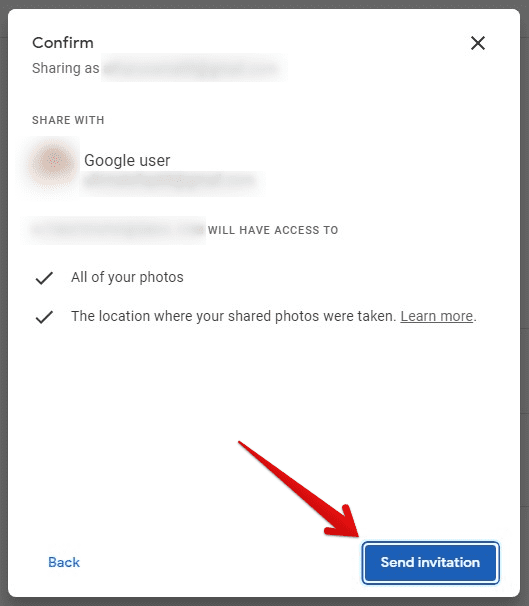
Sending invitation
Your contact will now receive this invitation via email. Once they accept the request, the shared library will come into effect. After selecting a different person, you will have to stop sharing with your current partner. Find more about canceling a shared library set up in the last section.
Setting up a shared library on mobile
You do not necessarily have to be on a desktop to set up a shared library. The same can be done with mobile applications as well. Google Photos has exquisitely developed apps on both Android and iOS. On all new Android phones, this app comes pre-installed. All you need is to sign in with your Google account. However, it is not the case with Apple devices. On iOS, you have to download the application beforehand from the Apple App Store.
Setting up a shared library is quite similar on both Android and iOS. There are no considerable differences in the interface either. We will assume that you are following on Android in the steps mentioned below.
Step 1: Open the “Google Photos” application on your mobile device. Log in with your account.
Step 2: On the Google Photos homepage, tap on your profile picture in the top right corner. It will open up the menu window on your screen. Tap on the “Photo settings” tab with a gear icon.
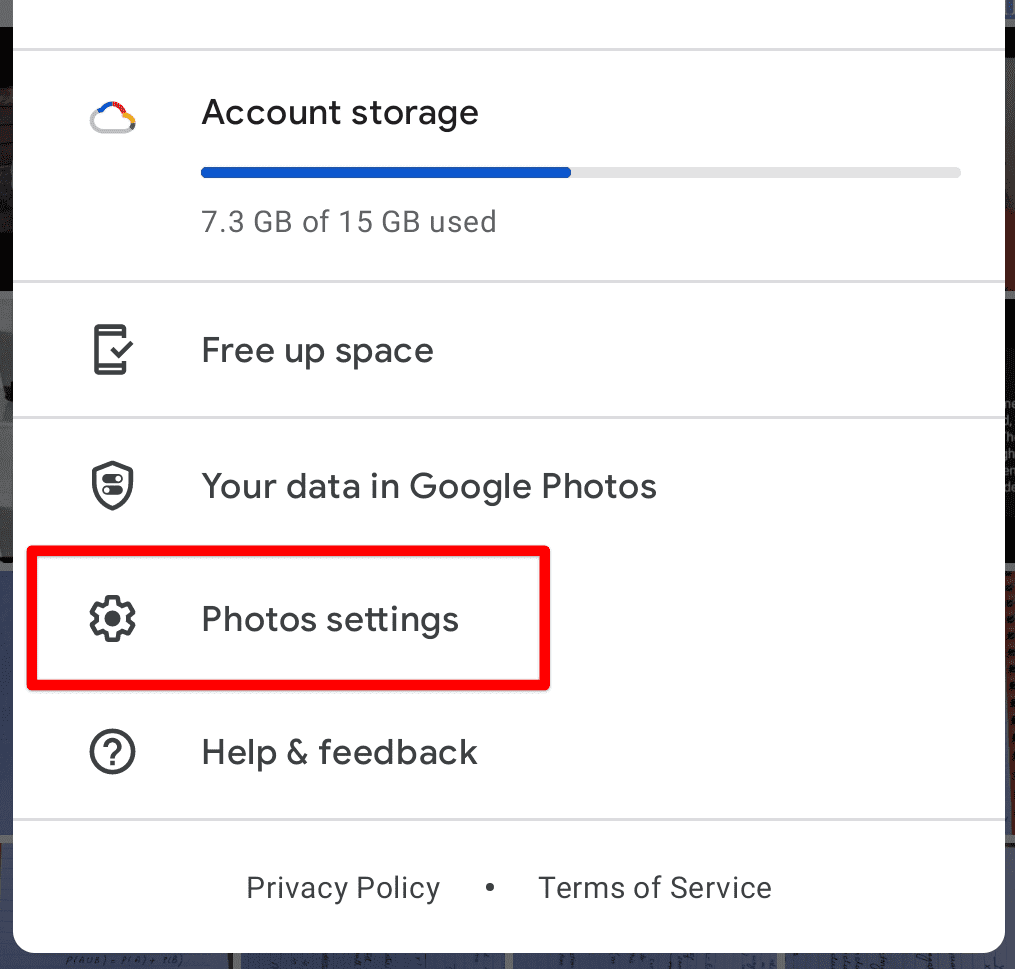
Opening Photos settings
Step 3: It takes you to the settings page. Here, you will find all sorts of options related to your Google Photos account. Scroll down to see the “Partner sharing” tab under the “Sharing” section. Tap on it.
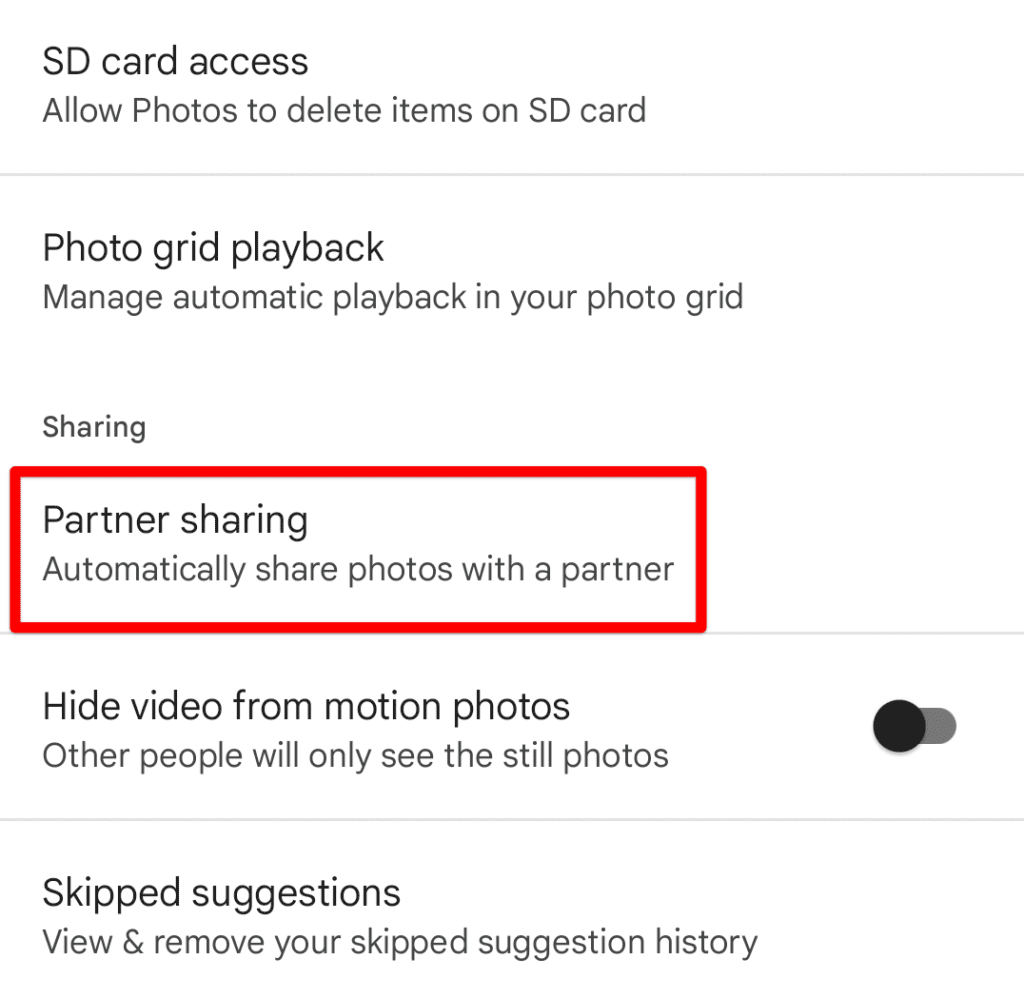
Partner sharing tab under sharing section
Step 4: You will be redirected to the partner sharing menu. Tap on the “Get started” button to proceed.
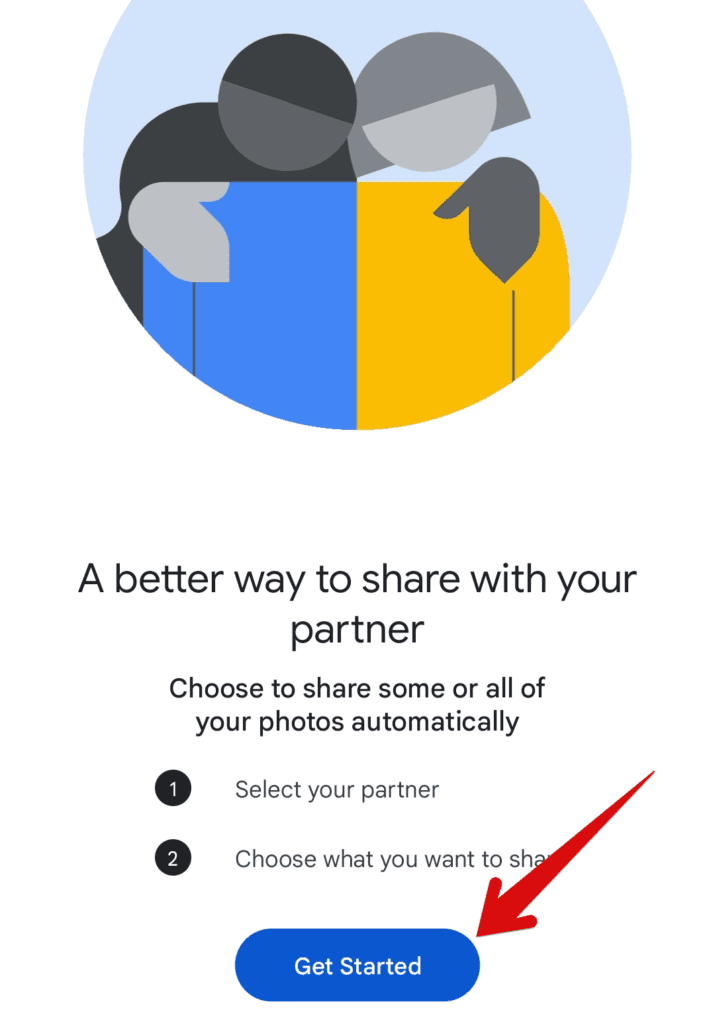
Starting the setup
Step 5: Now, you will be asked to select a partner to share the library with—type in the name or email address of your intended partner in the tab at the top. You can also select one of your contacts from the list displayed below.
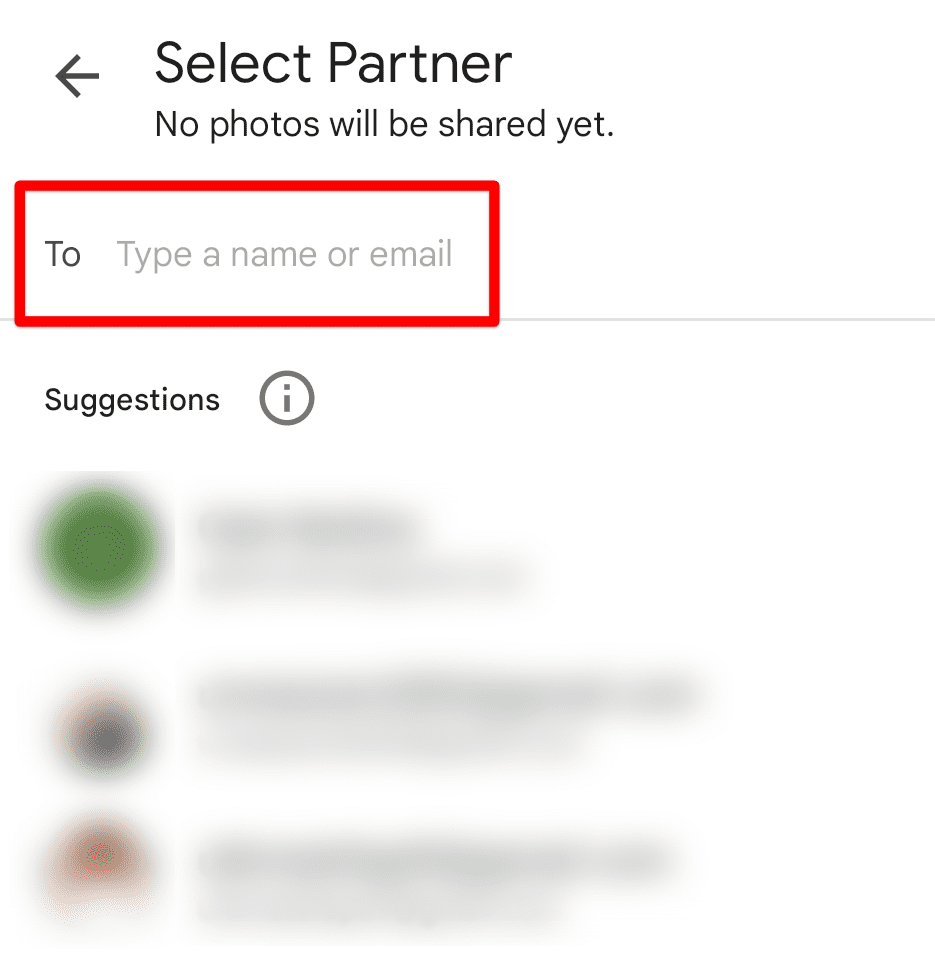
Selecting a partner for a shared library
Note: You can only share your library with someone having a Google account.
Step 6: Choose a suitable option for granting access. Select “All photos” or “Photos of specific faces,” depending on who you share the library with. In the next section, we will discuss filtering the files by face groups or date. Tap on “Next” to proceed.
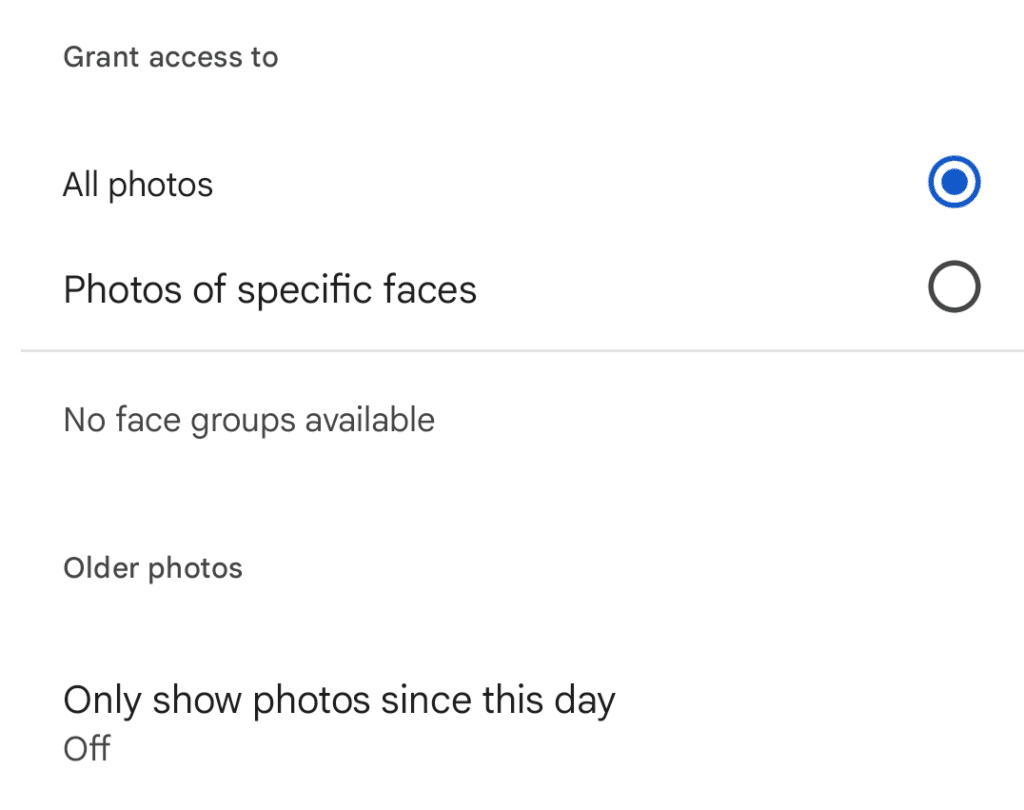
Choosing settings for the shared library
Step 7: A confirmation screen will appear in front of you. Make sure that everything looks fine. Then, tap on the “Send invitation” button at the bottom to complete the process.
The invitee will now receive this invitation via email. Once they accept the request, the shared library will come into effect immediately. After selecting a different person, you will have to stop sharing with your current partner.
Filtering files by face groups or date
It is possible that you do not want to share your complete library with a person. In that case, Google Photos provides you with two types of filters for files stored on your account. One is based on facial recognition, while the other has to do with the actual creation date of that file. Filtering by face groups helps when you want to send someone all of their photos from a particular event or tour. Photos’ AI search assistant will scan your library and only share those files with the right person.
Keep in mind that facial recognition is quite advanced but not flawless. Filtering by face groups may occasionally share photos that do not have any of the people you selected. The second option is to filter the files by date. You will see an “Older photos” section on the access window at the bottom. You can turn it on and then select a particular date. With that, Google Photos will only share photos from that day onwards.
Canceling a shared library setup
Let’s say you are already sharing your library with another person. If you need to share it with someone else, you will have to cancel the first setup. That is required because Google Photos only allows you to share your library with one account at a time. Once you cancel a shared library setup and remove your partner, they cannot find your photos, and similarly, you won’t be able to see theirs either. There is not much to worry about, as there is always an option to add the removed partner again.
Step 1: Launch your preferred internet browser and go to “Google Photos.” Log in with your account.
Step 2: On the Google Photos homepage, you will notice some menu options in the top right corner next to your profile picture. Click on the gear icon to open the settings.
Step 3: On the settings page, you will find all sorts of options related to your Google Photos account. Scroll down to see the “Partner sharing” tab and click on it.
Step 4: Here, the person with whom your library is being shared is listed as a partner. Click on “Remove partner” to cancel the setup.
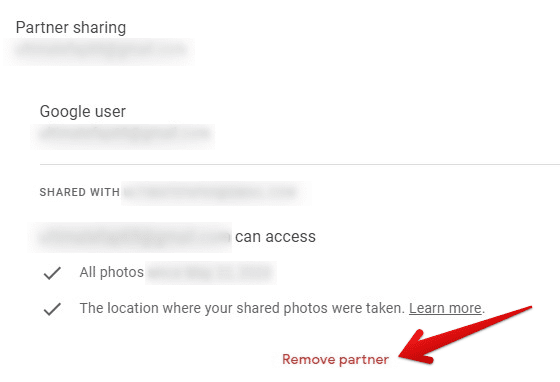
Removing partner
Conclusion
Almost all Google services are widely acclaimed for their collaborative tools and sharing features. With shared libraries, Google Photos takes it up a notch. By setting up a shared library on your account, you automatically sync all contents with your friends and family. The only caveat is that you can select one person at a time. Though, Google has made up for it by offering file filters so that you can share a preferred chunk and not everything. Want to experience another unique offering from Google Photos? Learn how to create and order a Google Photos book.
