Whenever you need to back up your photos or videos or store them on the cloud to save space, Google Photos comes to the rescue. It keeps your data safe and easily accessible to you at all times. Moreover, the user-friendliness of its interface and a wide range of features has made it the most widely used cloud-based service for storing media files.
Google Photos can also be used to share these files with others through active link sharing and customizable permissions. Many users do not even know about all the tools and features present on this platform. The following article will talk about one such facet, Google Photos Archive, dramatically improving its usability.
What is the Google Photos Archive?
If you have been using Google Drive or any other cloud storage, you have noticed that these services are not that great in file management. There have been some noticeable improvements over the recent years, but we still miss intuitive file and folder management as you usually find on local operating systems. In this regard, Google Photos is no different. When you log in to your account on Photos, the screen gets cluttered with plenty of individual previews and icons. You can organize your photos using folders and albums, but sometimes those are not enough. Please read our detailed article on creating and sharing albums in Google Photos.
The Google Photos Archive feature allows you to remove pictures and videos from the view gallery. It helps in giving a neat and clean outlook to the homepage and other folders in your account. When you put an image into the archive, it does not get deleted. Instead, that picture is put into a folder where it will not clutter your frequently visited tabs. Also, even though you cannot view these files inherently, they can still be found in search results and selection tools in Google Photos.
Keep in mind that Google Photos Archive is developed explicitly for those pictures which are not required to be viewed or shared regularly. Archiving a photo will drop it in an isolated folder, distant from other files. Another critical use case for Google Photos Archive is when you need to hide some critical or confidential pictures from general view. These files can still be accessed but are not present in shortcut locations such as “Recent” or “Favorites.”
Archiving photos on a PC
You can archive photos on both web and mobile renditions of Google Photos. However, if you have a lot of files to be archived, we recommend doing so on a PC. Due to the lack of screen space on mobile, you will find it challenging to browse through your photos for archiving. Also, the entire point of arching an image is to clear the clutter, which makes the most sense when you have opened Google Photos through a web browser.
Step 1: Launch your preferred internet browser and go to “Google Photos.” Log in with your account.
Step 2: On the “Google Photos” homepage, scroll down to find the picture you want to archive. Hover your mouse over the preview and click on the tick icon in the top left corner.
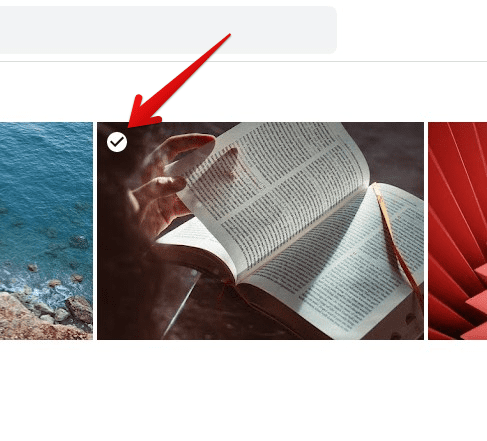
Selecting a photo
Step 3: Doing so will select that photo and put you in selection mode. Now, check all other images to be archived.
Step 4: Once you have selected all images, click on the three-dot icon in the top right corner of your screen.
Step 5: It will display more options in a drop-down menu. Click on “Archive” to send all selected images into the archive folder.
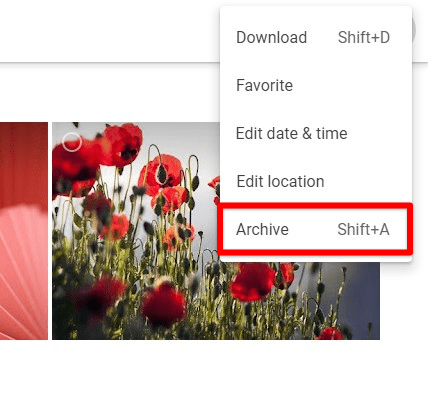
Archiving selected photos
After the photos have been selected, you can also use the keyboard shortcut “Shift + A” to archive them at once. If you want to choose a range of files, select the first file and then select the last file with the “Shift” key pressed. Doing so will mark all photos between these two as selected.
Once you have archived some files on Google Photos, learning how to access these files is the next step. Fortunately, the Archive folder on Photos is not that hidden after all. You can find it from the menu pane on the homepage.
Step 1: Launch your preferred internet browser and go to “Google Photos.” Log in with your account.
Step 2: On the “Google Photos” homepage, go to the menu pane on the left side of your screen. Click on the “Archive” tab under the “Library” section.

Archive tab
It will take you to the archive page, where all archived files are in chronological order. Please note that you cannot create subfolders within this location. Also, there is an option to archive more files here as well. You have to click on the + icon. It opens up a separate window where you can select new photos from different albums.
Archiving photos on a mobile device
As described earlier, you can archive photos from Google Photos mobile apps. Google Photos has exquisitely developed applications for both Android and iOS. The app comes pre-installed on all Android phones and is usually found in the “Google” folder on the home screen. If you have an iOS device, download the Google Photos application from Apple App Store beforehand. Once installed, both platforms run these apps similarly, and there is no considerable difference in the user interface. For the sake of this tutorial, we have only listed down the step-by-step method for archiving photos on Android.
Step 1: Open the “Google Photos” application on your mobile device. Log in with your account.
Step 2: On the “Google Photos” homepage, you will see four tabs at the bottom of your screen. Make sure that you are on the “Photos” tab.
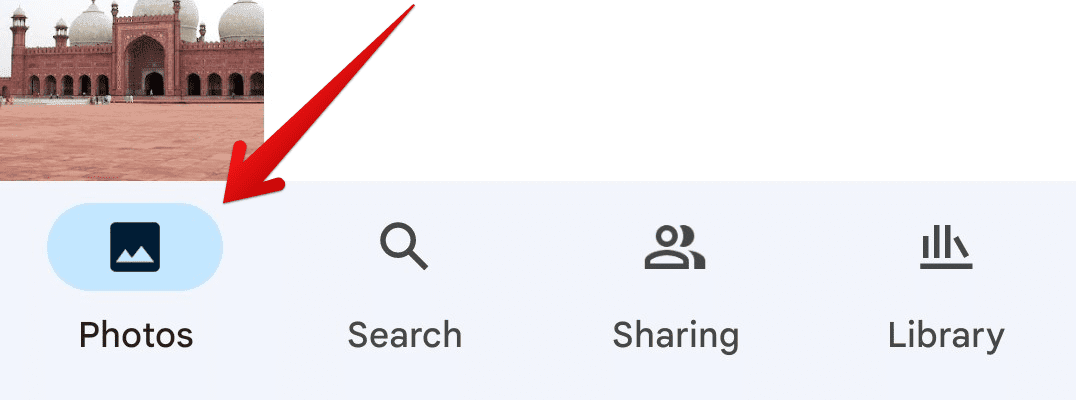
Photos tab
Step 3: Scroll down to find the picture you want to archive. Long press the image preview. Doing so will select that photo and also put you in selection mode. Now, tap on all other images to be archived.
Step 4: Once you have selected all images, tap on the three-dot icon in the top right corner of your screen.
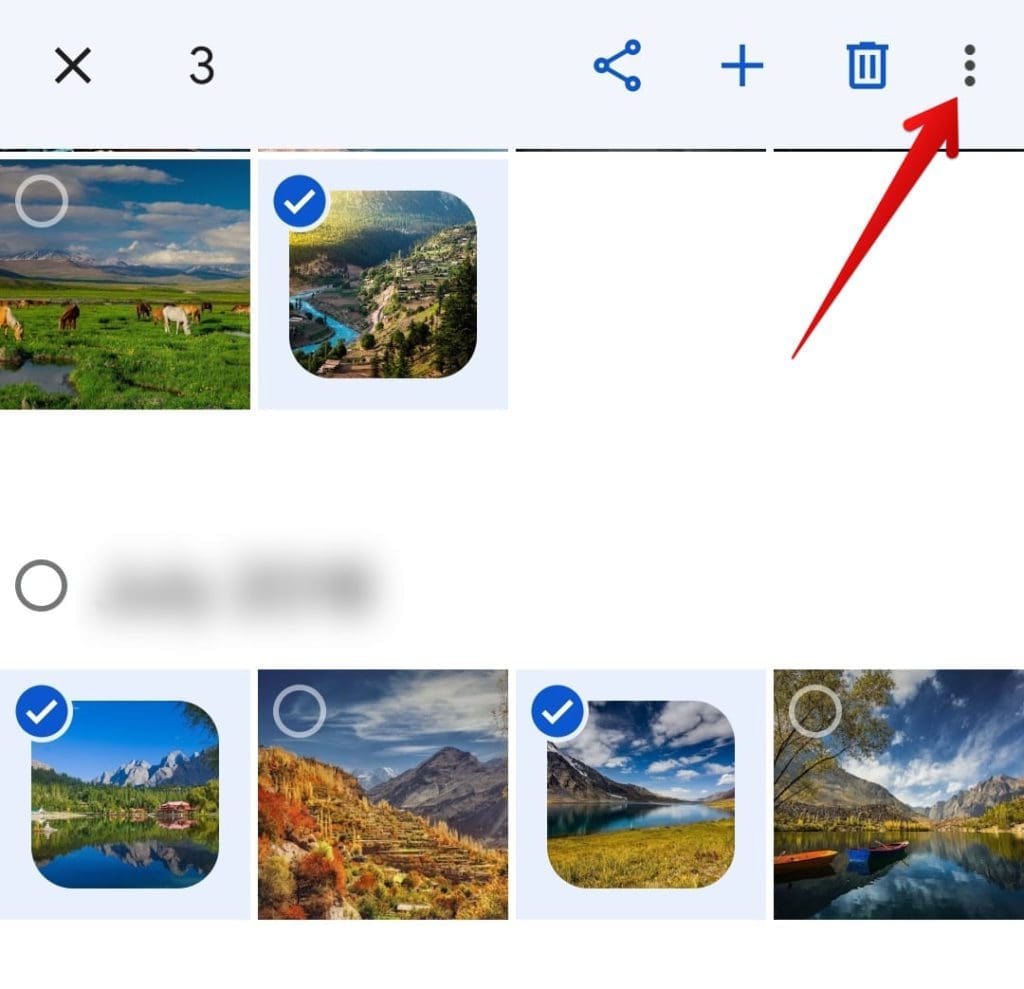
Selecting photos to be archived
Step 5: It will display more options in a drop-down menu. Tap on “Move to Archive” to send all selected images into the archive folder.
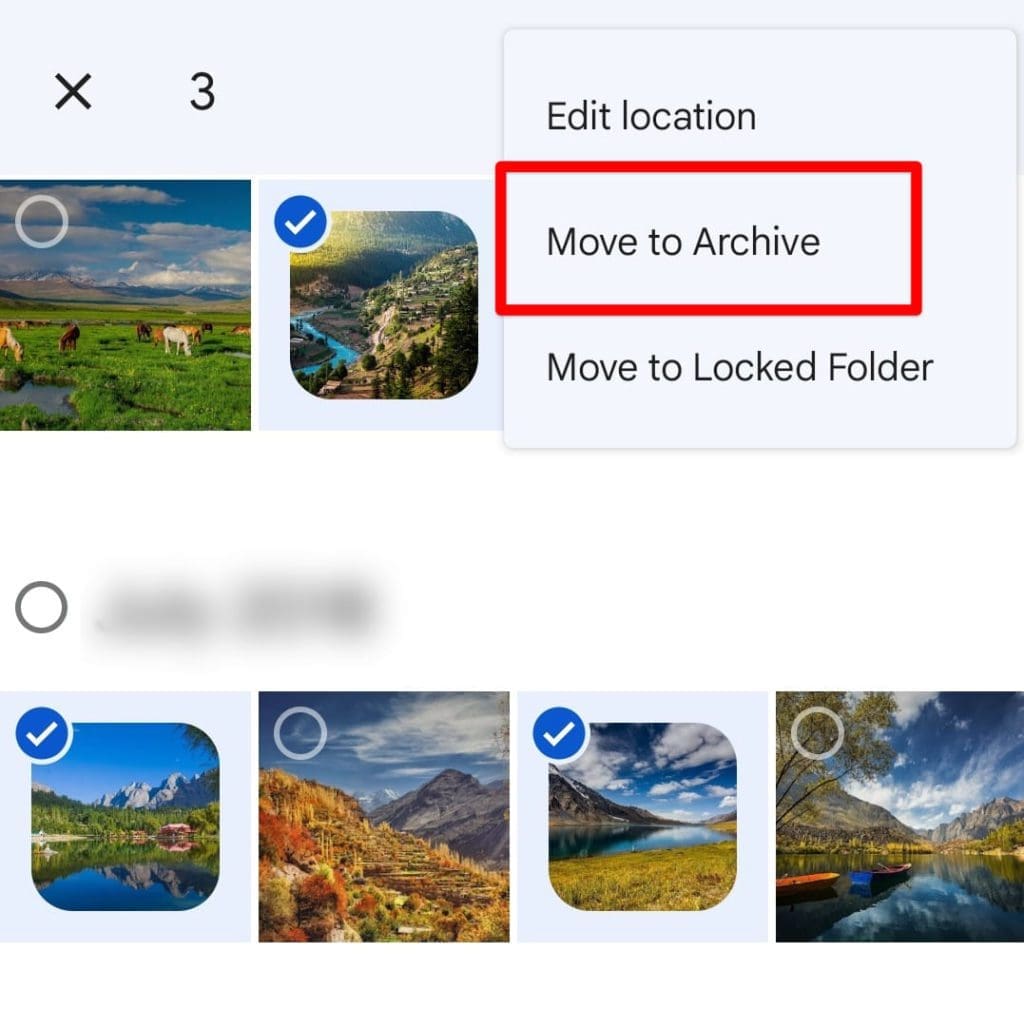
Moving to archive
If you want to select a range of files, select the first image and drag your finger to the last picture. Doing so will mark all photos between these two as selected. Once you have archived these files, the next step is to access them from the Google Photos app. The archive folder is present in the library tab on mobile devices, always displayed at the bottom.
Step 1: Open the “Google Photos” application on your mobile device. Log in with your account.
Step 2: On the “Google Photos” homepage, you will see four tabs at the bottom of your screen. Make sure that you are on the “Library” tab.

Library tab
Step 3: There are four different sections on the top. Tap on the “Archive” button to open the respective page.
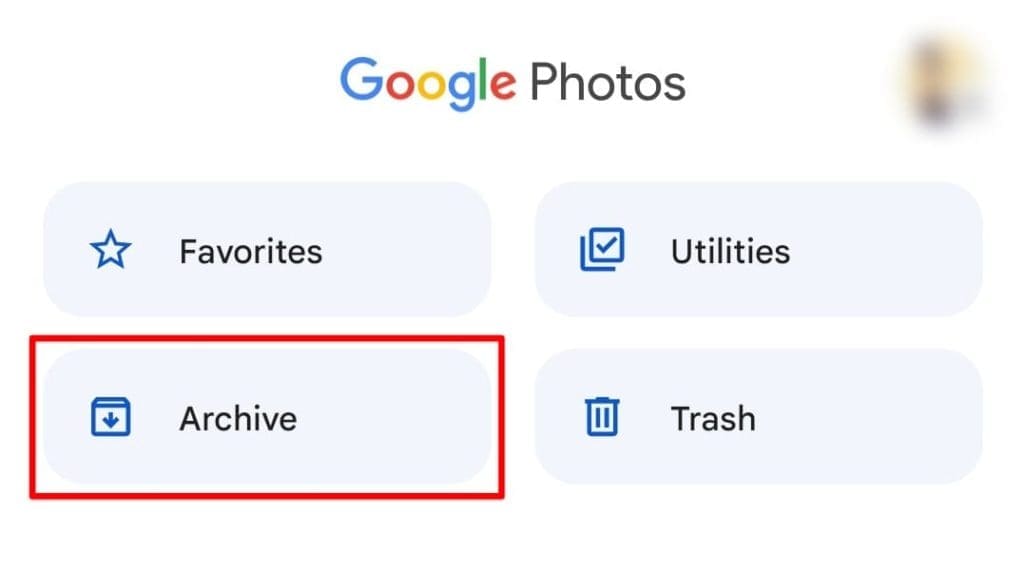
Archive button
All archived files are in chronological order with date tags on this page. Please note that you cannot create subfolders within this location. Also, there is an option to archive more files here as well. Finally, you have to tap on the “add image” icon. It opens up a separate window where you can select new photos from different albums.
Unarchiving images in Google Photos
Once a picture is archived, Google Photos limits it to a single folder and stops displaying it on the homepage. When you want an archived image to be restored in its original folder, mark it as unarchived. This can only be done from the “Archive” folder as those photos are not present anywhere else.
Step 1: Launch your preferred internet browser and go to “Google Photos.” Log in with your account.
Step 2: On the “Google Photos” homepage, go to the menu pane on the left side of your screen. Click on the “Archive” tab under the “Library” section.
Step 3: It will take you to the Archive folder. Scroll down to find the picture you want to unarchive.

Archive folder
Step 4: Hover your mouse over the preview and click on the tick icon in the top left corner. Doing so will select that photo and also put you in selection mode. Now, check all other photos to be unarchived.
Step 5: Once you have selected all images, click on the three-dot icon in the top right corner of your screen.
Step 6: It will display more options in a drop-down menu. Click on “Unarchive” to send all selected images back to their original folders.
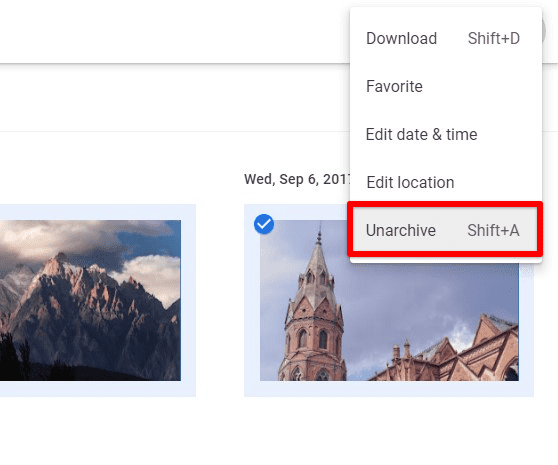
Unarchiving selected photos
After the photos have been selected, you can also use the same keyboard shortcut, “Shift + A,” to unarchive them at once.
Conclusion
Google Photos Archive enables you to stop files from cluttering in the preview section. Once you archive a particular image in Google Photos, it stops being displayed among regular photos and is immediately transferred to the Archive folder. That certainly improves file management and photo organization in other locations. You can also use the Archive folder to hide private images from others around you. Are you a new Chromebook user? Here is our guide on installing and using Google Photos on Chromebook.

1 comment
I want find my google backup my photo