Like Google Drive, Photos is an exceptionally well-developed cloud storage solution built explicitly for pictures and videos. It supports multiple media formats and offers a range of editing, organizational, and productivity tools. However, people usually have concerns with most web-based storage, no matter how reliable they are. Besides, it is always an excellent choice to back up your data, no matter how safely it is stored.
In the following article, we will look at how you can back up the files on Google Photos to your PC. That creates a secondary reserve and enables you to have quick offline access on the go. We will be describing multiple methods for doing so and how you can make sure that everything is organized perfectly well.
What is Google Photos?
Firstly, let us see what Google Photos is and how it can be used for storing media files. Unlike some other Google services, Photos is relatively new. Still, in recent years, it has settled on a pretty outstanding market share for the online storage of photos and videos. As expected, you get to have seamless integration with the Drive, making things easier for the end-user.
Apart from just storing your media files, Google Photos can be used for performing simple edits, basic retouching, making collages, creating albums, and so much more. What’s great is that Google Photos comes with free unlimited storage. However, there is a catch. Any files that exceed the maximum size limit will be automatically downscaled. There is an option in the Photos settings to keep the original resolution, but you lose the free unlimited storage. In that case, you get 15 GBs for free, while the additional cloud memory comes at $2 / month for 100 GBs.
More than enough, you need to know about the pricing and storage. Now, let us talk about some characteristic features. Google Photos has a built-in AI assistant that can help you sort photos, create albums, and search for particular images. It also can identify individuals and groups of people within your photos. Moreover, the collaborative tools and sharing options are limitless as well. All in all, Photos is such a great platform to store, view, manage, and share your precious memories.
Backup and sync in Google Photos
Everyone would like to keep their valuable and dear pictures secured forever. However, most of us do not even try to take up the extra effort of backing up these files if things go south. Even though Google Photos is entirely reliable, we cannot anticipate what might happen that cause us to lose our photos. Therefore, it is always recommended for you to have a secured offline backup for any file stored over the internet.
Keep in mind that there are multiple ways to back up Google Photos. You can download some files individually or copy the entire collection to your local storage. The latter can only be employed if you have Google Drive for desktop installed on your PC. Other methods involve Google Takeout or cloud storage managers such as MultCloud. We will explore each of these methods in great detail in the upcoming sections.
Backing up and syncing photos with Google Drive
If you do not want to back up photos and videos by yourself, the most suitable method is to use Google Drive on the desktop. With Google Drive’s desktop application, you can sync a folder permanently with Google Photos. Doing so will automatically transfer the photos and videos present on the cloud to that folder. If you do not already have Google Drive for desktop, download it from the official link and install it on your computer. It works equally well on both Windows and macOS.
The desktop app can also sync local folders on your device. It is the perfect backup solution for photos, videos, and essential files. As long as the sync process is enabled, it will update the folder, provided that your device is connected to the internet.
Step 1: Launch your preferred internet browser and go to “Google Drive.” Log in with your account.
Step 2: Click on the gear icon in the top right corner and go to “Settings” from the drop-down menu.
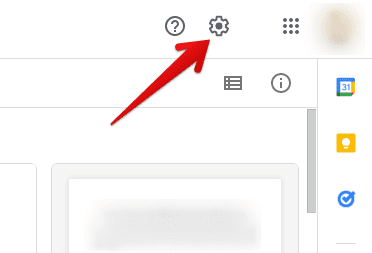
Opening Google Drive settings
Step 3: A separate window will pop up on your screen. Make sure that you are on the “General” tab. Scroll down to find and select the “Create a Google Photos folder” checkbox.
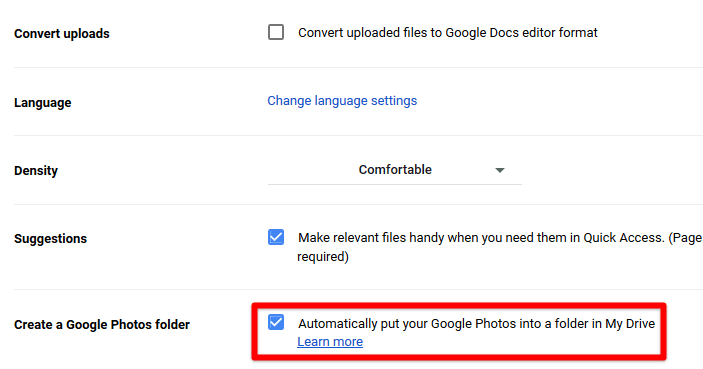
Creating a Google Photos folder
You can set up a local folder from Google Drive for the desktop. Then, all Photos will be automatically backed up and synced with your PC. As long as the same folder remains active, you do not have to update anything at all manually.
Backing up and syncing photos with Google Takeout
Google Takeout is another option to back up and sync photos to your PC. The following method is most helpful if you have a range of media file formats stored on Google Photos.JPG, PNG, SVG, etc. In that case, the best option would be to use a service like Google Takeout. It backs up all data stored on your Photos account and compresses it into a folder. That folder can then be downloaded and stored like a single file.
When using Google Takeout to back up Photos, consider that many file formats might change. However, there is nothing to worry about. You can set it up in a way that instructs it to restore these formats when the folder is decompressed on your PC.
Step 1: Open “Google Takeout” on your internet browser and log in to your account.
Step 2: You will be redirected to a page that lists the entire data set associated with your Google account. Make sure that only Google Photos is checked on this list. You can click on “Deselect all” and mark Google Photos separately.
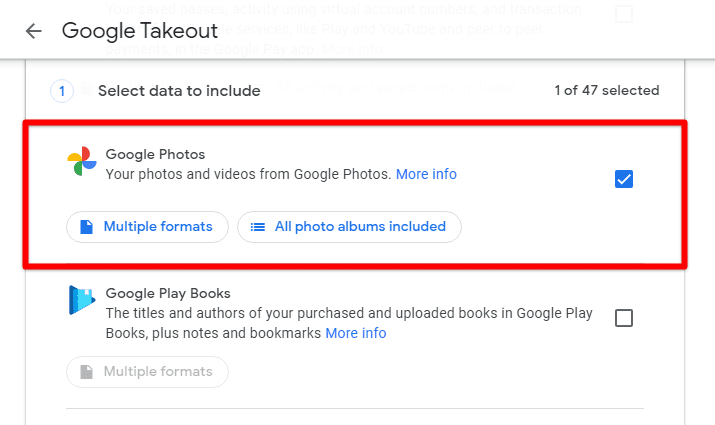
Selecting Google Photos from the list
Step 3: Adjust the format settings by clicking on the “Multiple formats” tab. Also, make sure that all photo albums are included. When everything is set up perfectly, scroll down to the bottom of that page and click on the “Next step” button.

Adjusting format settings
Step 4: It will take you to the second tab that reads, “Choose file type, frequency & destination.” Select “Send download link via email” as the delivery method and set the frequency to “Export once.”
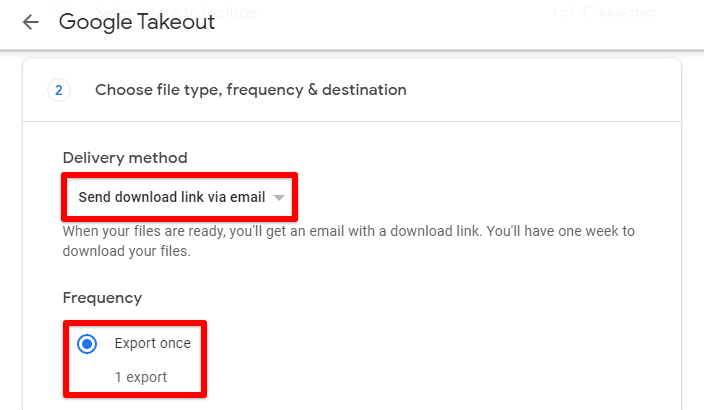
Delivery method and frequency
Step 5: Click on the “Create export” button to start the process. Please note that compressing the entire Google Photos collection in a single file will take some time.
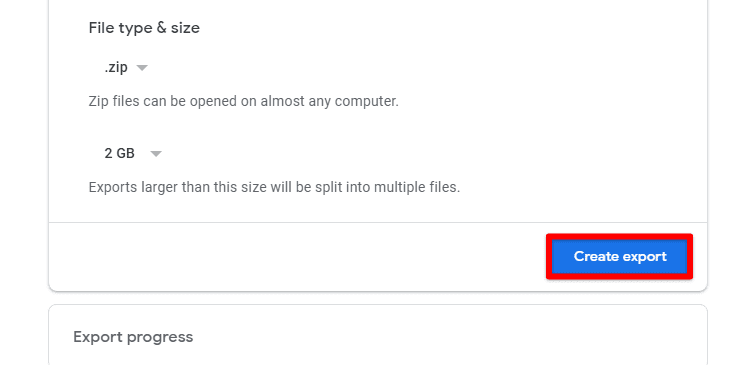
Create export button
When the file has been created, you will see a download button. Click on it to store it on your PC. A link to the same file will also be sent via email. Unzip it inside the drive menu after storing the file in a secured location on your PC. That will decompress all photos and display them in the current directory.
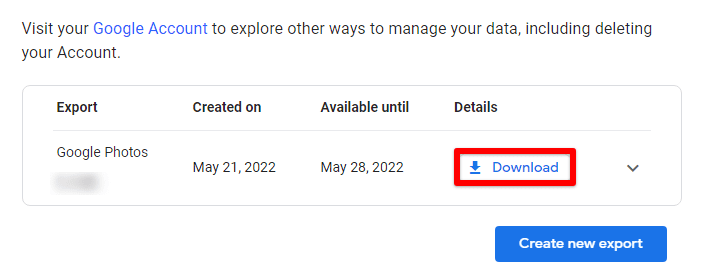
Downloading Google Photos takeout file
Backing up and syncing photos with MultCloud
A third-party application can also transfer files from Google Photos to Google Drive. One of the most reliable and secure platforms for doing so is MultCloud. It lets you integrate multiple cloud storage accounts under the same service. With these accounts linked, you can transfer files between any two of them. Unlike Google Drive for desktop, MultCloud can be used on your browser. This service has no local storage involved as it can transfer files directly from one cloud to another. You can sign up for free or check out the service with a guest account.
Once you have linked the two accounts, you do not have to manually transfer new photos and videos. MultCloud can be automated to a degree where transfer patterns are stored and activated whenever a new media file is uploaded to Google Photos. It keeps both Google Drive for desktop and Google Photos perfectly synced.
Step 1: Go to this link and click “Sign Up for Free.” On the sign-up page, fill in the details for your account.
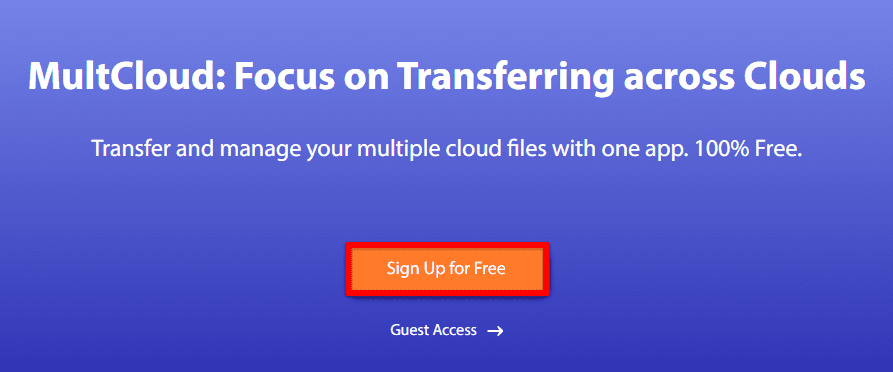
Signing up for MultCloud
Note: You need to have a valid email address for creating an account on MultCloud. It may also be signed in with Facebook or Google. Besides, you can also check out their service as a guest without linking any account.
Step 2: After you sign in, go to the “Add Cloud” tab located in the left pane. Here, you will see a list of cloud storage services.
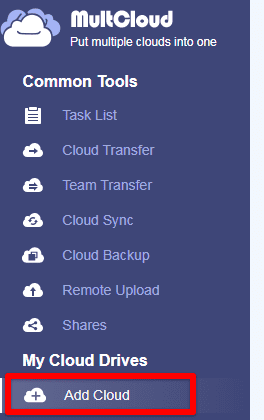
Add cloud tab
Step 3: Add your “Google Drive” and “Google Photos” accounts.
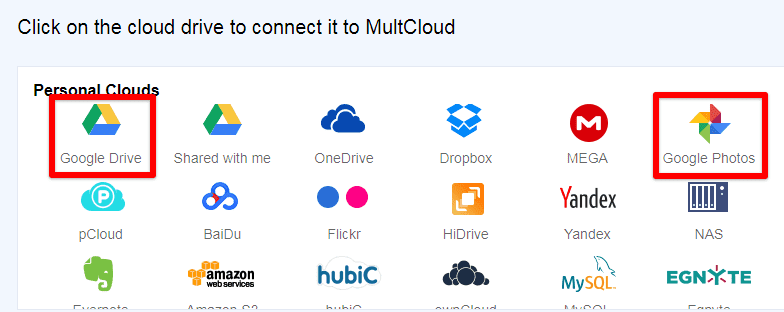
Adding Google Drive and Google Photos
Step 4: Once both accounts have been added successfully, click on the “Cloud Transfer” tab under “Common Tools.”
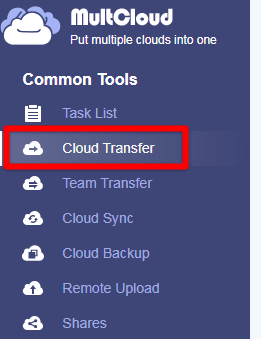
Cloud transfer under common tools
Step 5: MultCloud will now ask you to select a source and destination. Select “Google Photos” as the source and “Google Drive” as the destination. Next, click on the “Transfer Now” button in the bottom right corner.
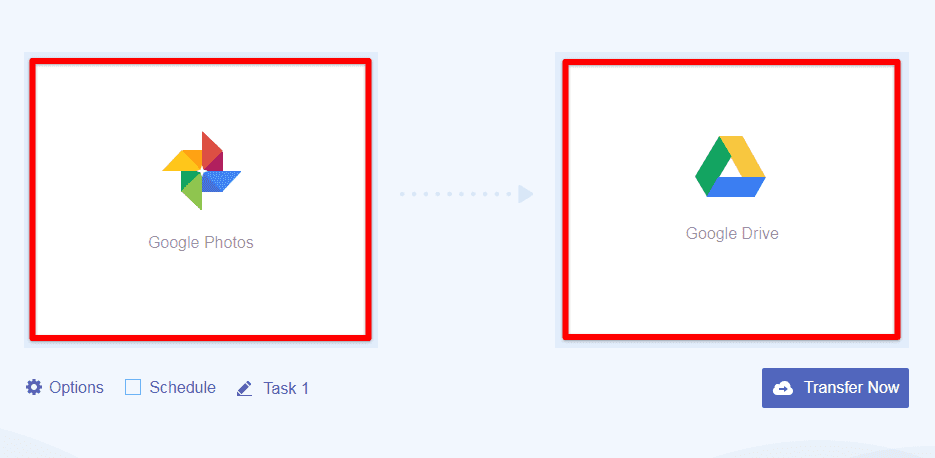
Transferring from Google Photos to Google Drive
Once the transfer is complete, all the photos imported to Drive will be synced with your PC through Google Drive for desktop. Since the transfer will take place entirely over the internet, the time it takes to complete may vary. Rather than just transferring the files right then, you may want to schedule it after working hours.
Moreover, there are tons of optional add-ons available, such as filters for files that are to be transferred. You also choose to delete the photos and videos from the source afterward. Since you will be transferring for backup purposes, keep this option unchecked.
Conclusion
Google Photos is an all-in-one solution for storing, viewing, editing, and sharing your photos and videos. With all of your data stored on the cloud, it’s good to have some backup on your local drive. You can back up and sync the files in Google Photos with Google Drive for desktop, Google Takeout, or a third-party application, MultCloud. Go through each of these methods and select the most appropriate one. Started using Google Photos recently? Learn how to create and share photo albums.

2 comments
Part of this article is three years out of date. You can not sync Google Photos to Google Drive. Google removed this option in 2019. “Automatically put your Google Photos in My Drive” is no longer part of the settings for Google Drive.
It would have been really nice to have an inherent option. We can only hope that Google adds it back again.