Chromebooks are reliable devices for handling lightweight tasks that don’t require a lot of system resources and run on the Chrome OS. Like any other laptop and operating system, you might encounter various issues when working with the Chromebook. One of the first solutions you can apply is resetting or power washing the Chromebook. However, if that doesn’t work, you will need to recover your Chromebook.
Note: Performing a recovery process on your Chromebook will completely erase/ format the whole drive, including any downloaded files. Therefore, we highly recommend performing a backup before (if possible) continuing with the recovery. Luckily, Chromebooks store most of their data online, and you will only lose any downloaded local data.
When to perform a Chromebook Recovery
There are several reasons why you might want to perform a recovery on your Chromebook. Some of the most common include:
- You are getting the error “Chrome OS is missing or damaged.” This error, sometimes called “the white screen of death,” appears when the device encounters issues loading the operating system. It mostly pops up during boot, but it can also randomly appear when working with the device. It might seem different on other Chromebook models, but the solution is the same.
- Chrome OS recovery can also be a good option if you have tried all other methods like resetting/ powerwash, and they didn’t work. Please check out our post – ‘How to Powerwash (Reset) a Chromebook.’
- Performing a recovery is also an excellent experience for people who love tweaking systems. It isn’t a complicated process if you have a reliable internet connection.
Using a Linux computer to recover your Chromebook
This post will guide you on using a Linux computer to recover your Chromebook. Some of the requirements you will need for this process are:
- A reliable internet connection
- At least 8 GB USB drive
- A PC running any Linux distribution
Before getting started with the post, you need to know your Chromebook model. Let’s look at the various methods you can use to know the exact model of your Chromebook.
How to know your Chromebook model
The first and most straightforward method is checking the Model string displayed on the “Chrome OS is missing or damaged” screen, as shown in the image below.
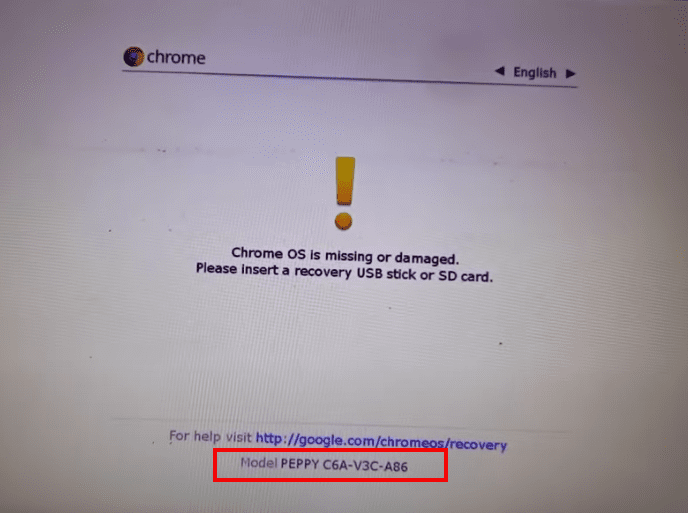
Model string
The other method is to flip your Chromebook and look at the details written on the back. For example, from the image below, you can see that we are using an Acer C720 Chromebook.
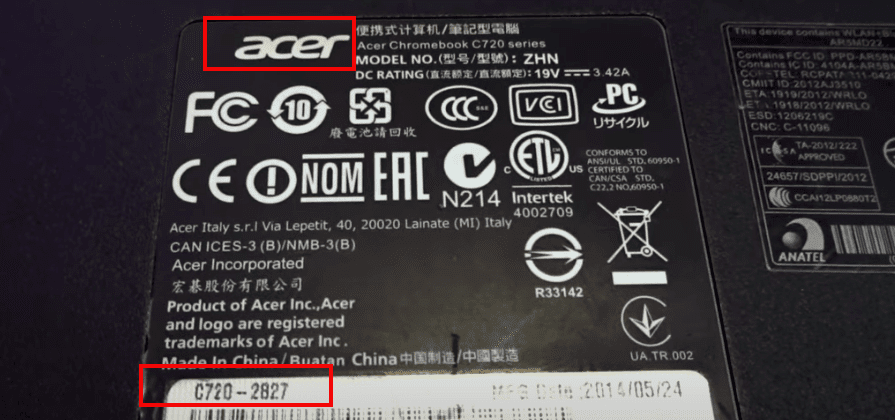
Acer Chromebook model
However, we highly recommend the first method since that will give you the exact Chrome OS recovery image you need to download. For the latter, you will still need to look through a list of several Acer model images to get the exact Chrome OS image for your Chromebook.
Step 1. Download the Linux Recovery Chromebook script
To get started, download the official Chrome OS recovery script using the link – Chrome OS recovery script. Alternatively, you can use the wget command to download the script from the Terminal, as shown below.
sudo wget https://dl.google.com/dl/edgedl/chromeos/recovery/linux_recovery.sh

Download script
Make the script executable using the chmod command as shown below.
sudo chmod +x linux_recovery.sh
Launch the script using the command below.
sudo ./linux_recovery.sh
Tip: Please ensure you have an active internet connection at this point.
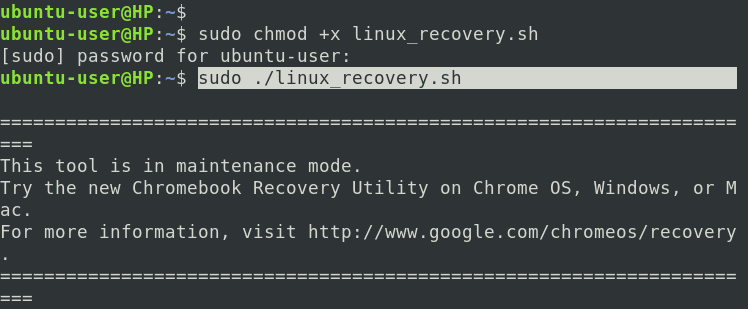
Launch script
The recovery script will launch, and you will see a prompt to enter the “Model” of your Chromebook. You can get the model string from the “Chrome OS” recovery screen. Alternatively, you can type the Chromebook brand (e.g., Acer) to list the various models available for that model. If you want to list all the Chrome OS models available, don’t type anything and just press ‘Enter.’ However, this latter method is not the best option since more than 414 Chromebook models are available.
In our case, we want to recover an Acer Chromebook. We will type “Acer” and hit ‘Enter.’ That will list all the available Chromebook recovery images available for Acer.

Acer Chromebook models
In our case, we already know our ‘model string’ is PAINE D25-C3G-B2Q-A4L. We will type it on the prompt and press ‘Enter.’ You will see an option to select the image you wish to use for recovery.
Tip: Please connect our USB drive at this point. We highly recommend formatting using NTFS or FAT32. Also, ensure the PC doesn’t shut down for any reason and also don’t close the Terminal. This script doesn’t have an auto-resume feature, and the download will start anew.
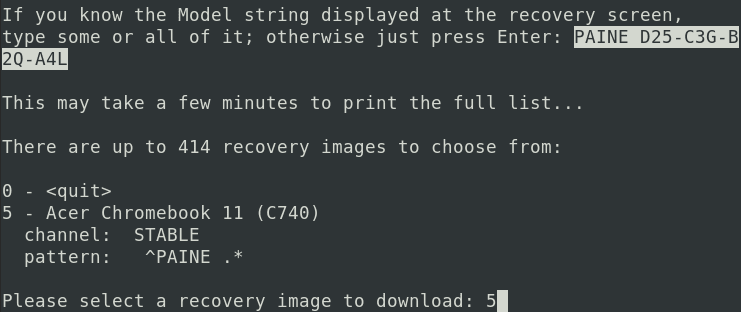
Select recovery image
After pressing ‘Enter,’ the recovery image will start downloading on your system. Depending on your internet connection speed, this step might take some time since the script will download the Chrome OS image. Once the download completes successfully, the script will scan for all connected USB drives and list them below. Select the USB you want to use for the recovery process by typing the number next to it and pressing ‘Enter.’ For example, our USB drive is listed as ‘1.’
Therefore, we will type ‘1’ and press Enter. Next, the script will start writing the Chrome OS recovery image on our USB drive. When done, you will see a message in the Terminal that your recovery media is ready.
Step 2. Begin Recovery
This step is much easier than you might imagine. Eject the recovery USB drive from your Linux PC and insert it into your Chromebook. Switch on the Chromebook, and it will automatically detect the recovery USB drive and start reinstalling the Chrome OS. This process might take a while – please be patient.
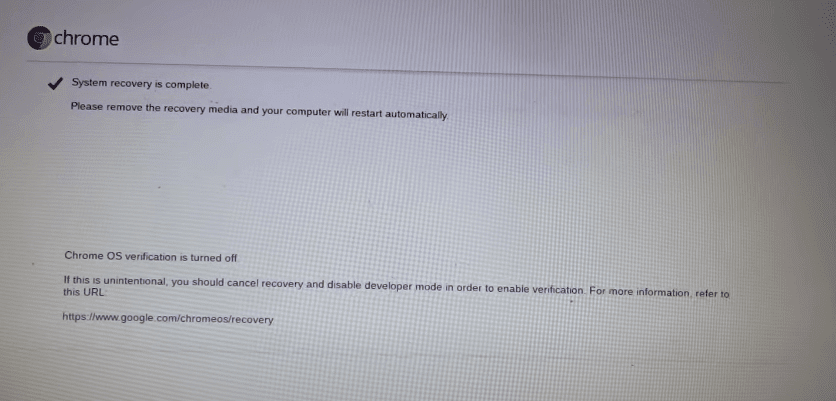
Chrome OS recovery
After a successful recovery, your Chromebook will reboot, and after a few seconds, you will see the Chrome OS welcome screen. Follow the on-screen instructions from this step to set up your Chromebook.
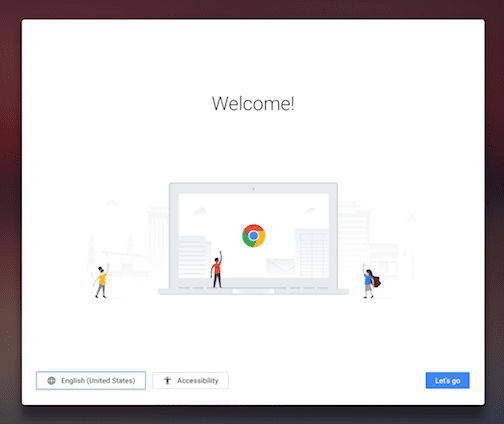
Chrome OS welcome page
Troubleshooting errors
You might encounter several errors during the recovery process. Let’s look at some of the solutions you can apply for each type of issue.
An unexpected error has occurred: If you get this type of error, don’t panic! It’s mostly a result of a damaged recovery image or USB drive. Format the recovery USB drive and rewrite a new recovery image to solve this. If the issue persists, you will need to look for an alternative USB drive.
Please remove all connected devices and start recovery: This problem is self-explanatory. Ensure it’s only the recovery USB media inserted during the recovery process. Unplug any other devices, including any external mouse or keyboard connected.
The device you inserted does not contain Chrome OS: If you get this type of error, format your USB drive and re-write the recovery image. Alternatively, try using a different USB drive since not all USB drives can be used as a recovery media for Chrome OS.
The security module on this device is not working: This is the type of error that you wouldn’t want to experience since the solution might seem pretty weird and time-consuming. Follow the steps below to solve this error and reset the TPM.
- Power on the Chromebook and leave for 30 seconds.
- Turn it off by pressing down the power key.
- Repeat this procedure around 20 – 25 times
Conclusion
That’s it for the guide! Did you come across any issues, or do you have any tips and tricks you wish to share with our readers? Please feel free to hit the comments below.

3 comments
Doesn’t find the model. But I do get this unhelpful message:
This tool is in maintenance mode.
Try the new Chromebook Recovery Utility on Chrome OS, Windows, or Mac.
For more information, visit http://www.google.com/chromeos/recovery.
for anyone still seeing this message, keep reading the text it all the way to the point where it asks you to enter the model string, and continue as normal
When I paste the command to download the script, I don’t get any of the errors in the screenshot about sudo and wget not being resolvable addresses. Did I do it wrong?