Over the last decade, Google tinkered with several platforms, searching for a perfect messaging solution. Recently, they have finally found one and are planning to stick with it for the foreseeable future. The initial release date for Google Messages was in 2014, but it has only picked up reasonable authority among users in the last 3 to 4 years. It comes as a default messaging application on almost all new Android phones.
Google Messages is an all-in-one service for every type of text and media communication. It not only contains standard SMS but also hosts Rich Communication Services. An advanced protocol incorporates many fantastic features to regular text messaging. From the time it was first launched, Google Messages have improved considerably. Now, it has turned into a viable messaging application that competes with all other services in this market. The following article will see what Google Messages is, some of its key features, and how you can use it to send and receive messages on your computer.
What is Google Messages?
Do you remember the messages app you used on regular Android devices? Google Messages integrated all of that as a base and built an entire range of features, tools, protocols, and settings. There is probably no form of texting that Google Message cannot handle or process. It is equally suitable for both Short Message Service (SMS) and chatting over the Wi-Fi. The way it handles emojis, GIFs, and animated stickers are just a treat. Before Google Messages, no other service could combine all of that in a default application.
Once users start to avail Google Messages regularly, they begin noticing features that offer convenience in inventive ways. A perfect example of that would be contextual emojis. They match what you are typing and provide a new method to express yourself instantly. You get to pin important contact whose tabs are displayed at the top of your Messages list. You can even use it to archive messages or add them to the starred section. Follow this link to learn how to send text messages from a Chromebook.
Another beneficial aspect is automatic spam detection. You no longer have to block annoying numbers and scammers manually. Google Messages can generate read receipts and shows typing indicators as well. However, they are only enabled after both parties have verified their mobile number. Google Messages works perfectly well with Google Assistant, which can be used for creating voice-to-text messages, sending smart replies, suggesting web stickers, and more. Not long ago, Google also introduced scheduled messages, online payments, and floating bubbles.
Google Messages on desktop
Do you think that is all that Google Messages has to offer? Think again. It can be set up on any operating system (including ChromeOS, Windows, macOS, or Linux) for sending and receiving messages through your computer. It opens up an entirely new avenue of specs that could not be delivered through mobile devices. Firstly, let us see how to set up Google Messages on a computer with device pairing. Then, we will move on to handling messages and other attributes. Feel free to browse the list of the 10 best messaging apps for Chromebook.
Setting up Google Messages on your computer
Before setting up Google Messages on your computer, make sure that it is currently installed on your phone. It is impossible to access it on the desktop without having it on mobile-first. Many Android phone manufacturers have started to include Google Messages in the list of pre-installed applications. If that is not the case with your device, head over to Google Play Store and download the Google Messages application.
Step 1: Open your preferred internet browser and go to this link. It will take you to Google Message’s official website.
Note: For those who have not yet installed the Google Messages app on their phones, the download button on the website will take you to the respective Play Store page.
Step 2: Click on the “Messages for Web” button in the top right corner.
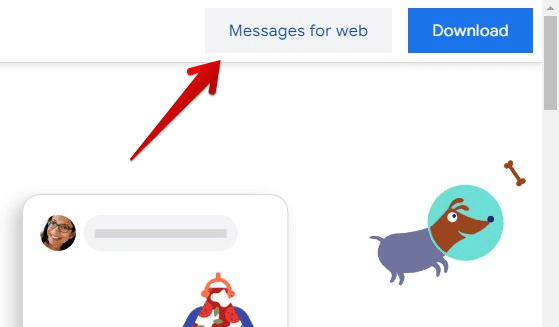
Messages for web
Step 3: You will be redirected to a new page with the QR code. All subsequent steps for setting up Google Messages on your computer are also listed.
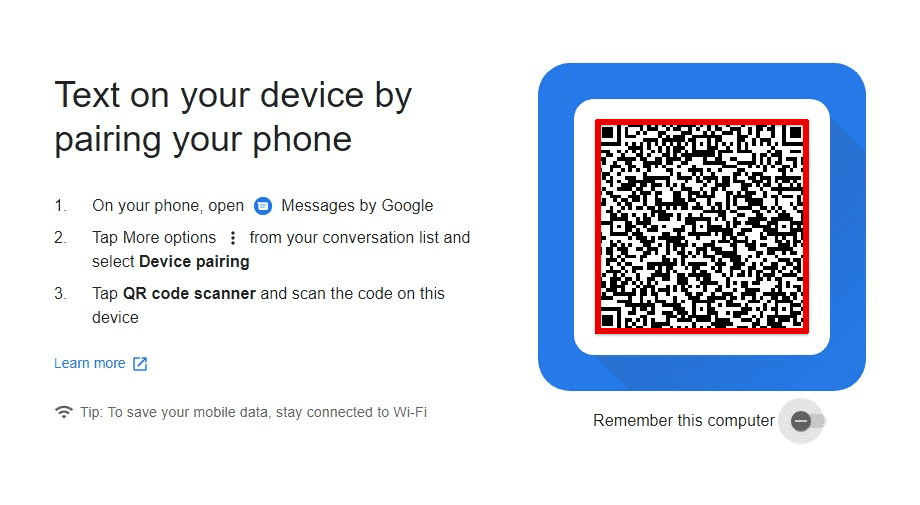
Google Messages QR code page
Step 4: Open the “Google Messages” app on your mobile device.
Step 5: Tap on the three-dot icon in the top right corner. Go to “Device pairing” from the drop-down menu.
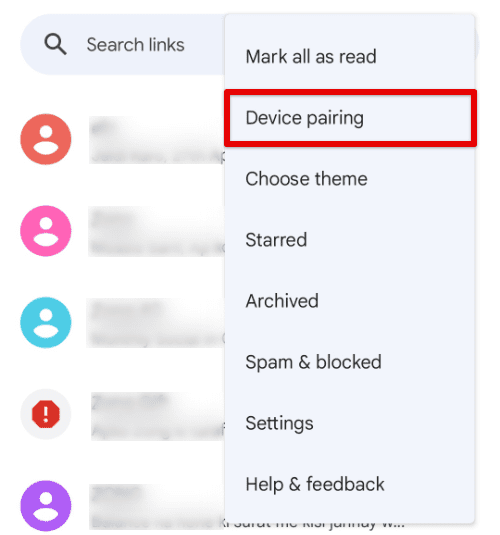
Device pairing
Step 6: Tap on the “QR code scanner” button. It will open a scanner window by accessing your mobile’s camera. Scan the QR code present on your computer’s screen.
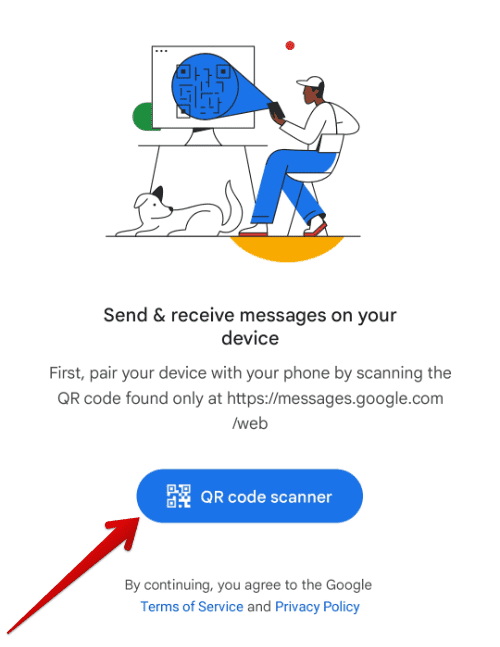
QR code scanner
Note: If you do not want to repeat the pairing process every time, toggle the “Remember this computer” switch.
After the scan, both the Google Messages app and website will reload. It will only take a few moments before your browser displays the inbox contents. With that, you have successfully set up Google Messages on the desktop.
Sending and receiving Google Messages on your computer
After setting up Google Messages for the web, the next step is sending and receiving messages. When a computer is paired, all new messages received by your number will automatically be routed to Google Messages. Therefore, you do not have to undergo additional steps to receive messages. To send messages, you need to start a new messaging thread.
Step 1: Make sure that your phone is connected to an active Wi-Fi connection.
Step 2: Open your preferred internet browser and go to “Google Messages.”
Step 3: Click on the blue-colored “Start chat” button in the top left corner.
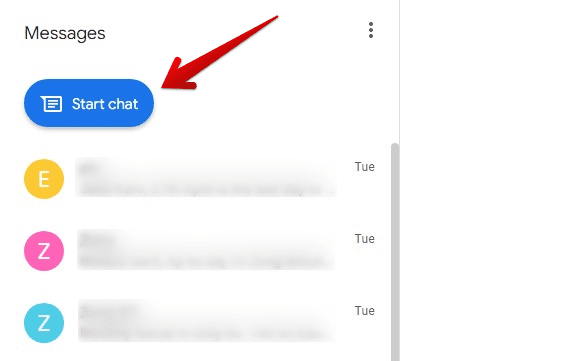
Starting a chat
Step 4: Type the recipient’s name, phone number, or email at the top. As soon as you click on a person’s tab, the chat with their account will open up. You can send any text message, emoji, sticker, GIF, or file attachment.
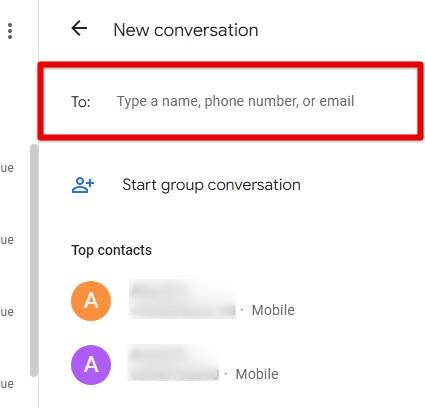
Specifying recipient
Similarly, Google Messages for the web also lets you start group conversations. If you want to add more people to an existing chat, click on the “Add more people” button at the top.
Note: Google Messages you send and receive through desktop are shared via Wi-Fi. Thus, the time it takes to load content and deliver new messages might vary with your internet connection speed.
Unpairing Google Messages from your computer
It depends on whether you want to keep the Google Messages for web active. After you have used it for a specific period, you may want to unpair both devices. That will stop routing messages to and from your computer. You will have to go through the same method described previously to set up again.
Unpairing Google Messages is strongly recommended when using it on a publicly available system. Make sure that you do not leave the account unattended. Considering the possible implications, Google provides multiple routes for unpairing your devices. For unpairing from the desktop, follow the steps mentioned below.
Step 1: Open “Google Messages” on a new tab in your preferred internet browser.
Step 2: Click on the three-dot icon in the top left corner of your screen. Go to “Unpair” from the drop-down menu.
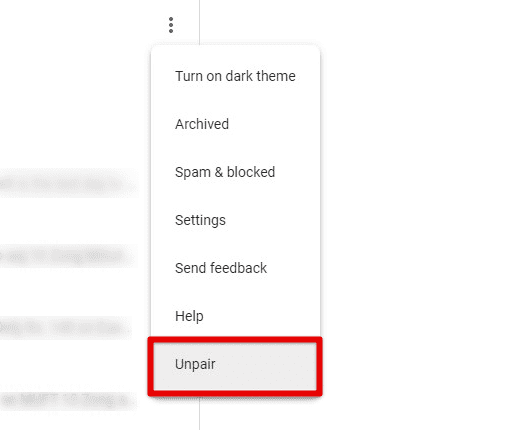
Unpair tab
Step 3: A window will pop up asking for confirmation. Click on the “Unpair” button to proceed.
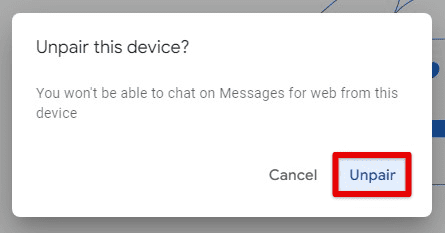
Unpairing your computer
As described earlier, you may be using Google Messages for the web on a computer or desktop not owned by you. In that case, you would want to unpair it from your mobile. That can be done by following the steps mentioned below.
Step 1: Open the “Google Messages” app on your mobile device.
Step 2: Tap on the three-dot icon in the top right corner. Go to “Device pairing” from the drop-down menu.

Device pairing tab
Step 3: On the “Device pairing” page, you will now see a menu at the bottom which contains the list of all currently paired devices. Tap on the cross icon right next to the device you want to unpair.
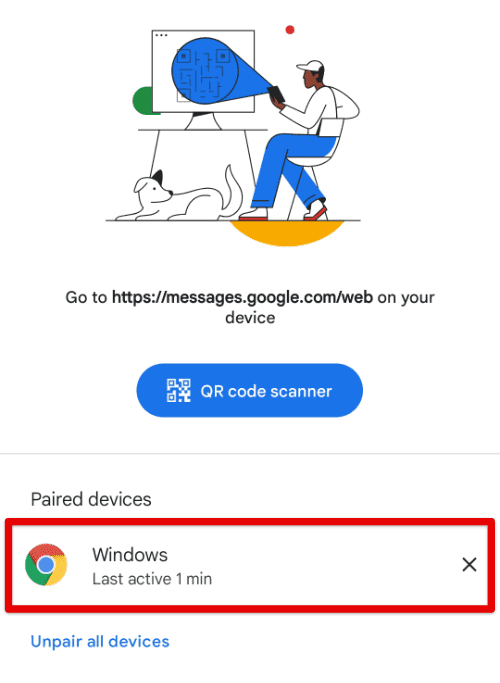
Unpairing paired devices
If multiple devices were paired previously, tap on “Unpair all device” to remove the entire lot at once.
Whenever you use Google Messages on any other device other than the host mobile, it will display an indicator tab in the notification panel. Tap on the down arrow icon on that tab. That will slide into view an “Unpair” button. That button redirects you directly to the “Device pairing” page in Google Messages.
Conclusion
Google Messages is an exquisitely developed platform for sending texts and sharing media. Other than its handy mobile app, Google has rolled it out for the web. That enables you to send and receive messages through Wi-Fi. It is not just accessible on Chrome OS but on all desktop-based operating systems that can launch internet browsers. Surprisingly, it does not even lack in any way when it comes to integrating hallmark features of its Android counterpart. Looking forward to trying new messaging services? Please read our guide on how to use Google Chat on Chromebook.
