Google Chrome consistently provides new features solely focused on improving the user experience. Bookmarks have been a part of this browser for a very long time. But quite recently, they got a new update that enabled them to be used and accessed from a side panel. That panel has been formatted to contain two sections. One of these is entirely dedicated to Google Chrome bookmarks.
The side panel adds a specific value for people who regularly use bookmarks and need to go back to some particular set of URLs. Now, you can have a permanent window displaying all saved links in an easy-to-navigate panel. It does not clutter the main view and seems like a great addition to the browser’s functionality. The side panel can manage, add, delete, display, and hide bookmarks. Essentially, all tools present in the bookmark manager are now available here.
What are Google Chrome bookmarks?
Google Chrome bookmarks are nothing but a set of links or URLs that need to be saved for subsequent visits. Once a particular web page or site has been bookmarked, it gets saved on your internet browser. The list of all bookmarks can be visible right below the address bar, or you may have to open the bookmark manager. These options allow for a quicker way to get to specific web pages, which would otherwise take a lot more time.
There is no need to install any Chrome extension or visit a page buried deep down into the browser settings to bookmark a link. Notice the star icon at the far right end of the Google Chrome address bar. That is the bookmarking tool. Click on it to mark any page as bookmarked. Whenever you tag a new link, it asks for the title and folder in a small window. It turns out that Google has made things even easier with a keyboard shortcut. By simply pressing Ctrl + D, the page currently opened on Chrome gets bookmarked instantly.
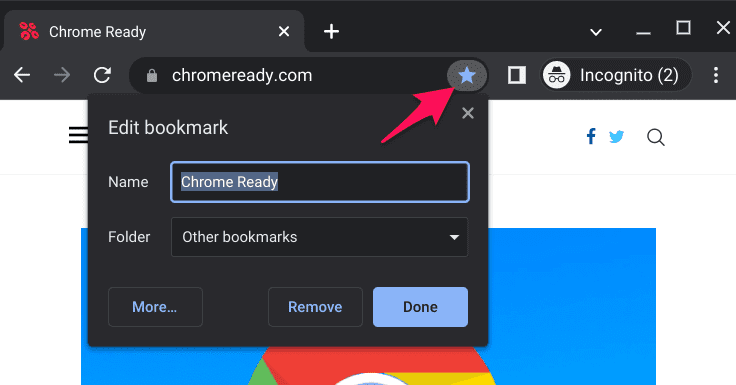
Bookmarking a website
If there are no bookmarks on your browser, the bookmarks bar will not be displayed. As soon as you mark the first link, a new banner appears at the top, including a shortcut to that web address. As you bookmark more sites, that banner appends more shortcuts. It can maybe contain the first 10 or 12 entries. That bar is only displayed on the Google Chrome homepage and goes away on all other tabs. However, if you do not want it there, right-click on it and disable the “Show bookmarks bar” from the drop-down menu.
What is the Google Chrome side panel?
The side panel on Google Chrome was only added last month. It was developed to provide quick access to two things; a reading list and bookmarks. Enabling or disabling the side panel on your browser is far easier than you may think. If Google Chrome on your computer has been able to install the recent updates successfully, you will see a new window icon in the top-right corner next to your profile picture. That is the toggle switch for the Google Chrome side panel.
As soon as you click on that icon, a new panel will slide in from the right. It contains two tabs at the top. Make sure that you are on “Bookmarks.” Here, you will find the entire list of bookmarks just like you see in the bookmark manager. Moreover, there will be a separate scroll bar on the right that lets you swiftly move through the list. Once enabled, the side panel shrinks the primary browser window. If that bothers you, click on the same window icon to hide it from view.
Adding, deleting, and editing bookmarks from the side panel
The Google Chrome side panel does not just serve as a shortcut for the bookmark manager. It can be thought of as an extension of it. You can add new bookmarks, delete existing ones, or edit their titles or URL from the side panel. Let us see how to do each one of this one by one.
Step 1: Open “Google Chrome” and log in to your account.
Step 2: Click on the side panel icon in the top right corner of the homepage. It will make the panel visible immediately. Make sure that you are on the “Bookmarks” tab.
Side panel icon
Step 3: Right-click anywhere on the panel and go to “Add page” from the drop-down menu. That will open a new window for bookmarking the current page.
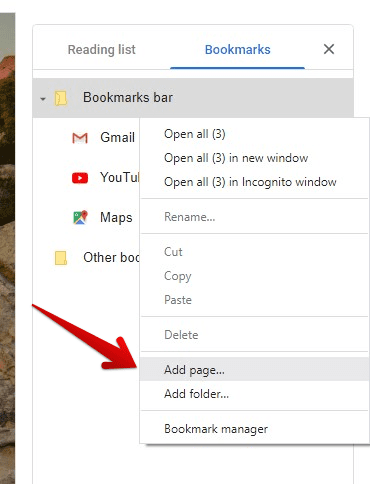
Adding a bookmark
Step 4: Click on “Save.” The bookmark for that page will be inserted into the place where you right-clicked in Step 3.
Step 5: To delete a particular bookmark, scroll down and right-click on it. Select “Delete” from the drop-down menu.
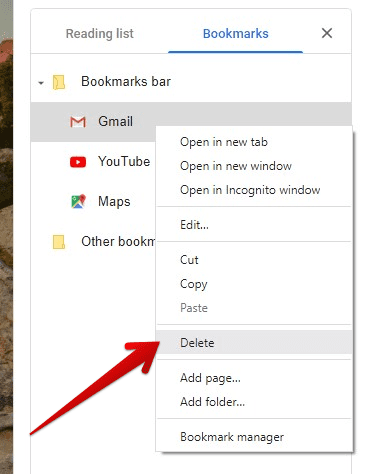
Deleting a bookmark
Note: When removing a bookmark, they are deleted instantly without asking for confirmation.
Step 6: For editing a bookmark, right-click on it and go to “Edit.” It will open the “Edit bookmark” window. Here, you can rename the entry, change its URL, or move the entry from one folder to another. Make sure to click “Save” after making the changes.
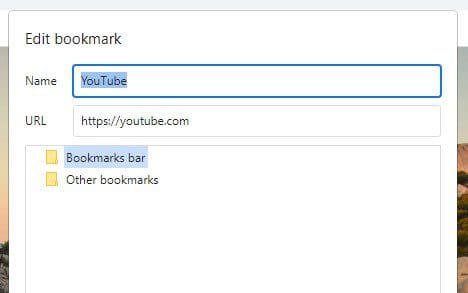
Edit bookmark window
Creating and managing folders in the side panel
If you have just started adding bookmarks, you might not see the need for creating and managing folders in the side panel. However, as the list grows, it becomes troublesome to manage. Moreover, when it takes so much of your time to find one, it defeats the purpose of bookmarks in the first place. Therefore, organizing bookmarks through folders seems much more reasonable.
Step 1: Open “Google Chrome” and log in to your account.
Step 2: Click on the side panel icon in the top right corner of the homepage. It will make the panel visible immediately. Make sure that you are on the “Bookmarks” tab.
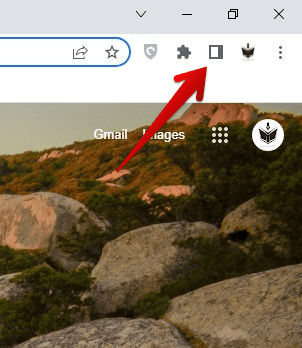
Opening side panel
Step 3: Right-click anywhere on the panel and go to “Add folder” from the drop-down menu.
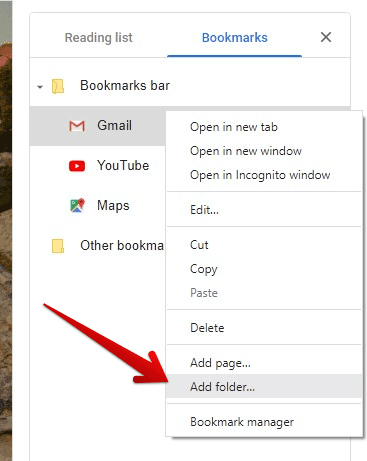
Adding a folder
Step 4: Name the folder you want to create and click on “Save.” That will insert it into the place where you right-clicked in Step 3. Now, you can drag and drop any bookmark into it.
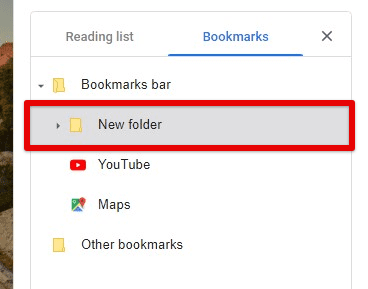
New folder created
The folder itself may be moved around similarly as well. Besides, you can rename the folder or delete it whenever you want. The method for deleting a folder is precisely similar to removing a bookmark.
Note: Any bookmarks currently located will be removed when deleting a folder.
Enabling side panel through Chrome flags
If you have disabled Google Chrome updates, you will not be able to see the side panel icon in your browser. In that case, there are two alternatives to enabling it on Google Chrome. One is through Chrome experimental flags, while the other uses an extension from the Chrome Web Store.
Using Chrome flags for enabling side panels in Google Chrome is not as complicated as it sounds. Chrome flags are simply some experimental settings that have not yet been rolled out into the main versions of Google Chrome. The Chromium project develops these settings.
You can use these flags, but they are not present in regular browser settings. Some flags developed by the project above enable the side panel for bookmarks and reading lists. We are going to use two flags in particular. One allows a browser-level side window, while the other enables the drag-and-drop of bookmarks within the panel itself.
Step 1: Open “Google Chrome” and log in to your account.
Step 2: Enter “chrome://flags” in the address bar. You will now see the “Experiments” page on your screen.
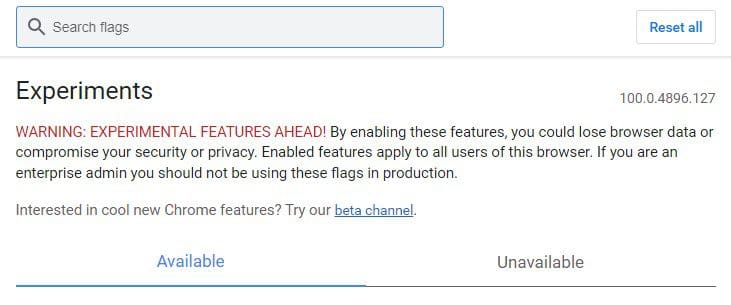
Experiments page
Note: All flags present under the “Experiments” page are just product features. Thus, you are requested only to tweak things if required.
Step 3: On the “Experiments” page, search for “Side panel.” You will notice that the buttons in front of panel flags are currently set to “Default.”
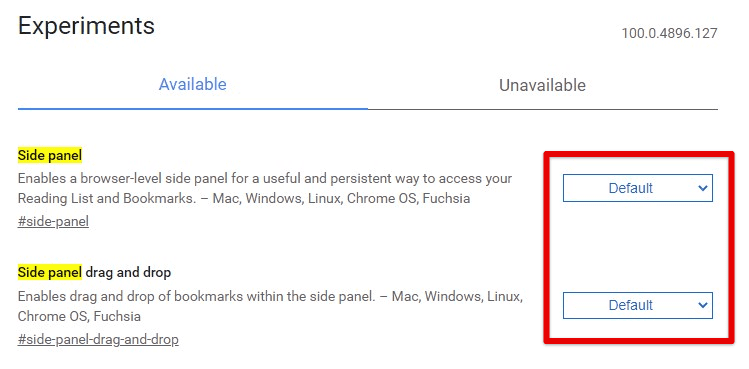
Side panel flags
Step 4: Switch both of these flags to “Enabled.”
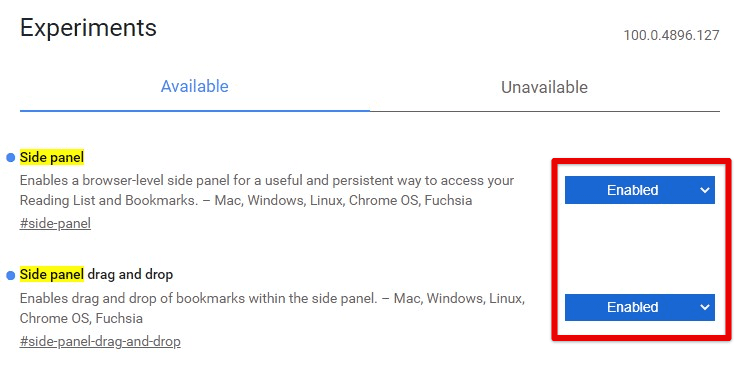
Enabling side panel flags
Step 5: As soon as you modify any default setting, a “Relaunch” button will appear in the bottom right corner of your screen. The settings will only take effect once you have restarted the browser. Click on the “Relaunch” button.
When the browser starts again, check if the side panel icon is now visible.
Enabling the side panel with an extension
If Chrome flags did not do the trick for you, the last resort would be using a Chrome extension to enable the side panel. The Bookmark Sidebar extension is one of the featured items on the Chrome Web Store and is used by more than 300,000 active users.
Step 1: Open “Chrome Web Store” on your browser and go to the “Bookmark Sidebar” extension. Install it on your browser by clicking on the “Add to Chrome” button.
Step 2: After installation, the extension will open a setup window in a new tab. It will ask you to choose the preferred location of the side panel.
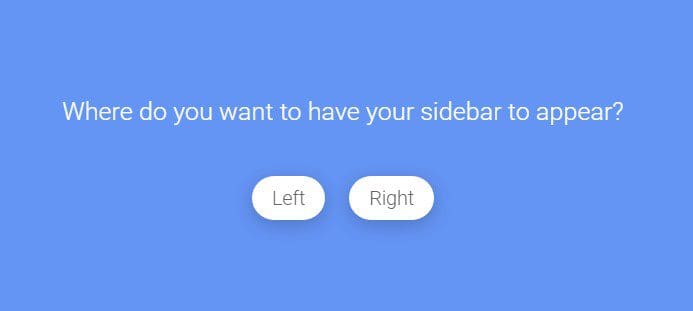
Side panel location
Step 3: Configure the extension’s panel with a light or dark theme.
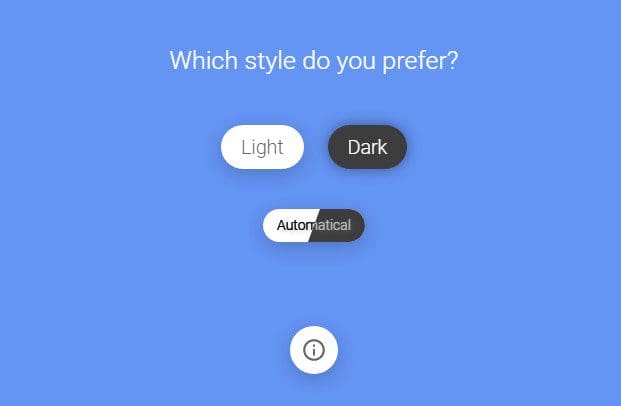
Configuring side panel theme
Step 4: Select how you want to access the side panel. The options include left-click, right-click, mouseover, and clicking on the extension icon. For closely replicating the default Google Chrome side panel set it to “Click on the icon.”
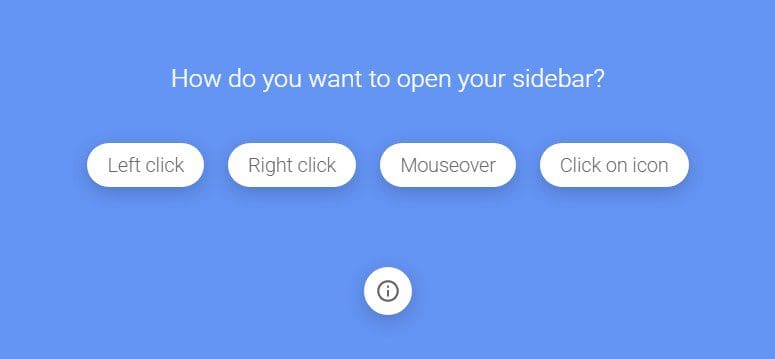
Toggle settings
The side panel you get with Bookmark Sidebar is far more feature-rich than the one offered by Chrome itself. It also lets you sort bookmarks in five ways or finds a particular one with the search tool.
Conclusion
Bookmarks in Google Chrome are a great way to save specific web pages that can be accessed later. They are used for picking up from where you left or simply pinning a handy link that needs to be opened frequently. The recently launched Google Chrome side panel lets you manage these bookmarks more conveniently than before. Even if you have not yet enjoyed the official release, it can still be installed through Chrome flags or a third-party extension. Please go through our detailed article on how to import bookmarks on a Chromebook.
