If Chrome OS users look for high-quality video conferencing software, they don’t have to make great strides. The developers of this sleek operating system have endowed Chromebook owners with one of the best video calling apps in the business called Google Meet. It’s fast, lightweight, stable, and even works right from the Google Chrome browser, although you can also download a dedicated Google Play Store app for it.
- Google Meet is a whole different experience with the right extensions. Check out the top 15 Meet extensions for Chromebooks for an elevated time with the app.
Getting around Meet is utterly straightforward, given the program’s painless-to-grasp and straightforward user interface. However, if you’ve been meaning to find out how to record a Google Meet meeting on Chrome OS or any other platform, you’ve come to the right place. This guide will cover just that with the help of some easy-to-understand steps, so let’s get started right away.
What to know before getting started
Recording a Google Meet conference is exceptionally helpful in professional settings. You can watch and review saved meetings for later whenever needed and have documented proof of everything during the video-centric hangout.
Whether you’re in the customer service or the sales department, saving your interactions with customers is an integral part of the business, not to mention its resourcefulness during the hiring and recruiting processes.
In light of this feature’s importance, Google has made the functionality available for only paid Workspace accounts. If you’re a free user, you won’t be able to record your Google Meet meeting using an in-built tool.
With that being said, not being a Workspace account holder doesn’t mean the end of the world. A method can help you record your video conferences on the fly without paying for anything.
To record a Google Meet conference with a free Google account, you need to install a Chrome Web Store extension called TL;DV. It’s fast, quick, and highly stable for accomplishing the purpose, so let us get right down to it.
Installing TL;DV to record Google Meet conferences
TL;DV is a browser extension that can be downloaded directly from the Chrome Web Store for free. To go more in-depth, the following steps illustrate this process from start to finish.
1. Get started by visiting the official app page of TL;DV on the Chrome Web Store. As soon as you’re there, click on the “Add to Chrome” button to get to the next step.

Clicking on “Add to Chrome”
2. After clicking on “Add to Chrome,” a prompt will appear at the top of the page, asking you to confirm the installation. Click on “Add app” to begin downloading TL;DV on your Chromebook.
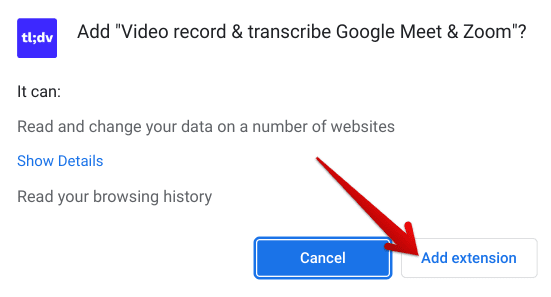
Adding the extension to Chrome
3. Clicking on “Add extension” will soon download TL;DV on the device. When the process finalizes, you’ll be notified that the extension has been added to the browser.
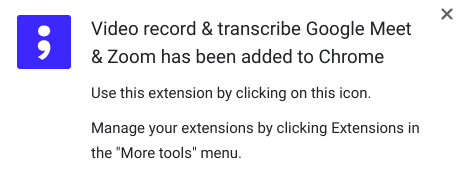
TL;DV added to Chrome
Now that you have the TL;DV Meet extension installed on your system, it’s time to launch Google Meet and record our conferences painlessly. The following section is going to illustrate how to do that.
Quickly recording a Google Meet meeting
The following steps will illustrate how you can record a Google Meet meeting. Be sure to follow them meticulously for the best results.
1. Begin by launching the Google Meet app on your end. If you’re on Chrome OS, you can use our detailed guide and learn how to get Meet on a Chromebook. Apart from that, you can also use this program on your web browser. Use this direct link to get straight to the web-based version of Google Meet.
2. As soon as you’re on the main Meet page, create a meeting or join one— whatever works for you. We recommend starting an “instant meeting” to test the extension functionality that we’ve just installed on the system.
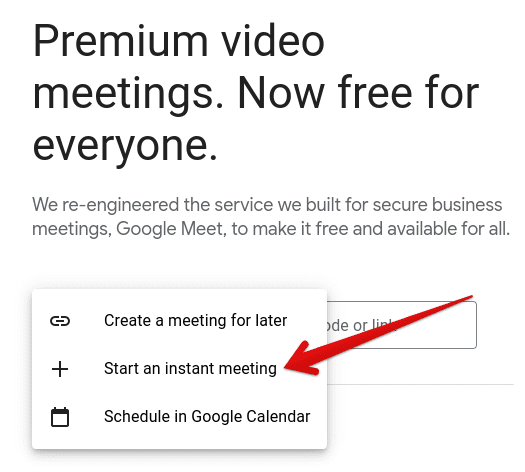
Creating a new meeting on Meet
3. As soon as you create a new Meet conference and you’re inside the working interface of the caller, you’ll observe the TL;DV pop-up somewhere at the bottom of the screen. Click on it to get to the next step.
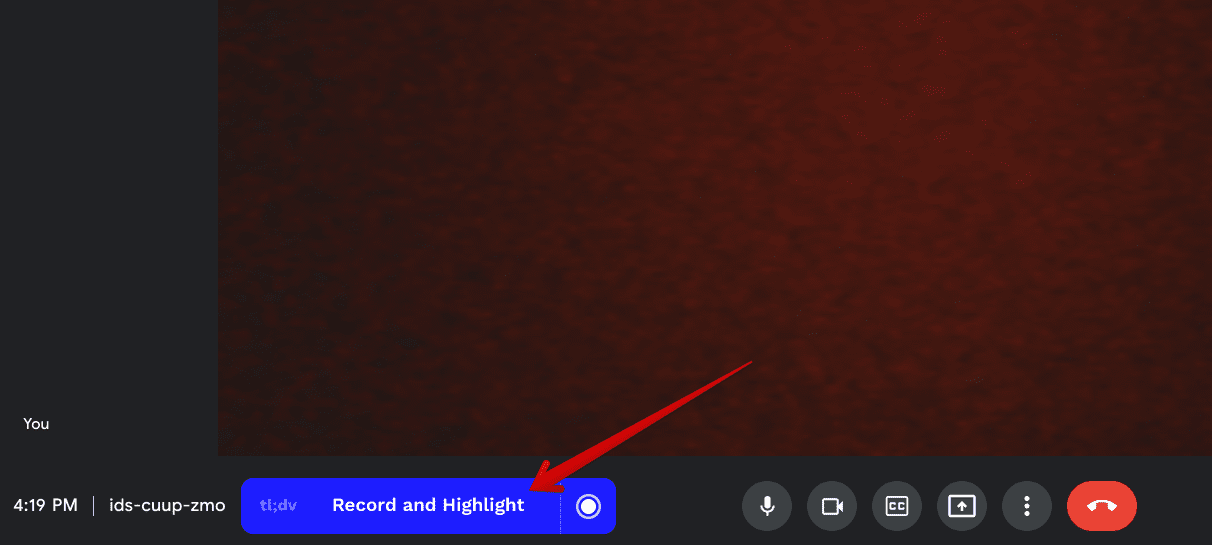
Clicking on the TL;DV prompt
4. Doing that will nudge you to sign in to your Google account again and register with the TL;DV Meet extension. This should be a reasonably quick process. All you need to do to proceed is grant the extension some permissions, and you’ll be well on your way to recording your Google Meet conference.
After signing in and returning to the opened Google Meet tab, you’ll get a notification that a participant wants to join your call. Admit them inside to get to the next step.

Admitting the meeting recorder
5. After you allow the TL;DV meeting recorder to join the conference, the recording will begin instantly. A small-scale window will appear in the lower-right area of the Google Meet conference, offering an additional piece of functionality for users to enjoy and use. You can place timestamps to capture moments of interest, particularly those that you know you will return to at a later time.
For this purpose, you can either click on the “Timestamp” icon or send a message in the chatbox, and that instance will be stored. Once you’ve recorded enough, click on the square-shaped button beside “Recording.” Keep on reading to find out what to do next.
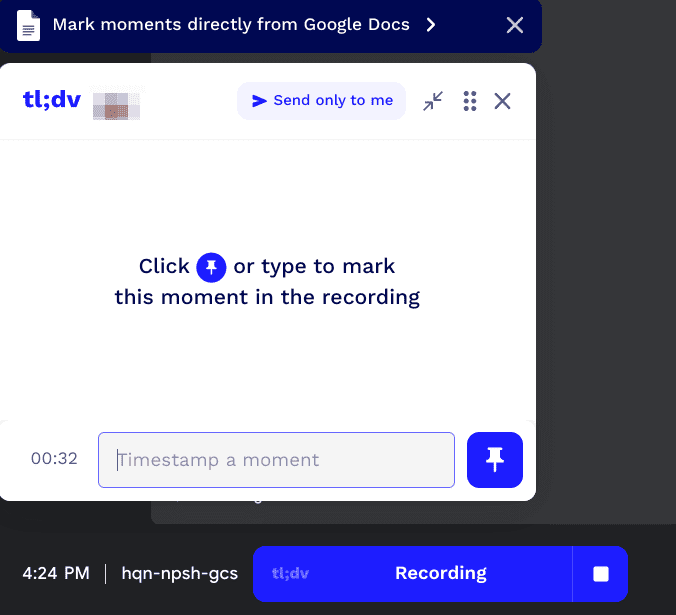
Recording started
6. After clicking on the “Stop Recording” button, you will be asked for confirmation whether you genuinely want to do this or not. Click on “Stop and save” to stop recording and send the recorded video to TL;DV’s cloud-based servers.
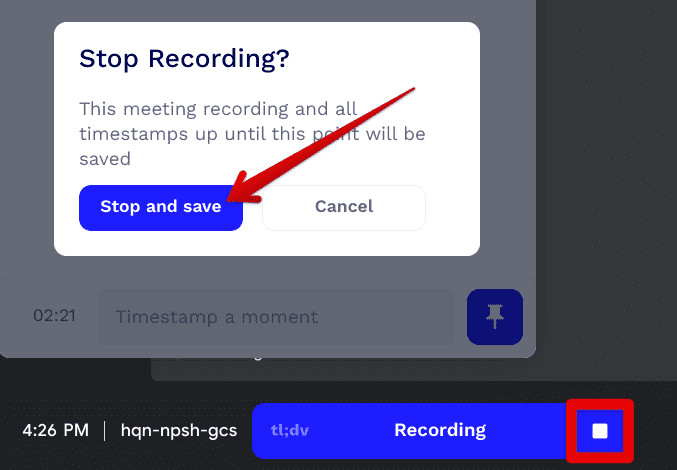
Clicking on “Stop and save”
7. Clicking on “Stop and save” will save your recorder video. A prompt will appear on the screen, asking you to view your stored conference. Click on the relevant button shown in the screenshot below to get to the next step.

Opening the saved recording
8. After clicking on the “Open recording” button, you will be taken straight to the storage repository of TL;DV. This is where you can access all of your saved Google Meet recordings, so fire away! Some of your options regarding the accessibility of your clips include adding highlights, copying a private link, and even trying the real-time transcription service of TL;DV.
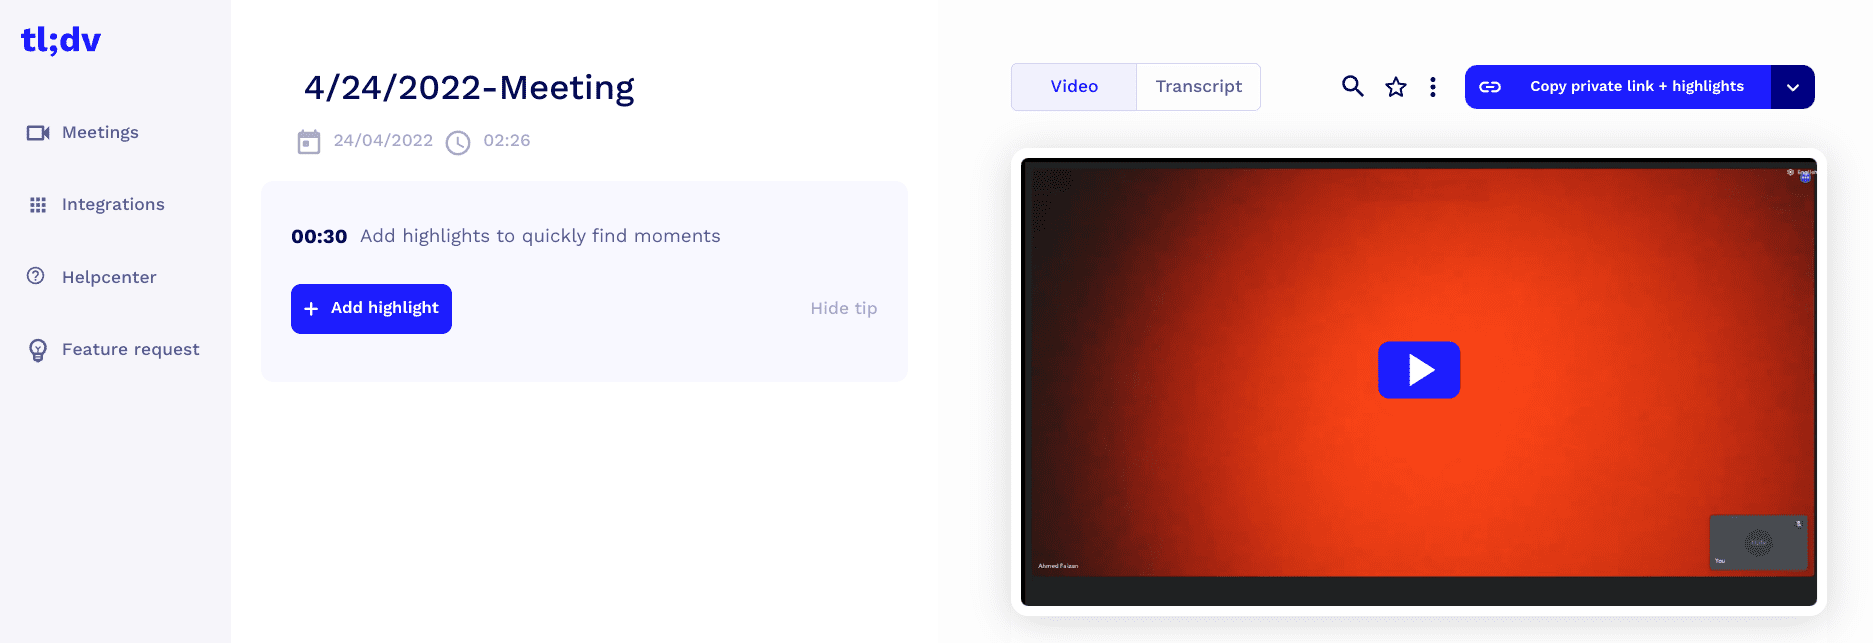
TL;DV’s recorded conferences
That’s about it for recording your Google Meet meetings! By the time you’re done replicating these guidelines, you’ll be painlessly able to document your clips on the fly.
Conclusion
Google Meet is the video calling application to cater to whenever you need to join or host online conferences. It’s loaded to the brim with tip-top features, such as sharing your screen effortlessly and collaborating with people using the rest of Google’s desktop productivity applications.
However, if there’s one feature that comes off as difficult to perceive at first, it’s Meet’s ingrained screen recording feature. You cannot record your Meet conferences right off the bat if you’re not a paid Workspace user. Otherwise, you would only have to click on the “Activities” button when inside a call and select the “Recording” feature.
Since that is not the case with regular Google account holders, there exists a high-quality Chrome extension called TL;DV that serves the purpose of recording Meet calls without breaking a sweat. This guide has gone through all the essentials that you need to read up on, so try it out on your end and let us know how it goes in the comments below. Chrome Ready wishes you good luck!
- Before you go, use Google Meet with third-party video conferencing apps.
