After an update in 2019, Google Drive and Google Photos stopped syncing media files. If you upload a photo or a video to your drive, it won’t automatically show up in your Photos account. It called for users to develop other methods to add photos and videos from Google Drive to Google Photos.
Google Drive is just a cloud storage service. Therefore, you cannot expect it to have tools such as basic photo editing, photo rendering, video trimming, filters, special effects, and more. All of that is only accessible on Google Photos. Therefore, when you are looking to modify the uploaded photos and videos in any way, the recommended option is to move them from Drive to Google Photos. It will serve as a backup of those files and provide you with proper tools and features.
Moving photos and videos to Google Photos
Compared to Google Drive, Google Photos has several additional benefits in picture and video management. First, since that platform is designed to handle those file formats, you get a variety of valuable means for viewing media files more conveniently. Moreover, when searching for a particular photo or video from your storage, the AI-assisted search can enable you to find what you are looking for within moments.
Besides providing excellent file management, photo and video editing tools are also available. You can use Google Photos to apply filters, crop images, trim videos, make adjustments, and create albums. Without a doubt, it is a precious library application to have at your disposal. Knowing that it offers such a great package, the next step is to learn how to import photos and videos from Google Drive to Google Photos.
In the following article, we will look at four different ways that can be employed to transfer files from Drive to Photos. Some are manual, while others routinely sync photos and videos automatically. If you face issues in the sync process, read how to fix Google Drive, not syncing issues.
Manually downloading and uploading each file
It is the most straightforward way of adding photos and videos from Google Drive to Google Photos. You have to download them from the drive and then upload them to Google Photos just like you did so to your drive in the first place. However, as you would have already guessed, it is time-consuming. So you will indeed find yourself in a fix, especially if there are quite a few photos and videos to transfer.
With that said, the following method is most appropriate when you have to move a few files. The bright side is that you won’t have to link any syncing process or integrate a third-party application. You can also download and upload entire folders, enabling you to save a considerable amount of time and effort.
Step 1: Open “Google Drive” on your internet browser and log in to your account.
Step 2: Select the photo or video you want to add to “Google Photos.” If there is more than one file, make sure to group them in a single folder beforehand. Then, right-click on the selection and click on “Download” from the drop-down menu.
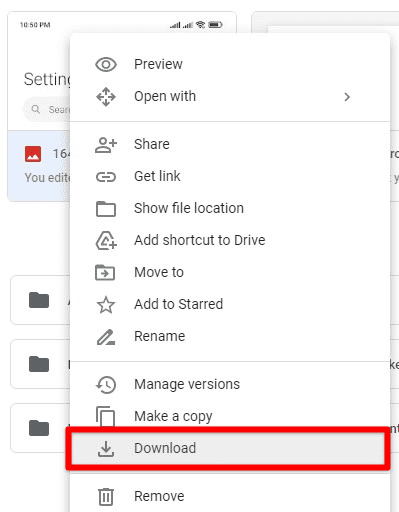
Downloading from Google Drive
Note: If you selected multiple photos or videos, Google Drive would automatically bundle them in a ZIP folder while downloading.
Step 3: Open “Google Photos” on your internet browser and log in to your account.
Step 4: Click on the “Upload” button in the top right corner of Google Photos’ homepage. Select “Computer” from the drop-down menu and browse the files you downloaded in Step 2.
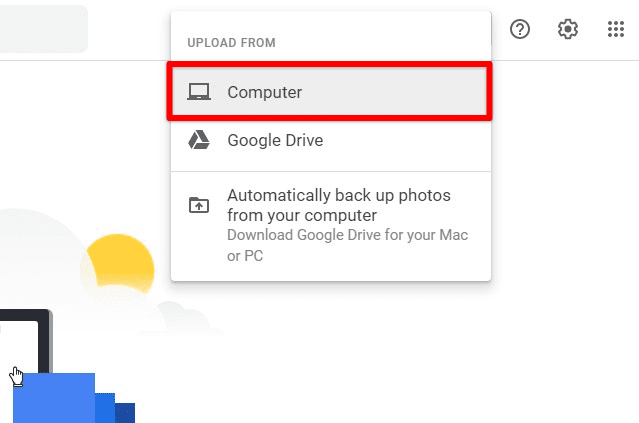
Upload from computer
If you do not want to create multiple copies of the same photos and videos, make sure to delete them from Google Drive after they have been downloaded.
Uploading from Google Drive directly
If you did not know this before, Google Photos provides two different options for new uploads. You can either browse them from your computer or import them from Google Drive directly. It eliminates the steps required to download the files and then upload them again. The following method enables you to transfer the files from Google Drive to Google Photos entirely over the internet.
It takes much less time than the first method and can also manage multiple files. Moreover, you will not have to wait for the download and upload to finish either. Once you select the photos and videos to be imported, you can close Google Photos while those files get imported in the background.
Step 1: Open “Google Photos” on your internet browser and log in to your account.
Step 2: Click on the “Upload” button in the top right corner of Google Photos’ homepage. Select “Google Drive” from the drop-down menu.
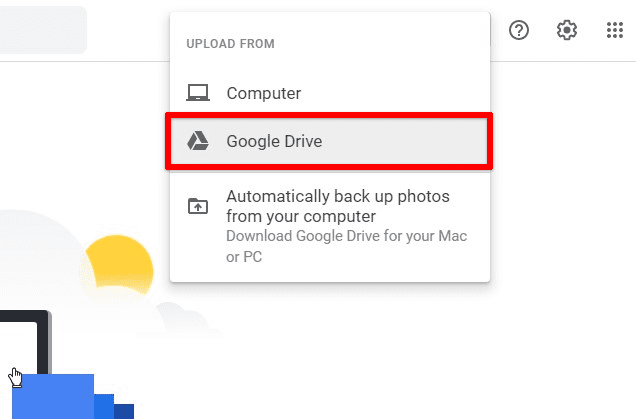
Upload from Google Drive
Step 3: It will open up a new window that displays your Google Drive contents. Here, you can select the photos and videos you want to add to Google Photos. You can also switch between “Recent,” “My Drive,” “Share With Me,” and “Starred” tabs.
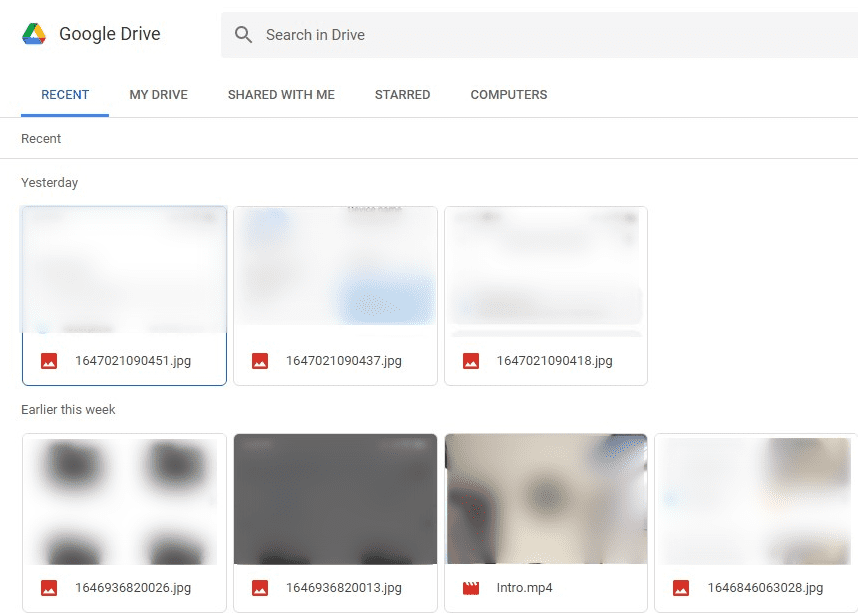
Google Drive window
If you use your Google account from a work or school desktop, manually downloading and uploading the files would be more secure. You can learn how to password protect your Google Drive from the linked article. Also, before you import files directly from Google Drive, please note that this method only supports JPG, WebP, RAW, and GIF formats.
Using Google Drive for desktop
If you do not want to add photos and video by yourself, an automated alternative is to use Google Drive for desktop. With Google Drive’s desktop application, you can sync a folder permanently with Google Photos. Doing so will automatically transfer the photos and videos present in that folder. If you do not already have Google Drive for desktop, download it from the official link and install it on your computer. It works equally well on both Windows and macOS.
The desktop app can also sync local folders on your device. It serves as the perfect backup solution for photos and videos, and all kinds of important files. As long as the sync process is enabled, it will update the folder, provided that your device is connected to the internet.
Step 1: Find the Google Drive icon from the taskbar. Click on it to open the menu.
Google Drive icon
Step 2: Click on the gear icon in the top right corner. Select “Preferences” from the drop-down menu.
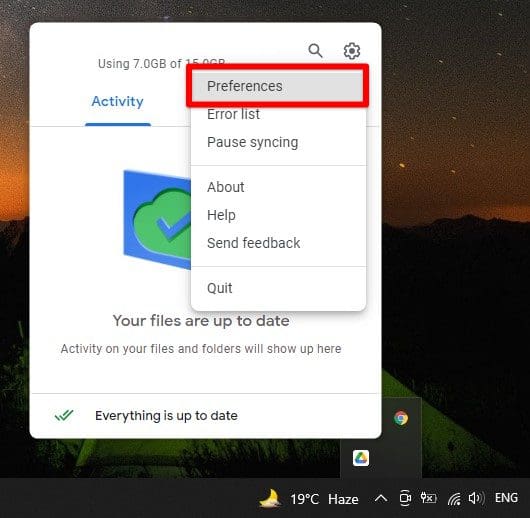
Google Drive preferences
Step 3: Here, you can add any folder from your drive or computer.
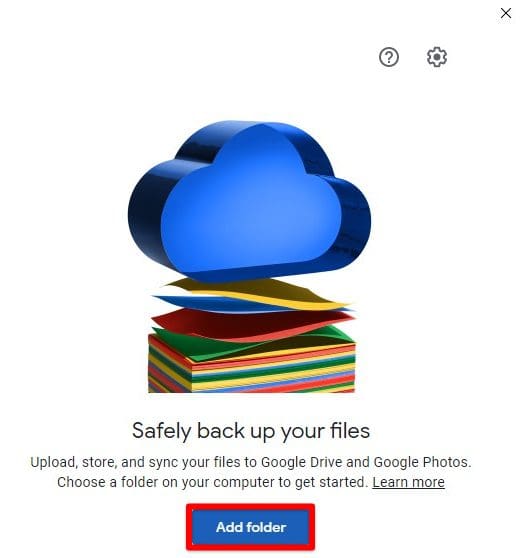
Adding folder for sync
Step 4: After adding the desired folder, open Google Drive settings. Scroll down to find the “Google Photos” section on the settings page. Ensure that the checkbox next to “Upload photos and videos to Google Photos” is ticked.
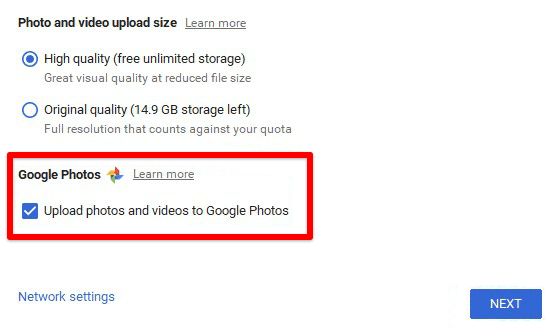
Upload photos and videos checkbox
Even though this method requires you to download an additional application on your computer, it is worth the effort. After setting up the folder and enabling the sync process, you won’t ever have to worry about adding photos and videos to Google Photos.
Using a third-party application
A third-party application can also transfer photos and videos from Google Drive to Google Photos. One of the most reliable and secured platforms is MultCloud. It lets you integrate multiple cloud storage accounts under the same service. With these accounts linked, you can transfer files between any two accounts. Unlike Google Drive for desktop, MultCloud can be used on your browser. This service has no local storage involved as it can transfer files directly from one cloud to another. You can sign up for free or check out the service with a guest account.
Once you have linked the two accounts, you do not have to transfer new photos and videos manually. MultCloud can be automated to a degree where transfer patterns are stored and activated whenever a new media file is uploaded. It keeps both Google Drive and Google Photos perfectly synced with each other.
Step 1: Go to this link and click on “Sign Up for Free.” On the sign-up page, fill in the details for your account.

Signing up on MultCloud
Note: You need to have a valid email address for creating an account on MultCloud. It can also be signed in with Facebook or Google. Besides, you can also check out their service as a guest without linking any account at all.
Step 2: After you sign in, go to the “Add Cloud” tab located in the left pane. Here, you will see a list of cloud storage services.
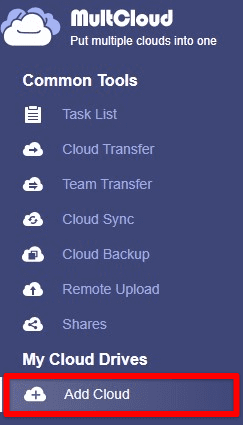
Add cloud tab
Step 3: Add your “Google Drive” and “Google Photos” accounts.
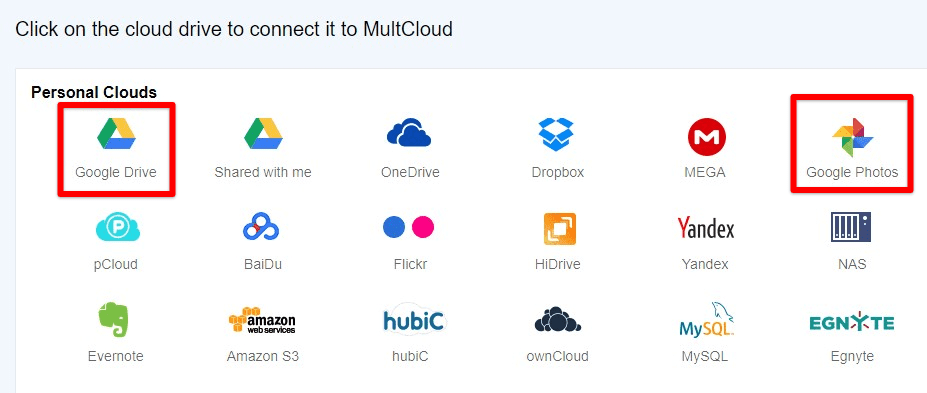
Adding Google Drive and Google Photos
Step 4: Once both accounts have been added successfully, click on the “Cloud Transfer” tab under “Common Tools.”
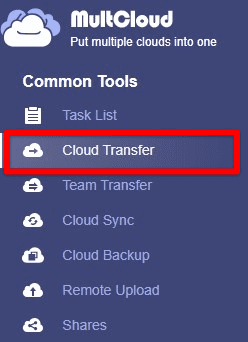
Cloud transfer under common tools
Step 5: MultCloud will now ask you to select a source and destination. Select “Google Drive” as the source and “Google Photos” as the destination. Next, click on the “Transfer Now” button in the bottom right corner.
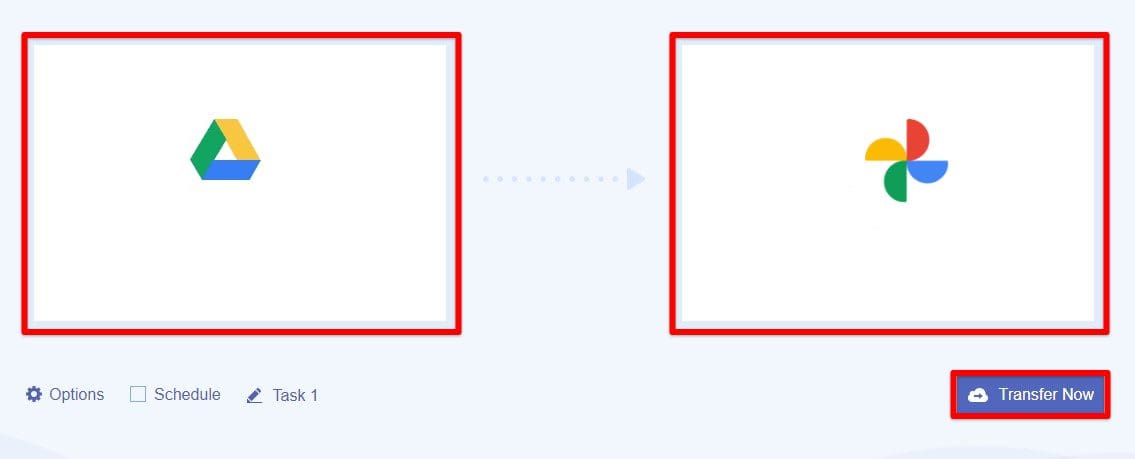
Transferring from Google Drive to Google Photos
Since the transfer will take place entirely over the internet, the time it takes to complete may vary. Besides just transferring the files right then, you can also schedule the transfer after working hours.
Moreover, there are tons of optional add-ons available as well. You can create filters for files that are to be transferred. Other than that, there is also a checkbox for deleting photos and videos from Google Drive after being transferred.
Conclusion
Google Drive is an excellent all-in-one cloud storage service, but it does not provide the basic features for media files. Therefore, you may want to move your photos and videos from Drive to Google Photos. To do so, you have more than one possible course of action. Files can either be manually uploaded or directly imported from Google Drive. Another option is to use Google Drive for desktop or a third-party application to sync these files regularly with Google Photos.
