From employing the functionality of Adobe Reader to running Kali Linux in a full-fledged environment, Chrome OS has come a long way from its roots. In the ripe tech-forward age of 2022, it can perform various tasks, such as filing taxes, watching online movies, playing online games, utilizing Android applications through the Google Play Store, and, of course, having the Linux feature readily available.
In addition, Chromebooks have been blessed with an in-built tool that helps users take screenshots and record their screens. This guide will discuss how to record a screen record on your Chromebook. Apart from covering the specialized tool already embedded within Chrome OS and how it operates, we’ll also go over some impressive third-party options that you can easily download from reputable sources and use to record your Chrome OS screen’s interface.
- Recommended read: What is Chrome OS Flex, and how does it differ from Chrome OS?
Screen recording on a Chromebook
Let’s dive right into the guide without any further ado.
Option #1. Use the in-built Chrome OS “Screen capture” tool
To use the tool, you must first ensure you use an updated version of the operating system. The latest Chrome OS stable release is 98.
This functionality made landfall on Chromebooks in the wake of Chrome OS version 89, released in March 2021. Plenty of other features made their way on the stable release of Chrome OS 89. Still, the most striking highlight was the screen capture tool—the Chromebook Snipping Tool—which allows users to take screenshots effortlessly and record their video in just a few clicks.
- If you don’t know how to update your Chromebook or check what version of Chrome OS you’re currently using, check out this guide.
After ensuring that your Chromebook is up to speed with everyone else, it’s time to get into the built-in tool that will help you painlessly record your screen.
1. The first step is to click on the Status Tray clock area in your Chrome OS interface.
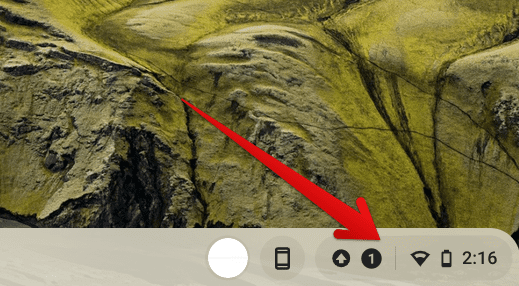
Clicking on the Status Tray area
2. Once done, you will see multiple options appear on the screen for you. Click on the “Screen capture” feature.
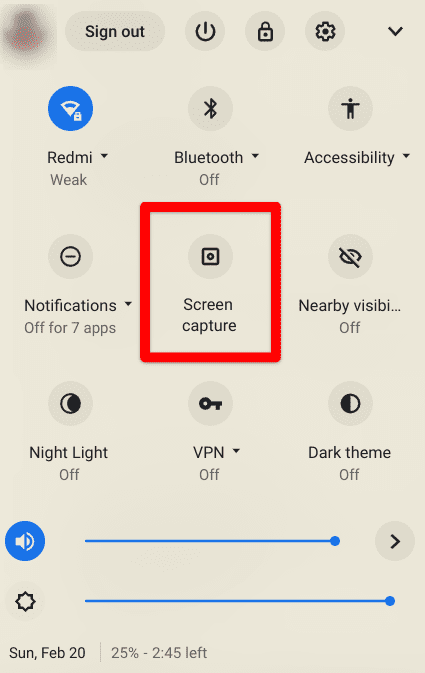
Clicking on “Screen capture”
3. You’ll see the control panel of the feature appearing promptly on your end. The interface of the Screen capture tool is simple to understand and painless to use. It comprises multiple ways of taking a screenshot, too, including a full screen and a window screenshot, but since we’re concerned with screen recording at the moment, we will click on the “Screen record” toggle to proceed.

Clicking on the screen record toggle
4. You can start recording the Chrome OS desktop by pressing the “Enter” key. Before you do that, we recommend looking at your options for recording your screen first. You can either record your screen in full or specify a partial area of the screen and record all developments.
It’s easy to choose any one of the options by clicking on them within the Screen capture tool’s interface. Then, when you’re ready, click “Record” or press “Enter” to start recording. The Screen capture tool will kick into effect with a 3-second countdown right after beginning the recording. Its symbol will appear right beside the Tote feature on the Chrome OS shelf.
- You can also click the “Settings” button shaped like a gear in the Screen capture tool interface. That will allow you to specify an audio input method for your screen recording. If you do not have an external mic, the built-in microphone of the Chromebook will do.
Screen recording in action
5. Whenever you feel you’re done and want to stop recording your screen, click the “Stop screen recording button” shown in the screenshot above. After clicking, you will find the recorded video in your Chromebook’s “Files” app. Unfortunately, the recorded video format from the Screen capture tool is WebM, which isn’t as universally accepted as MP4. However, as shown in one of our guides here, you can opt for an online video converter and quickly convert from WebM to MP4 within a few seconds.

Chrome OS screen recordings
That’s about it for the first and most preferable method of recording your screen on a Chromebook. If there’s something about the Chrome OS screen capture tool that doesn’t quite cut it for you, there are other options to pursue happily.
Option #2. Use a high-quality Chrome Web Store extension
The second option that you have for recording your Chromebook’s screen pertains to a high-quality Chrome Web Store extension called Screencastify. This software is simply one of the most reliable screen recordings on the web that users can employ effortlessly for Chrome. It lets you form, create, and change your videos without breaking a sweat.
Many people call it the ultimate productivity tool for Google Chrome users, and after giving it a go on Chrome OS, we can easily see why. When writing, the extension boasted over 10 million users on the platform and even had an excellent 4/5 overall rating on the Chrome Web Store. It sits at the highest rank of Chrome’s most downloaded screen recording tools, so you can comfortably delve into this application while knowing you’re right alongside millions of others.
While there are many features that Screencastify boasts of, such as easy-to-implement editing tools, direct sharing with Google Classroom, insights, and annotation features, another feature that’s worth noting is that the extension lets you record your whole Chromebook screen rather than just the Chrome browser window.
This is unique compared to other screen recording tools, where you are limited to the Chrome browser in terms of recording your screen. Therefore, if you wish to record parts of the Chrome OS interface, including other applications you might want to record and narrate while using, we recommend utilizing the first option, the in-built Screen capture tool, if you’re not going for Screencastify.
The steps given below will cover the installation of Screencastify on your Chromebook. Follow them carefully for the best results.
1. Visit this direct link and click “Add to Chrome” to get to the next step.

Clicking on “Add to Chrome”
2. You’ll receive a prompt from the top of the page asking you to confirm your selection. Click on “Add extension” to get to the next step effectively.
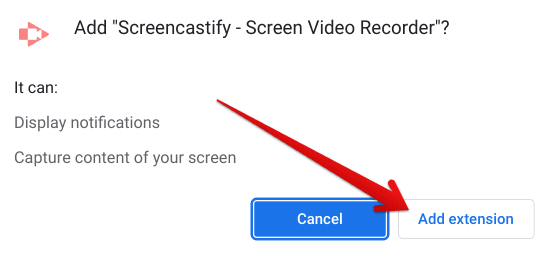
Adding the extension to Chrome
3. Download of Screencastify will commence. Once the operation is completed, you’ll be notified accordingly. The following should appear on your screen
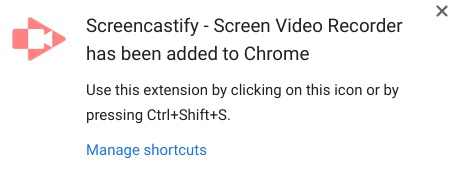
Screencastify installed
You’ve successfully installed Screencastify on your Chromebook. The next step is to launch the tool from your extensions bar and take it for a spin.
How to use Screencastify to record your screen on a Chromebook
Launch the extension and sign in with your Google account. The sign-in procedure will take you through a simple registration to enter basic information. You’ll also have to grant the extension some permissions to continue from here on out.
Fret not, though, since they’ll only concern your microphone and webcam. These are essential to record your screen, so you must allow extension access to these components.
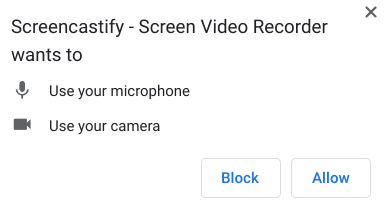
Granting the required permissions
Right after that, Screencastify will also demand additional permissions. These are mainly going to be about incorporating annotation tools in your screenshots. You can turn this feature on or off, depending on whether you will be using Screencastify to take snapshots of your Chromebook’s screen.
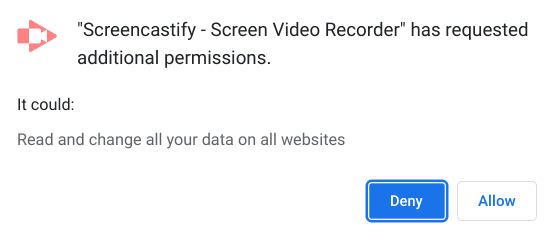
Allowing additional permissions
The final step would be to take Screencastify’s specialized tour so the developers can show you around the extension and teach you how to use it efficiently. It’s up to you to decide whether to go through the initial tutorial. For now, we’ll be jumping straight into the screen recording part. The basic functionality of the extension is outright straightforward.
You have to tap on the extension icon within your browser. Once done, the next step is to select the window on your screen that you want to record and finalize by choosing the large “Record” button.
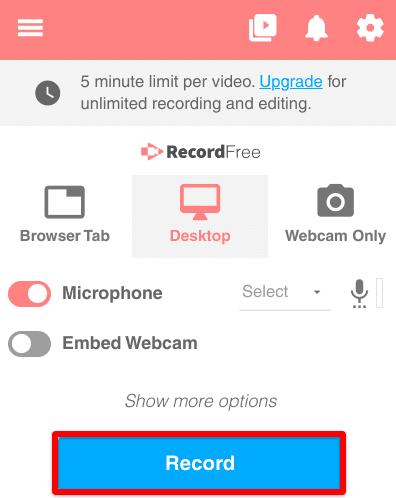
Recording with Screencastify
The best part is that Screencastify can get exceedingly involved in providing users with various options for recording their screens. So experiment with Screencastify and the unique functions you get for the best results.

Screencastify screen recording interface
Option #3. Download a Google Play Store app
As for the third and final option that allows you to screen record on your Chromebook, we are turning toward the Google Play Store. The world of Android applications is readily available for Chrome OS, and users of this sleek operating system have long been satisfied with this sort of functionality. On a side note, we recommend you check out our complete Google Play guide to utilize the feature to its full every time you use it.
The application at hand that will allow us to record our Chromebook screens is Super Screen Recorder. This Play Store-exclusive entry will enable people to document their desktops in a high-quality way. The app boasts more than 10 million downloads on the Google Play Store and has a terrific 4.7/5.0 overall rating that speaks volumes about it.
In addition, the Super Screen Recorder is pretty lightweight and sets your device’s storage back at about 27 MB. This isn’t a lot by any means, and the good news is that the application is fully optimized to work on Chrome OS. Let us jump right into the installation steps of the app and further the article.
- Make sure you have your Play Store activated at this point. If you’re unsure how to do that, check out our specialized tutorial here.
1. To start, fire up your Chromebook’s Google Play Store.
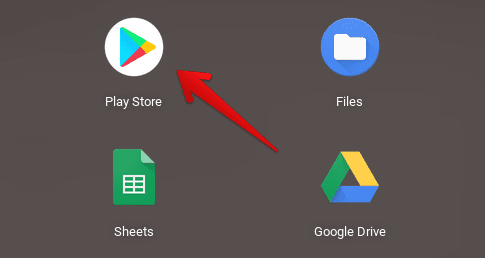
Opening the “Google Play Store”
2. Type “Super Screen Recorder” in the search box, look for the following app, and install it.
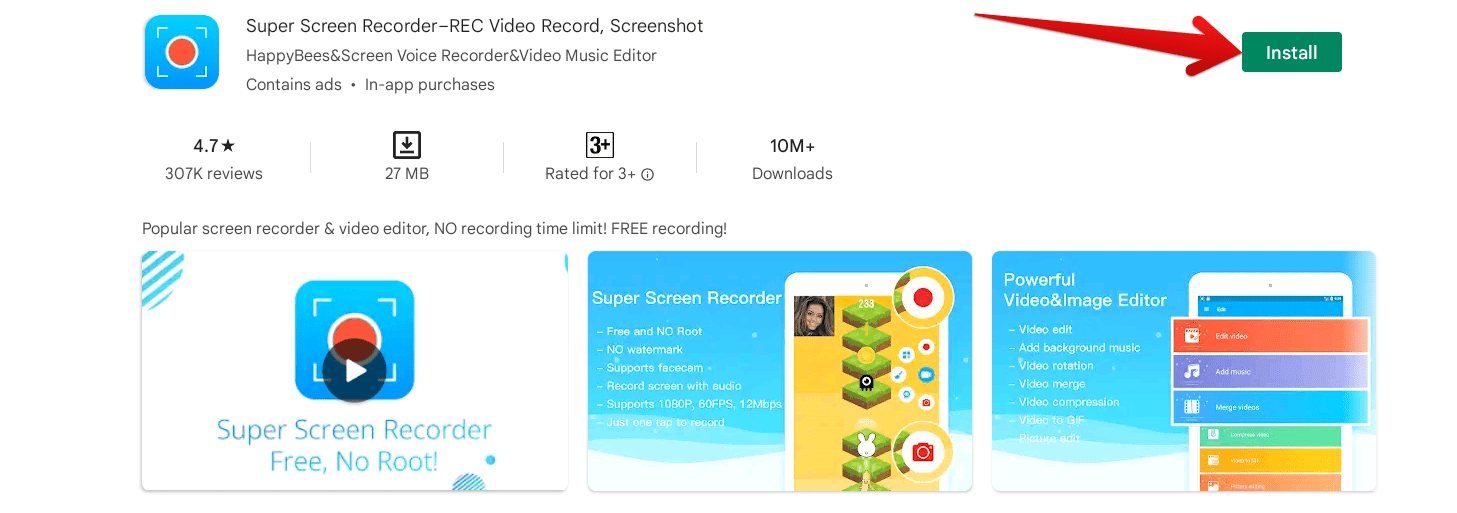
Installing Super Screen Recorder
3. When done, launch it.
Super Screen Recorder installed
You can now click on the application and test out its working mechanism.
How to use Super Screen Recorder to record your Chrome OS screen
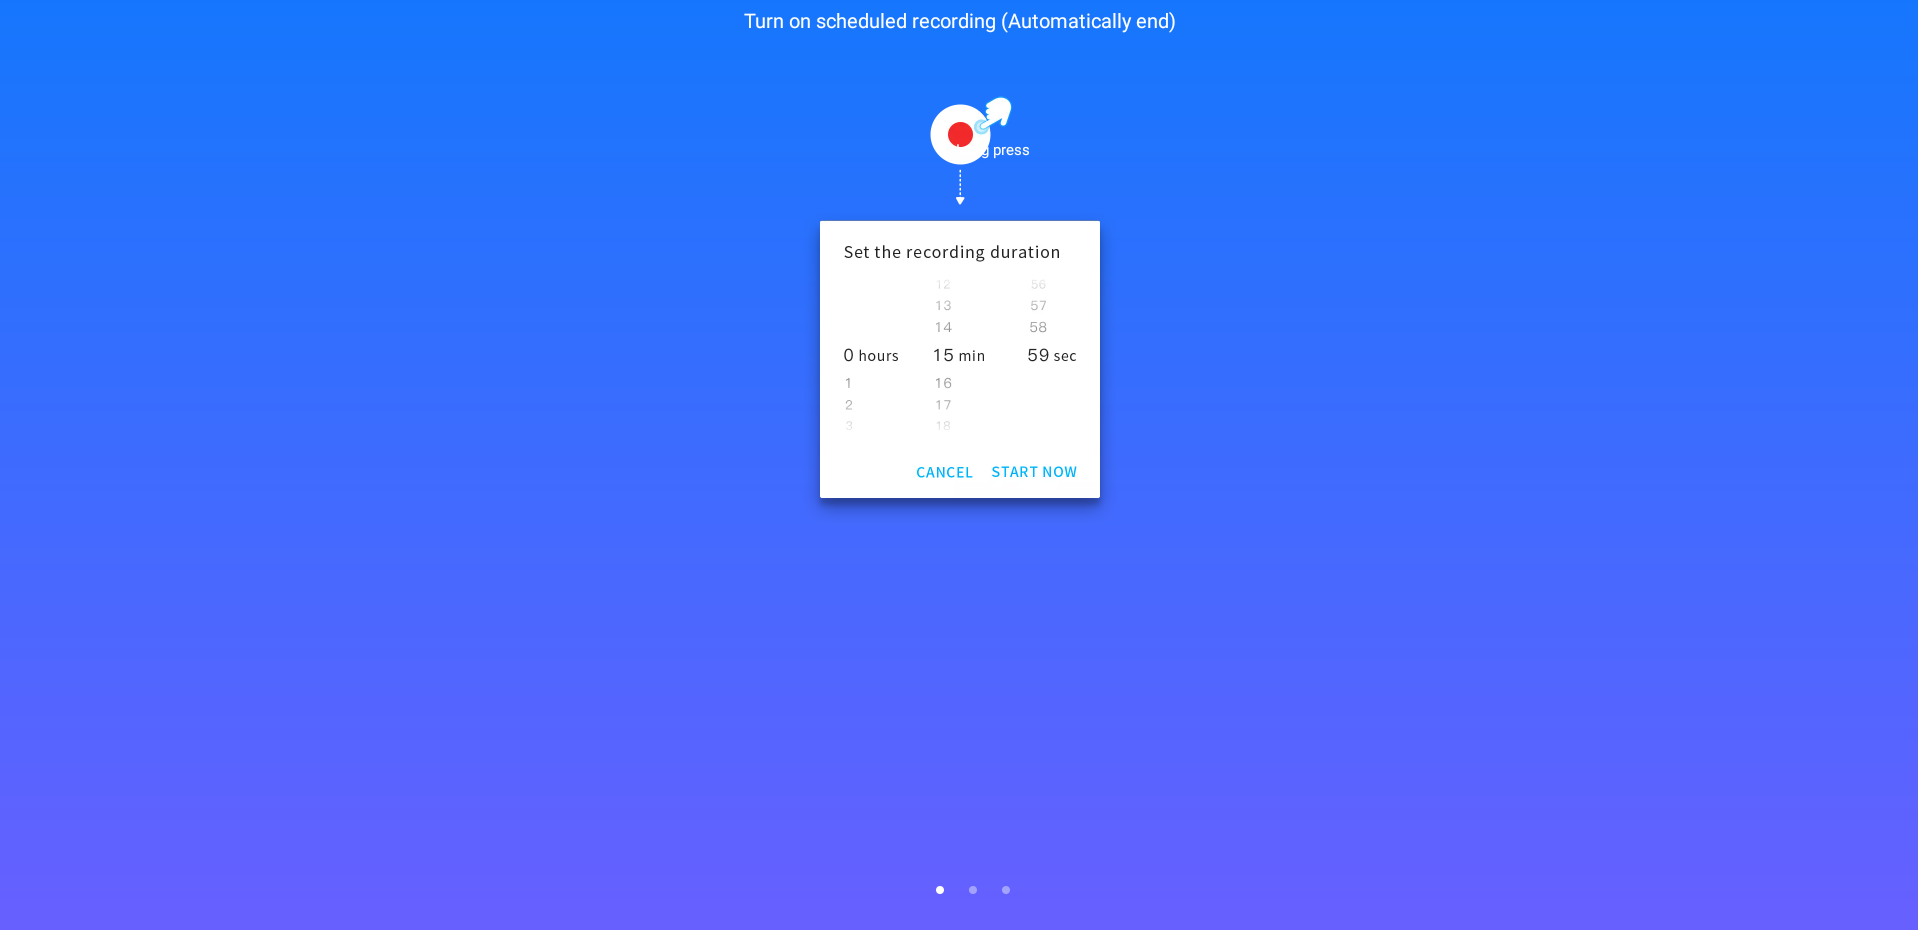
Super Screen Recorder user interface
When you launch Super Screen Recorder on your Chromebook, you will be greeted with an introductory screen where the application will inform you of most of the app’s functionality. After that, you will quickly sift through this part and get to the main area.
One high-class Super Screen Recorder feature worth mentioning is automatically scheduled screen records. Once you start them, they will end independently without you having to do anything manually—a perfect function for students and teachers looking to record their time-strapped assignments and lessons, respectively.
After you’ve gone through the initial setup of the application, the next step is to provide Super Screen Recorder with the necessary permissions to function correctly. Most of these will revolve around the microphone and the webcam, and you’ll also need to allow the app to display over other processes.
What makes Super Screen Recorder great for use is its “Floating Ball Widget” feature. This nifty little element follows you wherever you go on your Chromebook and allows you to start recording the screen instantly with just a button click. It lets you do much more than that, like taking a screenshot and using a full-fledged brush editor to draw on the screen if you have a stylus.
- Speaking of which, here are the top 10 Chromebooks with a built-in stylus to either jot down creative notes or let your inner artist manifest in full flight.
The following is how the Floating Ball Widget appears on your Chromebook. Notice how it comprises multiple functions for you to try and experiment with. You must tap the red-colored “Record” button to record your screen.
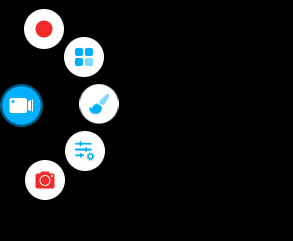
Super Screen Recorder Floating Ball Widget
The rest of the process is nothing but effortless. You go through the procedure of recording your screen, and as soon as you feel like you’re done, you can click on the “Stop” button to cease the recording. That’s about it.
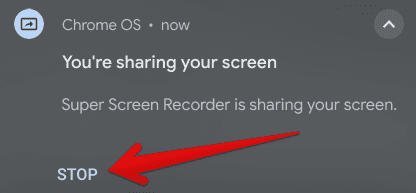
Stopping the recording
Conclusion
In this guide, we’ve talked about not just one but three different ways how to record your screen on a Chromebook. We recommend that most people go with the first method the developers initially intended. Still, it isn’t set in stone that you cannot also pursue other measures. That is why the remaining two options will help you find your way with screen recording on Chrome OS. As always, Chrome Ready wishes you good luck!
- Similar read: How to annotate screenshots on a Chromebook.
