It becomes challenging to keep track of all the files when switching between multiple computers, laptops, and other working devices. Syncing all of your devices together makes it easier to handle this load. You can use several services for syncing your devices; however, Google Drive is undoubtedly one of the best cloud storage services. It lets you sync all local data to the cloud, so you don’t have to transfer those items manually.
Even though this is an excellent service, it can sometimes face problems when syncing. In that case, it will pop up a notification stating that your files could not be synced properly. This article will list different methods to fix the Google Drive not syncing issue. Let us take a close look at each one of these methods individually.
Fixing Google Drive not syncing issue
1. Restarting the sync process
More often than not, the Google Drive not syncing issue can be solved by just pausing and restarting the sync process. It is the most straightforward solution to this issue. This works because sometimes, the syncing process gets interrupted by an external and temporary disruption. These extrinsic causes may get removed on their own, still leaving the syncing process impaired. In that case, your solution lies in restarting the sync process.
Before you do this, please make sure that your device is currently linked with an active internet connection. You may also want to close all other active programs and software. Doing it will ensure that anything that might have interrupted the syncing process is terminated. For the sake of this tutorial, we are going to assume that you are following it on a Windows device. However, the method is generally similar to other operating systems as well.
Step 1: Go to the “Windows taskbar” and find the Google Drive icon from the “System Tray.”
Google Drive icon
Step 2: Click on the icon. It will open up a small window right above it. Next, click on the gear icon located in the top right corner of this window.
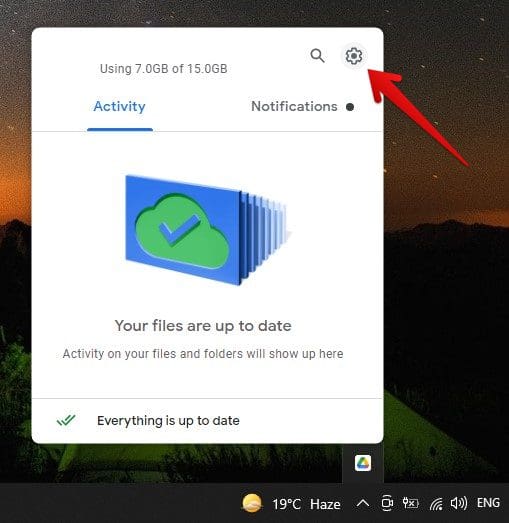
Google Drive for desktop
Step 3: From the drop-down menu, select “Pause syncing.” Doing so will immediately stop the syncing process.
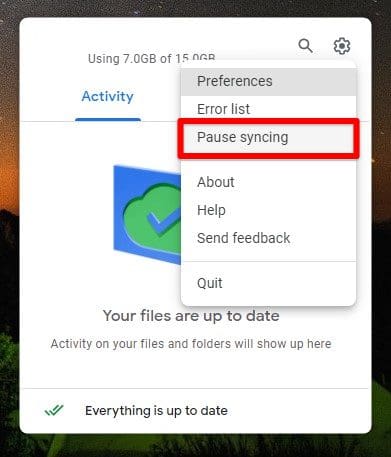
Pause syncing
Step 4: Open the same menu again. The “Pause syncing” tab will be replaced with the “Resume syncing” option. Click on it to start the process once again.
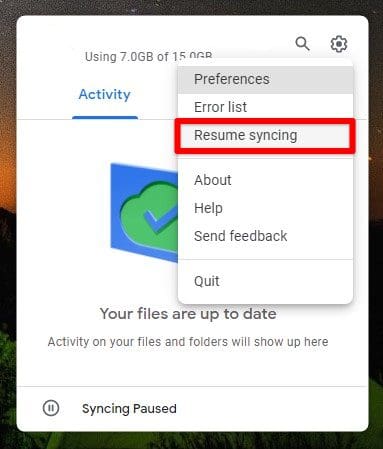
Resume syncing
Check to see if this resolved the Google Drive not syncing issue. If you are still facing the same problem, you should move on to the following method.
2. Reinstalling Google Drive for desktop
You may be facing the Google Drive not syncing issue because of improper installation. Whenever you install a program, always download it from the official source. An authentic source ensures that you are not prone to errors, viruses, malware, adware, and other issues. If you have installed Google Drive for desktop from a third-party application provider, please uninstall it immediately. We would recommend doing so even if you are not facing any issues with the program. The app you have downloaded onto your computer from an unauthentic source may contain harmful elements that can potentially cause concerns in the future.
Step 1: Go to the “Windows settings” and open the “Apps” tab.
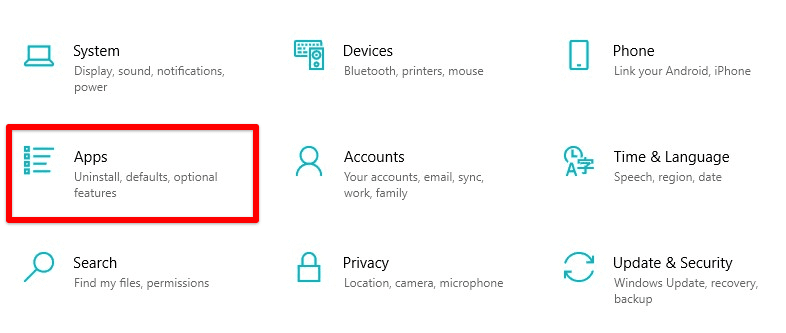
Apps settings
Step 2: In this tab, make sure you are on the “Apps & features” page. Here, you will find a list of all programs currently installed on your computer.
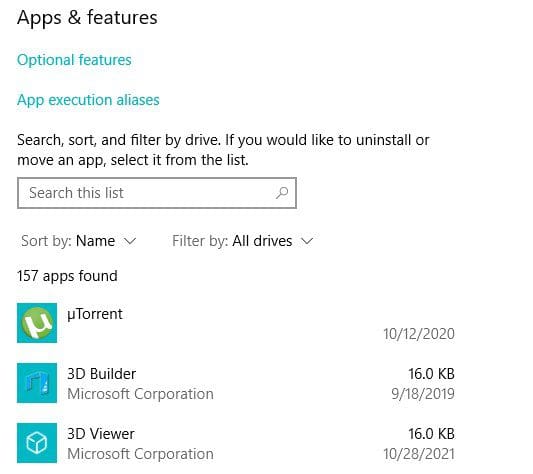
Apps & features
Step 3: Find “Google Drive” from this list. Select its icon and then click on the “Uninstall” button. Remember that it might take some time before the uninstallation process is completed.
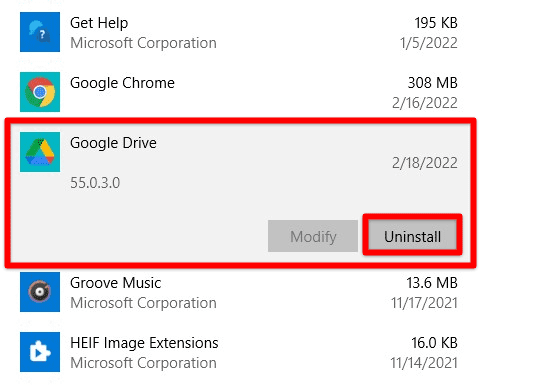
Uninstalling Google Drive
Step 4: Once Google Drive for desktop has been uninstalled, go over to this link. Download the program for your respective operating system and install it.
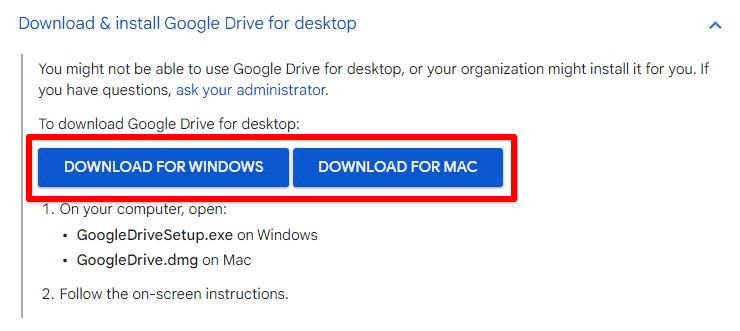
Downloading Google Drive for desktop
Check if reinstalling the program resolved the Google Drive not syncing issue. It will only work if your original installation was not finished correctly due to some reason. The article on disconnecting the Google Drive account from Chromebook could be helpful to you in this regard. However, if you are still facing the same issue, you should use the following method.
3. Deleting hidden error files
It is entirely possible that the issues you are facing have to do with the local error files of Google Drive. If you did not know this before, Google Drive keeps a hidden error file locally on your device that holds the error report. This report is generated whenever the sync process is paused. The same is the case with Google Chrome as well. This method also works when repairing Google Chrome. If you are facing issues with Google Chrome, read this article on fixing it.
Errors and viruses can quickly get onto this location and corrupt your Google Drive setup. Consequently, it ruins the normal syncing process. To resolve this, you need to access that local storage and delete that error file present in that location. Files generated because of these errors are usually hidden from regular view. Therefore, you cannot see or delete this file unless you have changed the hidden files view from the Control Panel.
Step 1: Click on the “Windows Start Menu” and open the “Control Panel.”
Step 2: Go to the “System and Security” tab.

System and security tab
Step 3: On the “System and Security” page, navigate to “Appearance and Personalization” from the pane on the left-hand side of your screen.
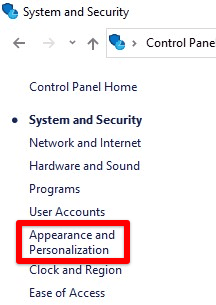
Appearance and personalization tab
Step 4: In “Appearance and Personalization,” click on “File Explorer Options.” This will pop up a new window on your screen.
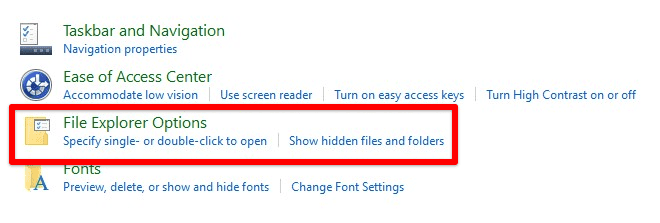
Opening file explorer options
Step 5: Go to the “View” tab. In “Advanced settings,” find “Show hidden files, folders, and drives.” Select this option and click on the “Apply” button.
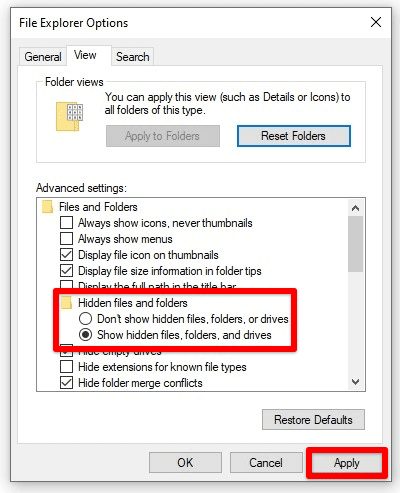
Show hidden files, folders, and drives
Step 6: Navigate to the folder where files are not syncing correctly. You will now be able to see the error file. It will be titled “Desktip.ini.” Delete it.
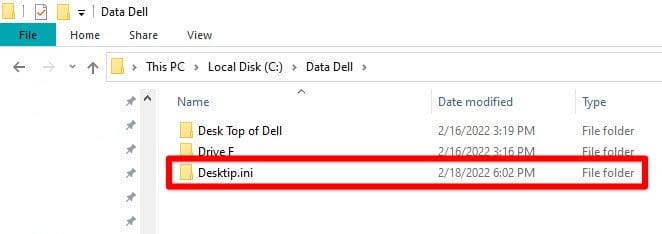
Deleting Desktip.ini file
After you have deleted the hidden error file, check to see if the Google Drive not syncing issue is resolved or not. If that error file was corrupted in any way, Google Drive should now be able to sync correctly. Nevertheless, if you are still facing the same issue, you should use the following method.
4. Switching proxy settings
The Google Drive for desktop maintains a uniquely developed set of proxies for encrypting the files synced with the cloud. It lets you keep your files safe, even if they are present on any other server. It also eliminates the possibility of any malware attacks from a third-party application that may integrate itself with Google Drive.
The proxy setting for the Google Drive for desktop is set to the auto-detect mode by default. With this mode, you can seamlessly control your files without granting permissions and overlooking each upload manually. However, sometimes this feature does not work as intended. If any such file is faced that cannot be encrypted through the auto-detect feature, you will have to enable the direct connection.
For changing the proxy setting to a direct connection, you will have to open the Google Drive preferences. Please ensure that you have paused the syncing process before modifying the proxy settings. Also, remember to shift back to the auto-detect feature after you are done with this procedure. If the proxy settings are left to be in direct connection, other files that would have been appropriately synced might generate an error.
Step 1: Go to the “Windows taskbar” and find the Google Drive icon from the “System Tray.”
Google Drive icon in the taskbar
Step 2: Click on the icon. You should see a window right above it. Next, click on the gear icon located in the top right corner of this window.
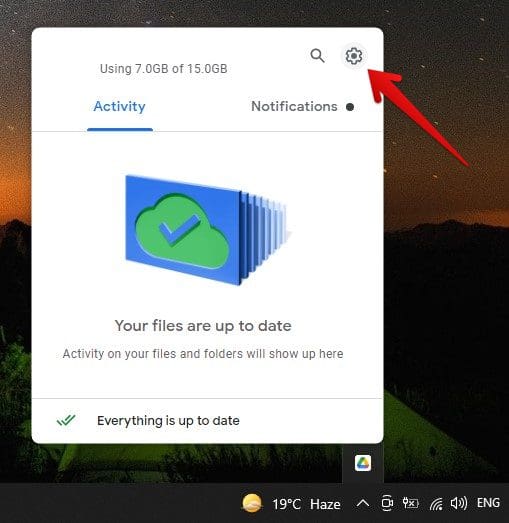
Google Drive for desktop window
Step 3: From the drop-down menu, click on “Preferences.”
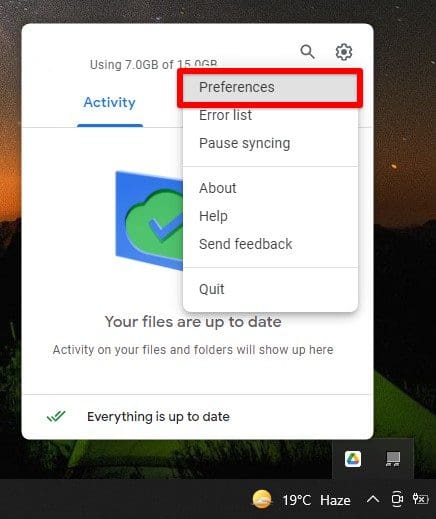
Opening Google Drive preferences
Step 4: In the Google Drive Preferences window, click on the gear icon in the top right corner.
Settings icon
Step 5: Scroll down to find the “Proxy settings.” Select the “Direct connection” option.
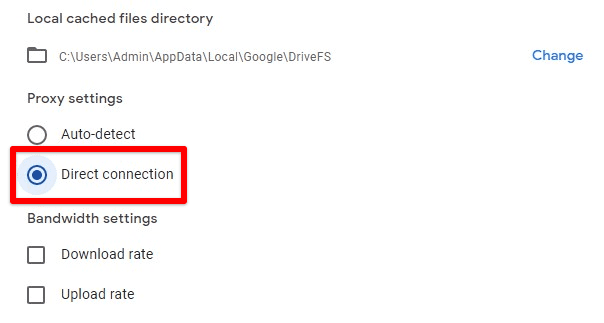
Proxy settings
After you have changed the proxy settings, restart your computer. Check to see if this resolved the Google Drive not syncing issue. Make sure to switch back to this option after successfully resuming the syncing process. If you can’t get Google Drive to sync, you should try installing a high-rated antivirus on your computer. Such issues are best resolved through programs that quickly identify the underlying cause.
Conclusion
The desktop version of Google Drive allows you to maintain a cloud backup of the entire system storage, including all types of file extensions. It not only serves excellent as a backup but also enables you to move files from one device to another rapidly. This can be compromised if the syncing process fails to work as usual. By following the four methods described above, you are more than likely to resolve this issue within minutes.
