Chromebooks have been thriving in the PC industry for a considerable time now. They’ve provided a modern-day solution to schools, businesses, and organizations and allow institutions from all over the world to get a taste of the effectiveness of Chrome OS. However, from an end-user’s perspective, you need to learn how to boot from a bootable USB drive on a Chromebook.
In case you missed it, Google has just made a jaw-dropping announcement of releasing Chrome OS Flex. We’ve talked about all that above because getting Chrome OS Flex on a system also revolves around booting it from a bootable USB drive. Once you know the basic mechanism, you can repeat the process on other software. So let’s dive right into this guide and explain the process in a step-by-step fashion without any further ado.
- Recommended from Chrome Ready: Check out how to install Chrome OS Flex on a PC or Mac.
Why should you boot from a bootable USB drive on a Chromebook
Back in the old days, people used to slap on operating systems on optical disk drives and insert them into conventional PCs to boot them up. Things have changed a lot now, considering that we’re living in 2022 and people are already purchasing land in outer space. In terms of modern-day computers, the paradigm has shifted drastically as well. You can use an external drive, particularly a flash drive or a USB, and insert it into a Windows laptop or a Chromebook to boot the device up from it.
Now, why one should do this is something many people might be wondering. Knowing how to boot from a bootable USB drive is essential to try out new operating systems like CloudReady or Ubuntu. Oh, and by the way, CloudReady is upgraded to a brand-new software called Chrome OS Flex. Find out everything important about this occurrence here.
Bootable USB drives can also help you recover your operating system when it crashes due to any pertinent reason or renders your device useless because of faulty system configuration. Therefore, it’s pretty much clear that you have many incentives to know how to boot from a bootable USB drive.
However, you cannot just flash your USB drive with an image of another operating system and get it to work on your Chromebook just like that. Thankfully for Chromebooks, the process of booting from a bootable USB drive on a Chromebook is nothing but straightforward, involving few tweaks.
Booting from a bootable USB drive on a Chromebook
We will break this operation down into multiple steps so that you can clearly understand the booting process.
Switching to the Chrome OS Developer Mode
Chromebooks can’t boot up from a bootable USB drive with factory settings. You have to make changes to the software in a certain way, so the system can allow you to perform this function on Chrome OS. For this purpose, we will be casting a lens on the Chrome OS Developer Mode first before anything else.
Enabling this feature on your Chromebook is bound to make the operating system more feature-rich, particularly in the area we need it to be for booting from a bootable USB drive. While we will leave the details here for one of the sections later, what you need to know for now is that switching the device to Developer Mode will Powerwash it from top to bottom. You know what that means:
Once you’ve taken care of the necessary stuff, the next step is to venture toward enabling the Chrome OS developer mode.
1. To begin, you will need to boot your device into the Recovery Mode. This is a dedicated section of Chrome OS that allows users to recover the operating system or enable the Developer Mode. You will have to press three different keys together to make this happen. Start by holding down the “Esc” and “Refresh” keys and then giving the “Power” key a swift press. That should signal your Chromebook to boot into the Recovery Mode.
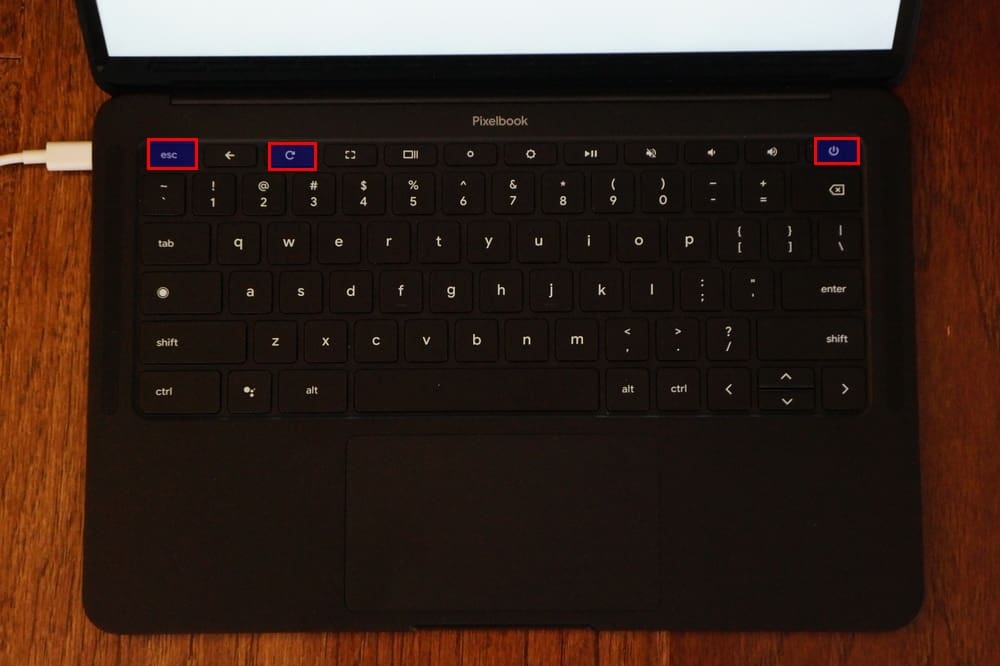
Booting into Recovery Mode
2. The device will reboot and let you enter the Recovery Mode. This is where you’ll see the screen saying, “Please insert a recovery USB stick.” If you’re using a dated device with old firmware, you might see “Chrome OS is missing or damaged.” Take no notice of any of the messages you see and press the “Ctrl” and “D” keys together.
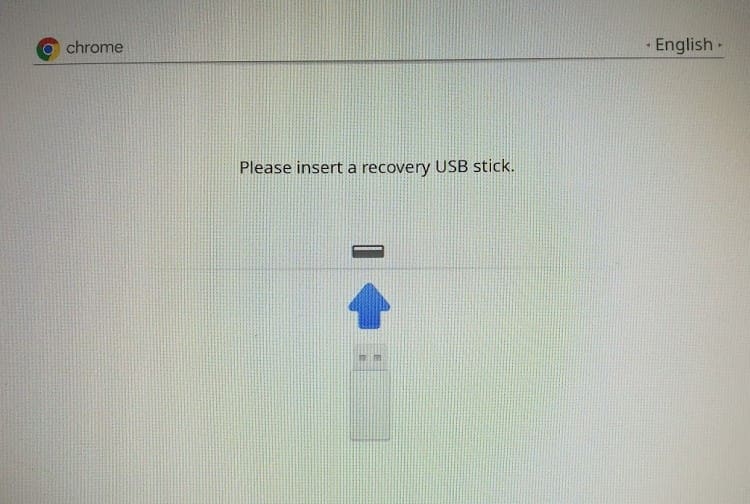
Recover Mode screen
3. After pressing “Ctrl” and “D” together, you will be essentially turning off the “Verified Boot” feature of your Chromebook. This specialized startup function allows Chrome OS to confirm whether the system has been hacked or altered in any dubious way. The process happens effortlessly and lasts somewhere around 5-10 seconds, so the user doesn’t have to wait long. Therefore, following your input of the specified keys, the device will restart one more time. Below is what you will see on the screen after this step.
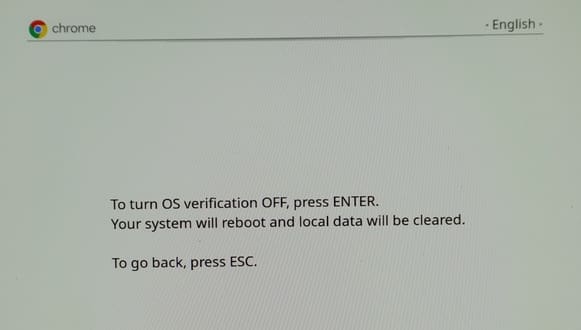
Turning off the Verified Boot feature
4. Once it boots back on, you will see a screen saying, “To turn OS verification OFF, press ENTER.” Do exactly what the prompt tells you to. Once done, the device will restart again and specify that “OS verification is OFF.” You will have to press “Ctrl” and “D” together once more at this stage.
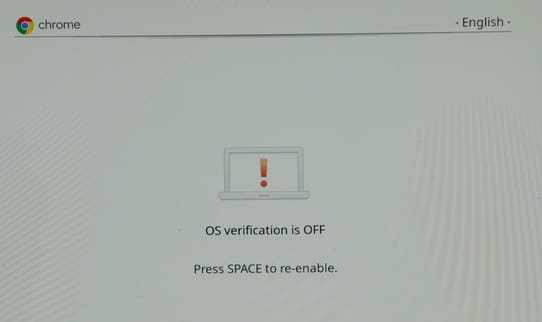
OS Verification off the confirmation
5. The device will begin transitioning to the Developer Mode. This is the step where all of your Chromebook’s data will be erased from your local storage.
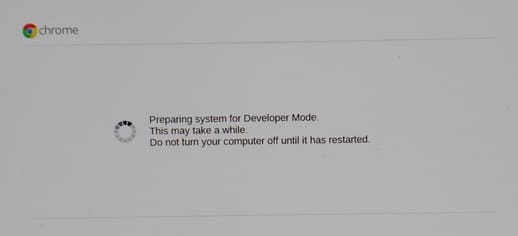
Transitioning into the Developer Mode
6. After the system has finished transitioning into the Developer Mode, you will see the “OS verification is OFF” screen again. Here, you’ll input “Ctrl” and “D” again for the final time before the Chromebook reboots itself and greets you with the welcome screen.

“OS verification is OFF”
That’s about it for enabling the developer mode on your Chromebook. Once you see the welcome screen appearing on the device, you will quickly go through the initial Chrome OS setup. However, please keep a keen eye out for an option called “Enable debugging features.” If you see it on the welcome screen, click on it, follow the on-screen instructions since you might have to press “Ctrl” and “D” again. Then, finally, click on “Enable” to finalize the process.
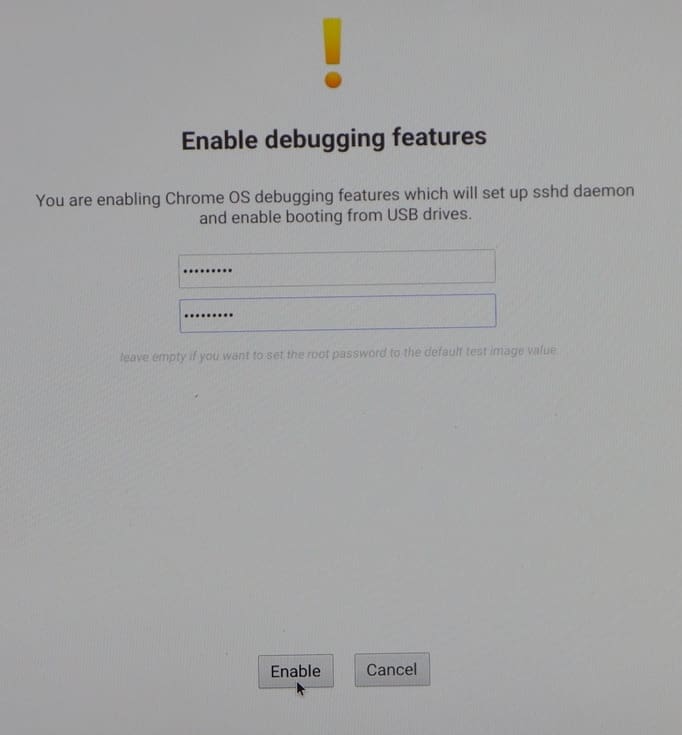
Enable debugging
Alternatively, continue toward the next section if you do not see the “Enable debugging features” option on your Chromebook on the welcome screen. You may not need to turn on debugging on your device at all to boot your device from a bootable USB.
Enable USB boot from the “crosh” shell
This next step will be performed within the Google Chrome browser, in the Chrome OS developer shell, to be exact. In other words, the Chrome shell is also known as “crosh” and is quite identical to Windows’ Command Prompt and Linux. However, don’t expect it to function as the latter since “crosh” isn’t well-versed with most Linux Terminal commands. However, there is a certain trick that we can employ to make “crosh” understand Linux commands, and that is precisely what we’ll be doing to enable USB boot from the Crosh shell.
The following steps are going to take it from here.
1. The first step is to open the Google Chrome browser on your Chromebook. That wouldn’t be anything to struggle with, we believe, so once you’re there, press “Ctrl,” “Alt,” and “T” together. That will open up the Chrome OS developer shell called “Crosh.”

Chrome OS developer shell opened
2. Within crosh, enter the “shell” command and then press the “Enter” key. This integral command will allow the Chrome OS developer shell to accept Linux-oriented commands from here on out.
shell

Entering the “shell” command in “crosh”
3. Type in the following command and press the “Enter” key. Do note that you will be provided with formal instructions on properly using the feature concerning other people.
sudo bash
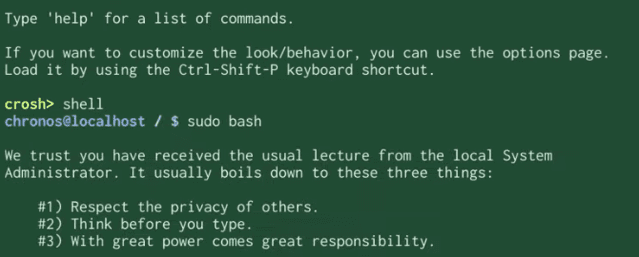
Entering the “sudo bash” command in “crosh”
4. The final step is to use the following command in the Chrome OS developer shell. By the time you’re done with the command in question, you will have successfully enabled your Chromebook to boot from a bootable USB drive.
enable_dev_usb_boot
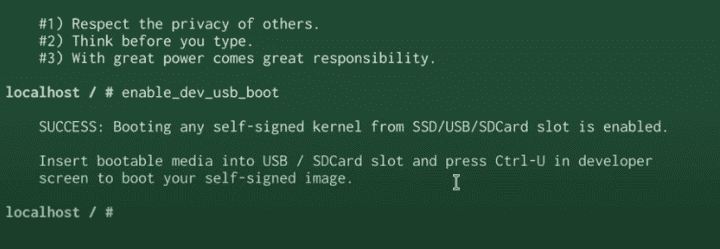
Entering the boot-enabling command in “crosh”
That’s about it for the second major section of learning how to boot from a bootable USB drive on a Chromebook. You’ve now done most of the work by coming this far. Next, it’s time to get into the third and final part of this entire operation.
Booting from a bootable USB drive on a Chromebook
This last section is all about preparing your USB drive the correct way and ensuring an appropriate ISO file has been loaded onto it. If you’ve been looking up all this information for general use cases and you genuinely don’t have a specific operating system in mind to boot up with, some enticing options are the Raspberry Pi Desktop, Windows 10, and even Windows 11.
We’ve outlined the instructions for creating USB installers for each operating system, so check out the embedded interlinks for more. On the other hand, if you do have specific software in mind or simply going for a Chromebook recovery, we don’t have to give you further guidelines in that regard. Let’s jump straight to the actual part that will allow you to boot from a bootable USB drive.
Once you have the USB flashed and ready to go, insert it into your Chromebook while the device is on and you’re past the initial sign-screen. The next step is to enter the Chrome OS Recovery Mode. We’ve already gone through how you can do that in one of the previous sections, but the following screenshot should jog your memory. Reminder: The Recovery Mode is accessed by pressing the “Esc,” “Refresh,” and the “Power” keys together.

Recovery Mode
Great going so far! At this stage, you now have to press two keys together, and your device will automatically boot from the bootable USB drive. Finally, press “Ctrl” and “U” together to top the whole operation off. After inputting the key combination, your Chromebook will restart and begin loading whatever you have on your external flash drive.
Conclusion
Overall, you see how easy it is for a Chromebook to boot into a bootable USB flash drive. It involved enabling the developer mode, USB debugging, and entering a few command lines to enable the USB boot functionality. You can also refer to our detailed guide on creating a bootable USB drive on Chromebook.
We hope that you’ve found in this article what you came for. Chrome Ready wishes you good luck!
- Check out the 10 best USB-C hubs for your Chromebook.

11 comments
I got to the final part of this setup but pressing Ctrl + U does not do anything, it said it was sucesfull on the crosh portion
I had the same experience as the comment above. Everything went according to the article until pressing Ctrl + U which resulted in nothing happening.
Same nothing happened
At sudo bash system requested my password. I entered the root password I had set up earlier, NG. Next I used my user account password, NG. Next I tried the PIN I set up to be faster than my user password, NG. Lastly I tried Enter, ie no password, NG
So what is the default password?
Hi, I did all the steps successfully, but when I pressed ‘Ctrl+U’, it told me to insert a verified Chrome OS image, so that means I can’t boot Windows 10.
Hey guys I had problem with enable a dev mode , on last step when I clicked on blue button enable with or without passwords I got messages ” something gone wrong” when I started system and enter code to console and tryied boot nothing happens, just logo os flex for second and… Starting Dev mode with deleting etc etc. In other page someone say on chromebook can be a problem with bootloader. Idk what’s will happen if my Dev mode will work ( without Dev mode system will run only recovery)
Try test0000
Last step before enable command it asks for a password, what is the password? It fails 3 times with enter and back to chronos@localhost prompt. Thanks.
I had the same issue and solved it with the solution mentioned here:
https://github.com/dnschneid/crouton/issues/2050#issuecomment-348382431
problem: “the device you inserted does not contain Chrome OS”
same problem. crtl U does nothing and there is a message” the device inserted does not contain Chrome OS”