STM32CubeIDE is a robust C/C++ development environment that includes peripheral configuration, code generation, compilation, linking, and debugging. It uses the Eclipse®/CDTTM framework and GCC toolchain, and GDB for debugging for development. It enables the use of hundreds of existing plugins to extend the capabilities of the Eclipse® IDE.
ST MCUFinder (ST-MCU-FINDER-PC) and STM32CubeMX functions are combined in STM32CubeIDE to provide an all-in-one tool experience. It makes it simple to create new STM32 MCU or board projects and build them with the available GCC toolchain.
A build analyzer and a static stack analyzer are included in STM32CubeIDE, and they give important information about project status and memory requirements to the user. Standard and advanced debugging tools include views of CPU core registers, memory, peripheral registers, and a live variable watch and serial wire viewer interface in the STM32CubeIDE. A fault analyzer displays error details if an error is caused by the STM32 processor during a debug session.
On the other hand, Chrome OS is designed to automate all user tasks and save them to the cloud. Instead of installing heavy software, you can use Google’s online apps, which can be found on your desktop or in your taskbar. Because of the less demanding apps and online features, the Chrome OS operating system is quick and uses less battery life. Chrome OS can only be used on Chromebooks, explicitly designed for the operating system.
Using STM32CubeIDE
Workspaces
A workspace is chosen when STM32CubeIDE is launched. The development environment will be utilized in the workspace. The workspace is technically a directory that can house projects. The user can access any project in the active workspace. A project is made up of files that are grouped into subdirectories. The project can also be linked to files stored elsewhere on the computer.
Many workspaces in various regions of the file system can be found on a single machine. Even though the user can switch between workspaces, only one can be active at any given time. Therefore, changing workspaces is a quick and easy way to switch from one project set to the next. The workspace and project design, in practice, allow for a well-organized hierarchy of workspaces that contain projects and files.
Information center
When STM32CubeIDE is opened for the first time, the Information Center is accessed, and a workspace is chosen. The ST Support and Community Information Center make it simple to get started on a new project, watch videos, read STM32CubeIDE documentation, and interact with ST support. The Help menu or the Information Center toolbar button can be used to access the Information Center.
Perspectives, menu bar, toolbar
When the Information Center is closed, STM32CubeIDE provides a perspective with a menu bar, toolbar, views, and editors. Each point of view is geared to a specific job. For example, the C/C++ language perspective is made for creating, editing, and constructing projects. When debugging code on hardware, the Debug view should be used. Each perspective can be tailored to the user’s requirements. If too many ideas are opened, or the views are reordered, the viewpoint can be reset at any moment. It is also possible to develop new views.
Views and editors
A perspective usually shows a variety of viewpoints. Each view provides specialized information, such as that gathered from the project or a debugging embedded device. There is just one editor area in perspective. Project files can be edited with the editor. Many files can be edited in the editor’s many tabs.
Installation of cube IDE in Chrome OS
To install cube IDE in Chrome OS, you will first Install Ubuntu on Chromebook then install cube IDE on Ubuntu.
How to use Crouton to install Ubuntu Linux on a Chromebook
ChrUbuntu is an Ubuntu distribution explicitly designed for Chromebooks. It functions similarly to a standard dual-boot system. You can pick between Chrome OS and Ubuntu at boot time when you restart your Chromebook. The following steps will install ChrUbuntu on your Chromebook’s internal storage.
1. Enable Developer mode
Before you can do any tricks, you must enable “Developer Mode” on your Chromebook. Chromebooks are usually protected by booting only properly signed operating systems, scanning them for manipulation, and preventing users and programs from modifying the underlying OS.
These security safeguards may be disabled in Developer Mode, giving you a laptop that you can customize and play with to your heart’s delight. You will also be able to access a Linux terminal from within Chrome OS after enabling Developer Mode and do whatever you want.
To enter recovery mode on a modern Chromebook, hold down the Esc and Refresh buttons while tapping the Power button. You will need to toggle physical developer switches on older Chromebooks instead.
Press Ctrl+D on the recovery screen, consent to the prompt, and you will be in developer mode.
You will then see a warning screen every time you turn on your Chromebook. To continue booting, either hit Ctrl+D or wait 30 seconds.
This message informs you that your Chromebook is in developer mode, which means that the typical security features are disabled. If you were using developer mode, it’s conceivable that background software was gathering your keystrokes and tracking your usage. You could typically log in using your Google account if you were using someone else’s Chromebook. That’s why Google makes it simple to tell if a Chromebook is in Developer Mode, and the warning screen can’t be turned off permanently.
2. Download and install Crouton.
Then it is time to get Crouton. Here is a link to the latest Crouton release, which you can receive by clicking on it from your Chromebook.
After downloading Crouton, click Ctrl+Alt+T to open the Crosh terminal in Chrome OS.
Type shell into the terminal to enter Linux shell mode and hit Enter. Developer Mode must be enabled for this command to work. This procedure has been modified, and the Crouton installer must now be moved to /usr/local/bin before being launched. See Crouton’s README for further information. Execute the command below to install Crouton
sudo install -Dt /usr/local/bin -m 755 ~/Downloads/crouton

Crouton
You have to run the command below to install Crouton the easy way. Crouton includes the Xfce desktop as well as a safe encrypted chroot. The actual installation procedure will take some time as the essential software is downloaded and installed—it took around half an hour on my machine—but it is largely automated.
How to launch Ubuntu
We must now choose a specific launcher for Crouton’s main graphical interface. There are several choices available to you in this regard. KDE is one of the most prevalent launchers proven to work flawlessly on Chromebooks. There are also other alternatives, such as Unity and Xfce. The Xfce launcher is lightweight and utilizes a decent amount of resources. Feel free to experiment with different solutions if you have the necessary gear. We’ll use the command below and type it into the Crosh terminal:
sudo crouton -t xfce

Xfce Launcher
Launch crouton using the command below:
sudo startxfce4

Start Ubuntu
If you’re currently using Crouton, you don’t need to power off or restart your device to return to the default Chrome OS environment. To transition seamlessly between Crouton and Chrome OS, press the following two shortcut keys.
1. To hop on Crouton, press “Ctrl” + “Shift” + “Forward.”
2. To return to Chrome OS, press “Ctrl” + “Shift” + “Backward.”

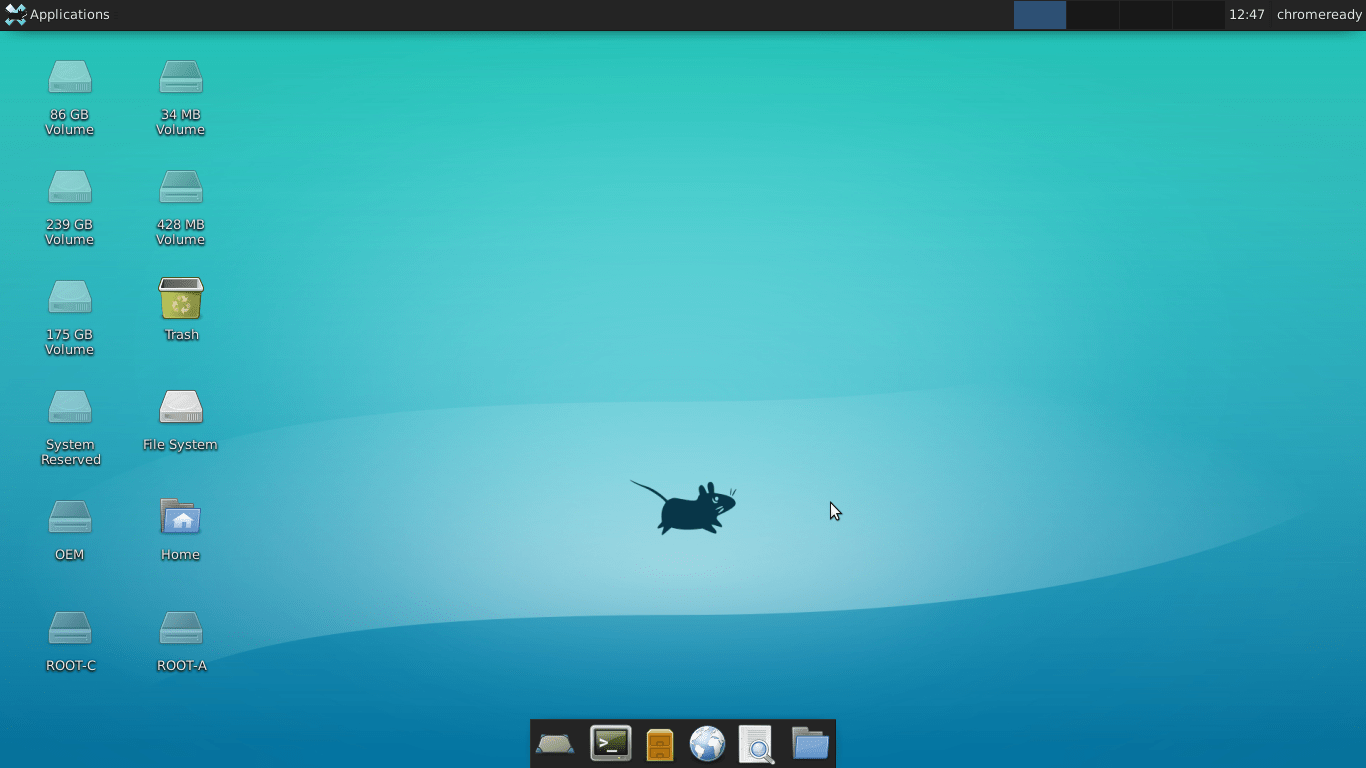
Ubuntu Xfce Desktop
Please note that the right arrow and left arrow on your Chromebook’s keyboard represent the “Forward” and “Backward” keys. When compared to a regular Windows keyboard, you’ll find in place of F2 and F3. They’re also located between the “Esc” and “Refresh” keys on a Chromebook.
What you can do with Linux
You may now use Chrome OS alongside a standard Linux desktop. In Ubuntu’s software repositories, all of that standard Linux software is just an apt-get away. Local image editors, text editors, office suites, development tools, and Linux terminal utilities you will ever need are all simple to install.
Use the Downloads directory in your home folder. All files in the Downloads directory appear in the Files app on Chrome OS. You may even quickly transfer files between Chrome OS and your Linux system.
However, there is one hitch. On an ARM Chromebook, your options are relatively limited. Some programs are incompatible with ARM Linux, so you won’t run closed-source software created specifically for the platform. Most closed-source software will not work on those machines if you recompile many open source tools and desktop apps for ARM.
On the other hand, you have a lot more flexibility with an Intel Chromebook. You could connect Steam for Linux, Minecraft, Dropbox, and other standard Linux desktop software alongside Chrome OS. As a result, you could use a Chromebook Pixel to install Steam for Linux and have access to a whole new gaming universe.
How to install cube IDE on Ubuntu
Installing the newest STM32Cube IDE in Ubuntu/Linux Mint is pretty simple. Please follow the procedures below to install STM32Cube IDE on Ubuntu/Linux Mint.
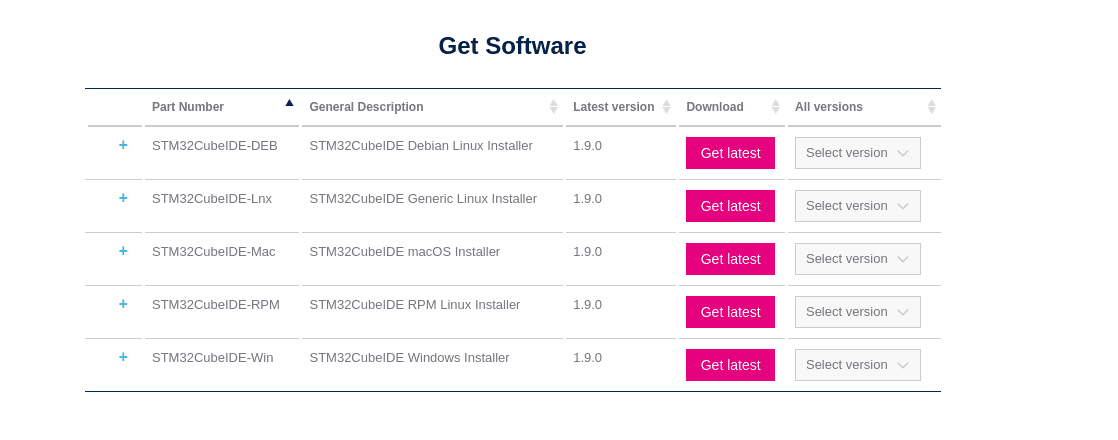
1. Go to STM32Cube IDE Download and download the STM32Cube installer package.

STM32CubeIDE download page
2. Extract the installer package from the Download location. Run the command in a terminal window. If you get an error about the “unzip” command not being found, run the command below to install it.
sudo apt install unzip

Install Unzip
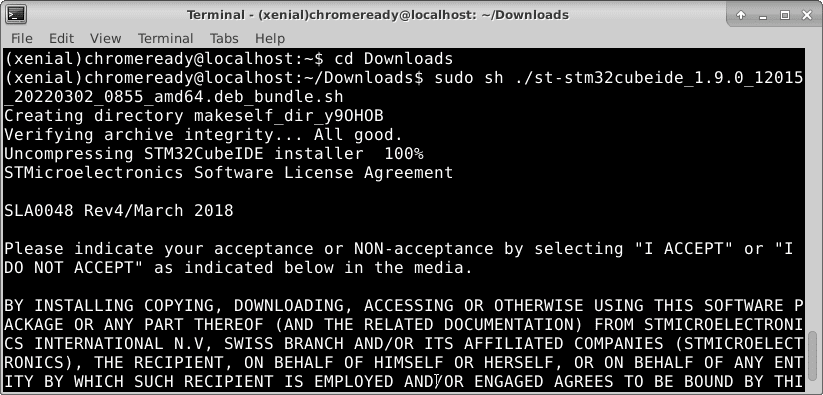
3. Open the STM32Cube IDE and install it. If you opt to use the terminal, use the command below to install the STM32Cube IDE.
cd Downloads
sudo sh ./st-stm32cubeide_1.9.0_12015_20220302_0855_amd64.deb_bundle.sh

cd Downloads and install CubeIDE
Note: The command above might change depending on the downloaded package. Also, scroll slowly while accepting the license terms, or else the installation will abort.
4. SEEGAR and ST licenses are accepted.
5. Start the STM32Cube IDE.
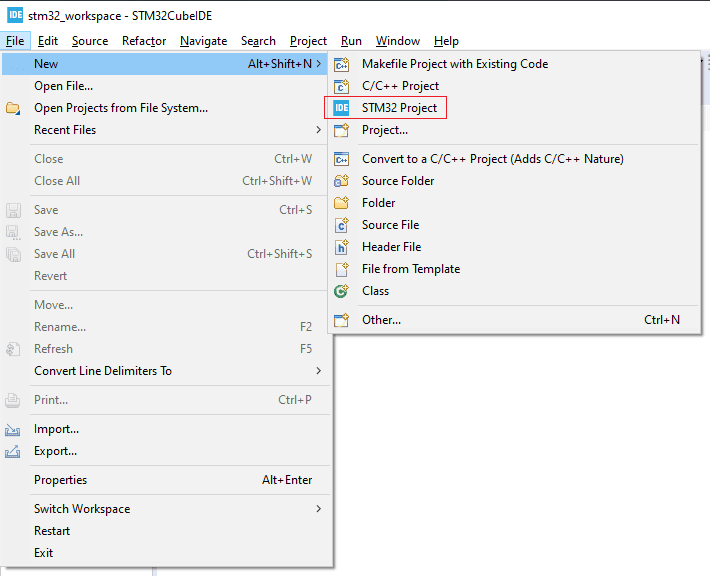
Search for “STM” in the program menu, and you will see the installed IDE there. It will be launched. You are now ready to utilize STM32Cube IDE after configuring your workspace directory.

STM
Conclusion
This article is a STM32CubeIDE installation guide that explains how to install the software on Chrome OS. It is primarily for software developers and system administrators to install the STM32CubeIDE product. If you have any questions, please feel free to reach out to us. Thank you for reading.
