This article will discuss how to convert an Excel file into Google Sheets. Microsoft Excel and Google Sheets are the two most widely used spreadsheet software in the market. The sheer range of their users and their compatibility with other programs have enabled them to tap into new markets year after year. However, since Google Sheets can only support specific file extensions, you need to convert your Excel document into one of those formats. Otherwise, that data cannot be opened, edited, or modified in Google Sheets.
Converting Excel to Google Sheets
Both Microsoft Excel and Google Sheets are strong enough to retain their users. These programs provide enough features to support all needs of any data set on its own. Therefore, Excel users tend to stick to Excel, whereas Google Sheets users regularly use Sheets. Still, there can be scenarios where you need to fit in the data you get from some other source.
If an Excel user sends a file or a data set to a person who uses Google Sheets, the receiver cannot open the file and edit it without having Excel installed on their device. If the person on the receiving end uses a Chromebook, the chances are that they will not have ever used Excel. Therefore, to work on that file, you need to convert it into a format that Google Sheets directly support.
Otherwise, the file can only be opened in viewing mode. Any modifications to that data can only be performed once that set is converted to a native format. Moreover, once the conversion is done, you can work on external data in the environment you are familiar with. This is the essential advantage of this transition. If you have never converted an Excel file to Google Sheets before this, there is no need to worry at all. We will go over three different methods that can be used for this conversion. Here, it is important to note that the method you pick for yourself can vary from case to case.
Converting Excel through Google Drive
If you are a regular Google Sheets user, you must have imported files from Google Drive at some time in the past. This is only possible because Google Sheets and Google Drive are inherently compatible. The support for their file formats is quite effective that enables you to edit and modify the files in their original storage locations.
Due to this, the most convenient and straightforward method of converting an Excel file into Google Sheets is accomplished through your online Google Drive storage. As you would have already guessed, the first step in this procedure is to upload the file to Google Drive. Afterward, you can open it up in Google Sheets directly. To upload the Excel file on your device to Google Drive, you will have to observe the following steps,
Step 1: Open “Google Drive” on your browser.
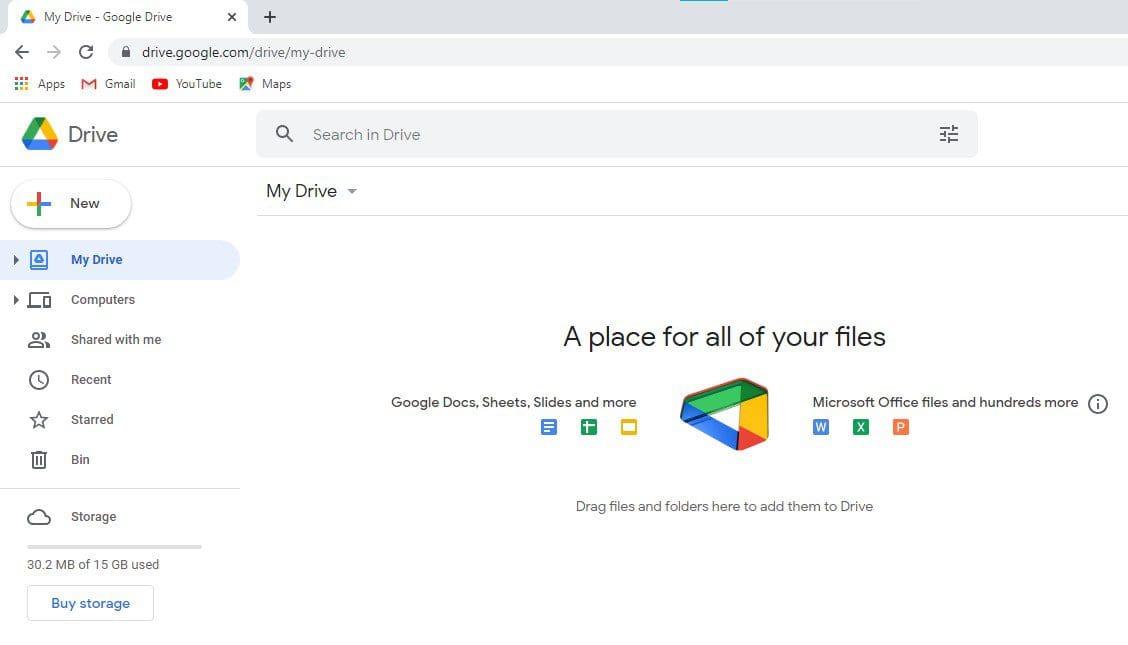
Google Drive homepage
Step 2: From the Google Drive homepage, click on the “New” button in the top left corner of your screen.
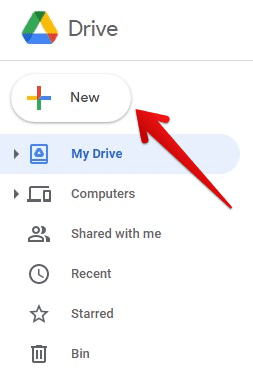
New button
Step 3: This will open a drop-down menu. Inside that menu, click on the “File upload” option. Browse for the Excel file you want to convert and then click on “Open”.
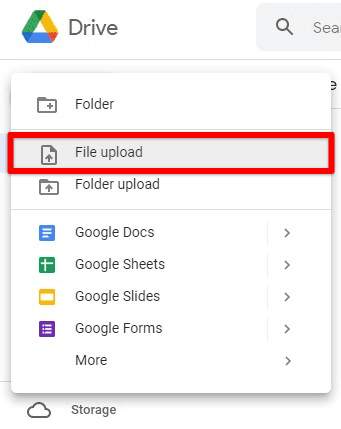
File upload
Step 4: This will start the uploading process. Once the file has been uploaded to this cloud storage, you can open it up by double-clicking on the file icon. If your file is in one of the native file formats, this will directly open up in Google Sheets. You can then edit and modify it however you want. Besides, these changes will also be updated in Google Drive.
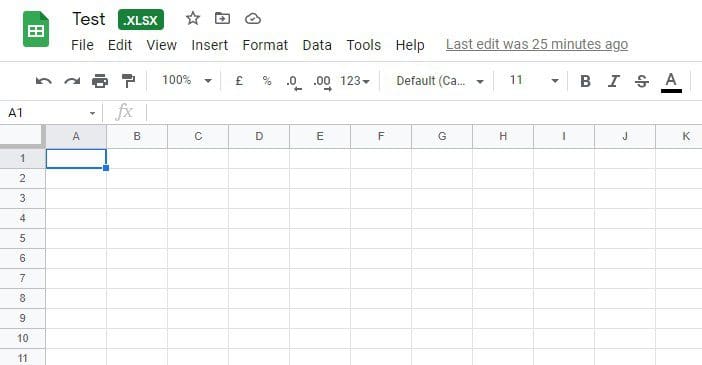
Excel file opened directly in Google Sheets
Step 5: On the other hand, if the Excel file is not present in one of the supported formats, the file will open in viewing mode only. In that case, you need to right-click on the file icon and then select “Open with Google Sheets” from the drop-down menu. Doing so will open the file in edit mode.
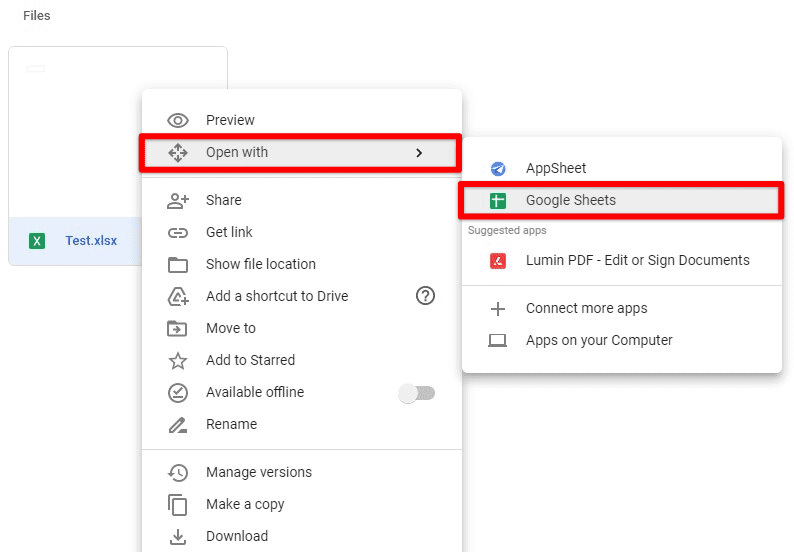
Open with Google Sheets
Using Google Drive for this conversion is the simplest method. This way, you do not require any additional settings from either software. Furthermore, it can be undertaken without having Excel installed in the first place.
Converting the file extension
In the previous method, the file can be opened and modified in Google Sheets. But the extension of that file remains to be .xlsx. This is one of the innate extensions of Microsoft Excel. This means that your file will still qualify as an Excel sheet and is not converted to Google Sheets. Therefore, if you are not just looking for minor edits and need to convert the file along with the extension, you will need to assume one more step.
For this method, we will assume that you have already uploaded the file to Google Drive and opened it in Google Sheets. From the taskbar, you can see a “.xlsx” badge along with the file name. This shows that it is still present in its original format. This is what allowed the changes to be updated in original storage locations. Once you have converted the file extension, all new edits will only be localized to the new file. Thus, you need to understand the difference between these two approaches and then select the one which is suitable for your needs. To convert the file extension from Google Sheets, you will have to follow the steps mentioned below,
Step 1: Open the Excel sheet with “Google Sheets” from your drive.
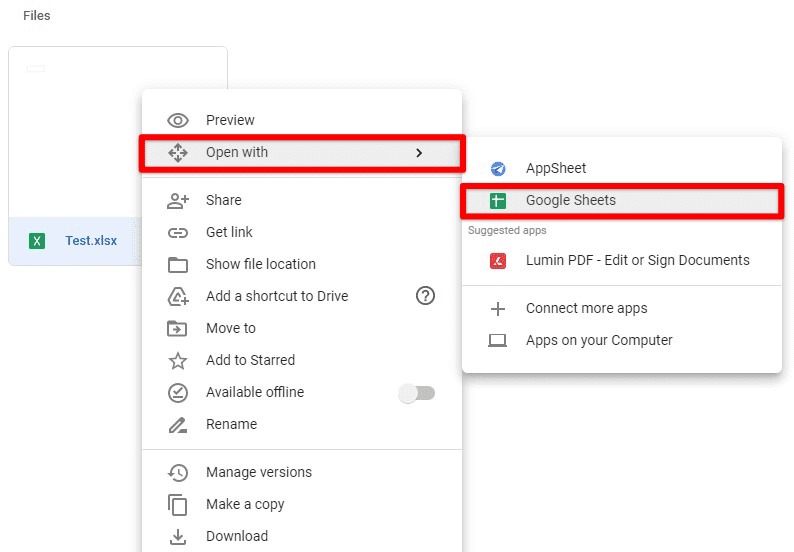
Open the file with Google Sheets
Step 2: Click on the “File” tab from the taskbar.

File tab in the taskbar
Step 3: This will launch a drop-down menu. Click on the “Save as Google Sheets” option.
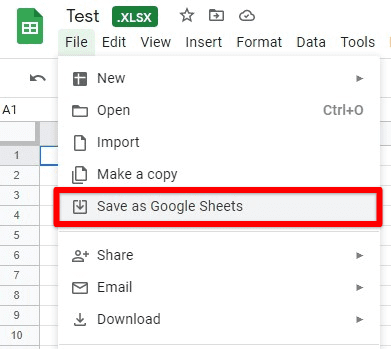
Save as Google Sheets option
As soon as you click, a new file will be opened in a new tab. This will be the converted file now present in Google Sheets format. You can also verify this by confirming that the “.xlsx” badge is now gone. The new file will also be located within your Google Drive storage and downloaded whenever you want. Keep in mind that any changes made to this file will not reflect in the original Excel file from this point onwards.
Setting up automatic conversions
As you have noticed, manually converting the Excel file and saving it as Google Sheets can take some time. This can be particularly annoying and troublesome if you have many files to convert. A solution to this is available too. You can change the Google Drive settings, which allows you to automatically convert all Excel files to Google Sheets as soon as they are opened. This will save a noticeable amount of time and effort. It can be beneficial if you need to convert the file extensions all the time. For setting up automatic conversions, you will have to observe the following steps,
Step 1: Open “Google Drive” on your browser.

Opening Google Drive
Step 2: From the Google Drive homepage, click on the gear icon present in the top right corner of your screen. Click on “Settings”.
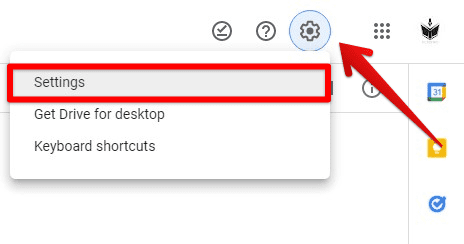
Google Drive settings
Step 3: In “General” settings, go to “Convert uploads”. You will see a checkbox that reads, “Convert uploaded files to Google Docs editor format”. Tick this checkbox.
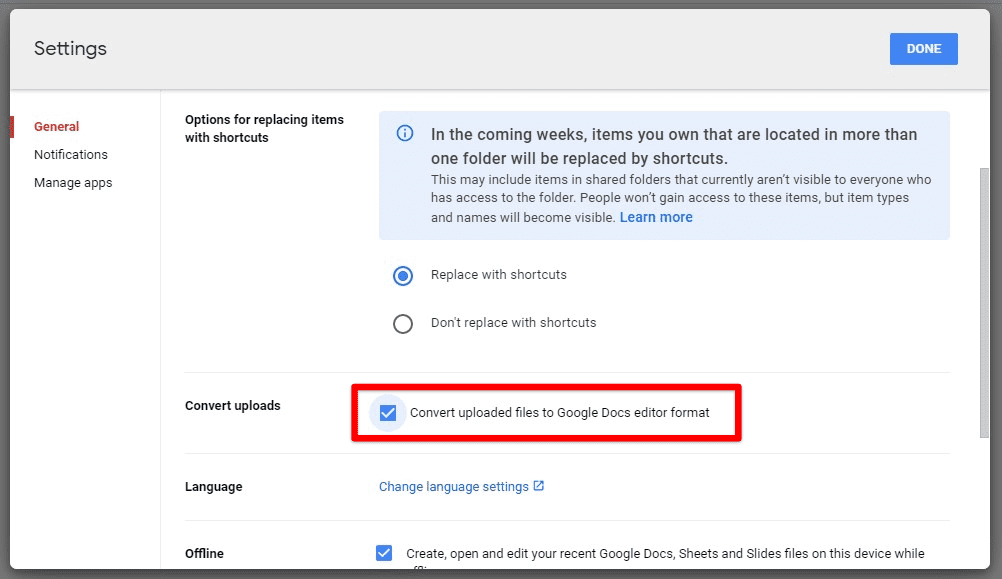
Convert uploads checkbox
Step 4: Click on the “Done” button from the top right corner of the settings box.
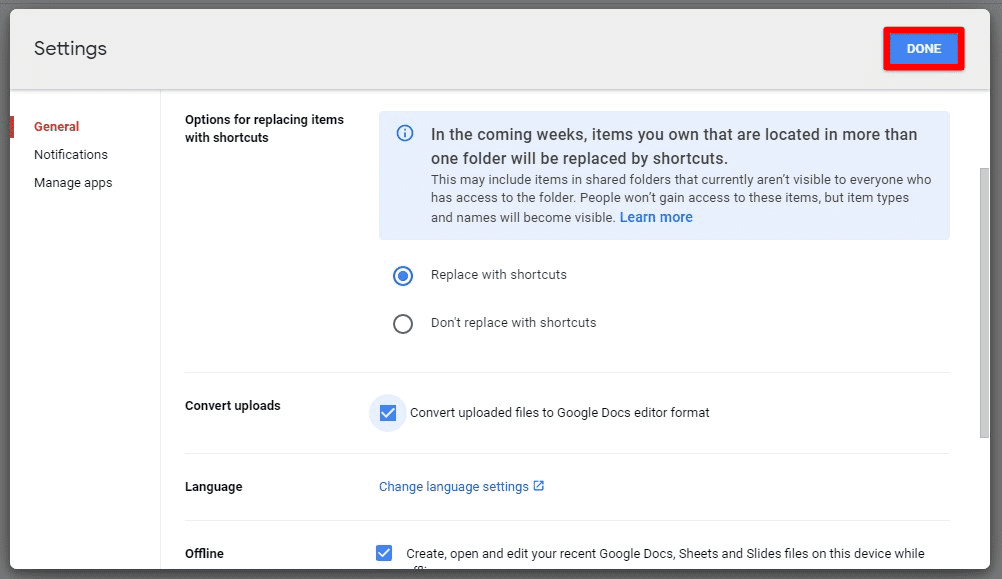
Done button
Once this is done, any new Excel files uploaded to your Google Drive account will automatically be converted to Google Sheets. However, it will not affect any already present files on your drive. Moreover, this setting applies to all files other than Excel as well. Therefore, only employ this method if you indeed need so. Else, you will convert unnecessary files into Google Docs editor format. This can potentially give rise to formatting and storage issues. Read this guide on how to use conditional formatting in Google Sheets.
Conclusion
By following the methods explained in this article, you can easily convert any Excel file into Google Sheets. Please note that even when the file has been successfully converted, you cannot expect the data contained in it to maintain its formatting all the time. There can be issues since you are converting a spreadsheet from one software to another. Still, knowing how to perform this conversion and then automating it for all future uploads can be pretty helpful for frequent users. If you are interested in learning how to convert PDF to Google Sheets, visit this article.
