If you’ve ever wished to have your computer environment with you everywhere you go, or if you’re curious about Google’s ChromeOS but not yet ready to buy a Chromebook, then you’ll be pleased to know that it’s possible to install and run Google ChromeOS directly from a USB drive. The process is easier than you might think, and I’m here to guide you through every step of it. To ensure a smooth experience, make sure to check out the FAQ and my helpful tips at the end.
Why ChromeOS on a USB drive?
Before we dive in, let’s chat about why you might want to run ChromeOS from a USB. For starters, it’s super portable. Imagine carrying your entire computer system in your pocket! Plus, it’s a great way to test drive ChromeOS without committing to a new device. I personally love the idea of not being tied to one machine – it feels like digital freedom!
What you’ll need
- A USB drive with at least 8GB of storage (16GB for a smoother experience)
- A PC (Windows or Linux), Mac, or a Chromebook with internet access.
- Google Chrome browser installed
- A sprinkle of patience and a dash of adventure
Install & Run ChromeOS Directly from a USB Drive
Step 1: Download the ChromeOS Flex image
First things first, we need to grab a ChromeOS image. Officially, Google does not provide standalone ChromeOS images for non-Chromebook devices. But they do offer ChromeOS Flex for individual use, which is fantastic, and it is the same as ChromeOS, minus the Google Play Android apps (as of today) and ChromeOS’s verified boot access. Know more here. It’s designed to work well on a wide range of hardware, making it a versatile choice. Head over to their website, free sign up, and download the ISO file. It’s user-friendly and does most of the heavy lifting for you.
Step 2: Prepare your USB drive
This part is crucial, but worry not—I’ll guide you through each step to make this as smooth as possible. Let’s ensure you have your USB drive ready and dive into the specifics.
Step-by-step guide to creating your ChromeOS Flex USB
- Gather your materials: Make sure you have a USB drive with at least 8GB of space. As I said previously, I suggest using a 16GB drive for a bit more room, ensuring a smoother experience.
- Download the Chromebook Recovery Utility: This handy tool by Google is your gateway to creating a ChromeOS Flex bootable USB. Head over to the Chrome Web Store and add the Chromebook Recovery Utility extension to your Chrome browser.

Chrome Web Store – Chromebook Recovery Utility
- Launch the Recovery Utility: Once installed, open the Chromebook Recovery Utility.
- Prepare the USB drive: Insert your USB drive into your computer. Be warned, all data on the USB drive will be erased during this process, so make sure to back up any important files beforehand.
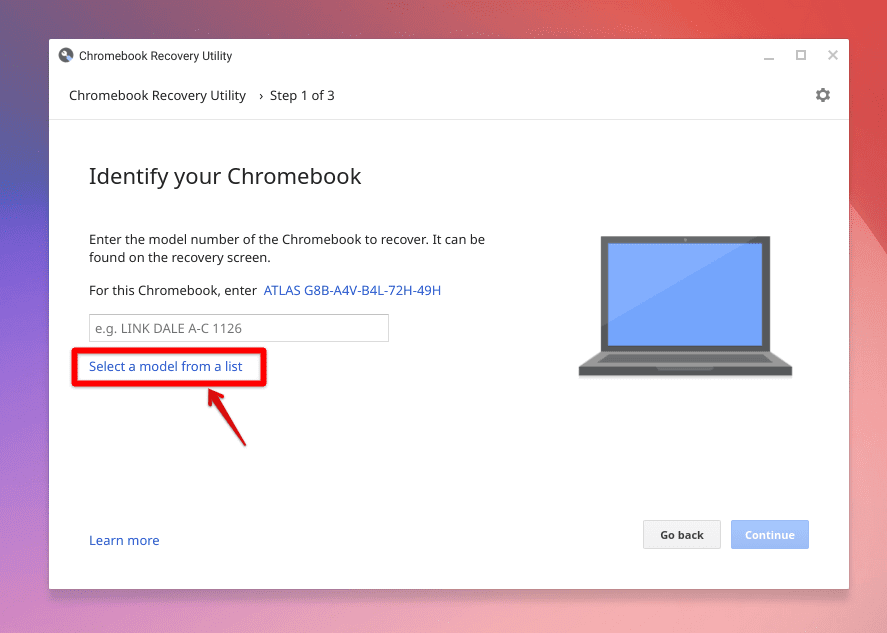
- Initiate the recovery media creation: In the Recovery Utility, click on “Get started.” You’ll be prompted to enter a model number, but since we’re creating a ChromeOS Flex USB, you can skip this part and instead look for an option that says “Select a model from a list” and click on it.

Chromebook Recovery Utility – Select a model from a list
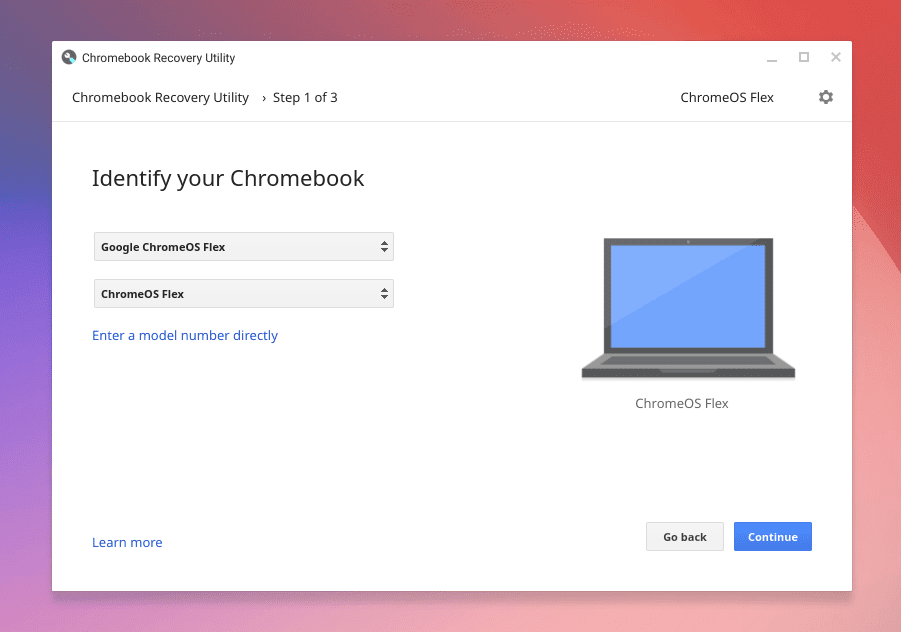
- Select ChromeOS Flex: Now choose “Google Chrome OS Flex” from the manufacturer dropdown. Then, select “ChromeOS Flex” as the product and proceed.

Setting Options
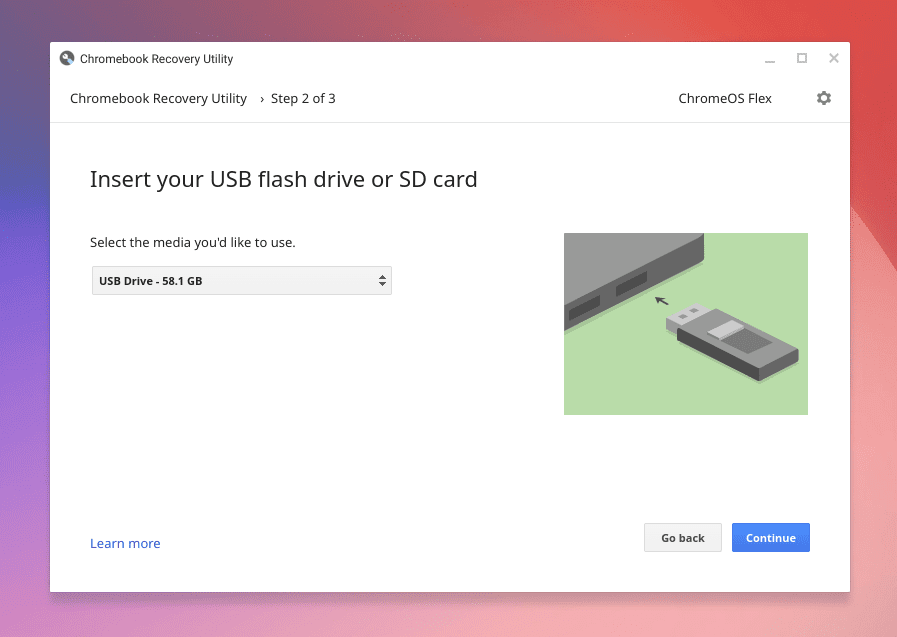
- Choose your USB drive: The utility will ask you to select the USB drive you intend to use. Make sure you choose the correct one to avoid any unwanted data loss.

Selecting the USB drive
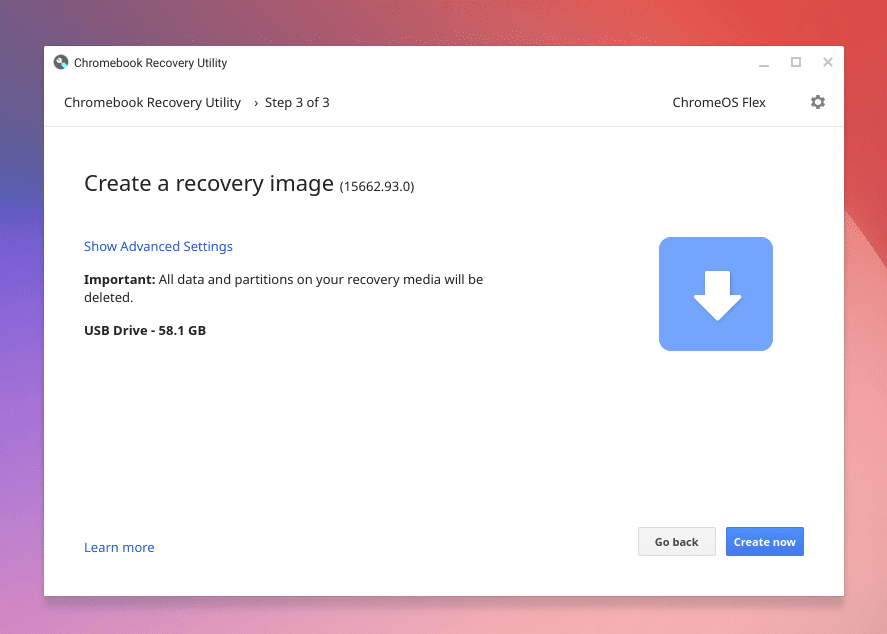
- Create the recovery media: Click on “Continue” and then “Create now” to start the process. The Recovery Utility will download the ChromeOS Flex image and automatically create a bootable USB drive. This might take a while, depending on your internet speed and the performance of your USB drive.

Starting the process
- Wait for completion: Once the process starts, it’s just a matter of waiting. You’ll see a progress bar indicating how the creation of the bootable drive is going. Grab a coffee, catch up on some reading, and before you know it, your ChromeOS Flex USB drive will be ready.

In Process
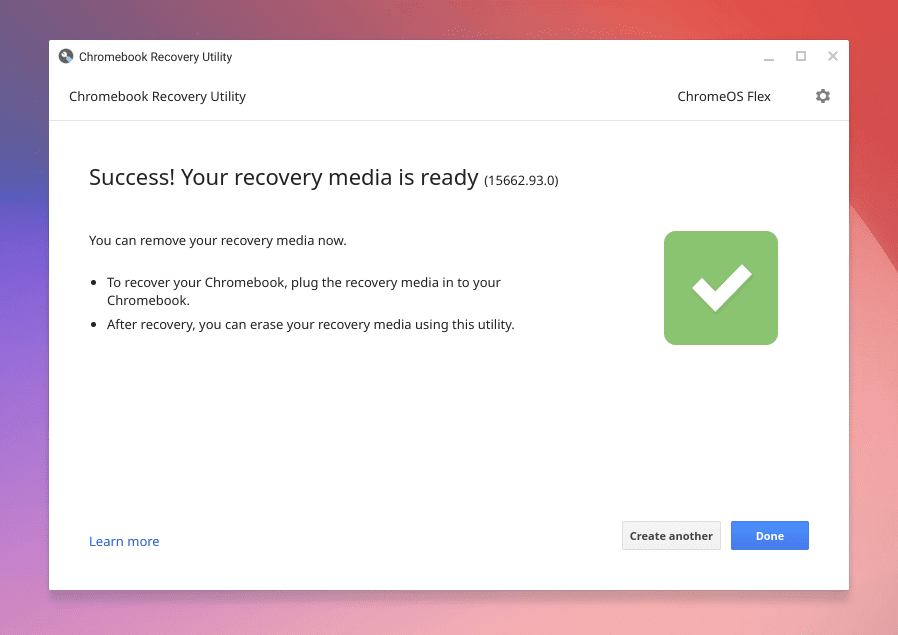
- Safely remove the USB drive: After the utility notifies you that the process is complete, make sure to safely eject the USB drive from your computer. This ensures that all data is properly written to the drive and prevents corruption.

ChromeOS USB Drive Ready
Step 3: Boot from USB
Now, we’re getting to the exciting part. Restart your computer and enter the boot menu. The key to press varies by manufacturer but is often F12, F10, or Esc. Once in the boot menu, select your USB drive as the boot device. This part always gives me a little thrill – it’s like telling your computer, “Let’s go on an adventure!”
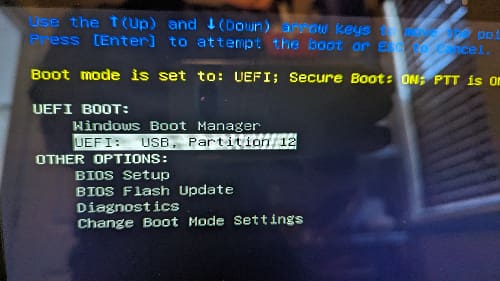
Windows Boot Screen on a Dell laptop
Step 4: Explore ChromeOS Flex
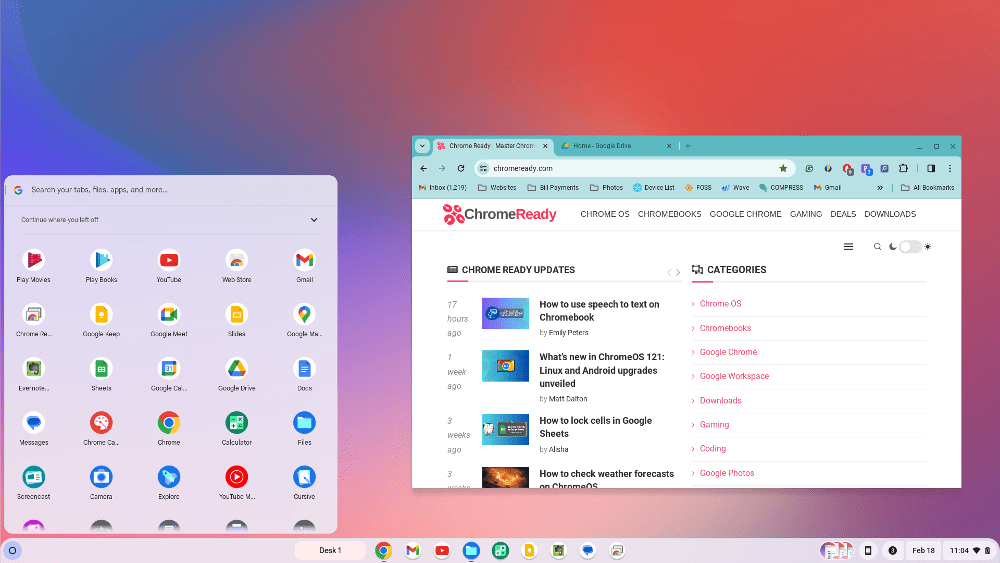
After a few moments, you’ll be greeted by the ChromeOS (CloudReady) welcome screen. Take a moment to savor this – you’ve just booted an entirely different operating system from a USB stick! From here, you can set up Wi-Fi, sign in with your Google account, and start exploring. I always enjoy this part; it’s like meeting a new friend.
What to expect
Running ChromeOS from a USB isn’t quite the same as running it on a dedicated Chromebook. Performance might be a tad slower, especially if you’re using an older USB drive or computer. However, I find the experience to be surprisingly robust – it’s perfect for web browsing, document editing, and even some light entertainment as you get access to Play Movies, YouTube, Play Books, and more.
Tips for a better experience
- Use a USB 3.0 drive if possible – it’s faster!
- Remember, any changes you make will only be saved to the USB drive. You can use Google Drive to save your work and access it anywhere. That’s the beauty of cloud computing.
- If you fall in love with ChromeOS, consider getting a Chromebook for the full experience.
FAQ: Running ChromeOS from a USB Drive
Can I run ChromeOS Flex on any computer?
ChromeOS Flex is designed to be highly compatible with a wide range of hardware, but there are exceptions. It’s best to check the official ChromeOS Flex compatibility list to see if your device is supported. Generally, most devices made in the last 10 years should work.
Will running ChromeOS Flex from a USB drive affect my existing operating system?
No, running ChromeOS Flex from a USB drive won’t affect your existing operating system. It’s a non-invasive way to test or use ChromeOS Flex without altering your computer’s hard drive. Once you remove the USB drive and reboot, your computer will return to its original operating system.
How do I switch back to my original operating system after using ChromeOS Flex?
Simply shut down your computer, remove the ChromeOS Flex USB drive, and power on your computer again. It should boot into your original operating system as it normally would.
Can I save my work or settings while running ChromeOS Flex from a USB?
When running ChromeOS Flex from a USB drive, changes and files are generally stored in the cloud, especially if you’re using Google Drive or similar services. However, any local data or settings changes made during the session might not persist after a reboot, depending on your USB drive’s setup. To ensure data persistence, consider installing ChromeOS Flex on your device’s hard drive or using a USB drive configured for persistent storage, if supported.
Is ChromeOS Flex free to use?
Yes, ChromeOS Flex is a free offering from Google, aimed at bringing the benefits of ChromeOS to a broader range of devices, especially older hardware that might not be running as efficiently with its original operating system.
Will all my peripherals work with ChromeOS Flex?
While ChromeOS Flex supports a broad array of peripherals, there might be instances where specific devices (like certain printers or specialized hardware) may not be compatible.
Can I install Android apps on ChromeOS Flex?
ChromeOS Flex is primarily focused on cloud-based productivity and web applications. Currently, it does not support Android apps or the Google Play Store, unlike some Chromebooks.
Conclusion
Venturing into the world of ChromeOS Flex via a USB drive offers a unique and flexible way to experience Google’s streamlined operating system without committing to a full installation on your device. By following the detailed steps to create a bootable USB drive and navigating the initial setup, you can breathe new life into older hardware or simply explore the perks of ChromeOS with minimal risk. The FAQ section addresses common concerns and ensures a smoother journey, emphasizing ChromeOS Flex’s broad compatibility, non-invasive nature, and the cloud-centric approach to data and applications.

