Not all android applications are compatible with Chromebooks. Most apps on the play store have different specifications, thus making them compatible or incompatible with Chromebooks. However, the foremost question is, how do you test if your android application is compatible with your Chromebook without having a Chromebook?
It is important to note that while using android applications on your Chromebook, not all functions will be similar when using them on your android devices. For instance, if you use a non-touchscreen Chromebook, you have to use mouse clicks, which is quite different from a touchscreen Android device.
The introduction of Chromebooks brought so much joy to “android” lovers who wanted to own android laptops. A Chromebook is an emulation of an android laptop with the ability to run android applications. However, most Chromebook users have had one primary concern about how android application compatibility can be tested without having a Chromebook. If this has been your concern, no need to worry anymore as we shall be providing a simple guide on how to do so in this short article guide.
We shall illustrate how to check the android application compatibility using a virtual Chrome OS device and Android Studio. Follow this article guide to learn more.
Note: it is vital to understand that we will use the Chrome OS without a Chromebook in this article guide.
Installing and testing android applications compatibility without a Chromebook
The Google Chrome OS has been one of the unique lightweight operating systems that has gained lots of praise from its users. However, this operating system is not similar to other OS such as Windows or Linux that can be installed on almost all hardware. Therefore, it is nearly impossible to run the Chrome OS without Chromebook hardware.
Most people use the base version of Chrome OS, the “Chromium OS,” which does not have all the features a Chrome OS can offer. However, thanks to the Chrome OS emulator, we can now try the full Chrome OS without having a Chromebook.
Testing android application compatibility is vital as it aids you or a developer creating android applications to know if the app will be compatible with the Chromebook. If you plan on testing any android application for compatibility, this tutorial is for you. Stick to it to learn more.
Prerequisites
- Working internet connection
- PC (Either Windows, Mac, or Linux)
- Android Studio
Note: it is recommended to have a high-internet connection speed for this tutorial as we shall be using an emulator to test the android application compatibility.
Once you have all the prerequisites in place, follow the steps provided herein to complete the testing process:
Step 1: Installing Android Studio
Before commencing with the process, we first have to install Android Studio. If you intend to try out the Chrome OS without needing Chromebook hardware, it is necessary to have Android Studio installed. follow the steps below to install it:
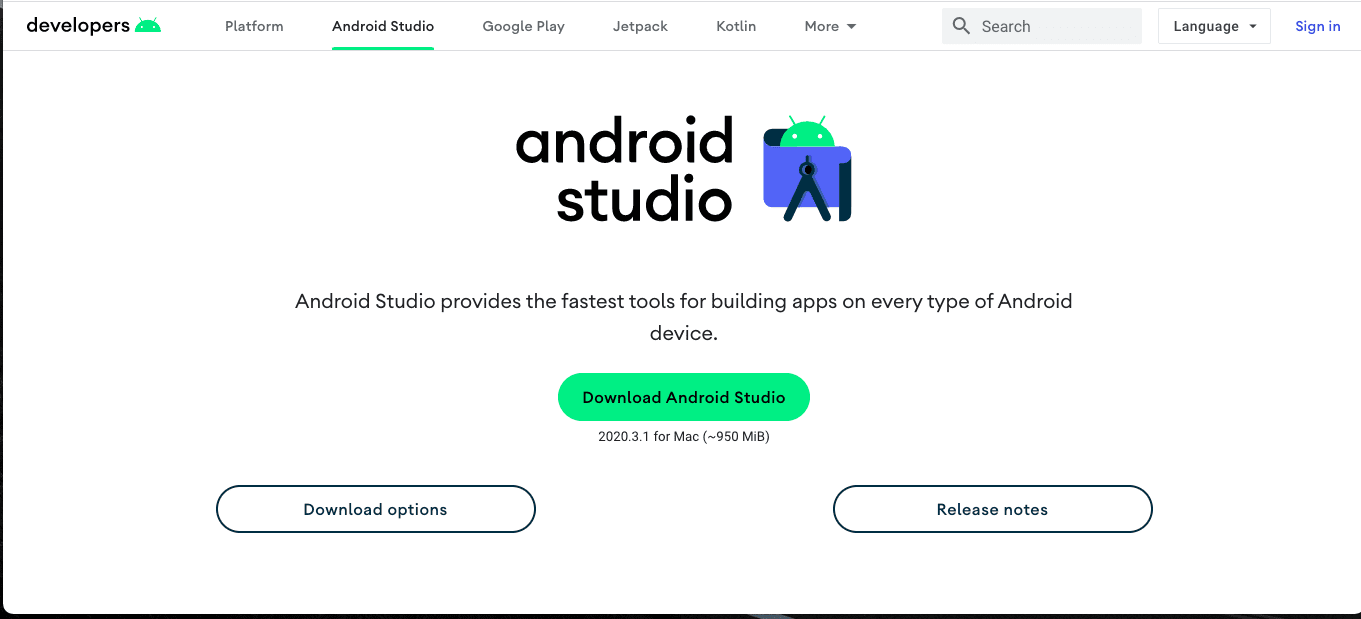
- Visit Android Studio’s official page

Android Studio official page
- Download the Android Studio installer application for your operating system. (this might take a while contingent on your internet speed)
- Open your Downloads folder and install the downloaded Android Studio application.
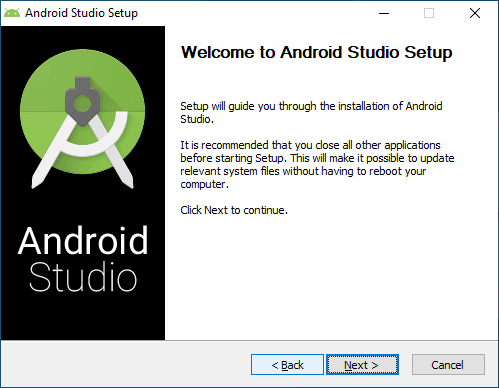
- Follow on-screen guides to complete the installation process.

Android Studio Installation Screen
That’s all. You have installed Android studio.
After a successful installation, proceed to the next phase.
Step 2: Enable Virtual Machines (VMs) acceleration
For smooth functioning of the VMs, it is recommended to enable acceleration. Most modern CPUs provide users with extensions to enable VMs acceleration. If you have not enabled or activated virtual machines acceleration, follow the steps below:
- Launch the Android Studio application we installed in the previous step
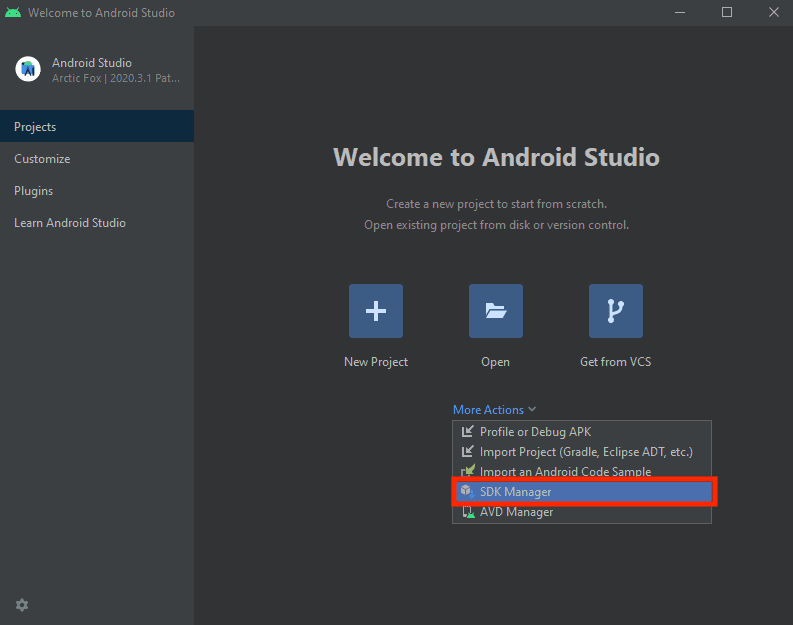
- Under the welcome screen, click on the “Configure” button located on the bottom right corner, as shown in the image below:Note: In newer versions of Android studio, don’t bother looking for the configure button. Click on the “More Actions” and select the “SDK Manager” option. as shown in the image below:

Select more actions and choose SDK Manager
- Now select the “SDK Manager.”
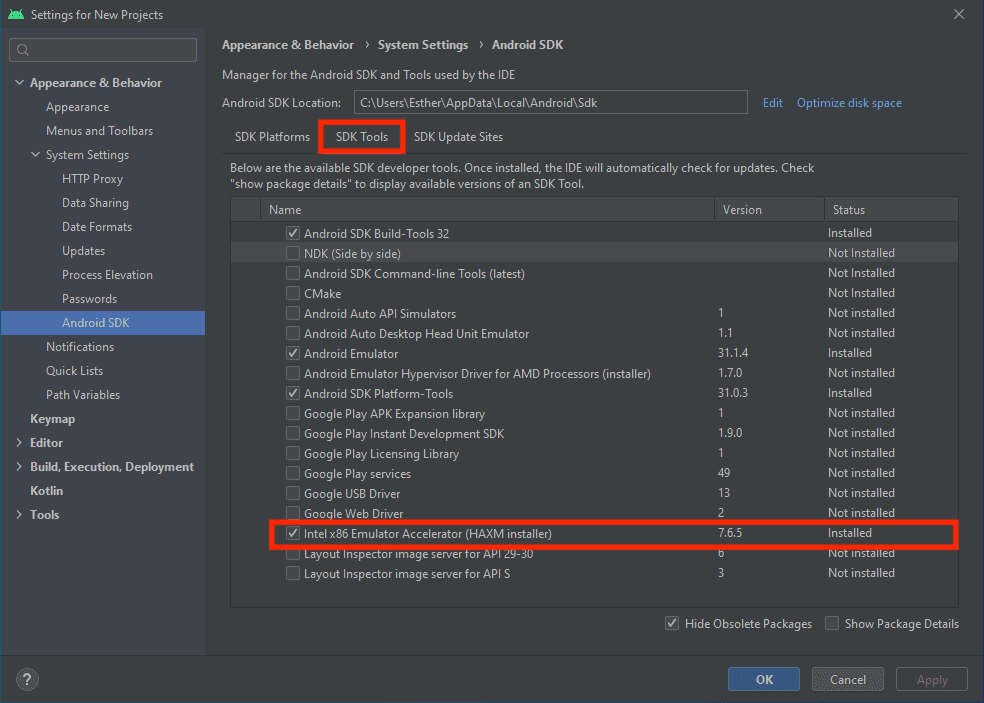
- Choose the “SDK Tools” tab and select the “Intel x86 Emulator Accelerator (HAXM installer).”

SDK Tools tab
- Click “Apply” to save the changes.
- Ensure you choose a minimum of 2.0GB recommended RAM for the HAXM Emulator Accelerator. Besides, don’t forget to confirm the installation if prompted
Wait for the installation to complete and proceed with the remaining steps below:
Step 3: Download the Chrome OS image
We need to download the Chrome OS image to run the Chrome OS virtually on our emulator.
Note: You can acquire the Chrome OS image via the Android Studio SDK Manager.
For this tutorial’s sake, we shall download the Chrome OS image using the steps highlighted below:
- Launch Android Studio
- Choose the “Configure” button, followed by “SDK Manager,” as we did while enabling the virtual machine’s acceleration. Alternatively, if you are using a different Android Studio version, click on “More Actions” and select “SDK Manager” as displayed below:

Select more actions and choose SDK Manager
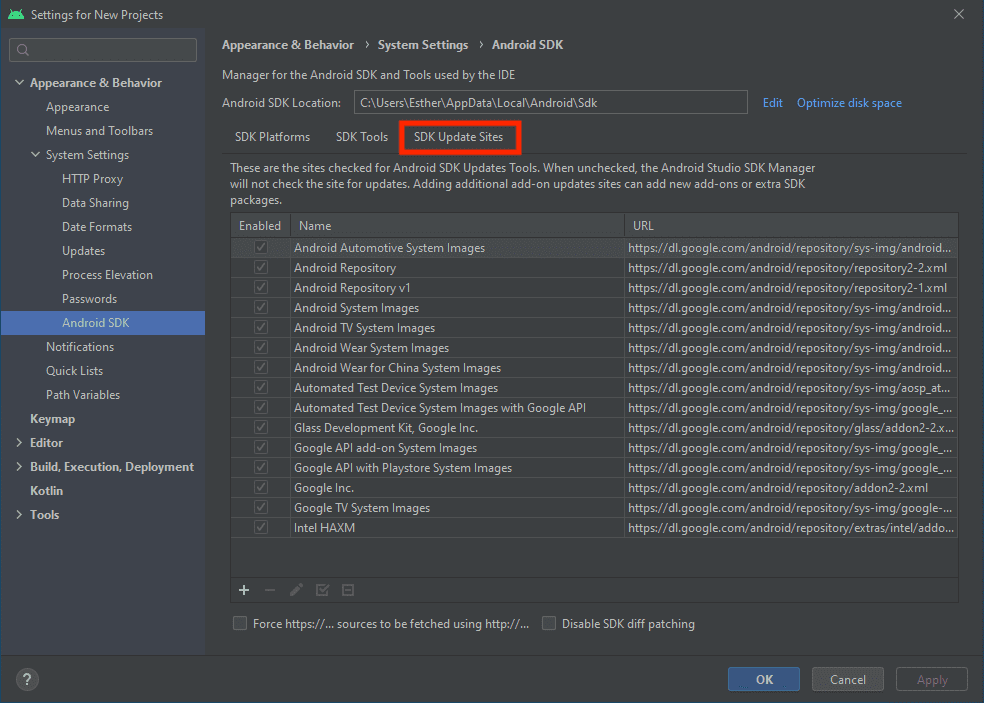
- Switch to the “SDK Updates Sites” tab

SDK Updates Sites tab
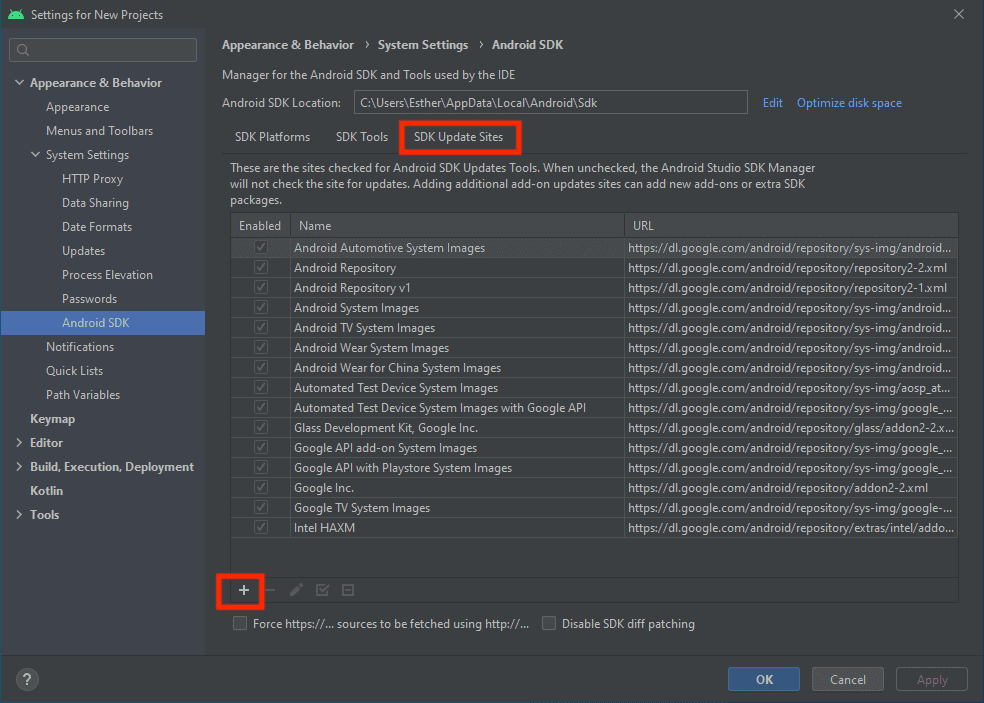
- Click on the + button located at the bottom side of the window, as shown in the image below:

Click the + button located in the bottom of the page
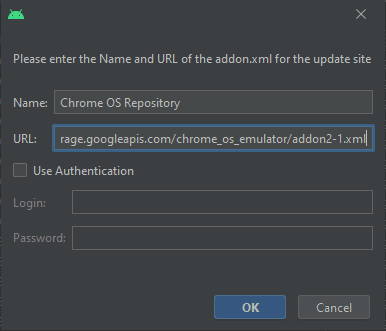
- Type the command below in the new dialog window:
Chrome OS Repository
Next on the URL field, add the URL below:
https://storage.googleapis.com/chrome_os_emulator/addon2-1.xml
Note: Ensure the above command and URL are typed correctly in their respective “Name” and “URL” fields.
Once you fill in the fields, click on the “OK” button.

Add the following commands in the Name and URL field, respectively
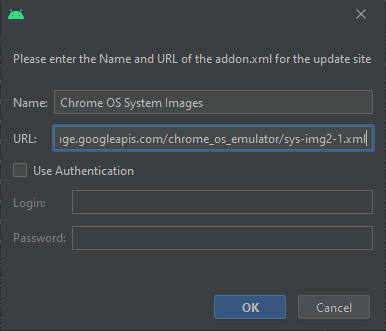
- Click the + button as we did in step 4 above and input the following command and URL, respectively:
Chrome OS System Images
https://storage.googleapis.com/chrome_os_emulator/sys-img2-1.xml
Like we did in step 5 above, ensure they are both typed correctly in their respective fields and save the changes made by clicking the “OK” button.

Add chrome os system images to the name field and URL to the URL field
- Once you are done, click on the “Apply” button
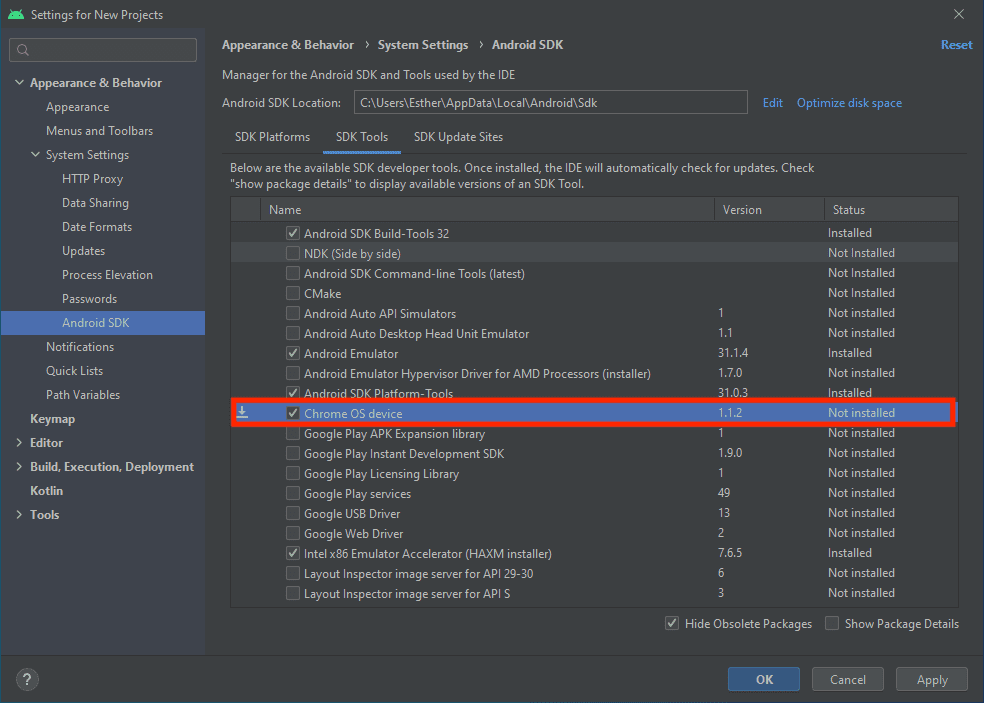
- Go back to the “SDK Tools” tab and check the “Chrome OS device” checkmark and click “OK” to install all the necessary tools.

Check the tickmark next to the Chrome OS device
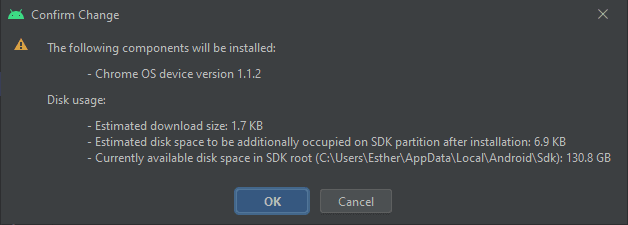
- Ensure to confirm the prompt if asked to do so.

Confirm Chrome OS device installation
- Be patient as the tools are installed. After complete, restart the Android Studio application to save the changes made.
Step 4: Creating a Chrome OS Android Virtual Device (AVD)
After successfully downloading the Chrome OS system image, it is time to create a virtual device environment to run the Chrome OS on an emulator.
To create a Chrome OS AVD, follow the steps provided herein:
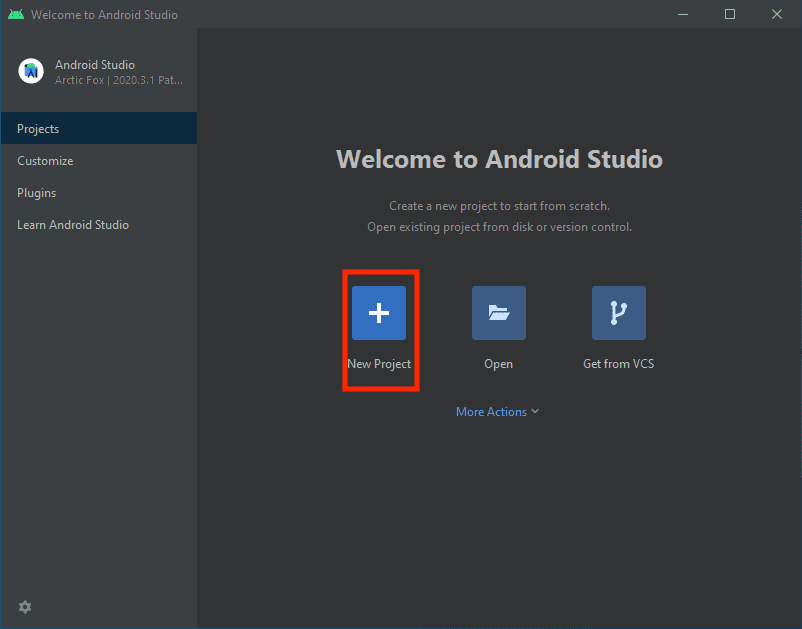
- Launch Android Studio and select the option to “Start a new Android Studio project.”Note: On some Android Studio applications, click on “New Project.” You will see a window similar to the one shown below:

New Project
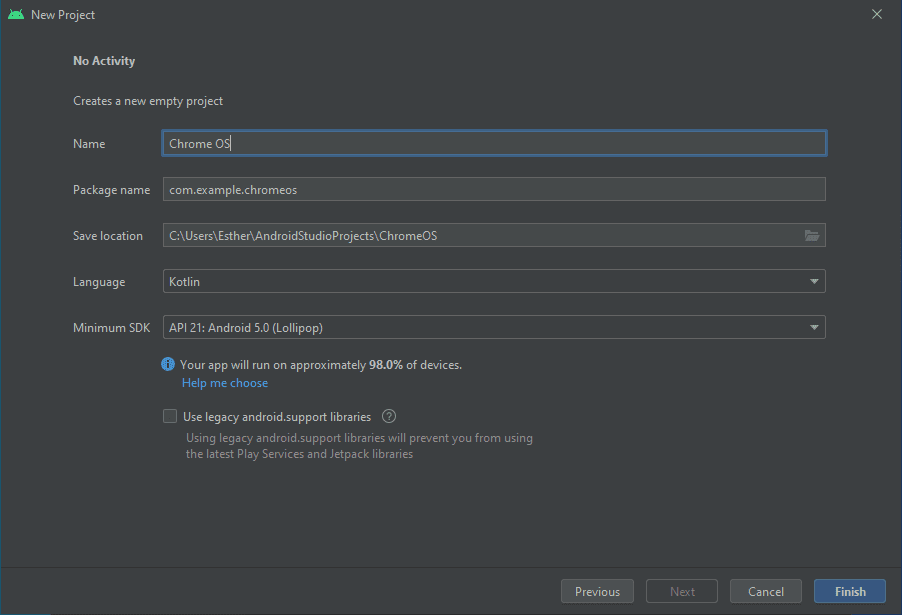
- Follow the on-screen guides to create a new Android Studio project

Android Studio Creating a new project
Note: It is vital to create a new project since the AVD manager can be found on the workspace screen. Reliant to your internet speed, this process might take a while to download some necessary files.
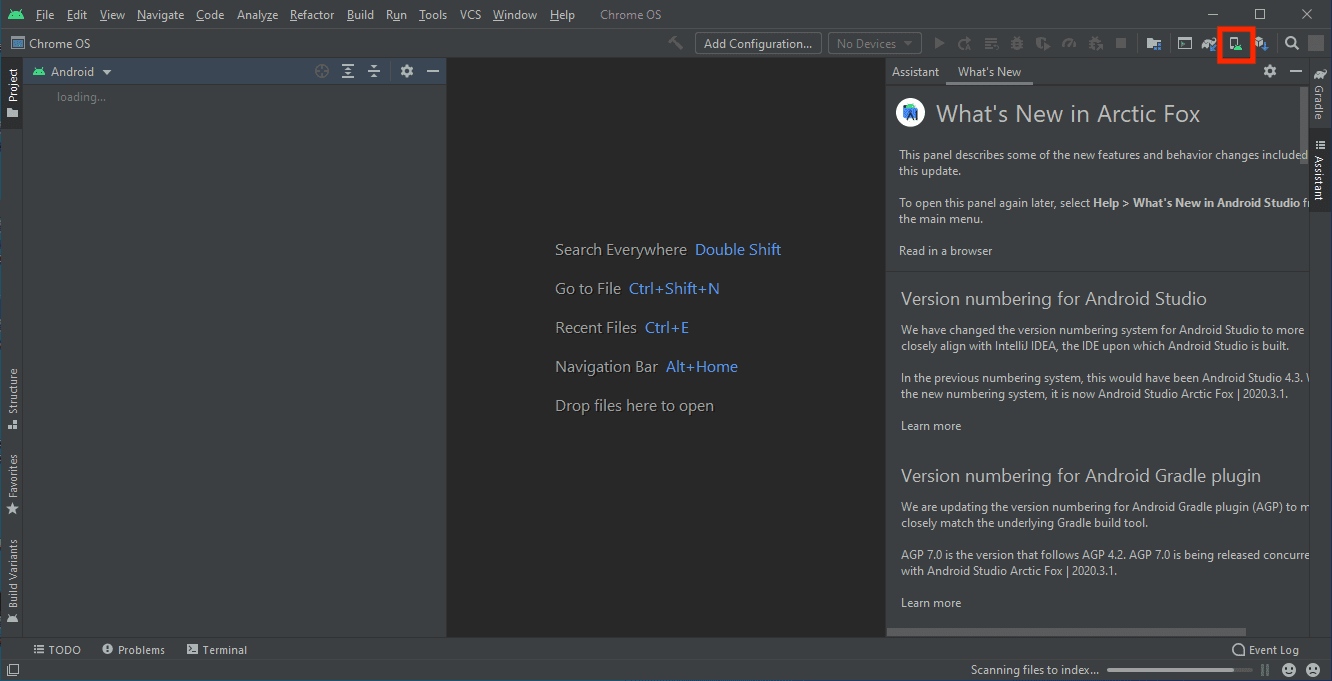
- On the top-right corner of the project window, click on the “AVD Manager” button as shown in the image below:

Click the AVD Manager on the top-right corner
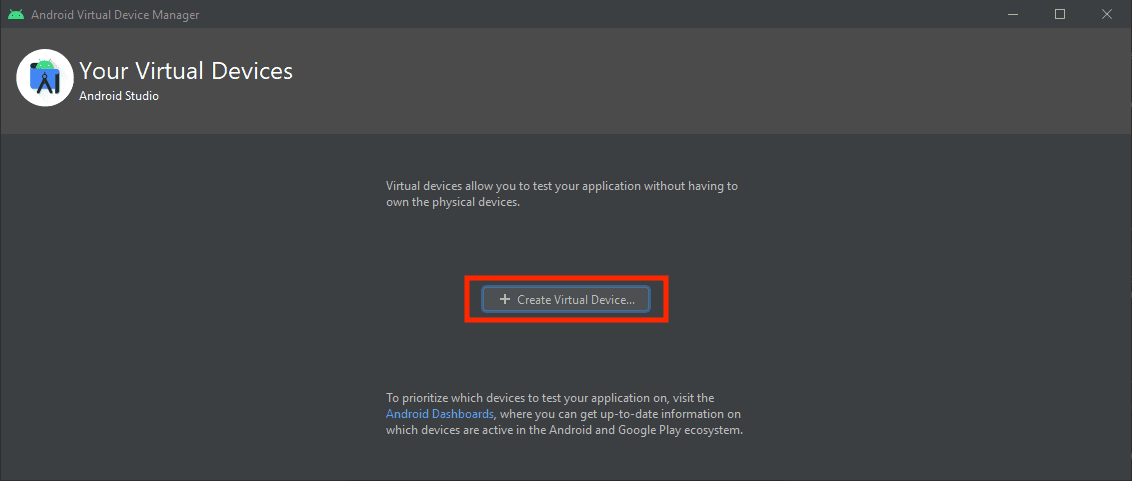
- Click on the “Create Virtual Device button.”

AVD Manager create a new virtual device
- From the left side, select “Tablet” and then choose the “Pixelbook (beta)” and click the “Next” button to proceed.

Select Tablet then Pixelbook (beta) and click Next to proceed
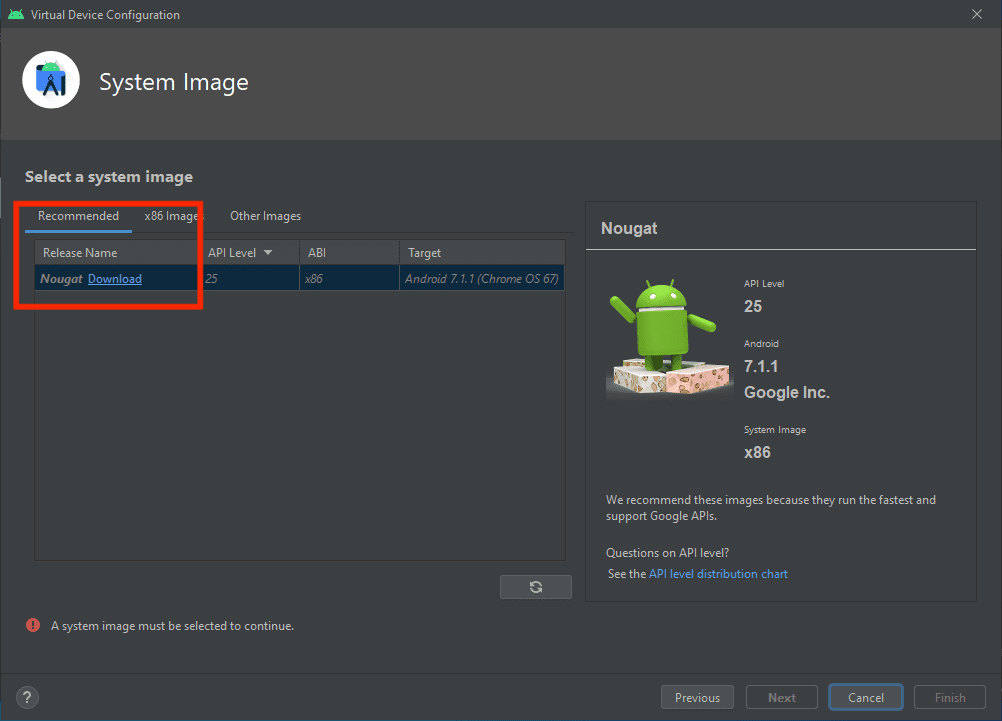
- Select the Chrome OS system image we downloaded previously in this article. This image will be used to create an Android Virtual Device (AVD).Note: Your system should have the required SDK Platform for a new AVD. If you don’t have one, don’t worry, as you can download it directly from the software “Recommended” tab as shown in the image below:

Download the required SDK platform for your new AVD Manager
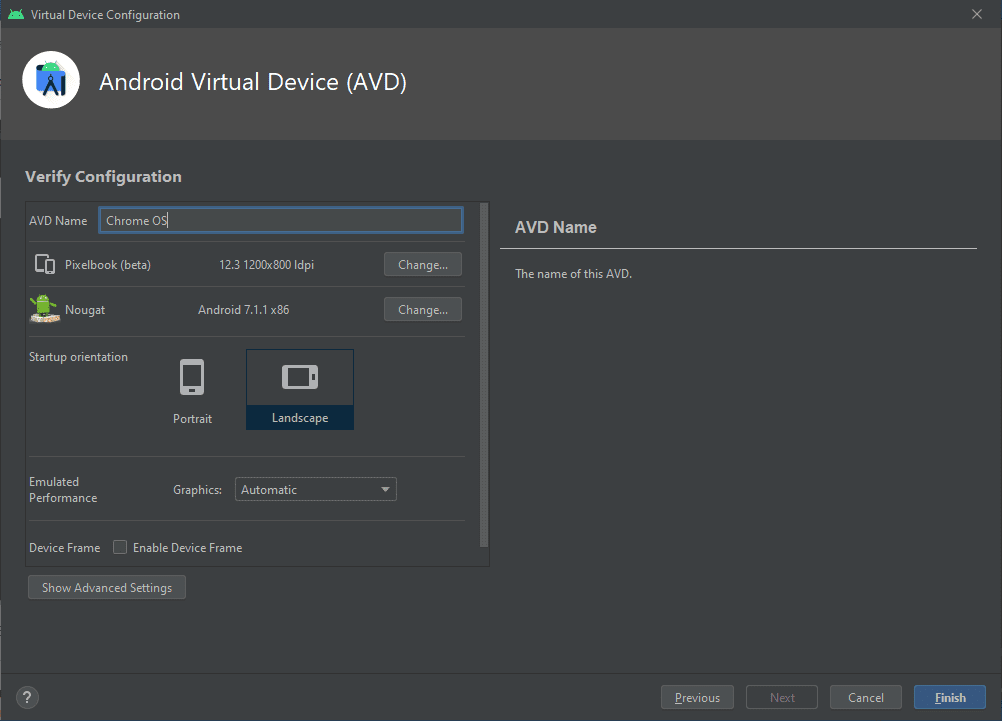
- Ensure you verify the new AVD settings.

Confirm AVD Settings
- Click “Finish” once you are done.
After everything is set up, you will see an entry in the Android Virtual Device Manager. Next, launch Chrome OS by clicking the “Play” button.
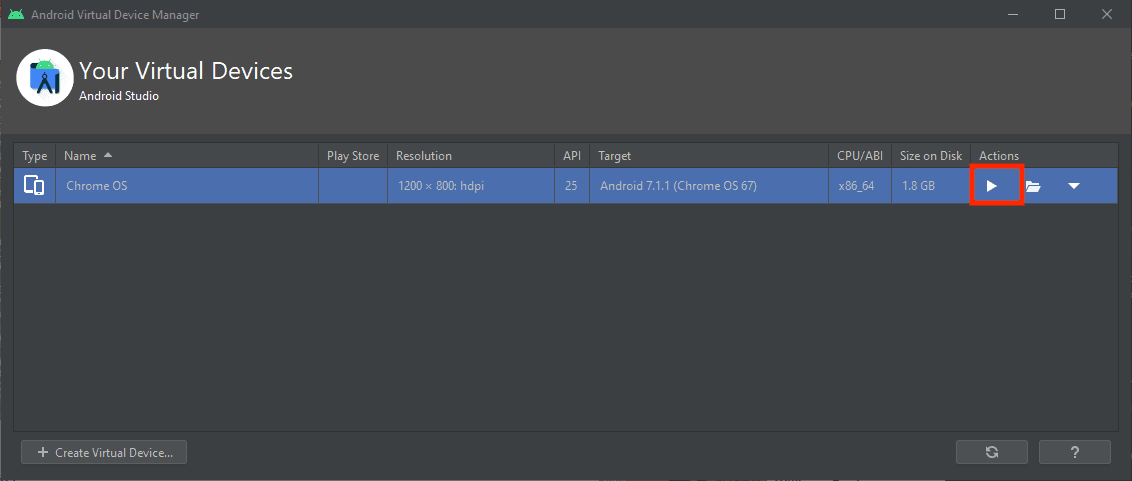
Click the play button to launch the Virtual Chrome OS
With Chrome OS running virtually, you can now test any android application to see if it is compatible with Chromebook hardware. The installation process might not be as direct as you might have anticipated, but it is also not complex.
Conclusion
This article guide was comprehensive enough to help you learn how to test your android applications for Chromebook compatibility without having Chromebook hardware. You can use this virtual emulator to test the application compatibility before purchasing your Chromebook. It is a good way of checking if your apps will be compatible without incurring any extra costs. You can attempt it out for free by following this article guide.
