Cursive writing is a unique type of handwriting where you join letters together and form words in a smooth flow. As opposed to block-style scripts where letters are penned in their capital forms individually, cursive writing is faster and boasts manifold benefits, especially for children.
Cursive can promote brain development by making little ones increase their memorizing and motor skills, not to mention enhanced neural connections. If you’ve been meaning to learn how to do cursive writing on your Chromebook, we’ve laid out a detailed guide to help you out.
Cursive is advantageous for adults as well, allowing them to improve their understanding of words, boost their focus, and involve different neural pathways all at once to get the entirety of the brain rolling. Therefore, there genuinely is no reason you shouldn’t try out cursive writing if you own a Chromebook with a digital pen or a docked stylus.
That is to say, if you’re thinking of getting a Chromebook with a built-in stylus, check out our top 10 picks for the best suggestions around. But, for now, let’s talk about cursive writing and how you can get it on Chrome OS.
Cursive writing on Chromebook
It turns out there is a couple of ways you can do cursive writing on a Chromebook. One of them is a definite and officially supported method given out by Google. At the same time, the other is a dedicated Play Store application that involves tutorials on cursive writing.
Before you can get started with either of those methods, it’s worth mentioning that you’ll be needing a touch-enabled Chromebook with a digital pen or a stylus. If you’re already past this prerequisite, it means you’ve done half the work. So let’s get into the methods one by one now.
- Find out how to use Google Meet with third-party video-conferencing applications here.
Option #1. Using Cursive — A Google-developed application for cursive writing
The first option for cursive handwriting on Chromebook is, eponymously, Cursive, and it could be the last one you’ll ever need. This feature-rich Progressive Web App (PWA) runs smoothly on Chrome OS and other Google-powered devices, including Chromeboxes and Chromebases. It can even work on tablets as well. Before we get into its installation, lets us highlight some of the most noteworthy features of the Cursive web application.
Cursive’s best features
Simplified user interface
The Cursive PWA comprises a streamlined user interface that doesn’t take much for a beginner to grasp wholly. It’s clutter-free and uses only a handful of options that can allow you to escape any potential complexity and make things as clean and straightforward as they can be. As a result, it’s perfect for newbies and experts alike, both of whom want a high-performance application for taking notes.
Gesture functionality
Cursive boasts support for a diversity of gestures that not only make the user experience more convenient but make you look pretty stylish while working with them as well. For instance, to delete a specific word, all you have to do is scribble over it aimlessly, which should rid the page of that word.
Another gesture that can uplift your productivity by leaps and bounds is word selection. If you want to select a specific word, you must create a circle around it. You will then move the chosen term around and place it wherever you desire on your page.
Lastly, you can add space between two different lines using an exceedingly undemanding gesture. Draw a line under the text you want to target, and that should make an arrow appear right where you drew. You can then drag the pointer up or down, depending on whether you want to create or decrease the distance between the two lines.
Notes organization
The Cursive application also lets you organize notes according to where they belong. Doing this is nothing but painless too. An easy-to-approach option rests at the Cursive home screen that allows you to add a note to a specific notebook.
Speaking of which, you can also create different notebooks in Cursive. You can color and name your notebooks to keep them organized and well in check. These little, nifty features go a long way in ensuring your workflow stays in motion and fully sorted.
Share and export
Cursive isn’t just about taking notes. It’s about sharing them as well. It employs an export feature to share your notes in PDF format. All you have to do is click on the three-dots-shaped icon after selecting a note from the Cursive home screen and proceeding to select “Export as PDF.” A download will begin as soon as you do that, letting you send the file to others so sharability can be uncomplicated.
Installing Cursive on Chrome OS
Cursive is generally a web application that has been intended by the developers to be used within an internet browser. That is to say, you can run this web app perfectly in the Chrome browser or Opera too, but that doesn’t mean you can’t install the program on your Chromebook.
You’re perfectly able to get cursive on Chrome OS locally, so you can even use it when you’re offline. The installation, however, isn’t so easy to kick off, and you have to have a keen eye out to spot the download icon for this PWA. All of this will be described more in-depth in the following tutorial, so let’s get right down to it without any further ado.
- The first step you have to perform to download Cursive on Chrome OS is to use the PWA’s direct link, “https://cursive.apps.chrome.” Then, continue to the next step once you’ve arrived at the application’s main user interface.
- You now have to look out for a distinct download button that’s situated at the top URL bar of your Google Chrome browser. The following screenshot specifies where to click to get started.
- Tip: The download button may not be instantly visible on the URL bar of the Cursive tab. It may take a couple of minutes to appear, so we advise waiting a bit if you don’t see it right away.
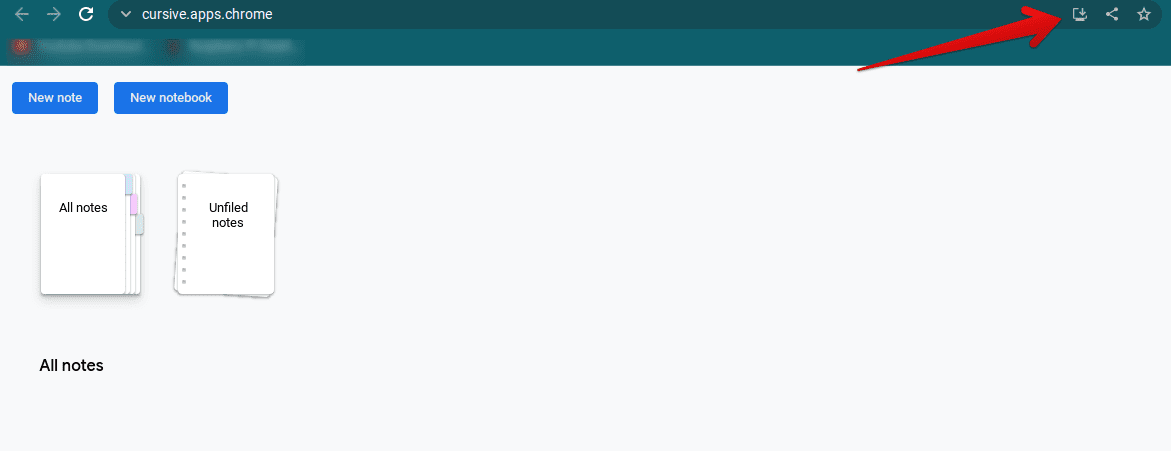
Clicking on the download button for the Cursive PWA
3. As soon as you click on the download button, you’ll find a pop-up appearing on the screen. This will be a confirmation prompt, asking you whether you want to proceed with the installation of Cursive on your device or not. Click on “Install,” as shown below, to continue.
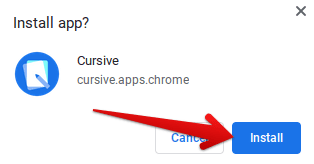
Installing Cursive by confirming the prompt
4. After clicking on the “Install” button, you’ll have to wait a brief moment until the application has been installed on your device. Check your Chromebook Launcher for the application once you’ve been notified that the process has concluded. You can press the “” icon at the bottom-left corner of the interface of Chrome OS to bring up all of the installed apps.
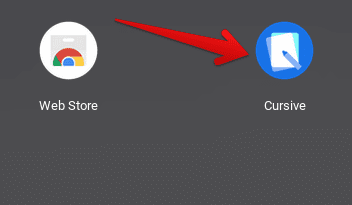
Cursive application installed on Chrome OS
Good going so far! You’ve successfully learned how to install Cursive on your Chromebook. Click on the app icon to launch it and give the handwriting PWA a whirl.
Cursive app’s working on Chromebook
The Cursive application can be used both online and offline, but since we’ve already talked about downloading it in the above section, we’re going to run the offline Cursive version on our Chromebook. As soon as you click on the application, you’ll be met with an introductory screen that’ll greet you for coming to Cursive.
It’s surely worth taking the time out to get started with the initial tour of the application so that you can check out all the features above of the Cursive app duly in action. First, as specified in the screenshot below, click on “Quick tour” to check out some basic instructions, including the gestures that we talked about earlier.
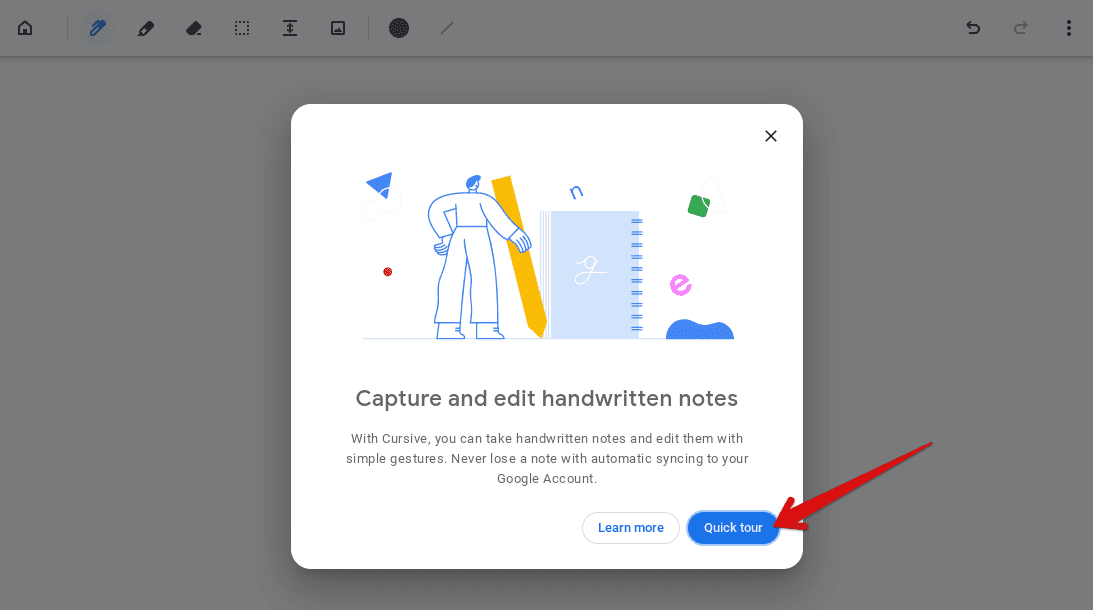
Starting the quick tour of the Cursive application
Once done, you’ll see a series of different pages, each separated by a single button that will allow you to switch back and forth. After going through the instructions provided on each page, you’re free to progress forward and click on “Next.” Make sure that you understand each gesture to get the best possible experience from the Cursive application.
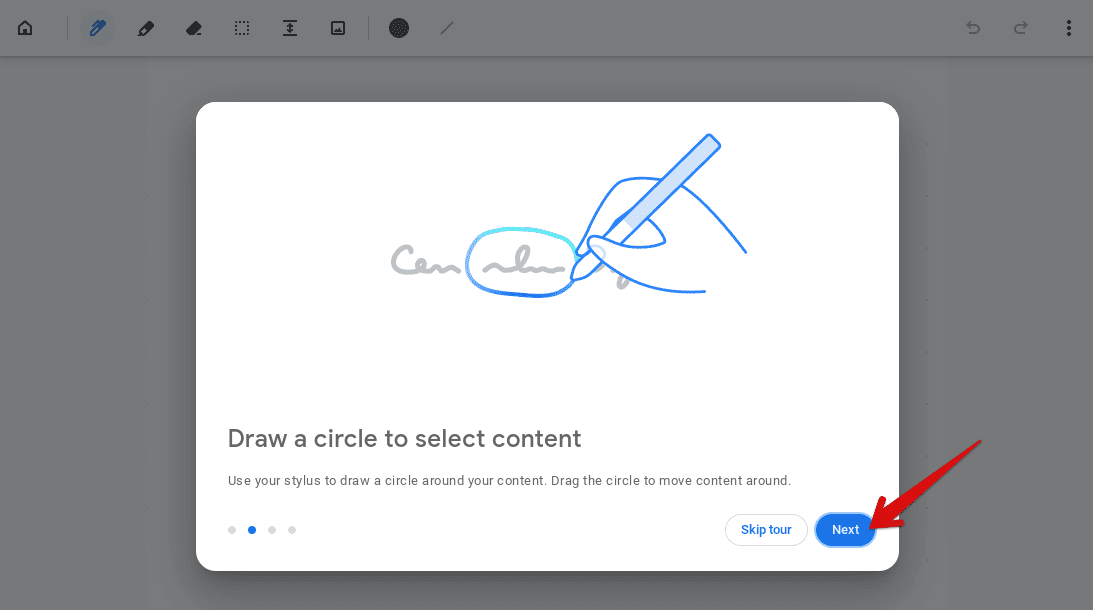
Clicking on Next to end the quick tour
Once you’re through the introduction, you’ll now be shown the main user interface of this intuitive Progressive Web App. The whole thing is put together quite compactly, as it looks entirely fitting with the overall mantra of Chrome OS. You’ll find options for changing the stroke thickness, switching between a highlighter and a pen, bringing up the color palette, and a few others—all in all, a highly organized experience that makes short worky of any potential complications.
We recommend switching to the stylus mode to start jotting down creative ideas with your Chromebook’s built-in stylus or a separate digital pen. First, click on the three vertically placed dots in the top-right corner of the drawing interface of Cursive to reveal a drop-down menu. Then, click on “Switch to stylus mode,” and you’ll be good to go.
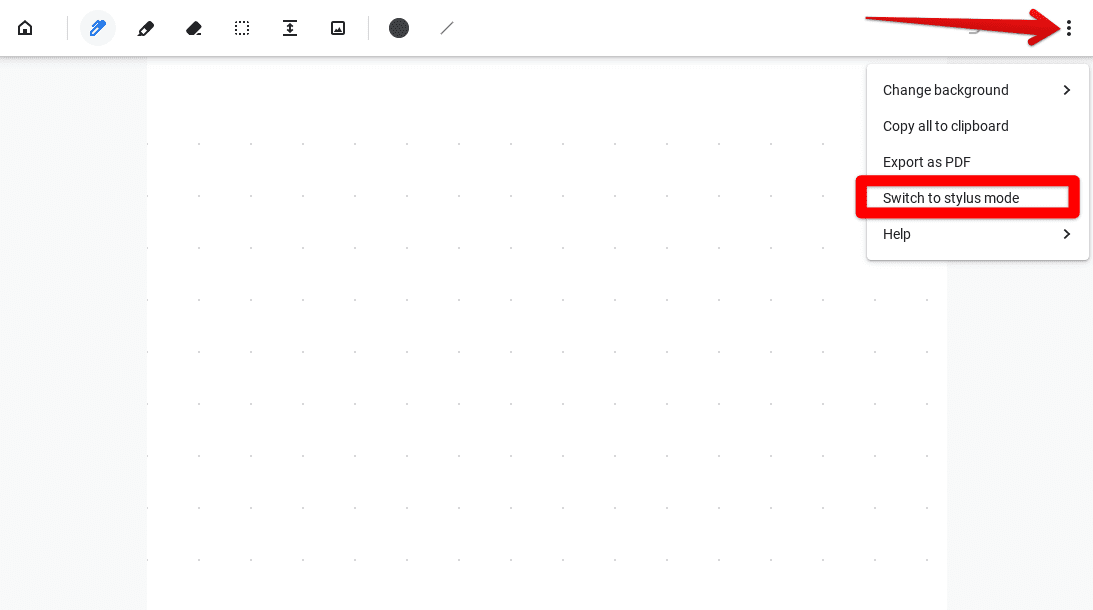
Switching to Stylus mode in the Cursive application
This is all you need to know about the basics of the Cursive application on Chrome OS! We’ve talked about its best features, the installation procedure, and its working as well to help you get started with it. All that’s left now is for you to put in the knowledge you’ve gained into the app and begin cursive handwriting. This is an exceedingly exciting application released by Google that will come in handy to adults and kids for the years to come.
Before we can get started with the second option for doing cursive writing on Chromebook, you should be aware of the potential problems you can run into while using Cursive and promptly get rid of them. The following section, therefore, is going to discuss just that briefly.
How to fix any potential problems with Cursive
One of the first things that will cause Cursive to give you problems on your Chromebook is storage space. You can check out the available RAM on your device from time to time to make sure storage isn’t an issue for you, and you’re keeping things under control.
Another causative agent for the Cursive app not working on Chrome OS is cookies. Your device probably isn’t allowing the application to use cookies, and that’s where things can go south.
You can click on the three vertical dots to explore the app’s settings and click on “Cookies” to enable all of those that are necessary. In addition, you can double-check whether the cookies have been disabled or they’re working. Check out the following screenshot. It clearly shows that several cookies are already in use; thereby, the PWA runs perfectly.
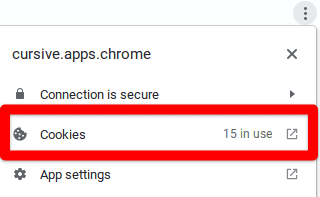
Enabling cookies for the Cursive app
Option #2. Downloading a Google Play Store app for cursive writing
There’s another Google Play Store application up for grabs that can get you in on cursive writing on a Chromebook in quite an eloquent manner. However, you should know beforehand that this option is suited for parents looking to teach their kids cursive handwriting.
The application in question is fantastic for learning material and comprises fun, interactive lessons detailing everything your little one needs to know about cursive writing. But, of course, all this is bound to be possible on your very own Chromebook, thanks to the Google Play Store.
- Ensure that you know which Chromebooks run Android and Linux apps, so you don’t miss out on two of the most excellent functionalities of Chrome OS.
Therefore, the steps listed below will walk you through the process of installing the Cursive Writing Wizard app on Chrome OS.
- The first step, as always, is to fire up the Google Play Store on your Chromebook. That can be done through the Launcher area or from the interface shelf if you have it pinned there.
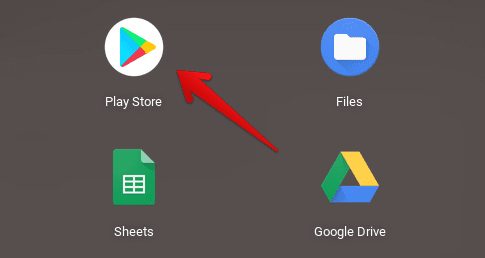
Opening the Play Store
2. Once the Play Store window launches, use the app’s in-built search bar and look for Cursive Writing Wizard. You’ll receive multiple suggestions during this step, but pressing the “Enter” key will do just fine.

Searching for Cursive Writing Wizard on the Google Play Store
3. Completing the last step will take you straight to the official app page of Cursive Writing Wizard. Click on “Install,” as shown in the screenshot below, to begin the download. The application’s file size is about 33 MB, so this isn’t going to take a long while, depending on your internet connection’s speed.
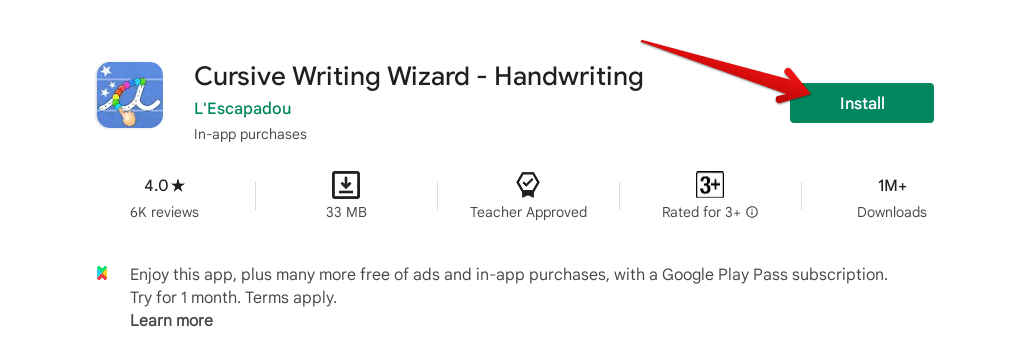
Clicking on the “Install” button for Cursive Writing Wizard
4. Once you’re through with the installation and you’ve been notified that the application has been installed on your Chromebook, head over to the Launcher area and find the app sitting there, awaiting your attention. Click on the Cursive Writing Wizard app icon and give it a go.

Cursive Writing Wizard installed on Chrome OS
That’s about it for the installation part. Let’s launch the application now and see how it operates on Chrome OS.
Cursive Writing Wizard working
Cursive Writing Wizard
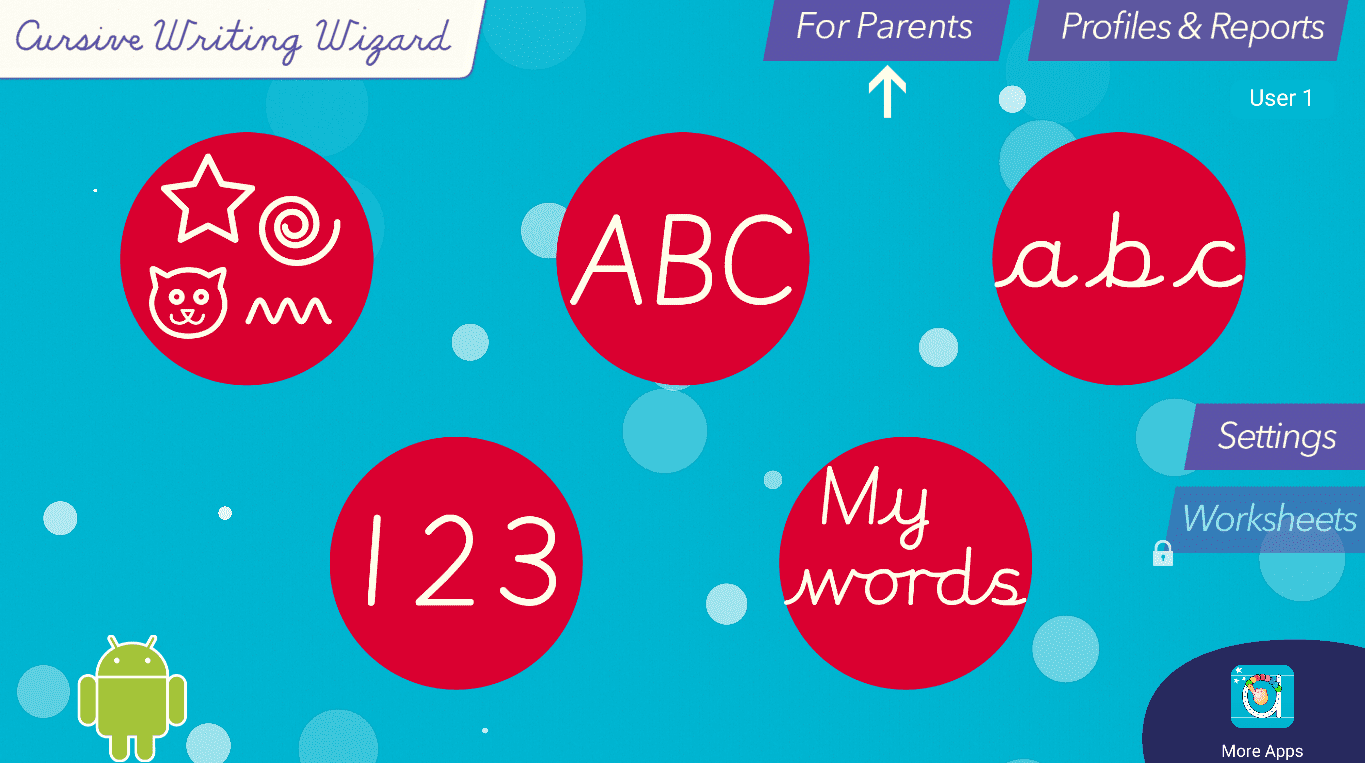
The above is what you see when you launch Cursive Writing Wizard. The application has been fully optimized for Chrome OS so that you won’t be experiencing lagging, bugs, or any other glitches for the most part. This program can help your little one get started with cursive writing and get a genuinely good grip on it in a relatively short period.
Different sections within the application can help you get started, but be sure that you’re sporting a Chromebook with a stylus for the best results. Perhaps, the ASUS Chromebook Flip CX5 can spark your interest if you’re in the market for a new device.
In the “My words” area of the application, you’ll find different words to practice for cursive writing, fundamental ones that can serve as an excellent foundation for children to learn with.
A swath of settings can be tweaked to enhance the application’s user experience, such as more significant margins, a dedicated left-handed mode, font size, game time limit, and different sound options.
In summary, it’s simply one of the best applications out there—being teacher-approved—to start learning how to do cursive writing on Chromebook, especially if you’re a parent looking to make the children explore newer horizons. Even a paid version of Cursive Writing Wizard unlocks premium features for a deluxe-grade experience.
Conclusion
Chromebooks are open to an expansive list of features now, given how much they’ve come far ever since their initial release. These sleek devices can run WordPress, Kali Linux, and even Steam using the highly convenient Linux container that comes built-in in modern-day Chromebooks.
Furthermore, if you’ve been meaning to find out how to do cursive writing on a Chromebook, then you now know by reaching the end of this article that there are two different ways you can easily accomplish the task at hand.
In this write-up, we’ve talked about two unique methods, and while the second one is great and all for kids and school-going children, we will recommend shooting for the first method, Google’s officially created Cursive application. It’s more of a note-taking program rather than learning-based, so you’re bound to have more flexibility with it.
Chrome Ready wishes you happy and creative writing!
- Find out how to unenroll a school Chromebook to unlock the full potential of your device.

1 comment
There’s an app called Inkcredible that works MUCH better than Google cursive, and I believe they have templates for writing. The ink is smooth and doesn’t leave your writing looking like you were riding on a conveyor belt.