In this article, we’ll be showing you an easy-to-follow method of creating a Raspberry Pi Desktop USB installer on your Chromebook if that’s what you only have. We’ll be sure to make the instructions flow clearly, so there’s nothing along the way that you don’t understand. Without any further ado then, let’s put forth a hefty incentive as to why you should use Raspberry Pi Desktop as your next operating system to shoot for.
Raspberry Pi Desktop features
Simplified user interface
One of the best parts about the Raspberry Pi Desktop is its simplified, Chrome OS-like interface that makes short work of anything complicated like Windows, which can get quite demanding when it boils down to it.
Unlike traditional operating systems, Raspberry Pi Desktop features an interface where the toolbar is placed at the top of the screen, giving users quick access to the internet browser, an Independent Development Environment (IDE), and other important applications like the “File Explorer.”
You’ll also find an apps explorer button there that fully expands the applications you have on your computer. In addition, basic interface elements like a clock, Bluetooth, a Wi-Fi menu, and volume options are placed for easy access. It’s a bit reversed compared to something like Windows, but rest assured, as you can get used to it soon.
Raspberry Pi Desktop is based on PIXEL. This acronym stands for “Pi Improved Xwindows Environment, Lightweight.” Having such a commendable foundation, Raspberry Pi Desktop looks and feels effortless to work with.
Since it’s intended to work on older devices that either do not work correctly anymore or cannot upgrade to the latest version of the operating system they’re currently running, you can expect blazing-fast performance from the software at hand that doesn’t slow down for anything.
Perfect for Linux users
Raspberry Pi Desktop features a lightweight environment deemed perfect for Linux users. Programming and coding using different text editors will be a breeze on this operating system, and you’ll see how.
Chrome OS already has many ways for an individual to write code and do programming, as we’ve talked about it all in our master guide that you can check out here. Still, Raspberry Pi Desktop is more inclined towards providing users with an Independent Development Environment (IDE).
The operating system already comes with many IDEs by default, such as Greenfoot and Thonny Python IDE. Education-oriented programs like Scratch also show their prominence on Raspberry Pi Desktop. But then, there is the open-source potential of the Raspberry Pi that lets you implement your additions to the mix without breaking a sweat.
How to create a Raspberry Pi Desktop USB installer
The following is a step-by-step guide on creating a Raspberry Pi Desktop USB installer on your Chromebook. To give you an overview of what we’re about to discuss, our first task is to grab the Raspberry Pi Desktop ISO from the official website.
Once that’s done, the next step is to download and install a specialized Linux application on Chrome OS called balenaEtcher. The software will help streamline the process and make the rest of the procedure duly possible.
Before we get started with everything, though, it’s worth mentioning that you need to have a Chromebook that is compatible with the Linux subOS.
We sense that this will be unlikely if you’re sporting a dated model. However, for those interested, look at this complete guide to check out all the listed Chromebooks compatible with Linux and Google Play Store.
If you have confirmed that your specific model of the Chromebook isn’t supported by Linux or Play Store, consider installing Linux as a standalone program on your Chromebook for better results.
Without any further ado, then, let’s jump right in.
- Interesting in gaming on Chrome OS? Find out how to play online games on your Chromebook using this guide.
Downloading the Raspberry Pi Desktop ISO
The following steps are going to take it from here.
- Click on this direct link to get straight to the official Raspberry Pi Desktop for PC website. Scroll down a little until you find the “Download” button. Click on it to begin the download.
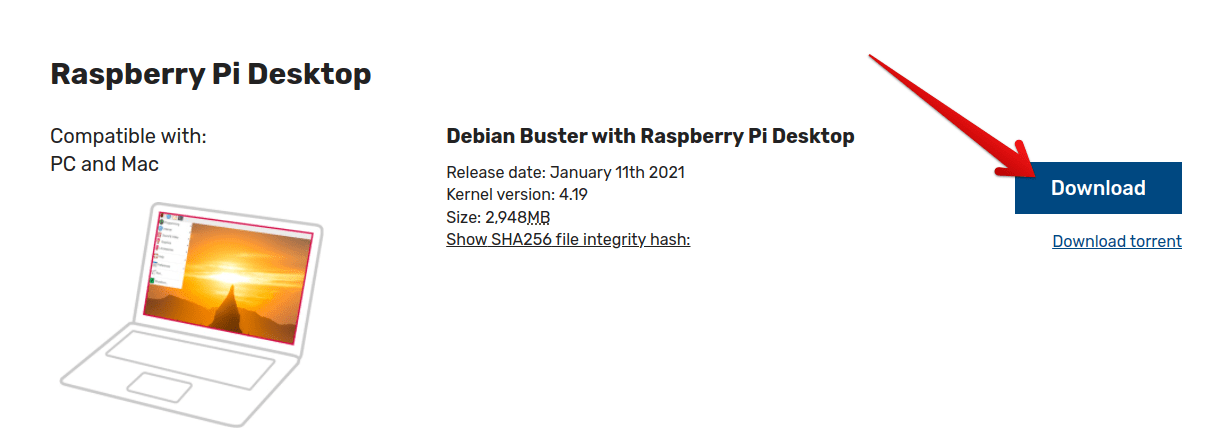
Downloading Raspberry Pi Desktop ISO for PC
2. The ISO file size is around 3 GB, so that the download can take a while depending on your internet connection’s speed. Once you’re notified that the downloading has finished, check the “My Files” application on your Chromebook for the Raspberry Pi Desktop ISO.

Raspberry Pi Desktop ISO downloaded
That’s about it for now. You’ve successfully downloaded the ISO; we need to further this process.
Chrome OS can’t do much with ISO files on their own. So if you were creating a Chrome OS recovery image, you would’ve needed to have the Chromebook Recovery Utility next.
Since we’re doing something a tad more complex at the moment, we require another program. Let’s get into all that now.
Installing balenaEtcher to prepare the Raspberry Pi Desktop ISO USB installer
balenaEtcher is one of the best cross-platform tools that you can grab online to prepare ISO files and get new operating systems to work on your devices. It’s an open-source utility, which means anyone with a brief background in programming can modify its source code to implement its features and is commonly used on desktop PCs to write images.
Due to the courtesy of the Linux container on Chrome OS, Chromebook users can also benefit from the effectiveness of Etcher. It uses a simple-to-follow installation procedure, which we’ll be getting down to shortly, and can be used to accomplish what we’re trying to achieve here in this article.
- Haven’t you set up Linux on your Chromebook before? Take a look at this descriptive guide that illustrates the process and makes the work effortless for you. You will need to have Linux set up and configured before installing balenaEtcher.
The following steps will detail the installation of Etcher on Chrome OS.
- The first step is to download the Debian file of Etcher so our Linux container can use it. To do that, click here to go to the relevant Github repository and click on the latest version of Etcher that ends with “amd64.deb.”

Downloading the Debian file of Etcher
2. Once you’re notified that the download has concluded for Etcher, go to your “My Files” application on the Chromebook and find the Debian file. It’s probably going to be in your “Downloads” section. Double-tap on your touchpad to reveal more options and then hover over “Open With.” Doing should show two more options for you. Click on “Install with Linux” to get to the next step.
Installing Etcher with the Linux container
3. Clicking on “Install with Linux” should open up another window for you. This is where you will be going forward with the installation of balenaEtcher. Click on “Install” after the system retrieves package information to continue.
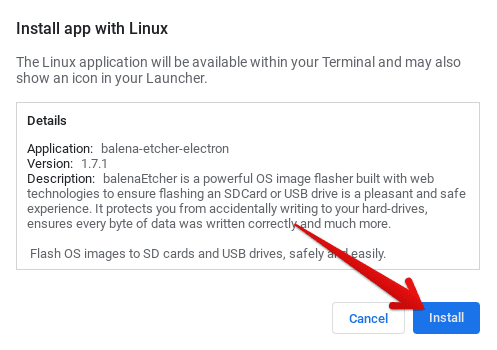
Clicking on the Install button
4. After clicking on “Install,” the process will begin. In the meantime, you can click on “OK” to close the installation window and wait until balenaEtcher is installed on your device.
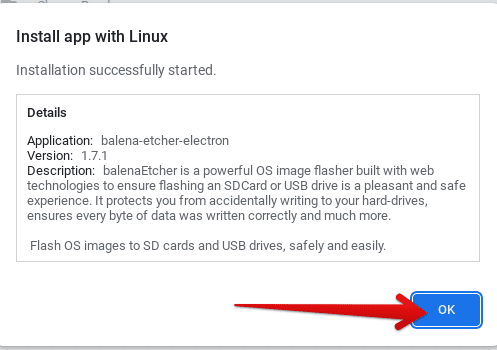
Closing the installation window
5. After the installation of balenaEtcher commences, a prompt will appear above the Status Tray area, which would essentially be one of your notifications. This prompt will show the installation progress for you, so it’s pretty easy to track that. Once you see that the installation has concluded, go into your Linux apps folder within the Chromebook Launcher to find the application sitting there.
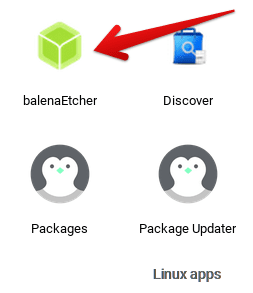
balenaEtcher installed on Chrome OS
That’s about it for installing balenaEtcher on your Chromebook. Time to give it a go and proceed with creating a Raspberry Pi Desktop USB installer.
Creating the Raspberry Pi Desktop USB installer
Now that you have the flashing tool, you require to create a Raspberry Pi Desktop USB installer and the ISO file of the operating system in question. You don’t have a lot of steps that are yet to be completed. To create the USB installer, begin by launching the balenaEtcher program on your Chromebook.
Once you have arrived at the application’s main interface, your first step is to click on “Flash from file,” which should open up your device’s local storage. Then, select the Raspberry Pi Desktop ISO to get to the next step when that happens.
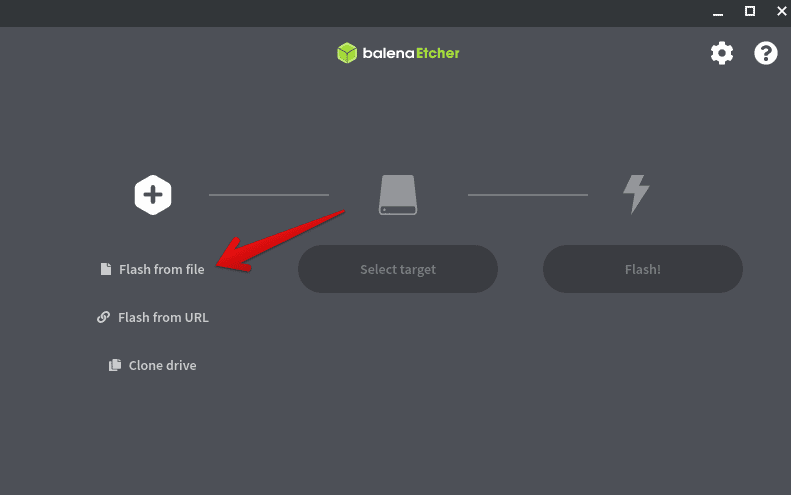
Selecting the Raspberry Pi Desktop ISO in balenaEtcher
Now that the Raspberry Pi Desktop ISO has been locked in, the next step is to grab a USB drive. Ensure that the drive you’re using has at least 8 GB of free space and doesn’t contain any valuable data that you might need later.
That is because every flashing process removes everything present on the USB drive being used—that’s just the way it works. Therefore, click on “Select Target” once you’ve inserted the external USB to select it. As soon as you’re done, click on “Continue” to get to the next step.
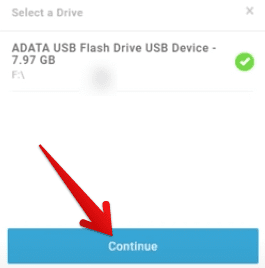
Selecting the USB drive for flashing the Raspberry Pi Desktop operating system
With the USB Drive selected and all, and the preceding ISO file already in place, it’s finally time to flash and prepare the Raspberry Pi Desktop USB installer. Click on “Flash!” to begin the process. Since we’re talking about a 2.3 GB ISO image here, the process will probably take a while. You can sit back and relax until then, but as soon as the process concludes, you’ll have to get to the next step.

Starting the Raspberry Pi Desktop flashing process
When balenaEtcher has finished flashing the new operating system to your USB drive, you will see a “Flash Complete!” screen where the program will give you the option of flashing another ISO file. Our work is done here as you’ve successfully done what you clicked on this article to do.
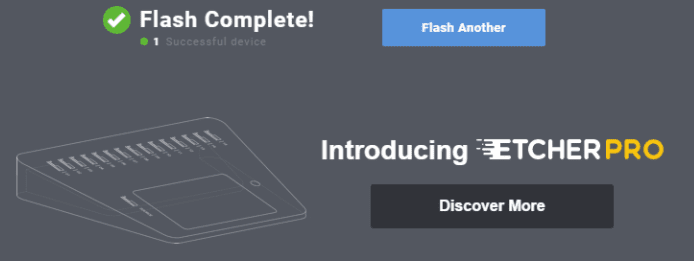
Raspberry Pi Desktop USB installer created
That’s about it for how to create a Raspberry Pi Desktop USB installer on your Chromebook. You can now safely remove the USB by going into the “My Files” application on the device and hitting the “Eject” button beside your USB device. This will ensure no data loss or any corruption occurs during the removal of the USB. Once you’ve done that, all that’s left is to boot up a device using the Raspberry Pi Desktop USB installer and proceed towards a full-blown installation.
We genuinely hope that you’ve found this helpful article for your cause. You’ve now reached the conclusion of the article.
- Similar Read: How to install CloudReady on a Windows laptop.
Conclusion
There will come a time when your specific device, may it be a Windows 10 PC, a Macbook, or a Chromebook, won’t do you any good and even fail to start up properly. That is when you’ll have only two options to work with: either sell the device at whatever price you get or let it catch dust in the corner of your attic somewhere.
Little do many people know that there is a third option amidst the mix, and that is all about installing a new operating system that could breathe new life into your now-useless device. Raspberry Pi Desktop is easily one of those anointed few that you can get and start using your computer perfectly again.
In this article, we’ve shown you how to do exactly that, starting from the features of this operating system right down to the process of creating a USB installer for it on your very own Chromebook. So be sure to follow the instructions as they’re written for the best results. Chrome Ready wishes you good luck!
- Now that you know how to create a Raspberry Pi Desktop USB installer delve into a similar read and find out how to create a Windows 11 USB installer.
