If you have been using Google Docs for quite some time, you might have noticed that this popular document editing software does not host a direct page border feature. Due to this, whenever you need to add borders in any document, you will have to rely on some workarounds.
These methods rely on tricky hacks to present that particular page with a border. If you want to copy this over the entire document, that can be done quickly.
Applying page borders in Google Docs
Google Docs is one of the most widely used word processors and boasts a vast user base. Though the platform relies entirely on cloud storage, it is not as feature-loaded as its competitors. For this very reason, a Google Docs user needs to have a few tricks under their belt to get the work done. When working on MS Word, the page borders can be inserted and formatted with a single click. That’s because MS Word has an entire tab set aside for this. However, this is not the case with Google Docs. When adding page borders in Google Docs, you may have to find an inventive solution.
The method you select for adding page borders in Google Docs is totally up to you. However, you need to keep in mind that the ways we will describe in this article will only display a specific kind of borders. Moreover, you might not find the formatting options too detailed either. Therefore, the method you choose also depends on the final presentation of that border. We recommend trying each way for at least one time and then deciding which one to use in different scenarios.
Even though you will not be able to customize the borders as much, there will still be some extensive formatting available at your disposal. This can also vary depending upon the type of content that is to be displayed inside the page border. Usually, the most appropriate option would be to select one style for the entire document. Once you have added a border on one page, you do not have to repeat every step on all pages. Instead, copy the insertion and paste it on whichever page you like. With the main idea of page borders in Google Docs sorted out, let us go over the methods above one by one.
Creating page borders with single-cell tables
Even though Google Docs does not support page borders, it still hosts the option of adding tables and modifying them however you like. We can use this to our advantage for adding page borders. This is undoubtedly the most common method of creating page borders in Google Docs. It is pretty easy to employ and does not take time. You can also insert all types of content inside a table, making this method even more favorable. Once you have inserted this table, you can fill it like a regular page. When creating or editing documents inside that border, you will not notice any difference.
When you insert a table in any word processor, the program asks you to select the number of rows and columns that you need in that table. When trying to use a table as a page border, you need to choose one row and one column so that you do not have any lines in between. Once done, you can then resize that single cell to fit the page. To use single-cell tables as page borders in Google Docs, you will have to observe the following steps,
Step 1: Open the desired document in “Google Docs.” Go to the page where you want to insert the page border.
Step 2: Click on the “Insert” tab in the taskbar. From the drop-down menu, select “Table.” You will see a mock-up table appear right next to this option. Select a 1 x 1 table.
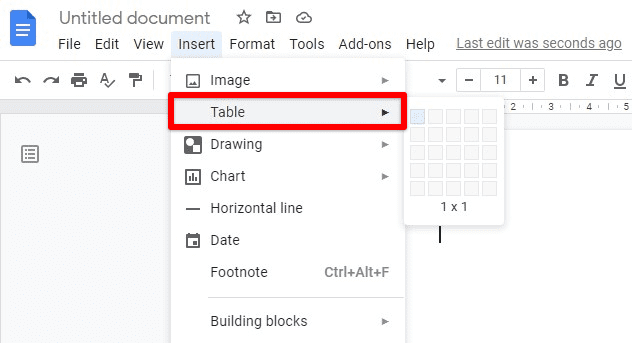
Inserting a 1×1 table
Step 3: A single-cell table will appear on the page. It will be in the shape of a long bar. You can now click over the lower side of that bar and drag it down to the bottom. Do not go over the margins since this will shift the table to the next page. You can also adjust the left and right sides similarly.
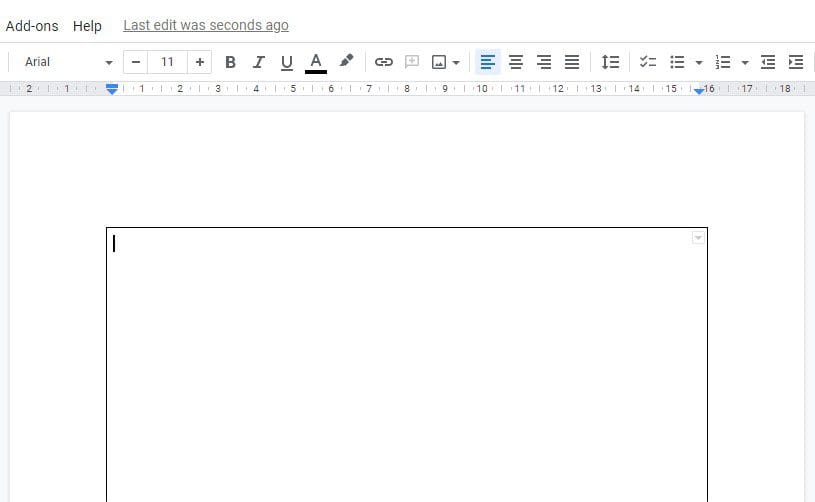
Table inserted
If you are happy with how the border looks now, this is all. The following steps are for users who need to format this border.
Step 4: With the table selected, click on the “Format” tab in the taskbar. From the drop-down menu, select “Table” and then go to “Table properties.” This will open a new window on the right side of your screen.

Inserting a 1×1 table
Step 5: Open the “Color” tab. Here, you can edit the border color and border width. You can also edit “Cell padding” under the “Alignment” tab. This allows you to increase or decrease the space between the page border and the content inside it.
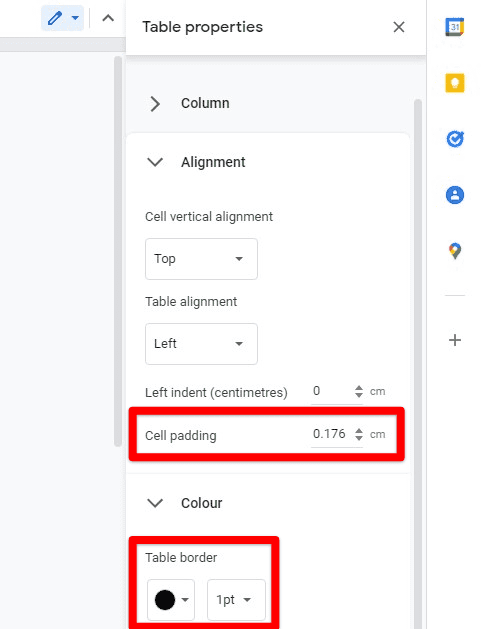
Adjusting border properties
Drawing page borders with the drawing tool
The second method of creating page borders in Google Docs employs the drawing tool. Since this tool enables us to draw clear line borders, we can format them to display as page borders. We recommend using this method, mainly when adding images and pictures to that page. Otherwise, text boxes will do the trick for you. For creating page borders with the drawing tool, you will have to undertake the following steps,
Step 1: Open the desired document in “Google Docs.” Go to the page where you want to insert the page border.
Step 2: Click on the “Insert” tab in the taskbar. From the drop-down menu, select “Drawing.” Next, click on “New” from the side menu.
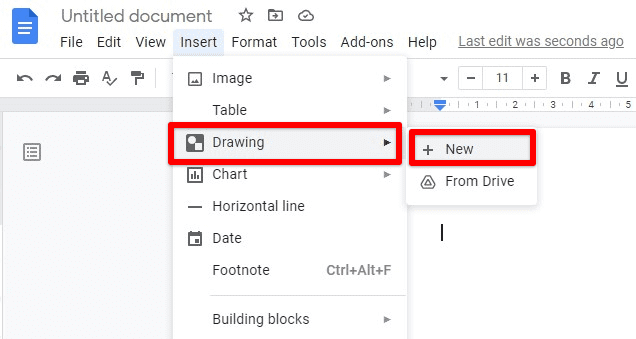
Inserting a new drawing
Step 3: This will pop up a new window on your screen. You can think of this as a new editor to draw whatever you want. We will use this feature to create a page border.

Drawing window
Step 4: Click on the shapes icon from the toolbar at the top. Go to “Shapes.” This will open up a variety of shapes for you to draw. Select a rectangle. Click and drag your mouse over the edit board to create one. Do not worry about its dimensions, as they can be edited afterward.
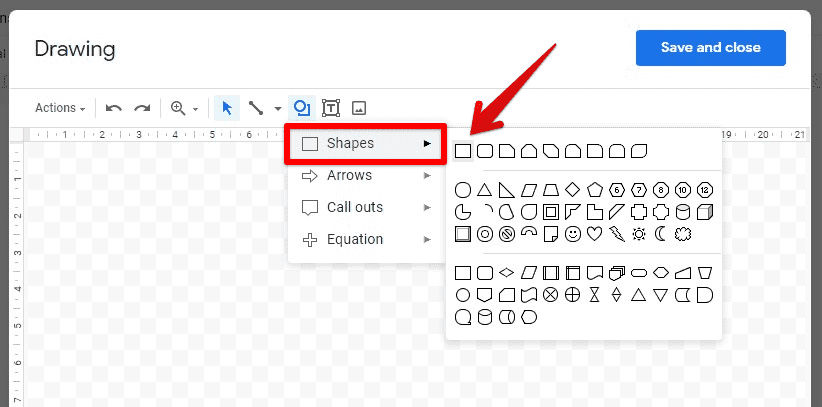
Drawing a rectangle
Step 5: Click on the “Save and Close” button in the top right corner of this window.
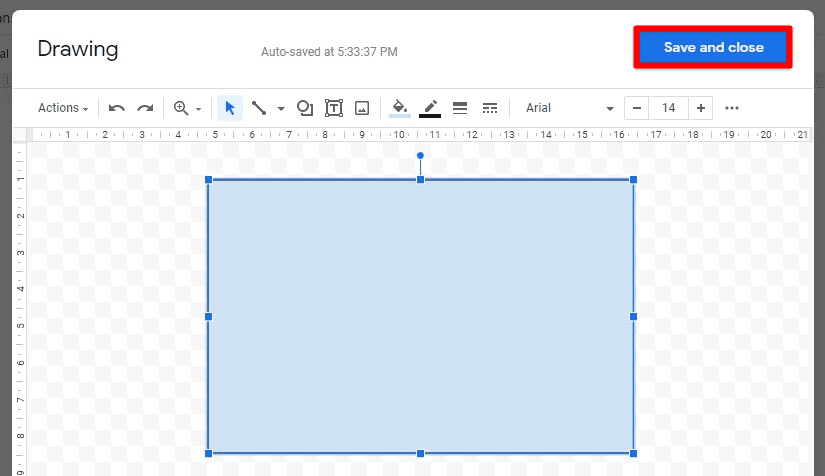
Save and close button
Step 6: You will now see a rectangle on the page you opened. Click on the rectangle and drag its sides to wherever you want.
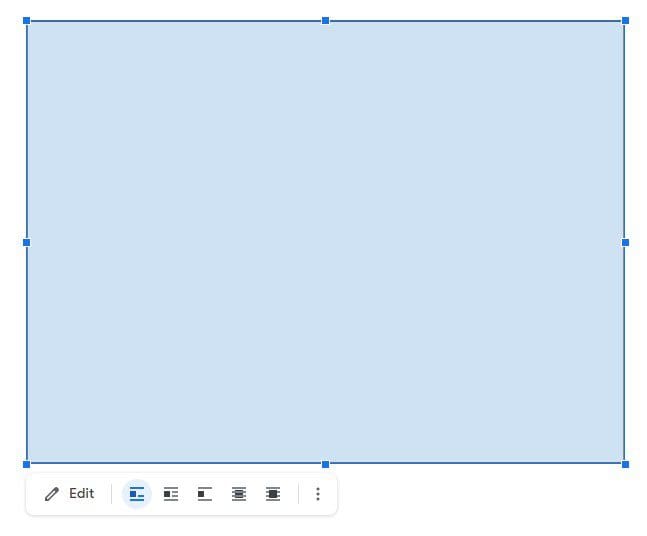
Rectangle drawn
Step 7: You might have noticed that the background of that rectangle will be blue. This can be changed easily as well. Click on the rectangle and then select the “Edit” option.
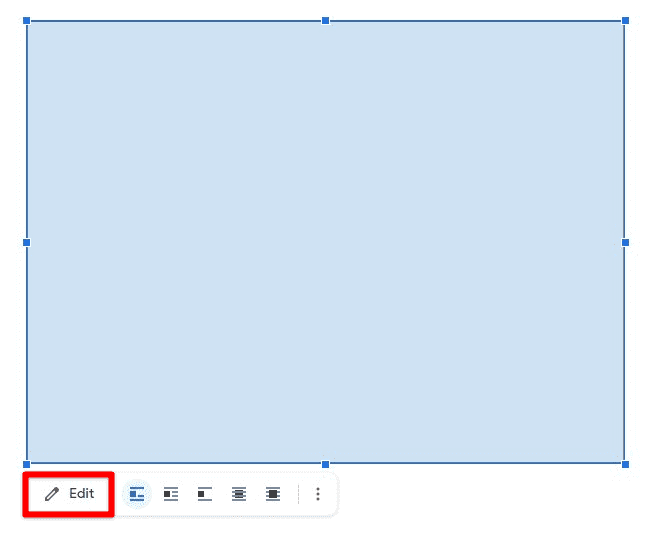
Editing the rectangle
Step 8: Go to the “Fill color” options and select “Transparent.” This will finish the setup for your page border.
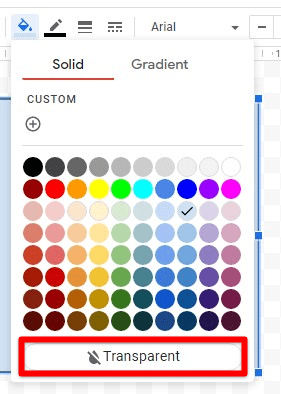
Making rectangle transparent
If you want to change border thickness or other properties, they can be accessed from the same option.
Inserting page borders as an image
If the methods described before this do not suit you, the last option is to insert page borders as an image. We have already covered how to add an image in Google Docs using its browsing feature. You can read about it in this article on top 10 Google Docs usage tips. Please note that once you insert the page borders as an image, you will have to create a text box inside that image. Otherwise, you will not be able to add anything inside the border.
Since this method is the most time-consuming, we recommend using this only if the previous ones do not work. The advantage of this method lies in the fact that you can insert any border design because it will be rendered as an image. For inserting page borders as an image in Google Docs, you need to follow these steps,
Step 1: Open the desired document in “Google Docs.” Go to the page where you want to insert the page border.
Step 2: Click on the “Insert” tab in the taskbar. From the drop-down menu, select “Drawing.” Next, click on “New” from the side menu.
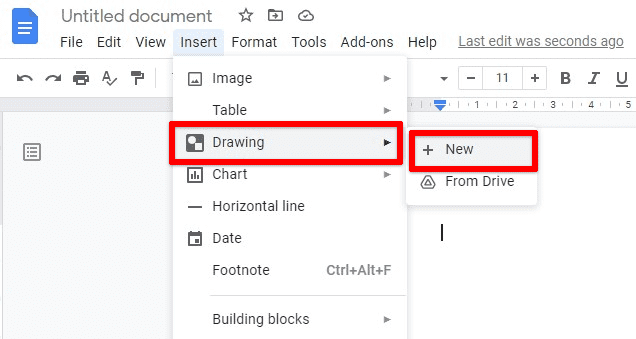
Accessing the drawing tool
Step 3: This will pop up a new window on your screen. You can think of this as a new editor to insert the border for your page.
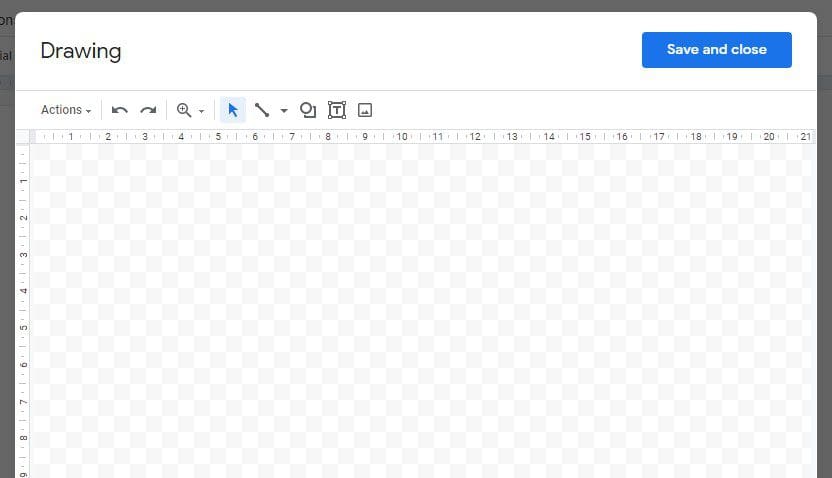
Drawing tool opened
Step 4: Click on the image icon from the toolbar at the top.
Image icon
Step 5: This will open a new window for inserting images. Here, you can either upload the photo from your computer or search for a picture on the internet. Click on the “Search” tab and search for “border.” Choose a design and then click on the “Select” button in the bottom left corner of this window.
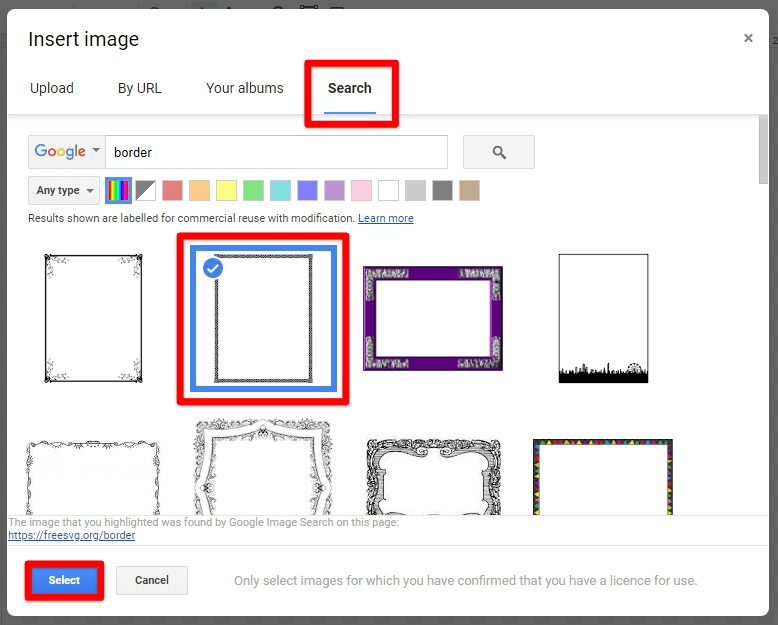
Searching for an image
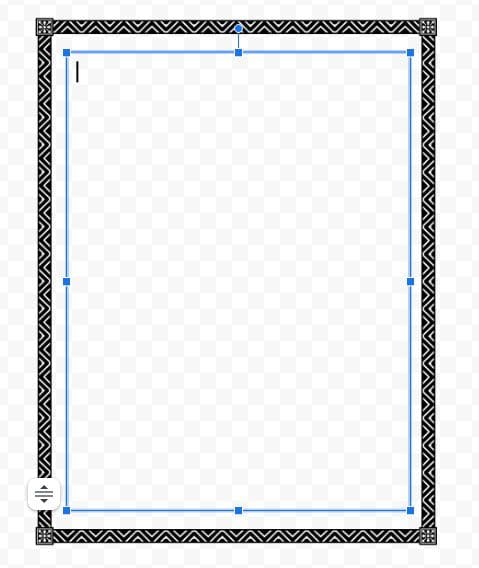
Step 6: Place a text box inside the inserted image. This will finish the setup for your page border. Next, click on the “Save and Close” button in the top right corner of this window.
Inserting a text box
If your border is asymmetrical, you may want to flip it vertically or horizontally. Read this article on how to flip an image in Google Docs.
Conclusion
Google Docs is full of valuable and productive features, but it has yet to add a tool for inserting page borders. To cater to this problem, you need to use other elements such as page borders in Google Docs. With these three methods listed in this article, you can create all kinds of page borders with proper formatting.
