Docker is a free and open-source containerization platform that allows developers to package programs into containers. These standardized executable components combine application source code with the OS libraries and dependencies needed to run that code in any environment. Containers make distributing distributed programs more accessible, and they’re becoming more popular as companies move to cloud-native development and hybrid multi-cloud setups.
In addition, Docker streamlines and makes development overly predictable.
Docker automates tedious configuration processes for fast, easy, and portable desktop and cloud application development across the development lifecycle. Docker’s end-to-end platform comprises UIs, CLIs, APIs, and security designed to function together across the application delivery lifecycle.
Developers can develop containers without Docker, but the platform makes building, deploying, and managing containers easier, simpler, and safer. Docker enables developers to use a single API to build, deploy, operate, update, and stop containers using simple commands and work-saving automation.
Docker set up on a Chromebook
The initial steps will involve putting your Chromebook in developer mode so that you can access the terminal. Usually, the Channel defaults to Stable. So, if you are using a version lower than 69, you will need to switch to developer mode.
This article assumes that you have done the prerequisites of getting your Chromebook to a point where you can access the terminal and run commands as a developer. Whether you have virtualized your Chrome OS or running an actual device, you can refer to our other article that has laid a good foundation on Setting up your Chromebook to the point where you have a Linux subsystem running in your Chromebook.
Modern Chromebooks can run native Linux apps without enabling developer mode. With this in mind, We’ll walk you through the steps to successfully install and operate Docker on a Chromebook.
Check your ChromeOS version
Make sure you’re on Version 69 or higher for this to work. You can access this by opening the settings on Chrome OS, then on the left panel, “About Chrome OS” is located at the bottom. When you click on “About Chrome OS,” you should see a window similar to the one below.
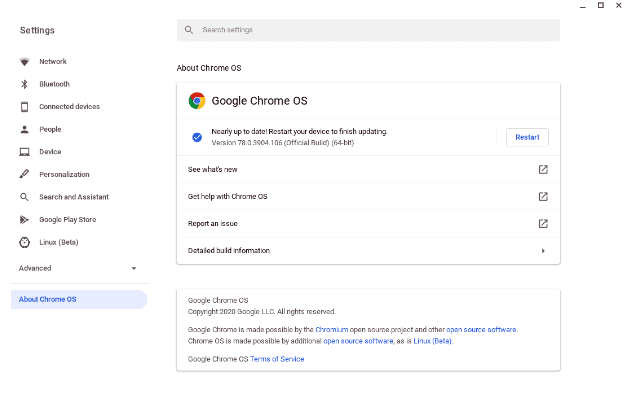
Chrome OS version
Enable Linux Beta
If you want to check out if your ChromeOS devices are Linux (Beta) compatible, then open the settings menu and check on the left panel if there’s a Linux(Beta) tab. If it is missing, then the ChromeOS device is not Linux(Beta) compatible.
It is supported if there’s a Linux (Beta) tab on the left side of the newly opened setup window. Make sure you click on “Turn on” to turn it on to enable it.
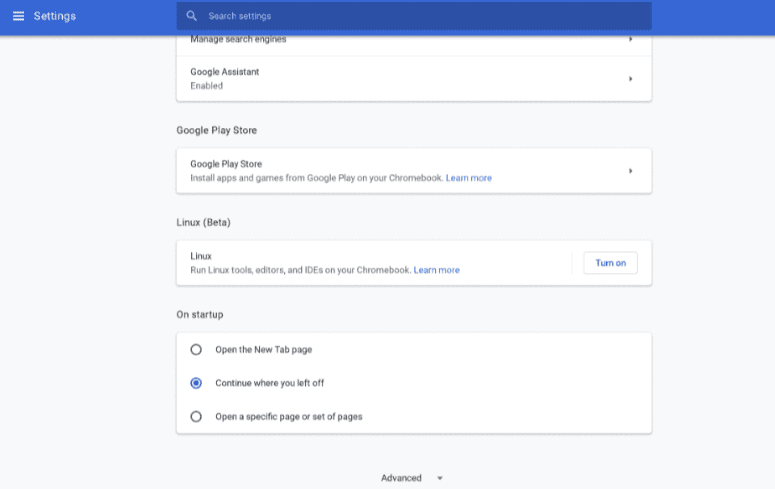
Linux(Beta) turn on
Accessing the Ubuntu-Subsystem
The first step is to press a combination of the following keys, Ctrl + Alt + T, to open the terminal called crosh on your browser. Now run the following command to access the shell.
shell

shell on crosh
Then follow this by running the following command.
chronos@localhost:$ sudo enter-chroot

sudo enter-chroot
After this, you will be provided with a terminal. Here, you will be prompted to enter the password for your parent system. If you successfully come to this point, then congratulations. You are now ready to install Docker in your Ubuntu subsystem in Chromebook.
Install Docker in Ubuntu-Subsystem
Installing Docker on Ubuntu is a simple process. First, the Docker repository will be enabled, the repository GPG key will be imported, and the package will be installed.
To add a new HTTPS repository, update the packages index and install the dependencies as follows.
chronos@localhost:$ sudo apt update

run system update
(xenial)chromebook@localhost:$ sudo apt install apt-transport-https ca-certificates curl gnupg-agent software-properties-common

update dependencies
Use the curl command to import the repository’s GPG key:
(xenial)chromebook@localhost:$ curl -fsSL https://download.docker.com/linux/ubuntu/gpg | sudo apt-key add -

import repository’s GPG key
Now, we need to add the Docker APT repository to our ubuntu-subsystem, as shown below.
(xenial)chromebook@localhost:$ sudo add-apt-repository "deb [arch=amd64] https://download.docker.com/linux/ubuntu $(lsb_release -cs) stable"
After enabling the docker repository, you are free to choose the version of Docker you wish to install in your system from the repositories. However, if you want to install the latest Docker version then, run the following command.
(xenial)chromebook@localhost:$ sudo apt update

(xenial)chromebook@localhost:$ sudo apt install docker-ce docker-ce-cli containerd.io

install latest docker version
If you wish to install a specific version of Docker, you may first need to view the entire list of the docker version currently present in the repository. You can attain that by simply running the following commands.
(xenial)chromebook@localhost:$ sudo apt update

(xenial)chromebook@localhost:$ apt list -a docker-ce
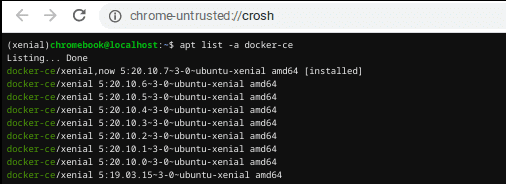
complete list of docker versions
From the diagram above, there are many docker versions currently present in the official Docker repositories. It is up to you to select the one you so wish to have in your system. Just note that the Docker versions are displayed in the second column of the output on the terminal.
So to install a specific version, all you need to do is add the version =<VERSION> after the package’s name, as shown in the demo below.
(xenial)chromebook@localhost:$ sudo apt install docker-ce=<VERSION> docker-ce-cli=<VERSION> containerd.io
After completing the installation process triggered by the above command, the Docker service should automatically start. Further, if you need to verify that it is up and running, feel free to run the command below.
(xenial)chromebook@localhost:$ sudo systemctl status docker
You can update the packages using the regular sudo apt update && sudo apt upgrade approach when a new version of Docker is published.
If you don’t want your Docker package to be updated, then you are free to Mark the Docker package as held back. It can easily be attained by running the following command.
(xenial)chromebook@localhost:$ sudo apt-mark hold docker-ce
How to execute Docker commands as a Non-Root User
Docker commands can only be executed by either the root or a user with sudo privileges by default. So, if you do not belong to any of those categories, what do you do?
Worry not because there is a workaround for that. You need to add your user to the docker group, usually created during Docker CE package installation. By so doing, you will be able to execute the docker commands as non-root and non-sudoer. Will run the following command to achieve that.
(xenial)chromebook@localhost:$ sudo usermod -aG docker $USER
Typically, $USER is a variable in your environment responsible for holding your stipulated username.
Now all you need to do is to log out of your system then log in again. It ensures that the group membership is refreshed, and you can now run the commands as a non-root user.
How do you know that the installation is successful?
There are various ways to check if the installation of Docker was successful. We will highlight three of them that include:
- running the docker command
- hello-world docker container
- pulling Ubuntu image
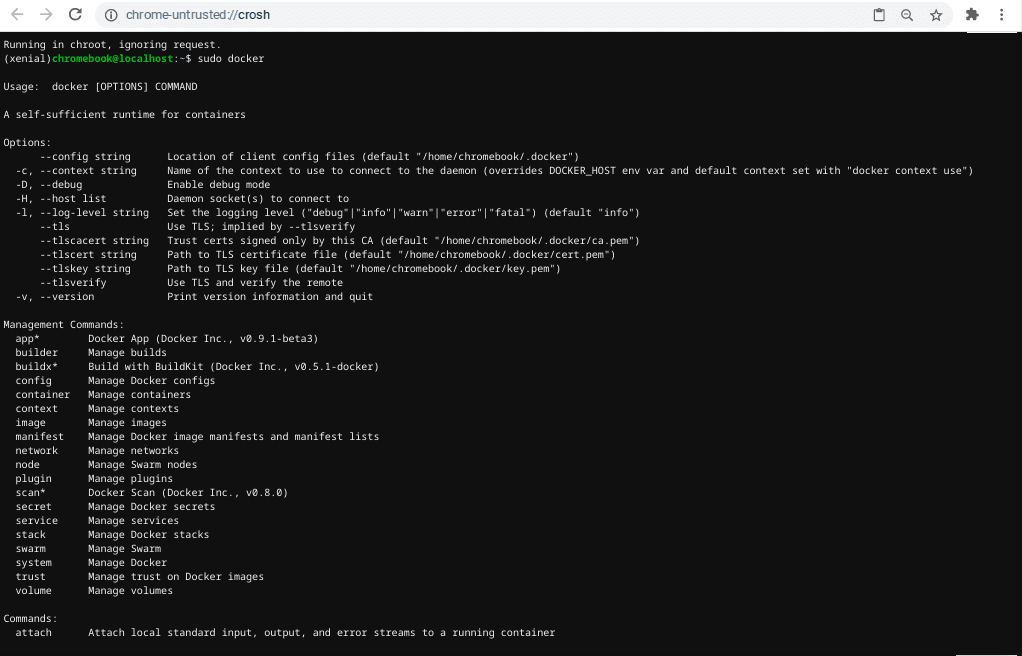
Running the Docker command
We’ll launch a test container to see if Docker has been successfully installed, and if you can run the docker command, then you are good to go:
Running hello-world
hello-world docker container run
If the test image is not found locally, the command will download it, execute it in a container, produce a “Hello from Docker” message, and exit. The following is an example of what the output should look like:
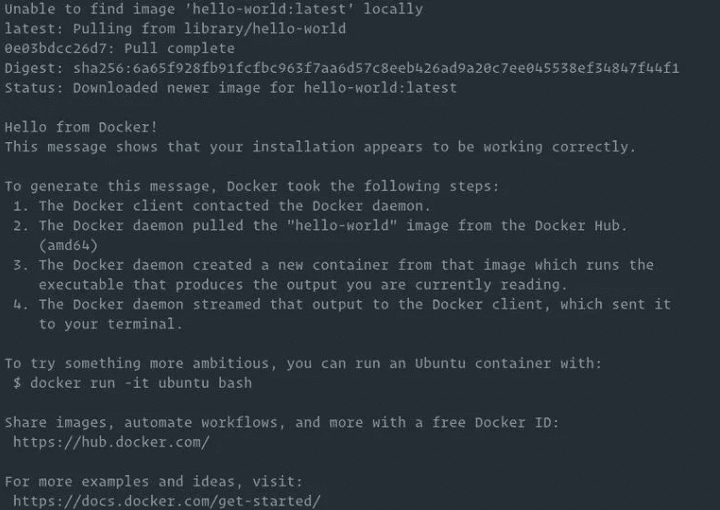
docker hello world
Because it does not have a long-running process, the container will exit after printing the message.
Docker pulling Ubuntu
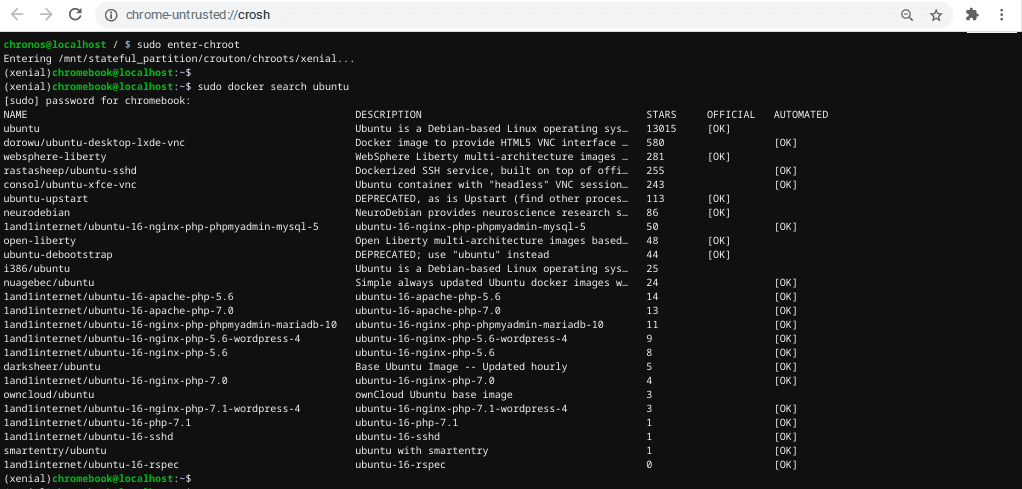
The first step is to check if ubuntu images exist in the official docker repository by running the following command.
(xenial)chromebook@localhost:$ sudo docker search ubuntu
(xenial)chromebook@localhost:$ sudo docker pull ubuntu
Subsequently, we can verify if the image exists in our local repository by running the following command.
(xenial)chromebook@localhost:$ sudo docker images

sudo docker images
As seen in the image above, our ubuntu image is available, which justifies our Docker being installed successfully.
Docker pulls images from the Docker Hub by default. It’s a cloud-based registry service that stores Docker images in public or private repositories, among other things.
Uninstalling Docker
It’s a good idea to remove all containers, images, volumes, and networks before uninstalling Docker. As a result, we will stop all the current containers and remove all the docker objects by running the following commands.
(xenial)chromebook@localhost:$ docker container stop $(docker container ls -aq)
(xenial)chromebook@localhost:$ docker system prune -a –volumes
Finally, Docker can be uninstalled just like any other package by using apt as follows.
(xenial)chromebook@localhost:$ sudo apt purge docker-ce
(xenial)chromebook@localhost:$ sudo apt autoremove
Conclusion
We’ve demonstrated how to install Docker on Chromebook in Ubuntu-subsystem. Always ensure that you have Crouton installed. The reason for this is that Crouton allows you to install Ubuntu as a subsystem in your Chromebook. First, you need to access crosh by pressing Ctrl+Alt+T. It will enable you to access the shell where you can now run the usual Ubuntu commands after running the command, “sudo enter-chroot.”
Docker containers can run on Chromebooks, but the experience you receive depends on your preferences. For instance:
- Stock ChromeOS maintains security but provides a poor user experience.
- Although Developer Mode provides a better experience than stock, it still performs poorly compared to native.
- Thanks to Docker Machine, modifying the Kernel improves the experience. After every OS upgrade, however, you run the danger of breaking your device and breaking your VirtualBox.
- Dual-booting gives you a native Linux experience, but it comes with the drawbacks of switching from ChromeOS and having limited hardware compatibility.
A quick reminder is always to change your Channel to Developer mode when using a version lower than 69 because that will allow you to access the terminal and run commands. But if you are using the latest version, then there is no need to change your Channel. Instead, check out the official Docker docs for additional information to explore more on the Docker use-cases.


2 comments
hello.
my linux version in chromebook is penguin. OS version 114.
i am in developer mode and have the “croch” terminal open. but in this terminal the command shell and sudo are unknown.
crosh> shell
ERROR – ERROR: unknown command: shell
crosh>
how can i install docker in this case?
best
huck
You need to enable developer mode, the guide describes this and links to an article:
“This article assumes that you have done the prerequisites of getting your Chromebook to a point where you can access the terminal and run commands as a developer. Whether you have virtualized your Chrome OS or running an actual device, you can refer to our other article that has laid a good foundation on Setting up your Chromebook to the point where you have a Linux subsystem running in your Chromebook.”