Chromebooks are slowly taking over, being one of the most lightweight operating systems in the market. The Google Chrome OS allows users to learn, debug, and find solutions to problems quickly. Since its inception, the manufacturers have gone a long way from providing affordable Chromebooks to providing high-end Chromebooks that developers and game enthusiasts can use. Therefore, Chromebooks are now students’ favorites.
The Google Chrome OS is centered around the Chrome browser, making it relatively light compared to other operating systems. This operating system contains a Linux environment that allows native installation of desktop applications such as the Visual Studio Code. To get the applications working in a Chrome OS, the Linux environment has to be enabled.
As you might already know, Visual Studio Code, commonly referred to as “VS Code,” is an open-source code editor manufactured by Microsoft. It is compatible with all major operating systems such as Linux, Windows, macOS, and Google Chrome OS. With VS code installed in your Chrome OS, you can code in various programming languages since VS Code supports most of them, including JavaScript, Python, Java, C#, Node.js, and many more.
Since Chrome OS is slowly but constantly gaining ground, we are obliged to show you how to install, set up, and use VS Code on a Chromebook. This is a comprehensive guide, and to be at par, you need to follow it to the latter.
Installing VS Code on a Chromebook
Requirements:
Since Visual Studio Code is a lightweight editor, it can run on almost all platforms. Below are some of the prerequisites needed before installing VS Code on a Chromebook:
- Being a lightweight code editor, VS Code can run on any Chromebook with a minimum of 1GB of RAM
- VS Code is available and can run on Linux with ARM64, ARMv7 CPU. Therefore, this implies that Chromebooks powered by ARM chips can as well-run Visual Studio Code.
- To run VS Code on a Chromebook, you should be able to enable Linux Apps via Crostini.
For the sake of this tutorial, I will be using a Chromebook with 4GB RAM and a 201GB-storage disk. I have already tested it, and I am confident to inform you that Visual Studio Code is flawless on my Chromebook. Continue reading this article to know the workaround.
Before installing Visual Studio Code on our Chromebooks, we first have to enable Linux Applications.
Enabling Linux Applications on Chrome OS
To complete, this task we shall be using Crostini. Open your Chromebook settings, then scroll down and locate the Linux (Beta) menu as shown below. Click on it and select the “Turn on” button
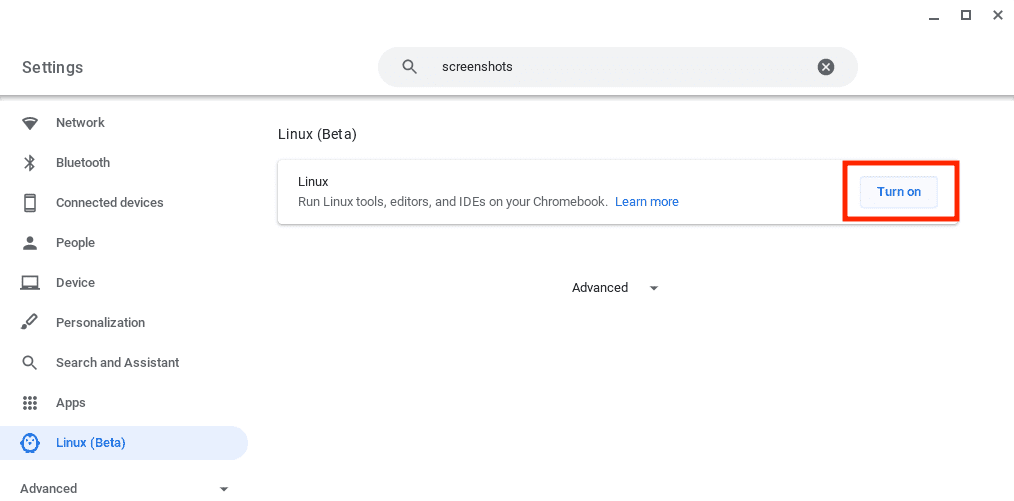
Enable Linux Applications
. If you have already enabled the Linux Applications, your Linux menu will resemble mine.
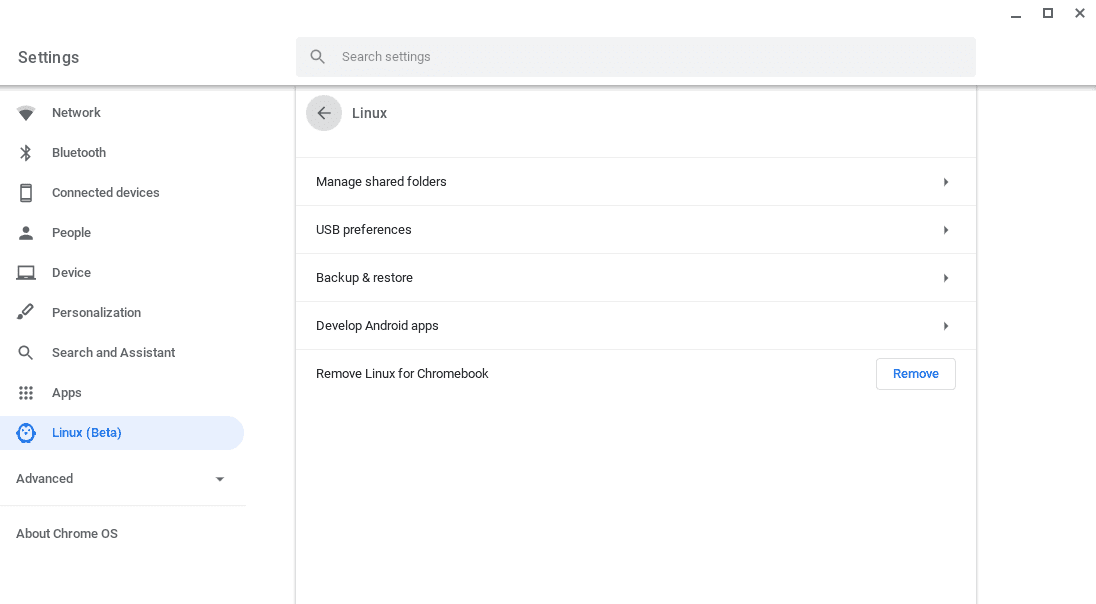
Linux beta after installing the Linux applications
Once you click the “Turn on” button, a popup window will show up requesting you to install the applications. Click on the “Install” knob to start installing the Linux applications on your Chromebook.
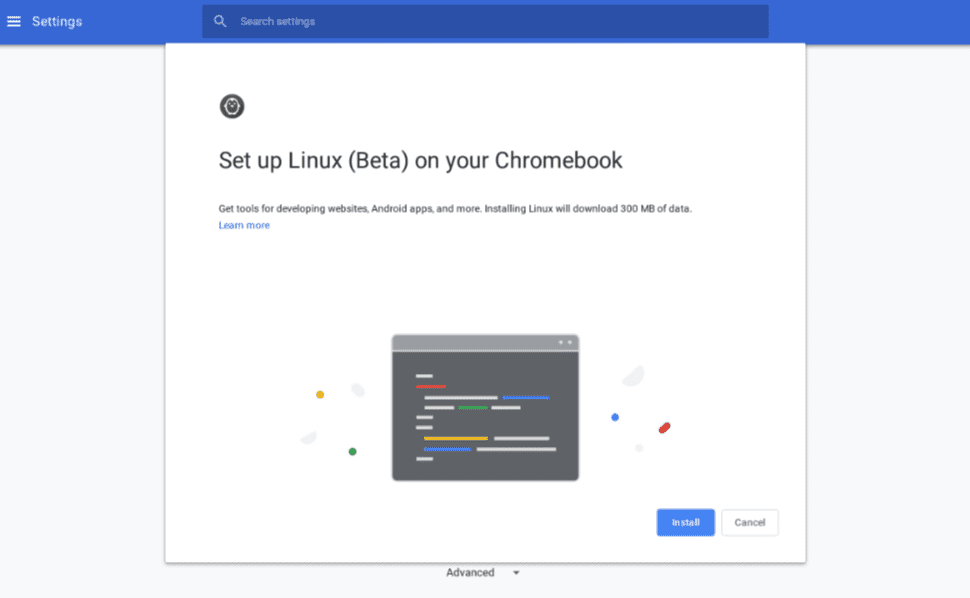
Setup Linux on Chromebook
Reliant on your internet speed, it might take a while to download and install the tools needed to create the Linux environment. Once the process is done, the wizard will configure it for you by creating a container and starting it. To know if the process has been completed, a new terminal window will pop up.
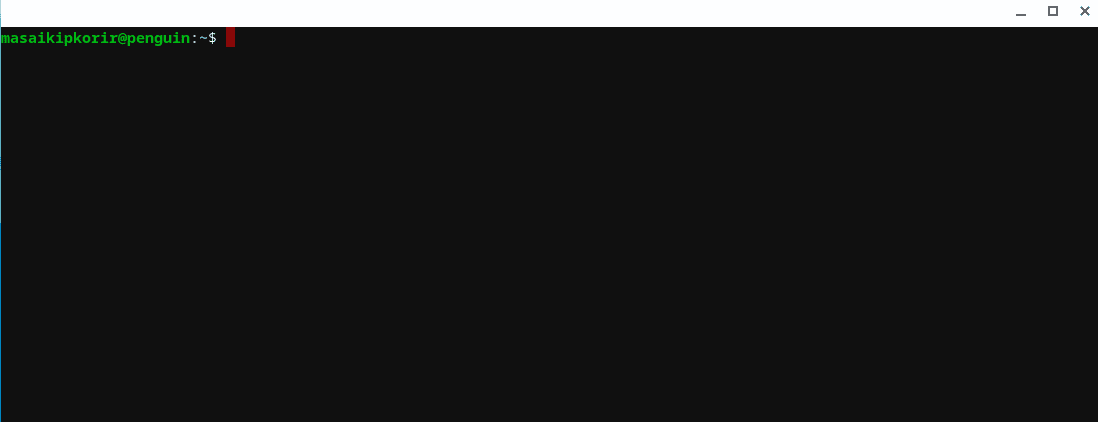
A new terminal popup window
We have one extra thing to do before installing VS Code to our Chromebook. Once the terminal windows pop up, there are a few commands that need to be executed. These commands will update the Linux packages list and also install an optional but highly recommended gnome-keyring. Please copy and paste the commands below to execute them. I believe you are already acquainted with the terminal. If not, paste the command and press the “Enter” on your keyboard.
sudo apt-get update
Output:

Update your Chrome OS
sudo apt-get install -y gnome-keyring
Output:

Installing gnome-keyring
Note: Your output will not be similar to mine since I had already installed gnome-keyring on my Chromebook. Therefore, give it time to install, and once it completes, you can proceed to install VS Code.
Let us now get to the installation phase.
Installing Visual Studio Code on a Chromebook
After ensuring that we have met all the prerequisites mentioned in this article, we are now ready to Install VS Code on our Chromebook.
The first step is downloading the Visual Studio Code installer from their official download page.
Note: Ensure you select the correct package for your Chromebook, to avoid falling into errors while installing it on your Chromebook.
Below is a guide to aid you to select the correct package for your Chromebook:
- If your Chromebook runs on an AMD or Intel chip, select the .deb 64bit variant
- If your Chromebook runs on an ARM64 chip, select the .deb ARM64 variant
My Chromebook runs on an Intel chip; therefore, I will select a .deb 64bit variant as shown in the image below:
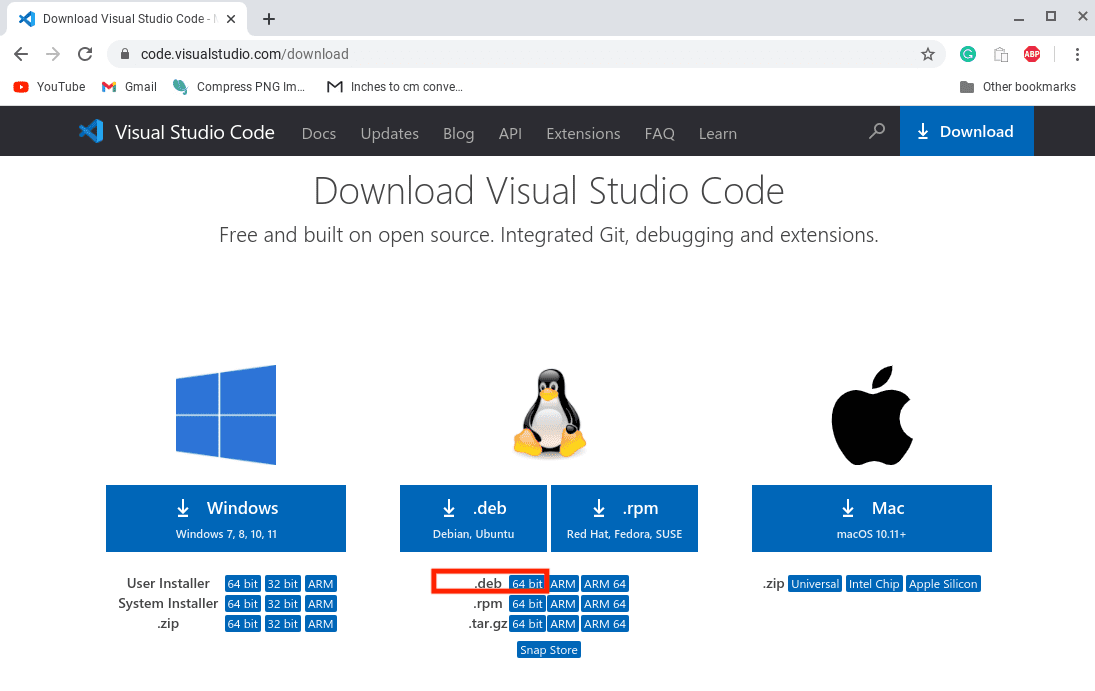
Downloading VS Code from their official download page
There are some instances when the user is not sure of which architecture their Chromebook is running on. Don’t beat yourself up if that is the problem since we have a simple command that can help you out. Copy and paste the following command line to your terminal to check which architecture your PC is running on:
dpkg --print-architecture.
Output:
Check architecture your Chromebook is running onIf the command above outputs amd64, then it means your Chromebook is running on either an Intel or AMD chip). However, if the command outputs arm64, then your Chromebook is running on ARM64 architecture.
Now that you know your Chromebook’s architecture, continue and select the correct download package. Depending on your internet speed, the download will take quite a while. Be patient as the installer is downloaded. Once downloading is complete, you can locate your VS Code installer on your Downloads folder.
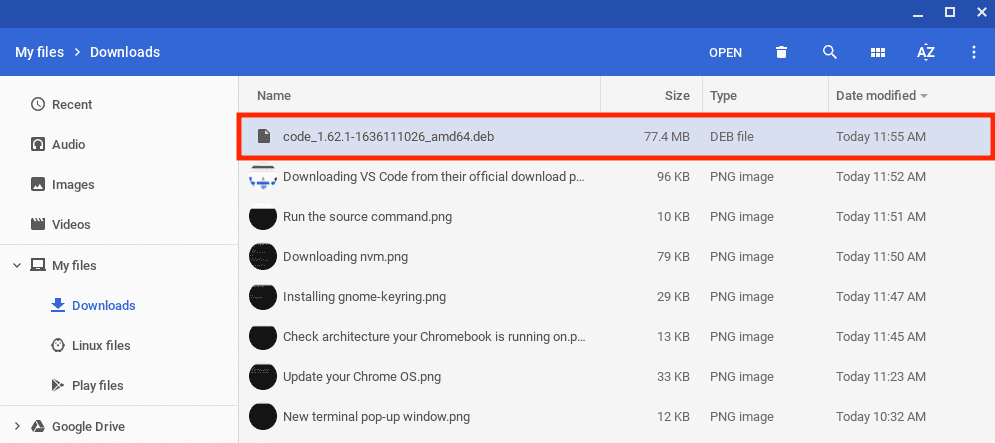
Downloaded VS Code Installer
To launch the installation, double-click the downloaded installer file. Similar output to the one displayed below will be visible. Next, select the blue “Install” button to start the installation process.
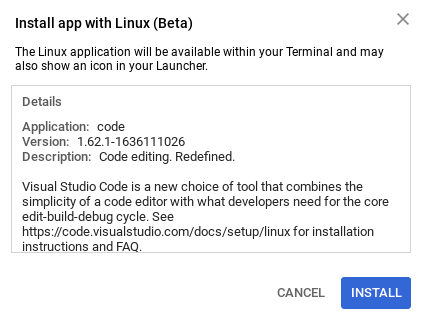
Click the blue install button.
Give the installation wizard time as it installs VS Code and other necessary dependencies on your Chromebook.
After a successful installation, you will find the Visual Studio Code in your list of applications. You can access your list of applications by simply clicking on the “Launcher” icon situated at the bottom left side of your Chromebook.
Launcher icon
You can now click the Visual Studio Code icon to launch it.
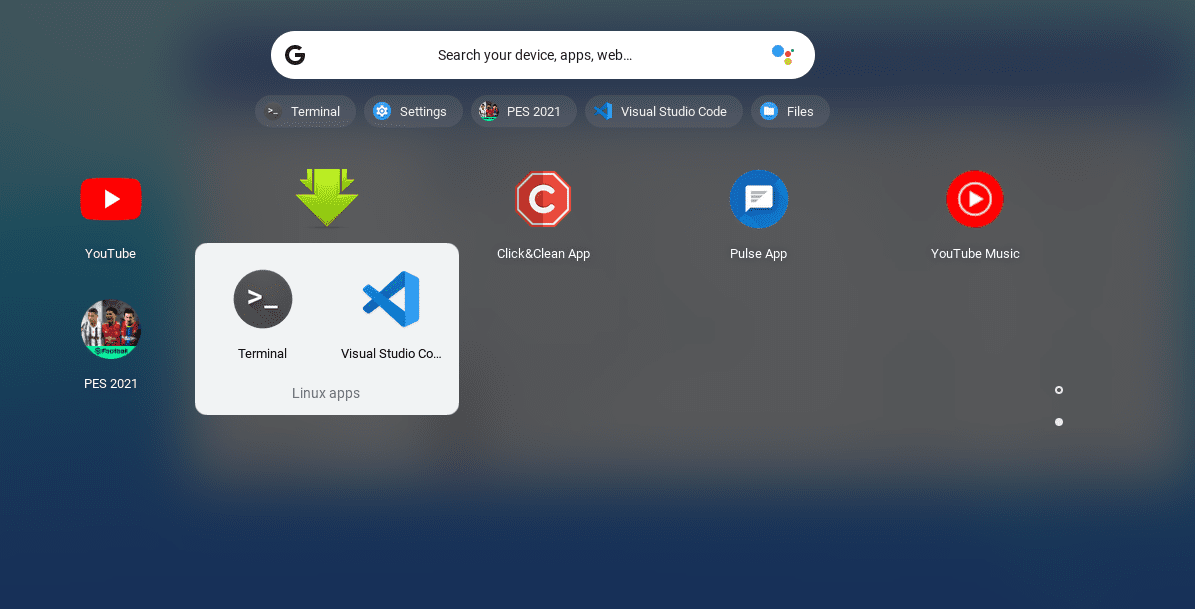
Visual Studio Code on the List of Apps
A VS Code window will pop up. At this stage, you are ready to start coding using your newly installed code editor (Visual Studio Code).
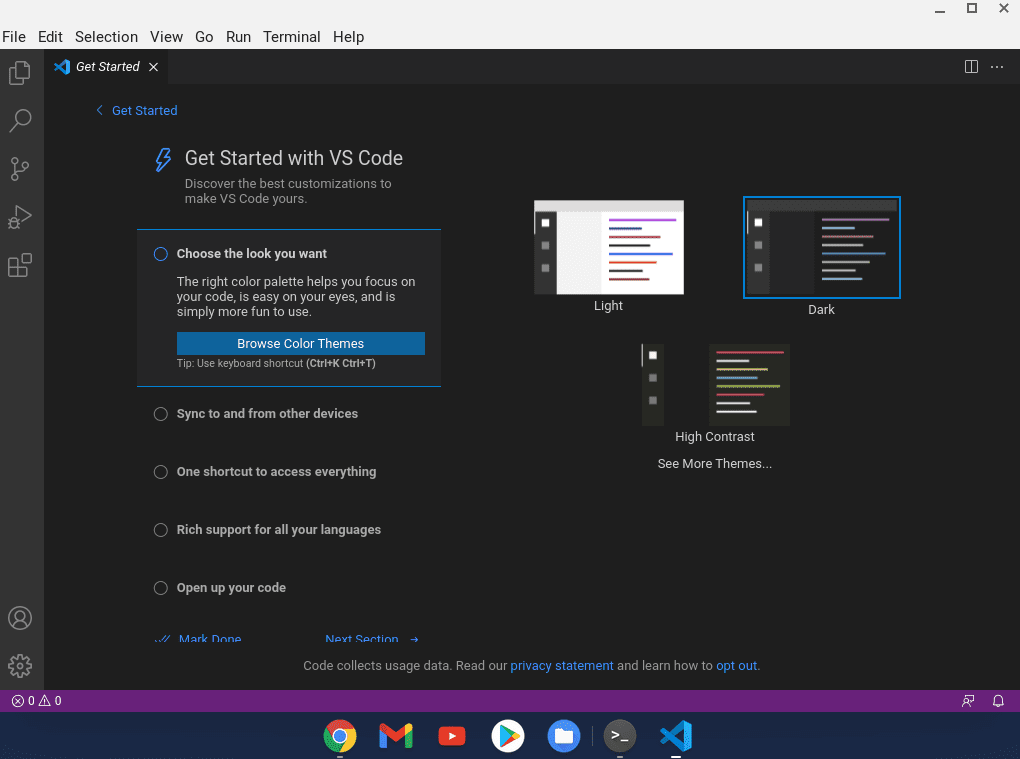
VS Code installed on Chromebook
How to use Visual Studio Code on Chromebook
If you are new to VS Code, you might find the welcome screen so confusing. Therefore, besides the official resources and videos provided to help you learn how to navigate and use VS Code, we shall also provide insights on how to use it. So stay tuned and continue reading the article to learn more.
Depending on the programming language you are bound to use, the setup and use process will defer. Therefore, in this article, we shall use VS Code on some of the most popular and widely used programming languages.
Visual Studio Code with JavaScript and Node.js
JavaScript is one of the most flexible and widely used programming languages in the market today. It can be used to build applications running on a web browser and web servers with the aid of Node.js. Recently, JavaScript has been used in making native desktop (Electron) and mobile (React Native & Apache Cordoba) Applications. It has also been used in programming IoT (Internet-of-Things).
VS Code is the most popular code editor has been widely associated with JavaScript and Node.js. Besides, VS Code is known for natively supporting JavaScript.
To use Node.js and JS (JavaScript) on your Chromebook, you will have to go the extra mile and install Node.js runtime onto your Chromebook. To install the runtime, we need to put into use a small open-source utility known as nvm. This utility makes it easier to install and update Node.js
Run and execute the following command in your terminal to download and install nvm onto your Chromebook:
wget -qO- https://raw.githubusercontent.com/nvm-sh/nvm/v0.37.2/install.sh | bash
Output:
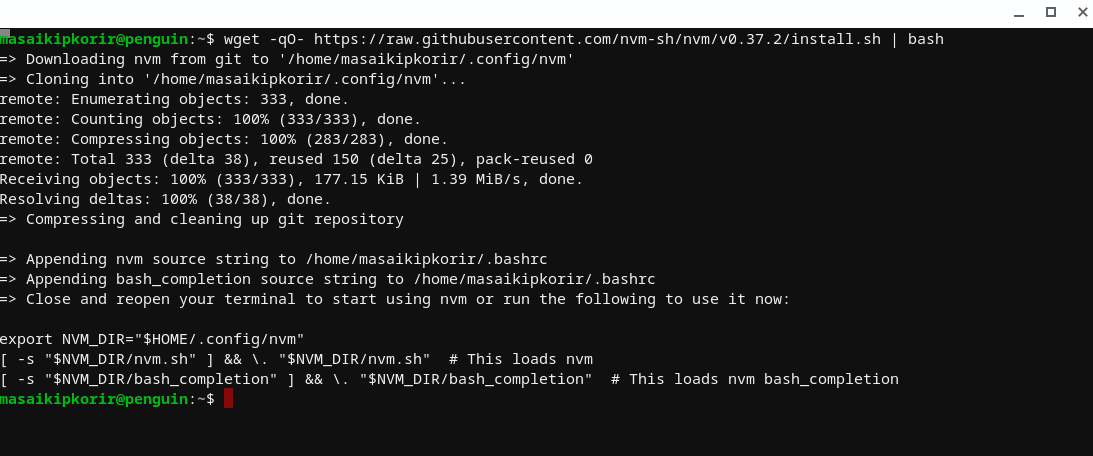
Downloading nvm
source .bashrc
Output:

Run the source command
Once you have successfully installed nvm onto your Chromebook, you can proceed and install the latest version of Node.js by executing the command below in your terminal:
nvm install node
Output:
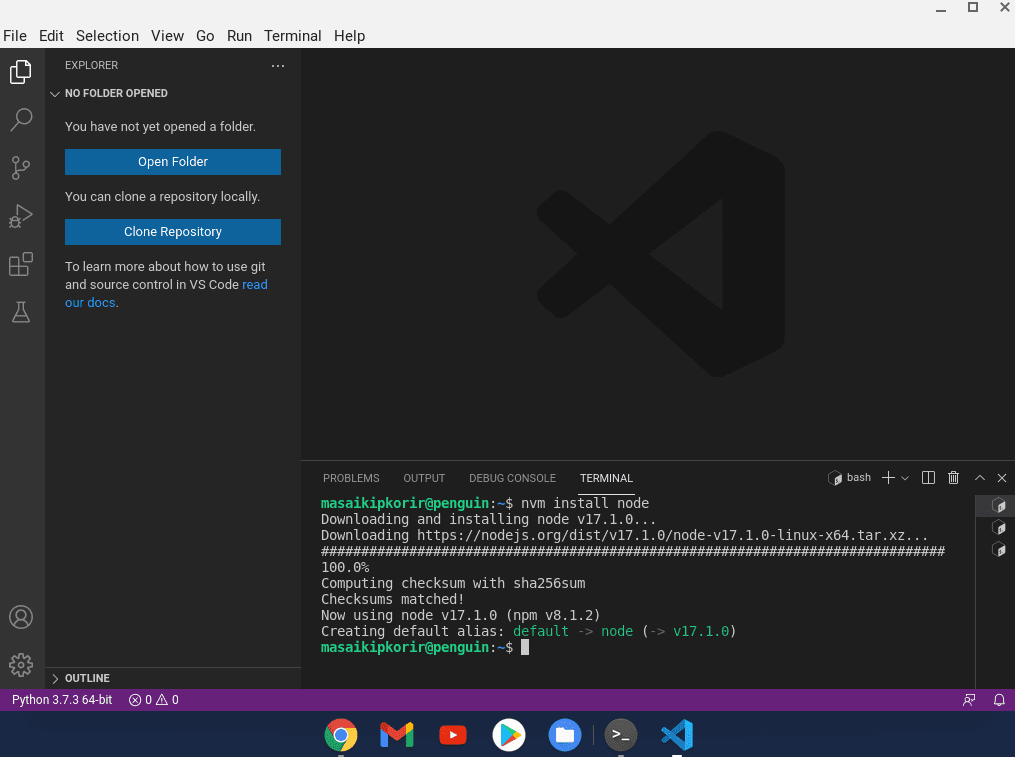
nvm install node
Note: to properly install node. It is essential to use the Visual Studio Code terminal rather than your Chromebook terminal, as shown above.
If you are a newbie to VS Code, it is crucial to note that it contains an integrated terminal that can be launched from the VS Code terminal menu. Open your VS Code application> select the Terminal menu > Click on New terminal to launch it. This will launch a new terminal in your VS Code.
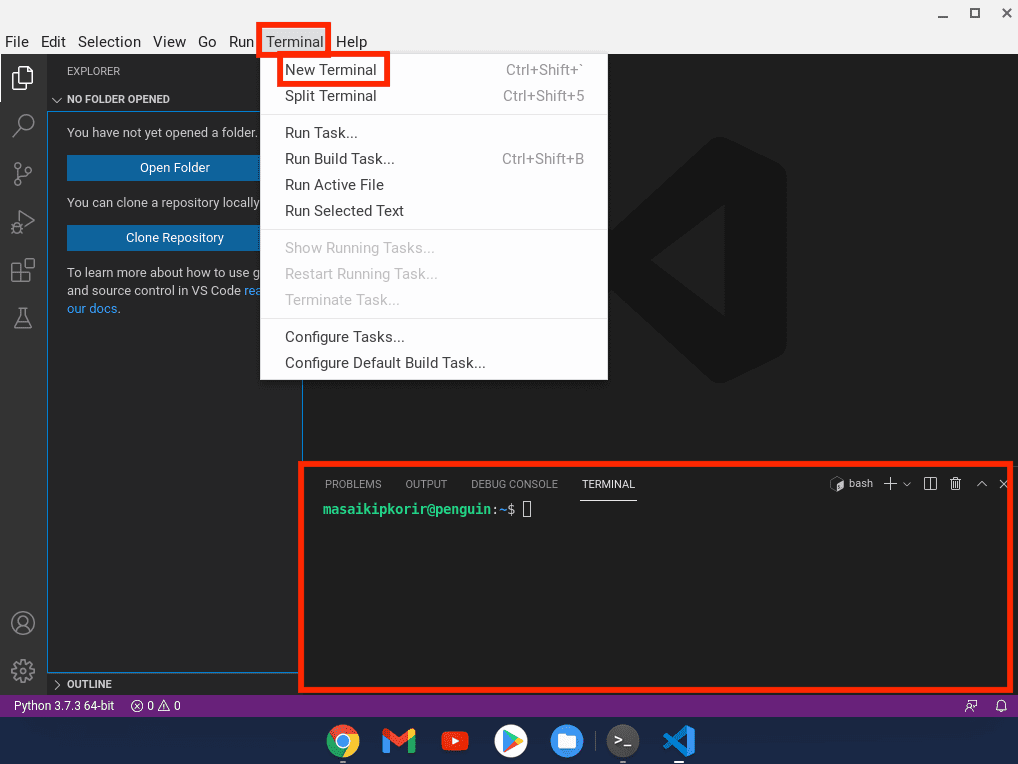
How to open a terminal in VS Code
With nvm installed, you can install, set up, manage, and update Node.js. Once Node.js has been successfully installed onto your Chromebook, you can enjoy coding JavaScript and Node.js using your Visual Studio Code. To check the version of Node.js installed, run the command below:
node --version
Output:
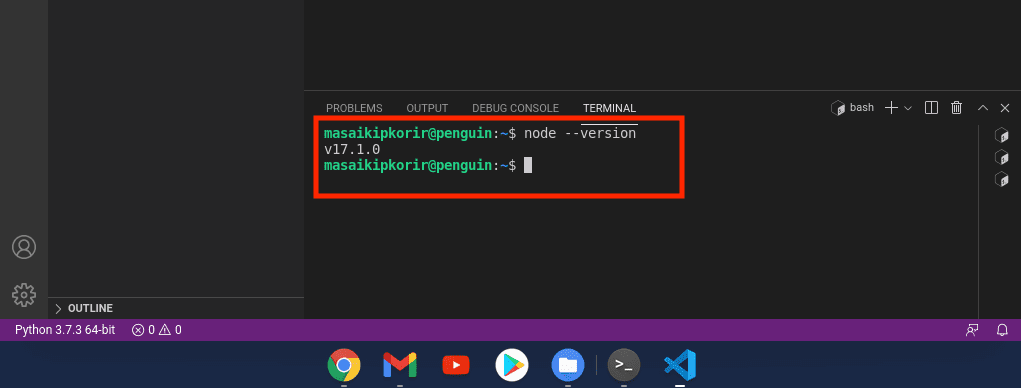
check node version
Visual Studio Code with Python
Python is one of the most popular back-end programming languages. It is the recommended language for beginners. Python can build web, desktop, and command-line applications. Besides, it is also suited to working with AI (Artificial Intelligence) and Data Science plus programming IoT microcontrollers and devices.
Most Python developers use VS Code since it is deemed one of the excellent code editors. Besides, VS Code aids newbies to acquaint themselves with this programming language quickly.
Our Chrome OS, by default, comes with an inbuilt Python3 interpreter. However, to use VS Code efficiently with the python programming language, we shall need to install additional packages. The packages we shall install include pip, a python dependency manager, venv, a package used to manage python virtual environments, and some native packages. Therefore, to commence the installation process, copy and paste the following command into your terminal:
sudo apt-get install -y python3-pip python3-dev python3-venv build-essential libssl-dev libffi-dev
Output:
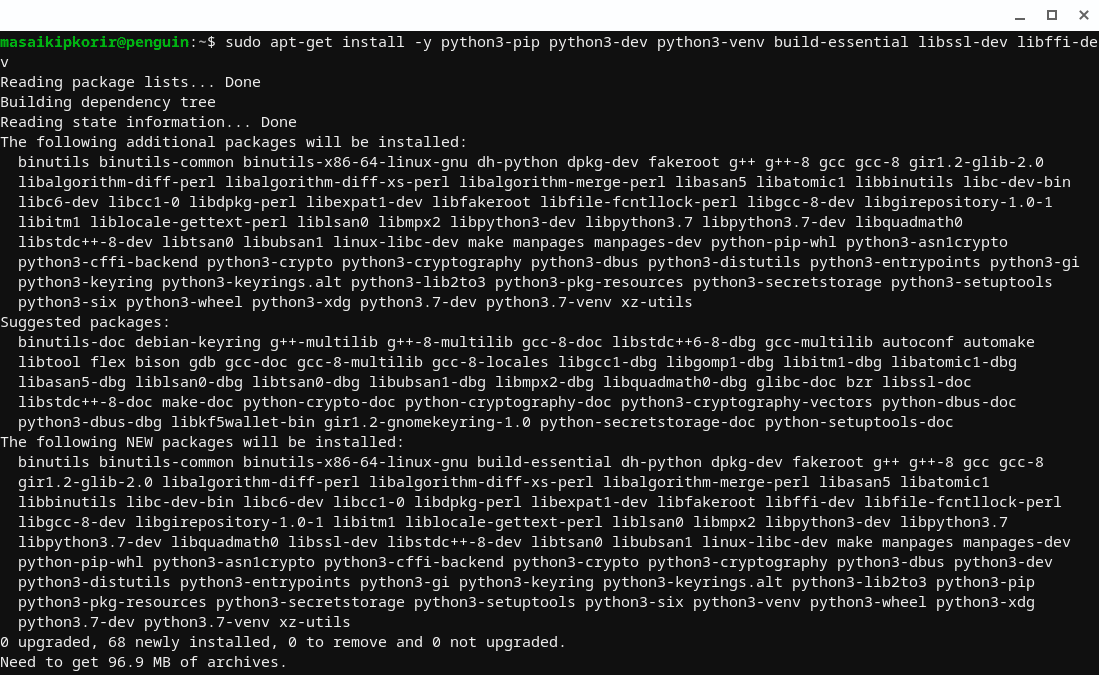
How to open a terminal in VS Code
The above command will install the packages required to kickstart our python programming journey is VS Code.
Note: it is vital to consider that VS Code provides supports via the Microsoft python extension. To install the python extension in your VS code, you can use the shortcut (⇧⌘X) or navigate to the left bar menu and select the icon similar to the one shown in this image:
Now search for “Python” and click the blue “Install” button to install the extension.
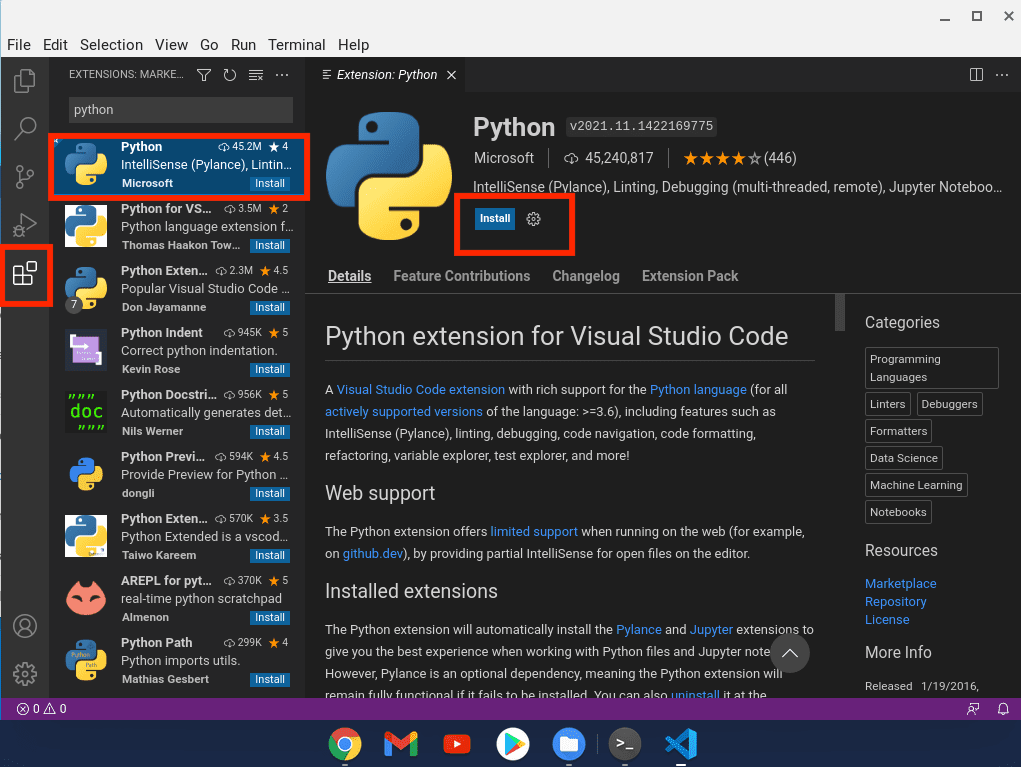
Search for Python extension and install it
That’s all you are now ready to start coding python with VS Code on our Chromebook
Conclusion
This is a comprehensive guide on installing and using VS Code on Chromebooks. All the necessary steps have been touched on in this article. We hope you find it helpful. Enjoy coding with VS Code on your Chromebook. If you encounter any challenges, let us know below.

6 comments
Is there a way to remove the big window border? Besides that I am really surprised how well it works
i have an error after installing arm64. E: https://deb.debian.org/debian-security buster/updates/main arm64 libnss3 arm64 2:3.42.1-1+deb10u3 is not (yet) available (404 Not Found [IP: 151.101.210.132 443])
please help.
I’m having the same issue, did you figure it out?
@DIONADRE, @ELSA run this to get past the errors:
sudo apt update
Then rerun sudo apt-get install gnome-keyring
Hi,
My visual ocde installed correctly.
but it keeps giving me a flickering black screen.
can you help?
I installed VSCode on my Google Pixel Slate Chromebook successfully and most features are working. But I’m challenged doing JS debugging, VSCode can’t find Chrome when I’m doing a Debug: Open Link to my page to be debugged. I have tried editing the launch.json to add a runtimeExecutable path but no luck. I’m guessing that VSCode is in a Linux container and Chrome is in ChromeOS? Any insight would be appreciated.