The introduction of Linux application support on Chromebooks led to an entirely new Android development era. Flutter is a Google cross-platform application development framework that recently released version 2.5.3 (a stable version.) Flutter is commonly known as Google’s User Interface (UI) toolkit. It is used for building beautiful and native applications for desktop, mobile, embedded, and web devices from a single codebase.
Advantages of Flutter
- Flexible and Expressive User Interface – Flutter gives users the ability to ship features that focuses on UX (User experience). The introduction of layered architecture enabled full customization, thus resulting in expressive, flexible, and fast rendering designs.
- Fast Development – Introduction of a rich set of customizable widgets that allows the building of native interfaces in minutes. With Stateful Hot Reload, you can paint your app to life within milliseconds.
- Native Performance – All critical platform differences such as fonts, navigation, scrolling, and icons are incorporated into flutter widgets. With the help of Dart’s native compilers, the flutter code is compiled to the native ARM machine code making its compilation flawless.
This article tutorial will illustrate how to install and run Flutter on a Chromebook.
Installing Flutter on a Chromebook
Below are the system requirements one should meet before installing Flutter on a Chromebook:
- Storage – minimum of 600MB (This does not include storage space for IDE and other tools)
- OS – 64-bit Chrome OS that supports Linux applications (Linux (Beta)
- RAM – Recommended 1GB minimum
- Shared Libraries – Flutter test command. This depends on the libraries available in your environment. libGLU.so.1(a product of mesa packages)
- Tools – for Flutter to work flawlessly, you need to have the following command-line tools in your Linux environment:
curl, bash, rm, unzip, xz-utils, mkdir, which, git 2.x
Once you meet all the minimum requirements provided above, you can proceed to the installation phase:
Note: To run Flutter on your Chrome OS, you need to have Android Studio installed. You also need to set your device for debugging after installing Android studio. If you have not installed Android Studio yet on your Chromebook, be sure to check out our comprehensive guide on installing Android Studio on a Chromebook.
Now that you have Android Studio installed and set up your device for debugging, you can proceed and install the necessary dependencies onto your Chromebook. The first dependency to install in the nano text editor for Linux. There are other alternative text editors. Hence if you don’t feel comfortable with nano, you can choose any that suits your needs. The second dependency we shall install is a dependency responsible for building flutter applications.
Don’t beat yourself up thinking of where to get the dependencies since this article tutorial shall provide a command line to install both dependencies.
Launch your terminal and copy and paste the following command line
sudo apt-get install nano lib32stdc++6
To confirm the installation, click “Y” on your keyboard.
After successfully running the command above and installing the necessary command lines, it is time to download the flutter application.
Downloading Flutter
Open Flutter’s official download page with your favorite browser and download the latest Chrome OS flutter version.
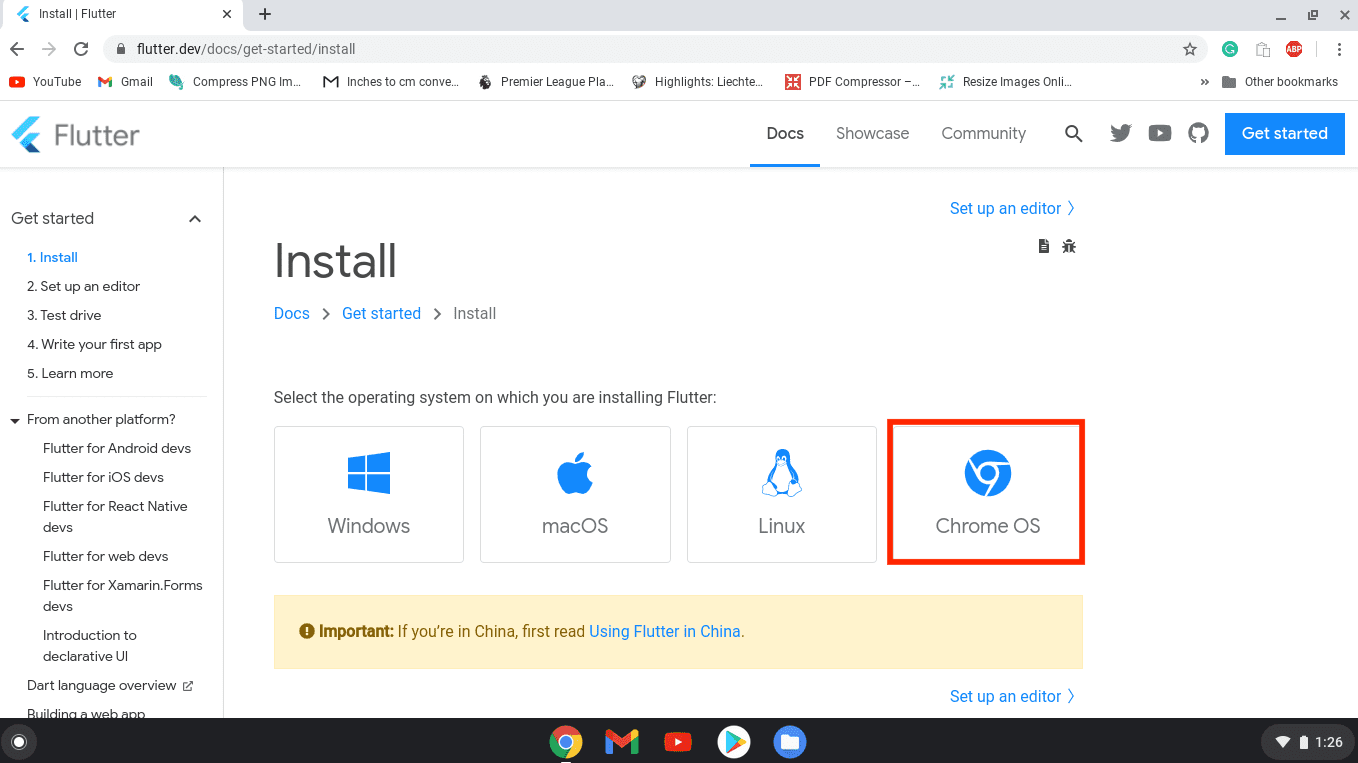
Download the latest Chrome OS flutter version available
For insistence, at the time of writing this article, the newest flutter version is 2.5.3.

Flutter download file
Be patient as the downloader downloads the installation file, which is about 584MBs. This might take quite a while, reliant on your internet speed and Chromebook specs.
Note: Always ensure you download the stable release to avoid unnecessary errors and complications while using unstable versions.
Install Flutter on Chromebook
We now believe you have successfully downloaded the flutter installer. Go to your downloads folder, then move the flutter installation file to your “Linux Files”, as shown in the image below:
Now extract the file by running the command below:
tar xf flutter_linux_2.5.3-stable.tar.xz
Output:

Extracting flutter downloaded installer file
To do this, we shall use the text editor we installed previously. Note that you can use any text editor to complete this process. However, if you are a newbie, we recommend you stick to all the steps we provide in this article to avoid falling into errors during the installation phase.
Run the following command line to make permanent adjustments to the Linux system path:
sudo nano .bashrc
Output:
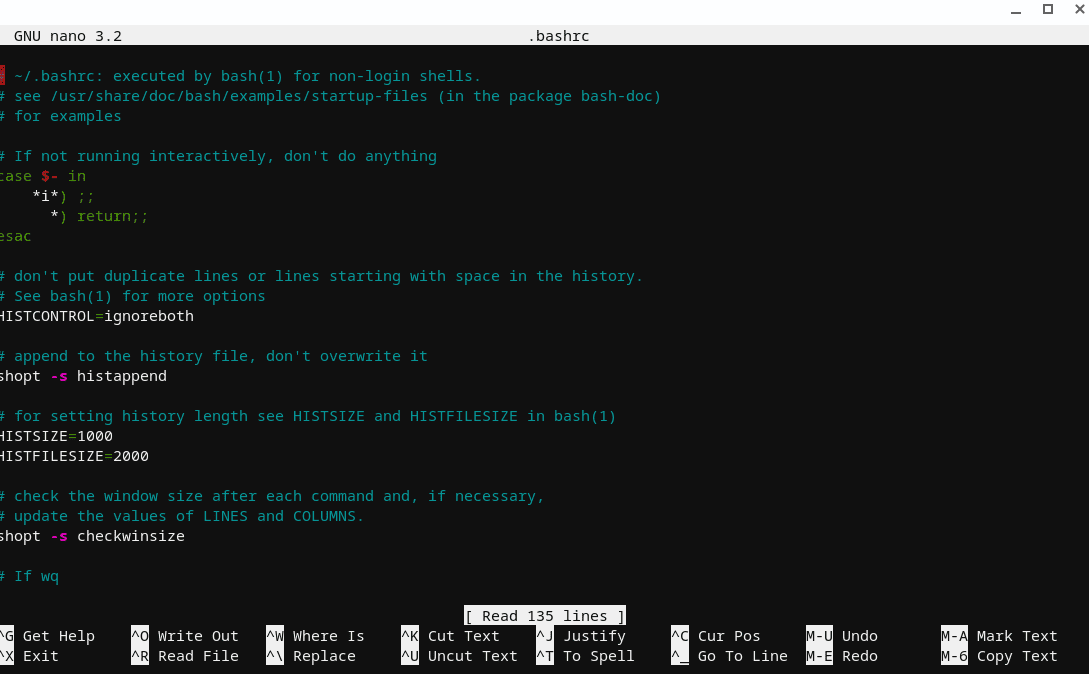
sudo nano bashrc (changing the default Linux path)
The command above will open up a simple nano text editor from the terminal. Using your Keyboard arrows, scroll down to the bottom and click the “Enter” key on your keyboard to input the text line below:
export PATH=$HOME/flutter/bin:$PATH
Output:
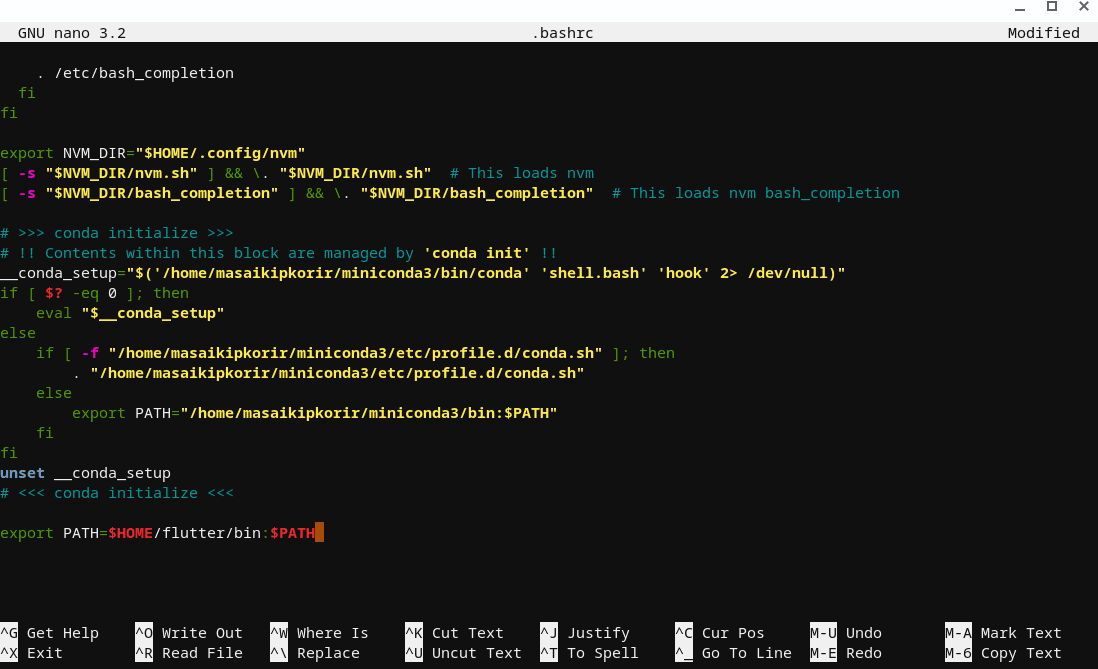
Add text file on the nano editor and save
Once you input the text file, press “Ctrl + O” followed by “Enter” on your keyboard to save the changes made. Next, exit the nano editor by pressing “Ctrl + X”. Now close re-open the terminal by manually closing it down and opening it again to apply the changes made to the text file.
Running the Flutter Doctor
We are almost done installing Flutter on our Chromebook. The flutter doctor is a convenient “doctor” that automates your environment’s flutter checking process and reports back on the terminal. The flutter doctor command automatically downloads and installs all dependencies needed by the flutter application, and it verifies a successful android installation.
With your terminal open, run the command below:
flutter doctor
Output:
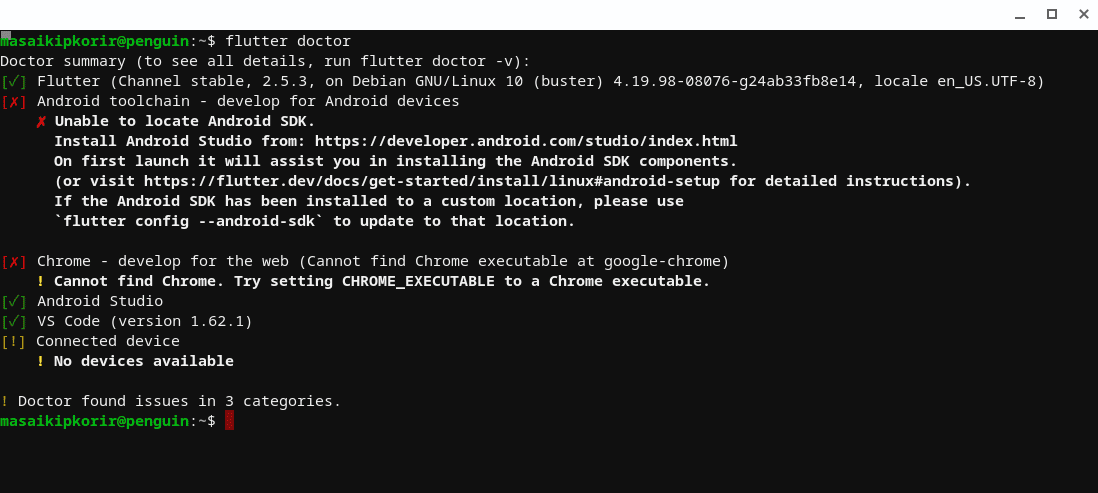
run the flutter doctor command
Note: To review and accept the Android SDK license agreement terms, run the command below:
flutter doctor --android-licenses
Output:

flutter doctor check android licenses
That’s all. You have successfully installed Flutter into your Chromebook. However, if you still need additional tips on navigating and running Flutter, continue reading this article.
Installing Android Studio Flutter plugins
Android studio is a heavy application, and it might cause your Chromebook to stutter if it is not a high-end one. Therefore, before proceeding with this optional step, evaluate your Chromebook specs and ascertain that it can run Android studio before proceeding with this step. However, it is not compulsory; hence you can skip it if you are not in dire need of it.
1. Launch your Android studio application and navigate to “File”> “Settings”> “Plugins”. This process might differ since, for some Android Studio applications like the one I am running, the plugins menu can be found on the Welcome screen on the left side, as shown in the image below:
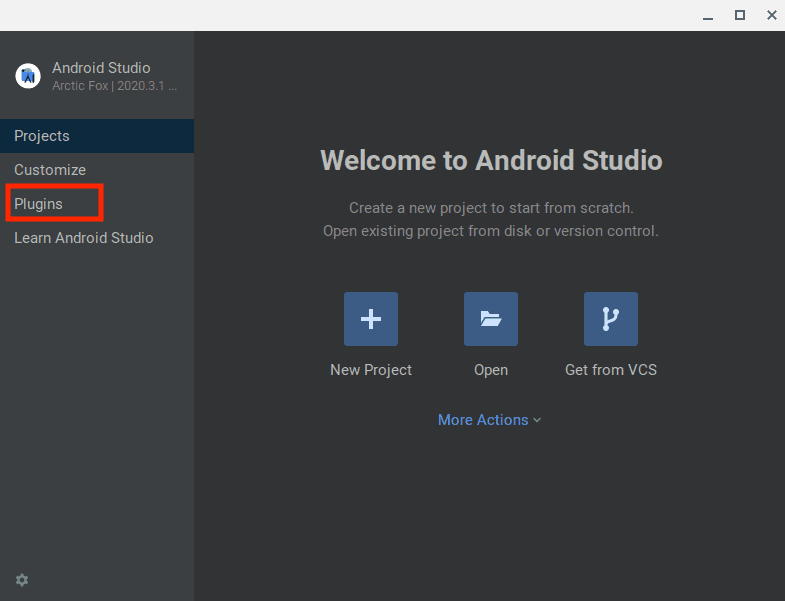
Choose the plugins menu
2. Now click on “Browse repositories”. A new window containing a search bar will pop up.
Note: If you use a different version like I am, skip this step to the next.
3. Under the search bar section, type and search for “Flutter”. Install the first search result as shown in the image below:
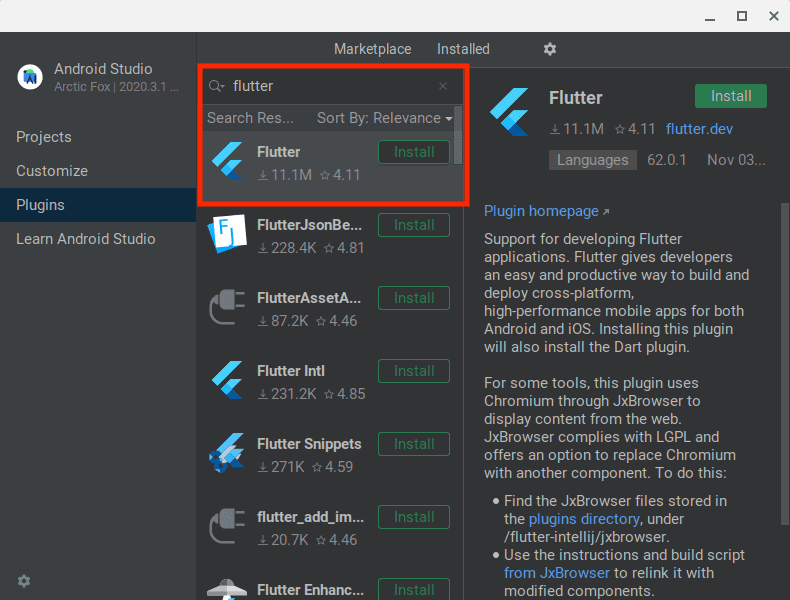
Search for the flutter plugin and install it
4. Now restart your Android Studio application to apply the new changes.
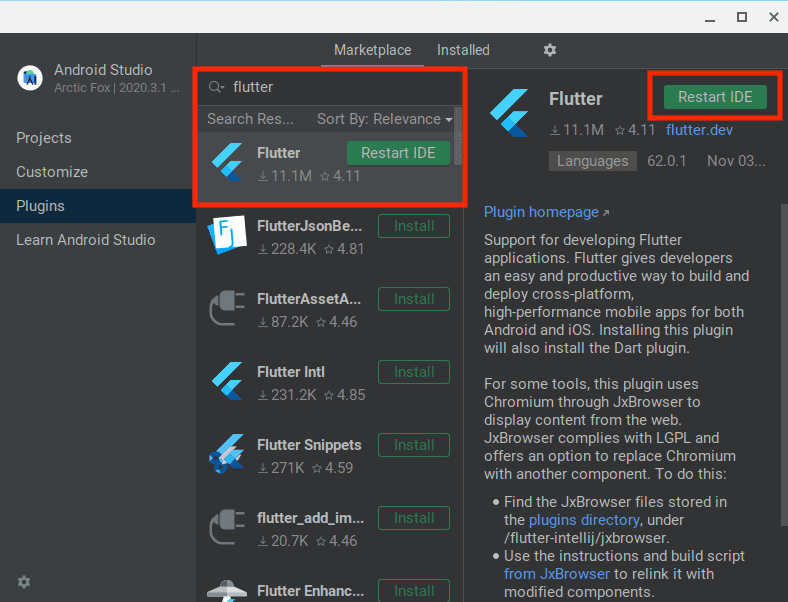
click on restart IDE to restart Android Studio and apply changes
Note: Before installing the flutter plugin, you need to install the dart plugin or else you will get an error during the plugin installation process.
5. Now you are good to go. You can start coding and developing applications with both Flutter and Android Studio on your Chromebook.
Updating Flutter path
You can update the flutter path for the current command line session. We update the flutter path to be able to run flutter commands on any and every terminal session. This process is similar to what we already did in this article, which entails changing the Linux path to suit the flutter path. To update the trail, you first have to determine the path of the flutter directory. After selecting the path, proceed and use your favorite text editor to edit the path environment after executing the command below:
sudo nano .bashrc
From the above command, nano is the text editor that will help us change the path of Flutter. remember there are many path syntaxes you can use, however for the sake of this tutorial, use this text syntax:
export PATH=$[Path of flutter directory]:$PATH
example:
export PATH=$HOME/flutter/bin:$PATH
you can verify that the flutter/bin has been added to that directory by running the command below:
echo $path
Output:

run echo path command
you can also verify the availability of the flutter command by executing the command below:
which flutter
Output:

run which flutter command
Conclusion
This guide has comprehensively covered all the steps involved in installing and using Flutter on your Chromebook. Remember, if you are new to Chromebook, follow the article to the last to get the best results. For instance, instead of using a text editor of your choice, use the one provided herein. This will help you avoid lots of challenges during the installation process. We hope you found this article helpful. If yes, leave a remark via the comments section. Thank you for reading. Stay tuned for more Chromebook tutorials.

1 comment
This is so helpful. Followed every guide step by step. Thanks so much