Google Docs is a widely used online program that enables you to open, view, and edit word files in cloud storage. It is precious for Chromebook users as they do not have the Office pack installed on their systems. This tool is helpful for someone who deals in this file format daily. However, it still lacks an array of features on offer in Microsoft Word. Even so, several tips and tricks can be employed for a better experience using Google Docs.
It enhances your experience with this program and saves considerable time and effort in the long run. Let us briefly look at the top 10 helpful Google Docs tips for Chromebook users.
Helpful Google Docs usage tips on your Chromebook
1. Syncing multiple accounts for collaboration
One of the most valuable features of Google Docs has to do with real-time collaboration between multiple users. Before this, no other programs offered this level of connectivity. It has always been considered that Google Docs provides more collaborative features than Microsoft Word, which is true by all means.
Let’s say that you want to work on a project report with your college friends. For this, you may divide the work among yourselves. Instead of completing your respective parts one by one, you can all work on the same document simultaneously. Once you grant access to multiple Google Docs users, each of these accounts can be used to edit the document simultaneously. You will see multiple editing cursors in the document that are also color-coordinated for your convenience.
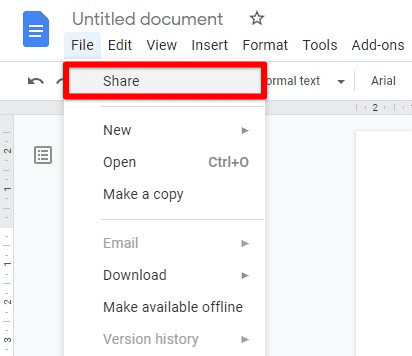
Syncing multiple accounts for collaboration
To sync multiple accounts on a single document, you must go to the “File” tab from the taskbar. In the drop-down menu, click on the “Share” option to add in other accounts. New accounts can be added through email addresses. Another way to do so would be to create a link and share it with everyone you want. Any Google Docs user with that link would edit that document in real-time.
2. Switching between typographical errors
Everyone who has worked on office documents should know that it is essential to deal with typographical errors accordingly. This is one of those basic features that can make or break the user experience on any program. On Google Docs, you get to use two keyboard shortcuts that can take you from one typo to the other. You can use (Ctrl + ‘) to move to the following typo and (Ctrl + ;) to move to the previous typo. This feature is handy in documents that span over quite a few pages. In that case, you do not have to find the errors by scrolling through the entire document manually. With these shortcuts, you can move from one to the other.
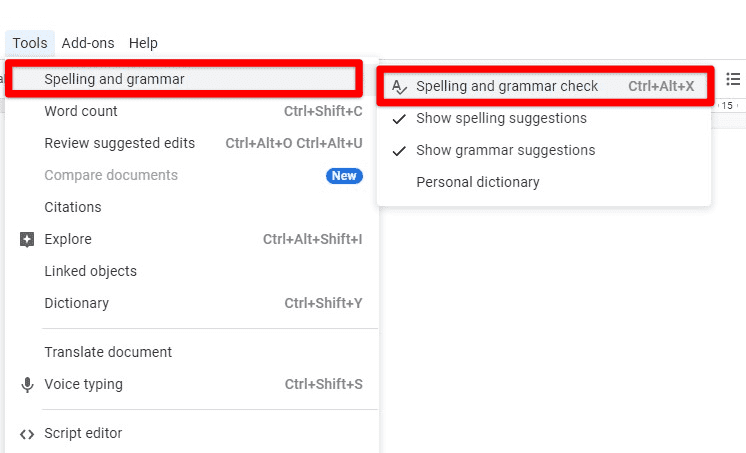
Switching between typographical errors
Apart from this, you can also go to the “Tools” tab in the taskbar and go to “Spelling and grammar”. By enabling the spell-check feature, you will see a pop-up window in the top right corner of your screen. This window also includes arrow keys that can be used to switch between errors inside your document.
3. Selecting text style
Google Docs also provides its users with text styling features. Using this, you can get rid of manual formatting that takes a lot of time, especially when dealing with an extensive document. The text styling options in Google Docs include normal text, title, subtitles, and three different levels of headings. With these options at your disposal all the time, you can apply various formatting layouts within moments. You also get to set a default style automatically loaded whenever you open Google Docs for any document.
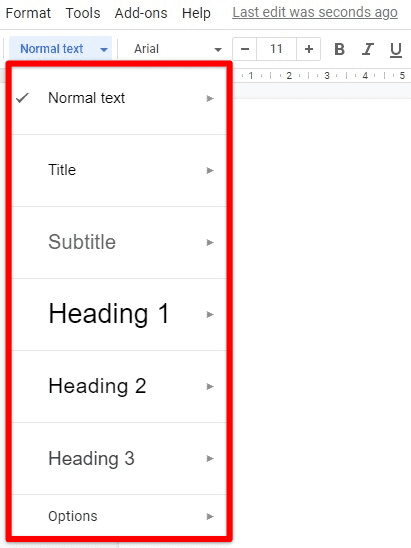
Selecting text style
A text style tab is present below the taskbar. More often than not, it is set to “Normal text,” but you can change it anytime. Click on this tab to launch a drop-down menu. You can select any of the aforementioned options from this menu. The chosen style is applied to the section where the insertion point is located. You can also select more than a few paragraphs to style them at once.
4. Using web clipboard
Another great feature of Google Docs is the web clipboard. This is a tool that is shared between all Google services. It is linked with your Google account and can be accessed from all devices that share that account. This clipboard works just like a regular clipboard, but the fact that it can share content across devices is just amazing. Other than that, it can also be used to contain multiple items simultaneously. This means a memory buffer is designed into this clipboard that lets you copy and paste different elements.
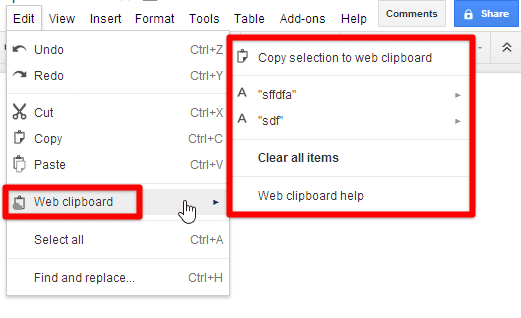
Using web clipboard
The “Web clipboard” option is present under the “Edit” tab in the taskbar. Once you click on the web clipboard, it will open a side window that lists all currently pasted items. You can either select one item for the document or clear the clipboard. We should point out that this can also be used to copy and paste media.
5. Installing add-ons
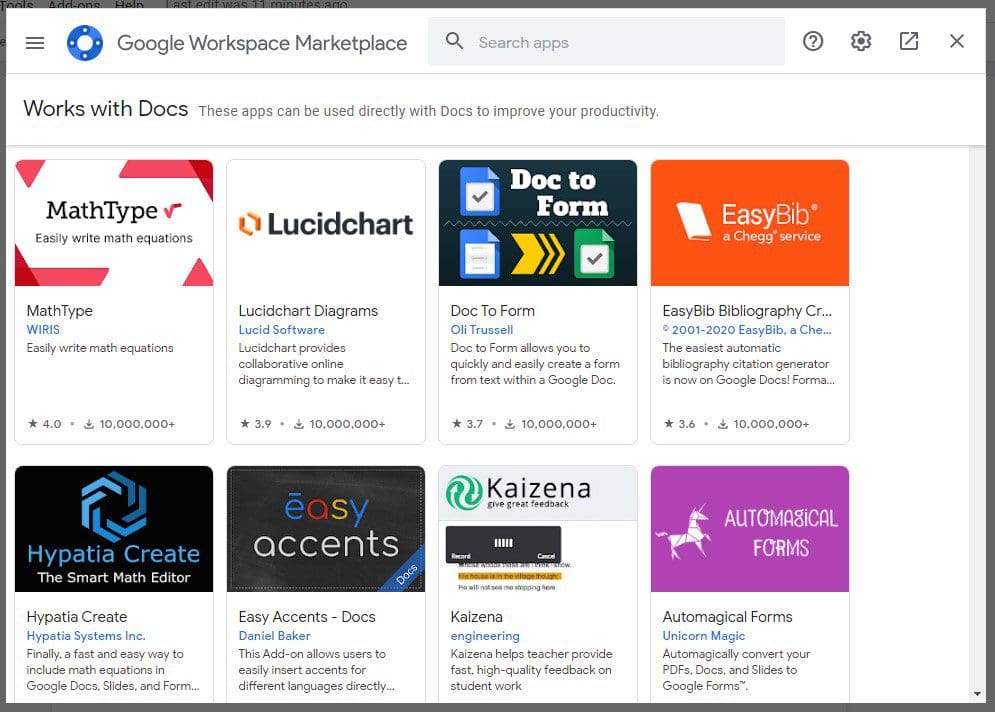
Google Docs also lets developers worldwide build onto its script for creating add-ons for this program. This enables you to install these third-party features in Google Docs that can undoubtedly improve your experience. This is a relatively new feature, but you can still find quite a few valuable add-ons for this. One of the most common add-ons on Google Docs is an online dictionary. This gives you tons of new features as you examine the words present inside your document. If you have ever used it before, this online glossary works precisely like the in-built thesaurus of Microsoft Office.
Installing add-ons
Other than that, you can find several other plugins that can prove helpful. These may include content generators, report generators, diagramming tools, labeling tools, file converters, and more. All of this is present under the “Add-ons” tab in the taskbar. Previously, this was located under “Tools,” but now Google has shifted it over to an independent tab.
6. Displaying word count
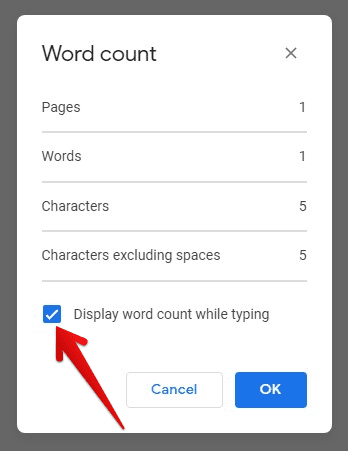
Whenever you are working on a professional document that needs to be limited, you need to look at the total word count constantly. You may also need this count for other reasons as well. In Microsoft Word, you always get this number in the bottom left corner of your screen. However, it is not displayed in Google Docs by default. For displaying word count in Google Docs, you will have to use this keyboard shortcut (Ctrl + Shift + C). If this doesn’t work, go into “Tools” to find this option.
Displaying word count
With this, a window will pop up on your screen. The title of the window will read “Word count”. Apart from words, you can also see the total number of pages, total characters, and the total number of characters, excluding spaces. If you need to display this count at all times, tick the checkbox at the bottom of this window.
7. Pasting without formatting
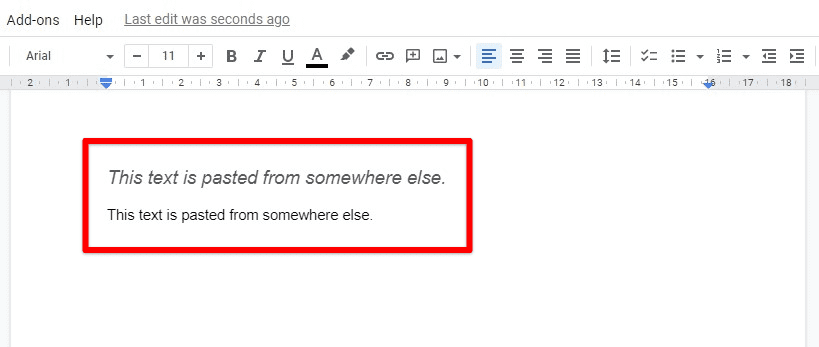
While working on textual documents, you may need to paste content frequently. This tip on pasting text without formatting can be rather valuable. By default, when you copy a chunk of text and paste it into Google Docs, the new text will take the formatting copied along with it. This means that its font, size, color, and style will all be similar to the place where you copied it from.
Pasting without formatting
However, this is not what you need in most cases. Because when you are pasting something into your document, you require the new text to take the formatting already present on your file. A simple yet useful trick can achieve this. Instead of pasting with the usual (Ctrl + V) shortcut, use (Ctrl + Shift + V). This will automatically instruct Google Docs to format the text with new settings. If this shortcut does not work, you can first paste the item into notepad and then paste it into Google Docs. This will also take the same effect. In the picture given below, the first line is pasted with (Ctrl + V) while the second line is pasted with (Ctrl + Shift + V).
8. Retrieving earlier versions
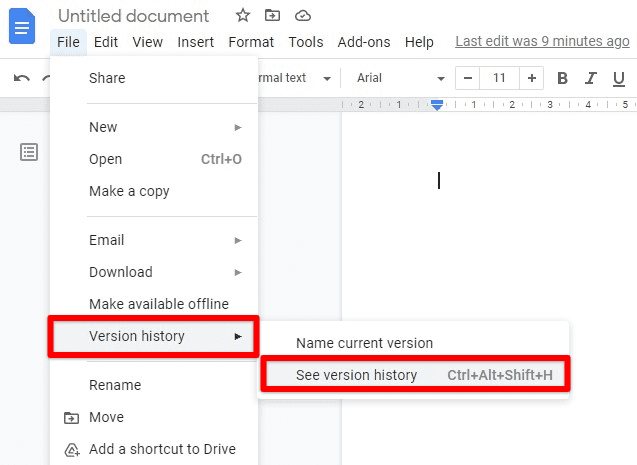
Unlike offline counterparts, Google Docs keeps records of all saved versions of a particular document. This means that when you save the file in Google Docs, it does not overwrite it on the previous version. Those versions are also kept safe in cloud storage that can be accessed whenever you want. This is mostly useful for individuals making changes at a fast rate. To retrieve earlier versions of your document, you will have to go to the “File” tab in the taskbar. From the drop-down menu, click on “Version history”.
Retrieving earlier versions
Here, you can either view the entire version history or give a specific name to the current version. This history can also be acquired through (Ctrl + Alt + Shift + H) shortcuts. Once you have opened the history page, you can toggle between any document versions. This log is maintained along with the respective time and date as well.
9. Using the built-in internet browser
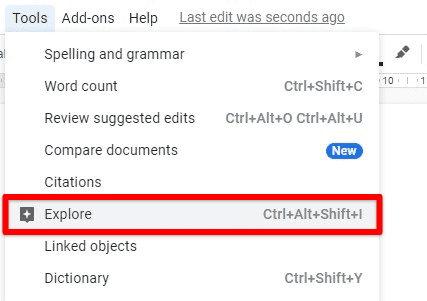
It might be surprising for you to know that Google Docs has a mini internet browser that can be used on the same tab. This allows you to search the World Wide Web without leaving your document. It is something that was never heard of on local document editing programs. This browser is available under the “Tools” tab. Go to “Explore,” and this will open a new window on the right side of your screen.
Using the built-in internet browser
The search bar at the top of this window reads, “Search your docs and the web,” and this is exactly what this tool does for you. Whenever you search for something through this, all results are divided into three main sections. This includes Web, Images, and Drive. What’s great is that you can drag and drop any text or image from this window to your document. This browser is believed to cut down the time spent on this process by more than 75%.
10. Transcribing audio files automatically
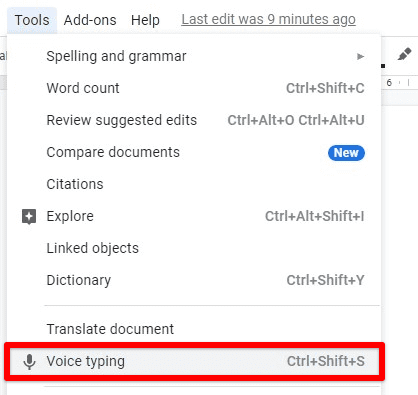
This feature is the last on this list but most definitely not the least. On Google Docs, you can transcribe any audio files with automatic conversion. Even more surprising is that you do not even have to upload the file to Google Docs or even your drive. This feature works by using your device’s microphone. Therefore, you can play the file on a speaker. Right before your eyes, the contents of that audio file will be typed into the document.
Transcribing audio files automatically
You can also use this feature for voice typing as well. Make sure to use headphones as this is known to produce the best results. This transcription tool is most useful for people who cannot use a keyboard. Use the (Ctrl + Shift + S) shortcut to start voice typing. It can also be started by going over to the “Tools” tab and clicking on the “Voice typing” option. Please note that this feature is available in all languages and dialects supported by Google Docs.
Conclusion
With users worldwide shifting their focus towards internet-based applications, Google Docs has become a major competitor to MS Word in recent times. By having these valuable tips, you can go about your working practices on Google Docs while maximizing proficiency. This enhances your overall experience by introducing new features that you did not know existed before this. For example, did you know that you can flip an image on Google Docs? Make sure to read all about it here.
