Chromebooks sport the highly efficient Google Chrome as their main web browser, which is loaded to the brim with features and functionality. Although you can install other browsers on Chrome OS as well, such as Opera that now totes itself as the world’s first alternative browser optimized for Chromebooks, the Chrome browser has established itself as the go-to choice for millions of people across the spectrum.
Apart from lightning-fast internet surfing speeds and a minimalistic interface that makes it easier to get stuff done, Google Chrome has many features to its name that does nothing but enhance the browsing experience tenfold. One such piece of functionality in Chrome is known as “Bookmarks.”
The latter allows you to save web pages and websites of interest that you would like to return to later. Bookmarks, therefore, are a great way to make sure you don’t miss out on anything important since you can easily revisit the section of your soundly secured bookmarks and revisit what you want to. However, in a scenario where you have changed your browser, like how we mentioned Opera above, you can easily import your previous bookmarks to your new browser, but there is one prerequisite for that to happen. You need to export bookmarks to store them locally on your device and then import them to your browser of choice.
Therefore, in this article, we’ll be showing you how to export bookmarks in Chromebook if you’ve meant to carry on your bookmarks for whatever reason. So without any further ado, then, let’s jump right in.
Exporting bookmarks in a Chromebook
The process of exporting bookmarks in Chromebooks is outright simple and uncomplicated. Follow the steps given below to get started.
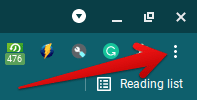
1) The first step in exporting your bookmarks in Chromebook is to launch the Google Chrome browser. While that isn’t a challenging prospect, the next thing to do is click on the “Customize and control Google Chrome” button in the top-right corner that looks like three vertical dots.

Customizing Google Chrome
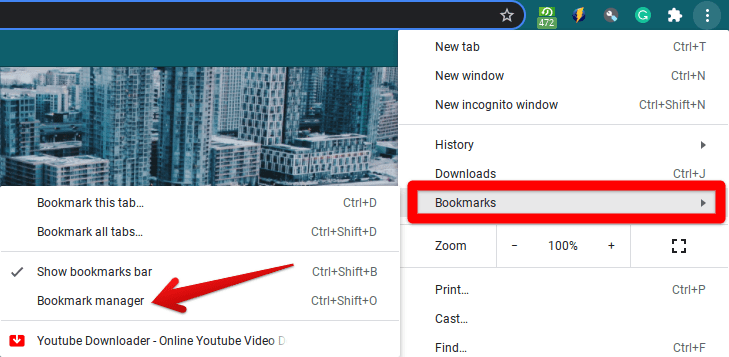
2) Once done, you will hover over the “Bookmarks” area that will expand to another small-scale window. There, you will click on “Bookmark manager” to continue.

Clicking on “Bookmark manager”
3) After that, another Chrome tab called “Bookmarks” will open in your browser. There, you will have to click on the three vertical dots button again to expand the options.

Opening Bookmark options
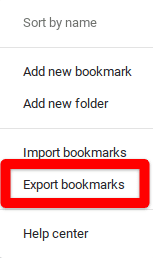
4) As soon as you do that, a list of options will appear in that area. Click on “Export bookmarks” to progress to the next step.

Clicking on “Export bookmarks”
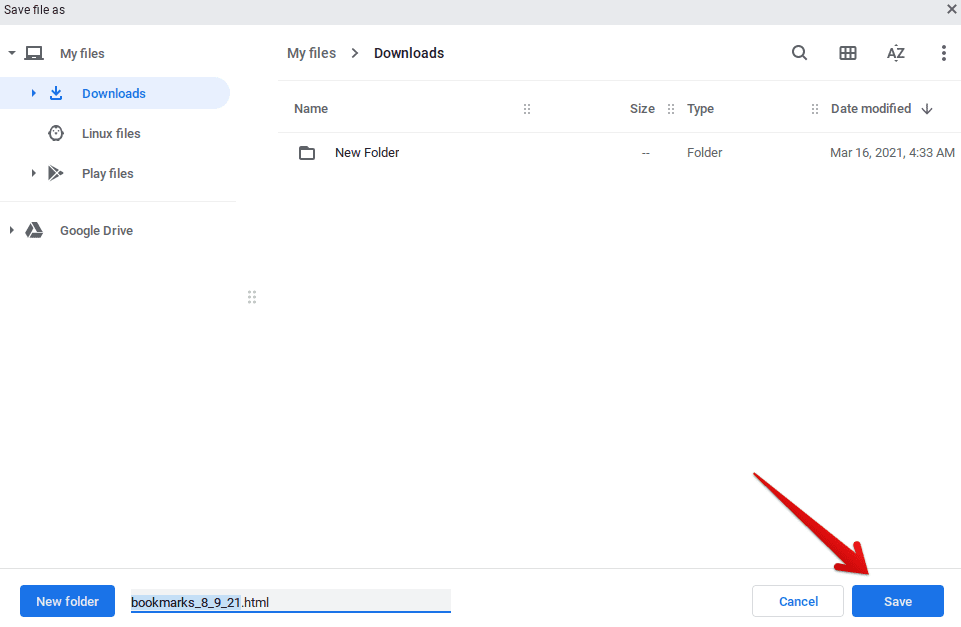
5) You’re fast approaching the end of this whole process now. All that’s left is to choose the location of your exported document as the browser prepares the Chrome HTML document to be stored. You have multiple options available in this regard, such as creating a new folder and saving your exported bookmarks in it, your Google Drive account, or simply in the Downloads area. Once you’ve gone through what you need to do, click “Save” to finalize the process.

Saving the exported bookmarks
Pat yourself on the back for making it this far! Finally, you’ve successfully learned how to export bookmarks in a Chromebook. Now that you have your necessities saved as an HTML document, other browsers can import them effortlessly in their own interface, so your workflow and productivity are never affected.
