Chromebooks are packed with functionality, and a new set of features arrive with every major Chrome OS update. May it be screen recording or a dedicated Phone Hub to make phone controls seamless, there’s something for everyone in these sleek and minimalistic devices. However, zooming in to something on your screen is a neat feature that may come in handy from time to time. There are a whole bunch of ways you can zoom in and out on Chromebooks and all of them are outright effortless to do so.
In this article, therefore, we’ll show you how to focus on the things on your screen, zoom into them, and then subsequently restore your screen size by zooming out.
Zooming in and Out on Chromebooks
The following are all the different methods that you can use to zoom in and out on your Chromebook.
Zooming in and Out on a Page
The “CTRL” key will be of the essence here, allowing us to zoom in and out in a variety of ways. The first way to perform said action is by pressing the “CTRL” key followed by pressing either the “+” or the “-” key where each of the latter would zoom in on a Chrome tab or zoom out, respectively. When you perform this key combination, you’re also going to get a prompt in the top-right corner of the screen that confirms whether you have zoomed in or out. Keep in mind that this method only works on a page, whether it’s a Chrome tab or your “Files” section.
Zooming in and Out on a Screen
This method will allow you to increase the size of all the screen contents, including your Chromebook Shelf, Launcher, Status Tray, and everything of the like. This is a good approach if you’d like bigger icons as well. To zoom in and out on your screen, press the “CTRL” and “Shift” keys together and then press either the “+” or the “-” key that zoom in or out, respectively.
Zoom in and Out Using the Fullscreen Magnifier
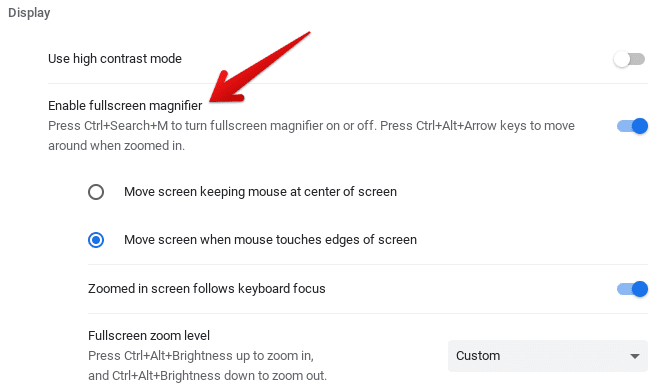
Another nifty feature that comes built into your Chromebook is the Fullscreen magnifier. This function can be found in the Chromebook’s “Settings” under the Display section of the “Accessibility” settings. A through-and-through method of enabling this feature is a keyboard shortcut. By pressing the “CTRL” and “Search” keys together, you’re required to press the “M” key. This would enable the Fullscreen magnifier and allow you to zoom in or out on specific areas of whatever page you’re on. The feature basically magnifies the whole screen, and you can easily move your cursor around to navigate as if you were using a magnifying glass.
You can also zoom in and out while magnifying the screen. To do that, you can press the “CTRL” and “Alt” keys followed by either pressing the “Brightness Up” or the “Brightness Down” key. This would respectively zoom in and out on your screen.

Enabling the Fullscreen Magnifier
Using Docked Magnifier to Zoom in and Out
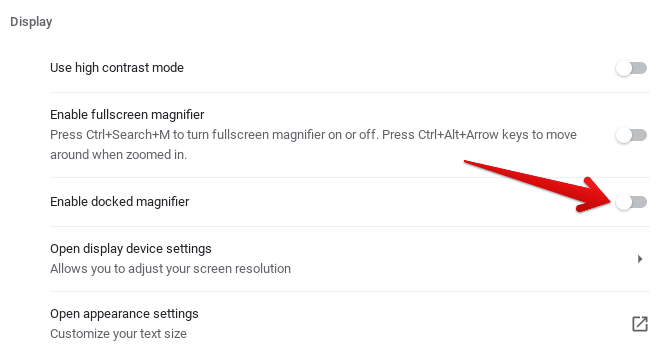
Docked magnifier is another pre-loaded Chromebook feature that lets you magnify a part of the screen by displaying it above the original screen. It’s a cool feature if you’re trying to zoom in on something specific on whatever page you’re viewing. To enable this function, press the “Shift” and “Search” keys together, followed by pressing the “D” key. You can also find docked magnifier in the “Settings,” right below Fullscreen magnification.

Enabling the Docked Magnifier Feature
How to Zoom in or Out on a Touchscreen Chromebook
If you own a Chromebook with a touchscreen-enabled display, zooming in and out is nothing but a simple affair. All you have to do is use a two-finger combination to perform a zooming-in or zooming-out gesture. This is something that almost every smartphone user is familiar with, so repeating it on a Chromebook shouldn’t be any different or difficult.
