Chrome OS has been subject to popularity and success for quite a while now, and ever since the unfortunate pandemic hit, the numbers depicting its sales and growth have almost doubled. The scenario even led this sleek operating system to sprint out just ahead of macOS, thereby beating the latter at the end of 2020.
However, as more manufacturers compete to make more refined and hardware-oriented Chromebooks, the possibilities are increasing manifold when it comes to how they can be used to operate these convenient machines. You can even install another operating system on it, but doing so, you would require to have a recovery drive for your Chrome OS.
Having your Chromebook’s default operating system stored somewhere safe and secure is a great way to strengthen its longevity, especially when your device has been affected and requires a proper hard reboot. In this article, therefore, we’ll be showing you how to create a Chromebook recovery USB drive so the most important component of your laptop—the operating system—can be backed up effectively.
Creating a Chromebook Recovery USB Drive
The first thing that we’ll have to do is install the Chromebook Recovery Utility tool from the Chrome Web Store. This is an application offered by Google to assists users in instances such as these, whether they’d like to replace Chrome OS with a new operating system or re-install Chrome OS if it has been rendered useless. The main purpose of this tool is to create a backup of Chrome OS on a USB drive so it can be installed later. Therefore, we’ll first have to get the Chromebook Recovery Utility from your browser to continue.
Installing the Chromebook Recovery Utility Tool
The following steps will explain how you can easily install the Chromebook Recovery Utility extension on your device.
1) Begin by clicking on this link so you can head straight to the official download page of Chromebook Recovery Utility. When you’re there, click on “Add to Chrome” to continue.

Installing the Chromebook Recovery Utility Extension
2) After doing that, a prompt will appear from the top of your window. It’ll be to confirm whether you’d like to continue the download or not. Click on “Add extension” to move forward.

Confirming the Install
3) Right after that, your download will begin, and Chromebook Recovery Utility will be added to your Chrome browser in a moment. You’ll be notified shortly that the extension has been installed. The tool will be present in your Extensions Bar near the top-right corner of your Chrome window.
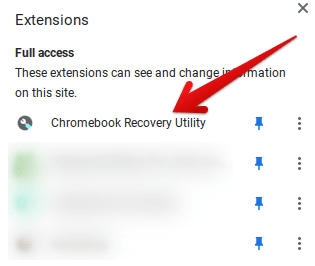
Chromebook Recovery Utility Added to Chrome OS
You’ve done half the work installing the Chromebook Recovery Utility tool on your Chromebook successfully. It’s time to move ahead and launch this tool to create a backup of your Chrome OS effectively.
Creating a Backup for Chrome OS
After you’ve installed the Chromebook Recovery Utility tool on your Chromebook, click on it in your extensions bar and launch it to continue. You will need a USB drive or a microSD card with 8GB of free space for this. Please choose the one which doesn’t have important files or data stored on it, since all that will be erased in the coming steps. With that said, the following steps will explain the rest of the process from here.
1) As soon as you launch Chromebook Recovery Utility, click on “Get started” to move forward.
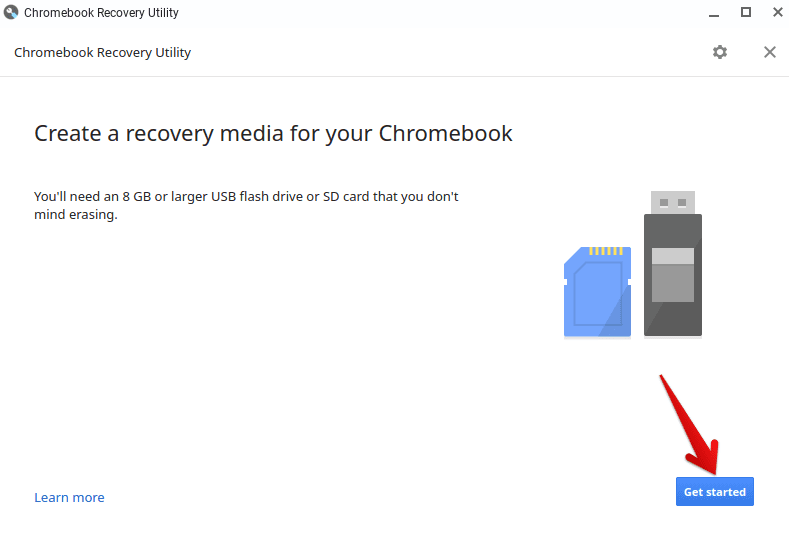
Getting Started With Chromebook Recovery Utility
2) After clicking on “Get started,” you’ll be taken to the next page, where you’ll have to enter the model of your Chromebook. The tool makes everything easy for us by detecting the model of our device by itself. All you have to do is click on the model number right above the typing bar, and your Chromebook will be instantly recognized. After you’re done, click on “Continue.”
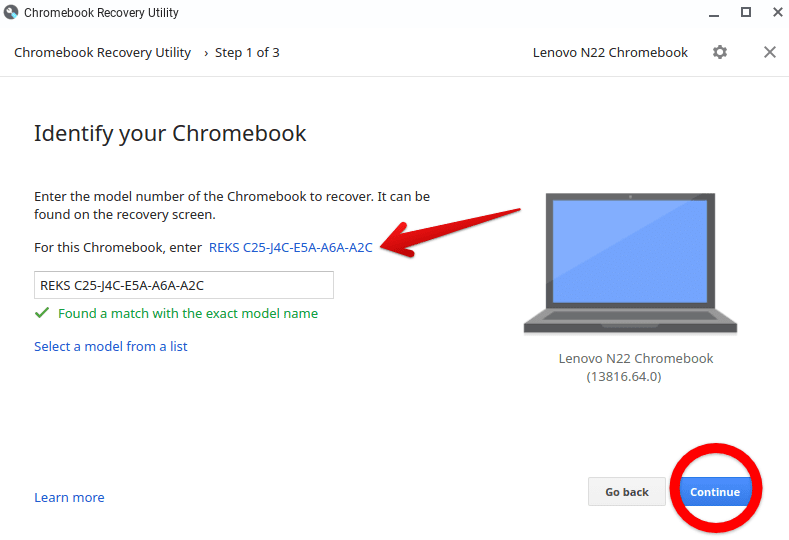
Entering the Model Number of Chromebook
3) The second step of Chromebook Recovery Utility is where you’ll have to insert a USB drive into your Chromebook. When you’ve done that, select it in the Recovery Utility’s interface and click on “Continue.”
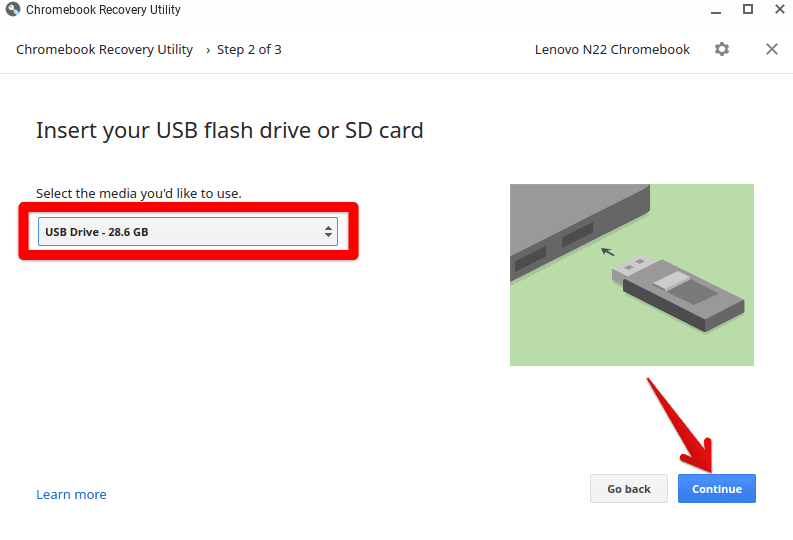
Inserting the USB Drive
4) This is the step where all contents of your USB drive will be erased. Now’s the time to take out anything important in your USB, but if you’re already chosen an empty one, click on “Create now.”
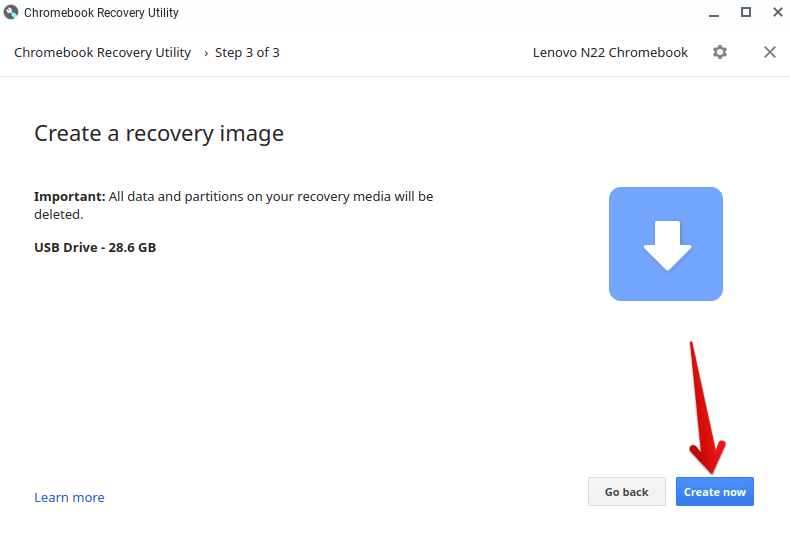
Creating the Recovery Image
5) After clicking on “Create now,” the recovery image creation process will begin thanks to the Chromebook Recovery Utility tool. It will take a while for this operation to finish since there are multiple steps involved, such as verifying, unpacking, writing, etc. When you’re prompted that the process has been completed, click on “Done.”
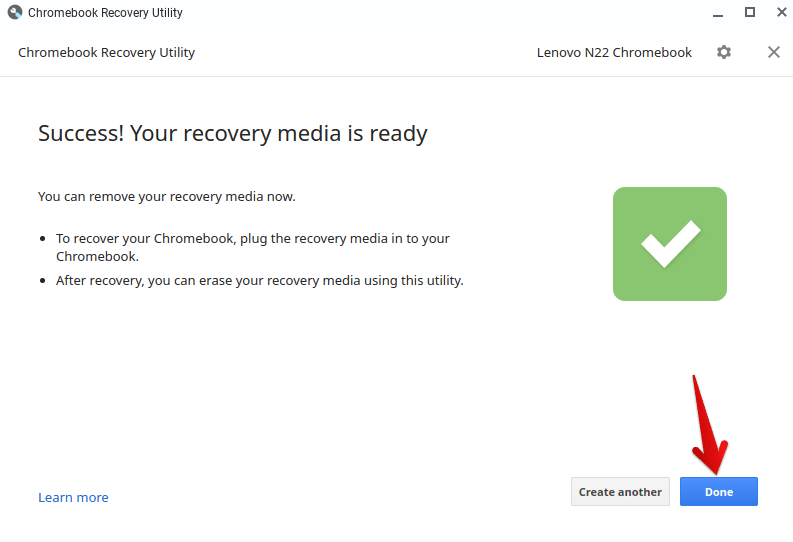
Recovery Media Creation Complete
If you’ve made it this far, you have successfully created the recovery media for your Chromebook. All that’s left to do now is removing your USB drive. You can insert it into any Chromebook you want again to recover/restore or reinstall Chrome OS. The whole process was as easy and simple as that. Chrome Ready wishes you good luck!
