Dealing with PDFs is no exception to a Chromebook’s list of workable features. If you wish to venture out of a Chromebook’s league, you’ll have to refer to the horde of applications available on it through the Google Play Store and the small-scale Linux OS within.
With that being said, restrictions do apply, and you’ve probably come here looking for a proper way to edit and electronically sign PDF documents on your Chromebook with minimal effort. This article will reflect exactly that and educate you on the subject extensively. Let’s dive straight in.
What Can You Do With a Chromebook’s Built-in PDF Viewer?
Chromebooks are well able to open files that are in PDF format. This is a no-brainer right off the bat, but let’s shed some light on what more you can do with them.
You can do as much as open and view PDF files and add annotations or notes through Chrome OS’s built-in PDF viewer. You can also print your document and rotate it as per your preference. The Chrome browser’s ability comes into play here since each time you click on a PDF file on your device, and it’ll open up in none other than your friendly-neighborhood browser.
However, we’re afraid that’s about it for the pre-loaded functionality. If you’re looking to plunge a step further and sign PDF files as well, keep on reading.
How to Sign PDF Files on Your Chromebook
Those with professional-grade jobs, brokers, or business owners may frequently require to electronically sign PDF files since that’s just how it is now in the tech-forward world we live in. Unfortunately, the Chrome browser and the built-in PDF viewer cannot accomplish this task and can only allow you to read the document and leave a few notes.
To increase your functionality in handling PDF files on Chromebook, you’ll have to pay heed to online PDF editors that can either be installed from the Chrome Web Store or the Google Play Store.
- Check out the top 10 best PDF editors for Chromebook here.
One easy-to-use PDF editor with a smooth design, lightweight size, and a fluid interface is Sejda. This editor is free of cost and can host various functions, making it on par with paid products. Sejda can be installed from the Chrome Web Store, and you can download it on your Chromebook by clicking on this link.

Installing Sejda
Sejda to the Rescue

Sejda PDF Editor
After installing Sejda, look for it in your extensions bar to launch it and give it a go. Since this is a web-based application, another tab will open for Sejda as soon as you access it from your extensions.
You can begin editing your PDFs by uploading them to the PDF editor. Either that or you can start from a blank document and draft your own document and send it to others in PDF format. One of the best things about Sejda is that it supports multiple formats and can even convert files from one format to the other. Do you require to send someone a Word document, but you have it in PDF form? No worries because Sejda will get that sorted in a jiffy for you.
Signing Documents With Sejda
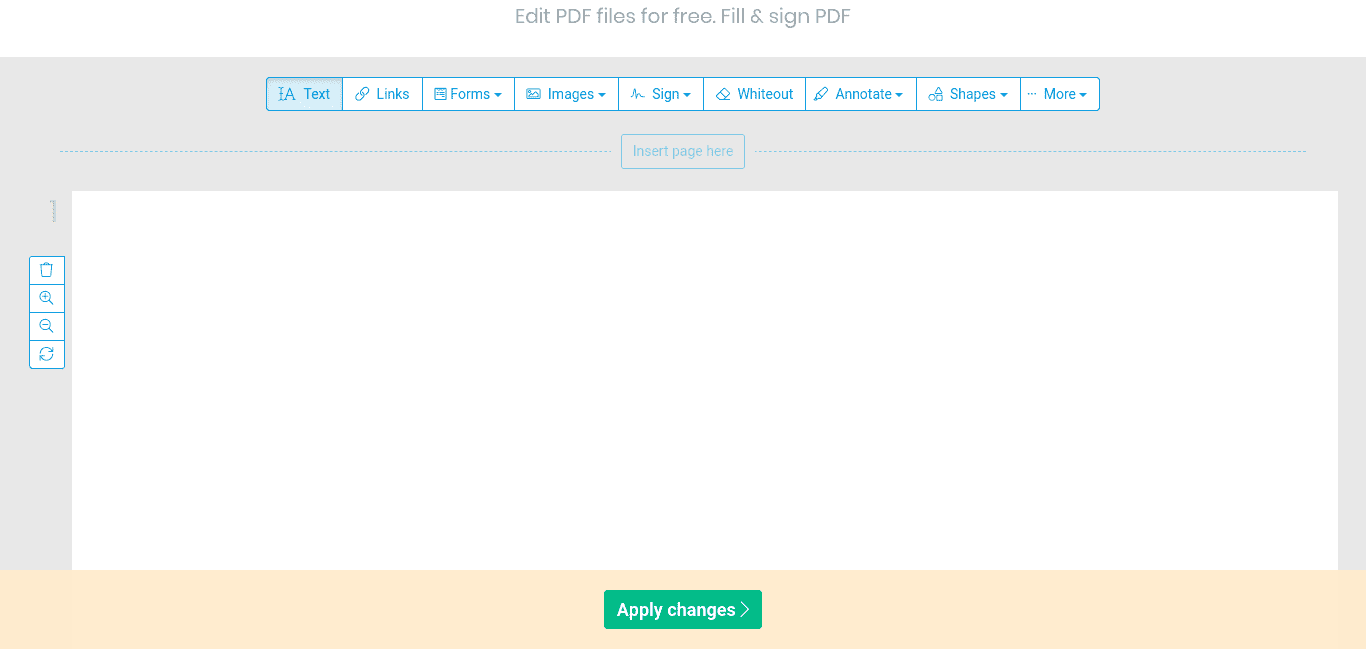
With a blank page opened, click on “Sign” followed by a prompt click on “+ New Signature.” The screenshot below will illustrate how to do this.
- Note: You can also do this with a PDF document of your own and not just from a blank page.

Adding New Signature on Sejda
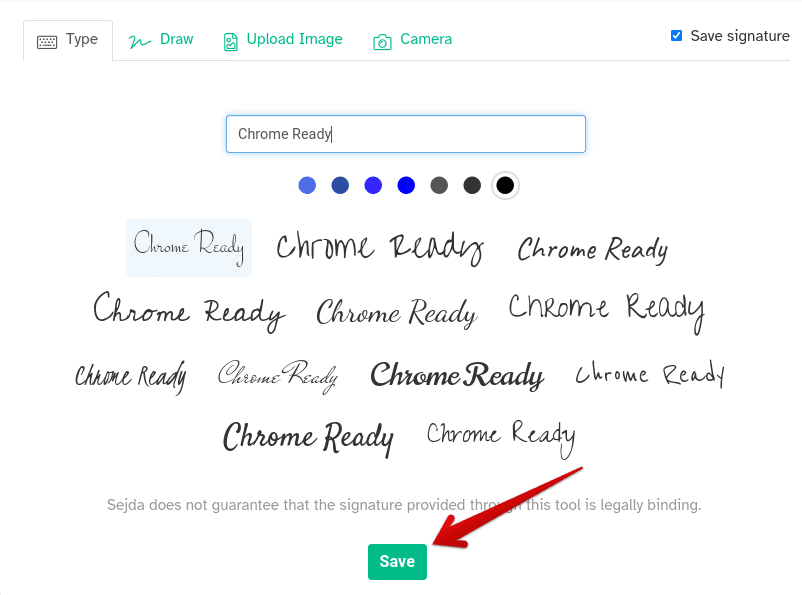
Next, you’ll be present with several options to help you sign your PDF file. Sejda has its own tool that generates lively-looking signatures, but that’s not all there is to it. You can also draw your own sign using your touchpad or mouse and even upload a photo that depicts your signature. Whatever you choose to go with entirely relies on you here. When you’re finished, click on “Save” to finalize the signature.

Finalizing Electronic Signature
In our opinion, Sejda is a PDF editor that blurs any hindrances a user might experience with PDF files on a Chromebook. It’s a remarkable free tool that gets the job done promptly. Rest assured, it’s truly capable of handling all work about PDF files, their conversion, editing, signing, and even more.
We hope that this guide proved helpful for your cause. Chrome Ready wishes you good luck!
