After several moments of no activity, you’ll find it common for devices to go to sleep. This is a default setting intended to save battery for users whenever the system detects the device is left idle. However, there are many instances when you’d require your Chromebook to stay awake despite zero usage. This could be when you’re trying to upload a bulky file, or you’re multitasking with another device at the same time, and you’d like to make your Chromebook screen stay visible.
Keeping your Chromebook from falling asleep
For any reason, keeping your Chromebook from falling asleep can seem like a difficult prospect at first, but rest assured, it’s simple and easy. In this article, we’ll show you how to keep the power on and make sure your Chrome OS doesn’t doze off when you need it not to. We got a couple of methods lined up for you, so let’s dive right in.
Option #1: Using a Chrome Extension
It turns out there’s a handy Chrome extension called “Keep Awake” that can be downloaded and installed from the Chrome Web Store. This application targets the battery power of Chrome OS and alters it to our preference. Its working is uncomplicated, and we’ll get to it later on. First, however, let’s go through its installation. The following steps will take it from here.
1) Begin by going to this link. When you’re there, click on the apparent “Add to Chrome” button.

Clicking on “Add to Chrome”
2) As you do that, the system will confirm the installation from in you in the shape of a prompt. Click on “Add extension” to continue.

Clicking on “Add Extension”
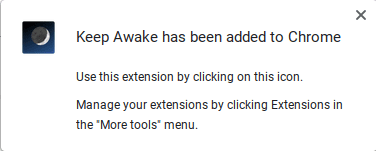
3) Right after that step, Keep Awake will be added to your Chrome browser. You’ll be notified by the system shortly as well. The screenshot below illustrates the completion of the installation.

Keep Awake Successfully Installed
Be sure to pin Keep Awake to your Extensions bar so you can use it consistently. Now that it has been installed let’s get on to the working part of this utility.
Keep Awake Working
Keep Awake Extension Icon
There’s nothing much to understand here apart from a few basic concepts. When you first install Keep Awake, it’ll show you an icon of the moon. When you click on it, that icon will change and resemble the sun. Another click will compel it to become a sunset. Here’s what each of these icons represents.
- The moon: The extension is inactive, and all power settings reflect Chrome OS’s original ones.
- The sun: In this setting, the screen will not sleep. Keep Awake is fully enabled here.
- The sunset: The screen might lose its brightness and turn off after no activity, but the system itself will not sleep, and all your connections will stay online. This setting yields the best of both worlds.
To discover what each icon means yourself, hover the cursor over them, and you’ll get a short description.
Option #2: Using Chrome OS’s System Settings
This may not have been available in the last 2-3 years or so, but there’s now a definite way of changing your power settings from within your Chromebook. The following steps will explain how.
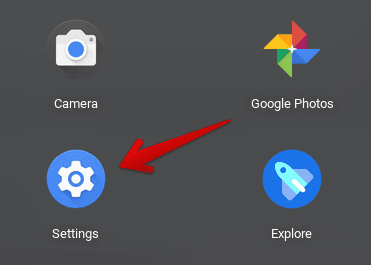
1) Begin by opening your Chromebook’s “Settings.”

Opening “Settings”
2) In the left column, click on “Device,” followed by a prompt click on the “Power” settings.

Accessing “Power” Settings
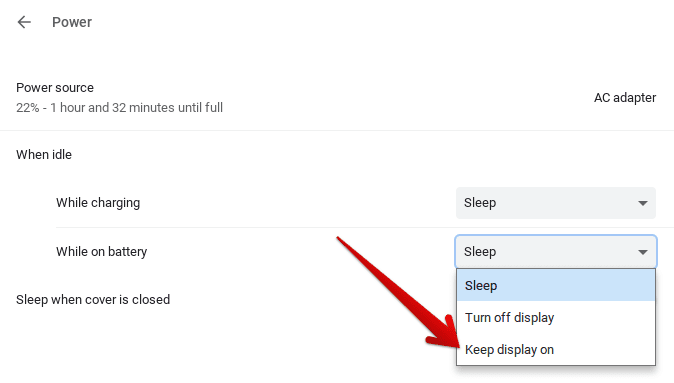
3) After clicking on “Power,” you’ll gain access to a variety of settings. Here, you can easily change how your Chromebook’s screen behaves when it’s idle. You can optimize it when it’s being charged and when it’s using the battery, depending on your requirement. Moreover, you can also decide if your Chromebook sleeps or not when you close its lid. Pretty neat. Anyway, if you want the screen to stay awake when it’s on battery, click on the bar beside it. This will reveal more options for you. Click on “Keep display on” to finalize the process. Additionally, you can do the same when you’re Chromebook is being charged.

Keeping the Display Awake
That’s about it as far as preventing your Chromebook from sleeping is concerned. For your convenience, we’ve given you two options you can work with. You can go ahead and try both of them to determine which one works better for you.
