Chrome OS can be quite limiting sometimes. Even with the newly added support for Android and Linux applications, there are still a handful of things that you can’t do with your Chromebook. However, burning an ISO file (often called ISO image) to a USB drive on your Chromebook is very much possible. I have done this a couple of times, and it always works like a charm – never disappoints.
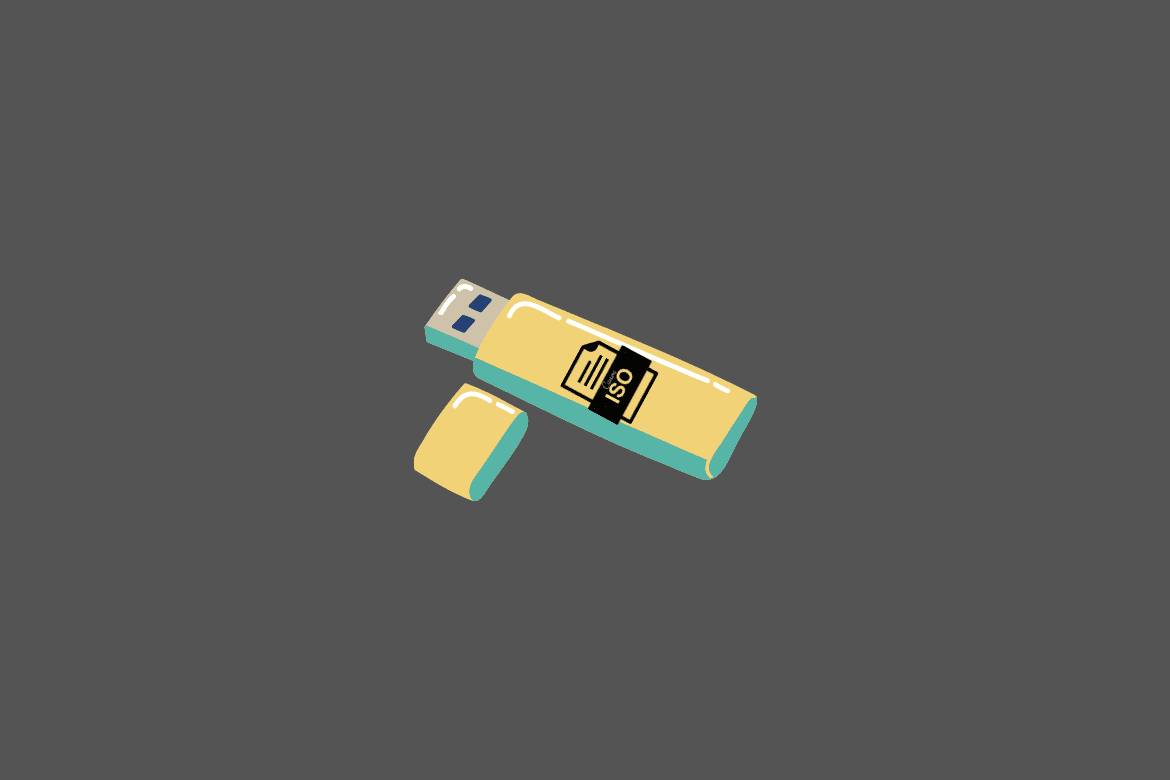
Burning an ISO image to a USB drive on Chromebook
Some of the significant uses of a bootable USB drive include installing a new operating system or run software like Gparted, Antiviruses, and Penetration testing Operating systems on Live mode. Most people are used to using tools like Rufus, Balena Etcher, PowerISO, etc., developed to run on Windows, Linux, and macOS natively. On Chromebooks, we will use quite a different tool – Chromebook Recovery Utility.
The Chromebook Recovery Utility was designed to create recovery images for Chromebooks if you ran into an issue with your Chrome OS. It is also available for Linux, Windows, and macOS. The tool works by either downloading the image file from Google’s servers or selecting an image from your system and burning it onto a USB drive. Even though it is meant for use with Chrome OS image files, the Chromebook Recovery Utility does seem to work well with Linux and Windows ISO files. Let’s dive in and create a bootable USB drive on Chromebook.
Download the Chromebook Recovery Utility
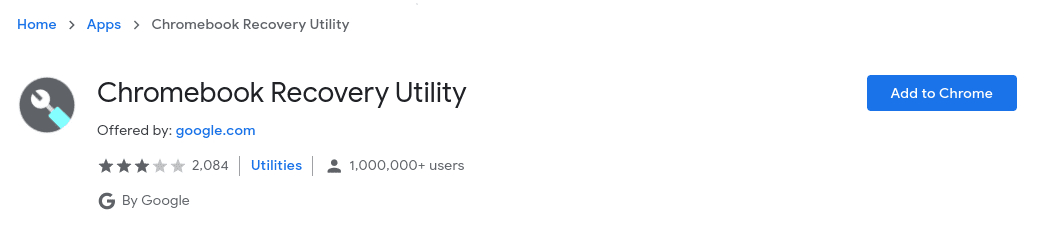
The Chromebook Recovery Utility is like any other Chrome app, and you can easily install it from the Chrome Web Store. Use the link below to install Chromebook Recovery Utility.
Chromebook Recovery Utility – Chrome Web Store
Chromebook Recovery Utility
Download and Rename Your Windows/Linux Iso File
Since you want to create a bootable USB drive, I presume you already have the OS image files on your system. If not, download the file from their official website. Now, the Chromebook Recovery Utility was designed to work with .bin files, and in our case, here we have downloaded .ISO file. Luckily, you don’t need to do any conversion; rename the extension to .bin. For instance, Ubuntu-20.02-Desktop.iso will now read as Ubuntu-20.02-Desktop.bin.
Create a Bootable USB Drive with Chromebook Recovery Utility
Once you have added the Chromebook Recovery Utility app, you can now burn your image file onto the USB drive. Follow the steps below.
1. Insert the USB drive into your Chromebook
2. Launch the Chromebook Recovery Utility from your applications menu.
3. You will see the Chromebook Recovery utility welcome window. Click on Get started.
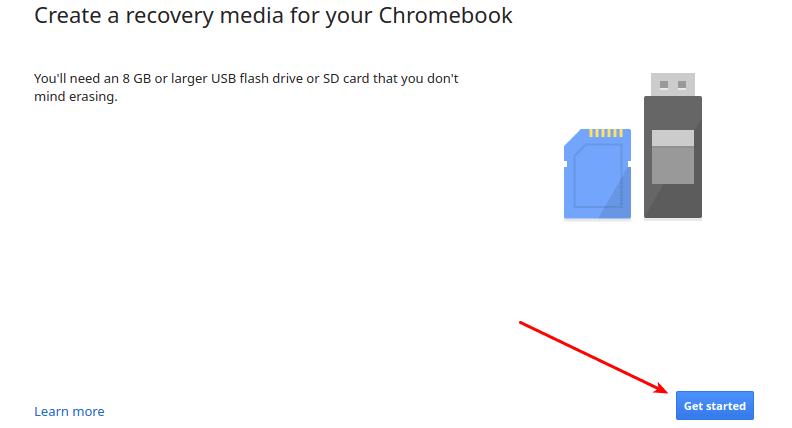
Chromebook Recovery utility
4. Next window, click on the Setting button (cog wheel) located at the top-right. On the drop-down menu that appears, select “Use Local Image.”
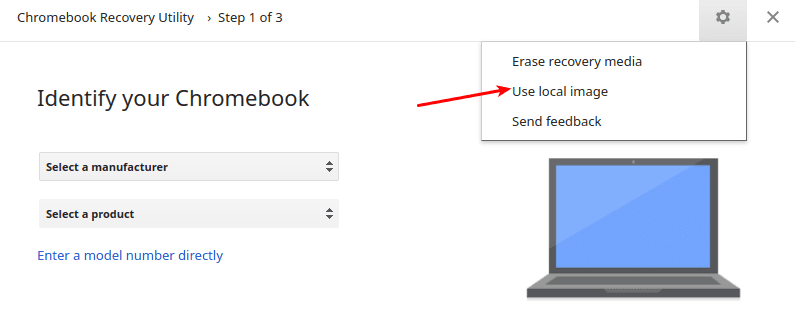
Use Local Image
5. A file manager window will open, and you will need to select your image file.
Note: It should be renamed to a .bin file; otherwise, the file will not be visible.
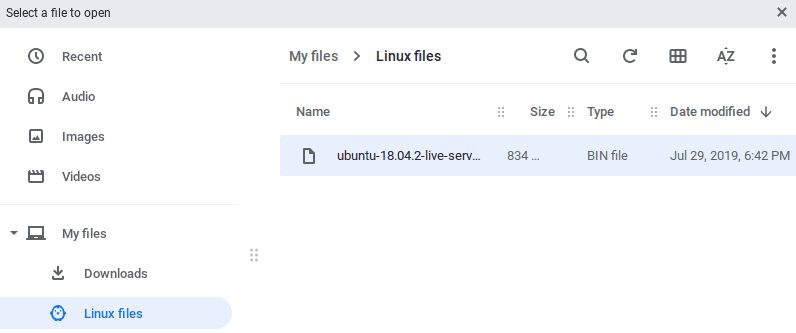
Select image file
6. Next window, select the USB flash drive or SD card you want to use from the drop-down menu. Click Continue.
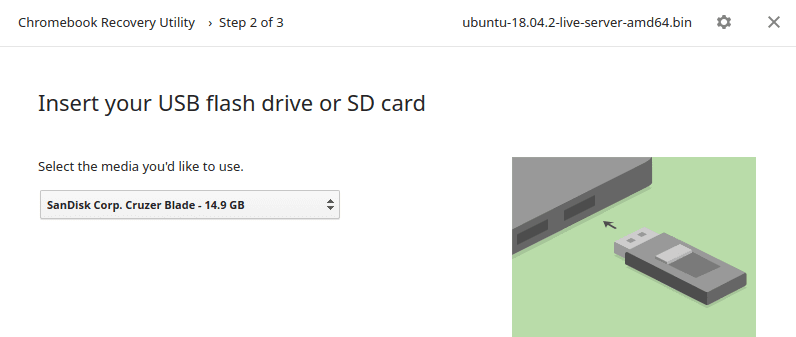
Select USB drive
7. On the next window, you will see a warning that “All data and partitions on your recovery media will be deleted.” Click Create Now.”
The Chromebook Recovery Utility will start burning the image file onto the USB drive. Please don’t remove the USB drive during this process.
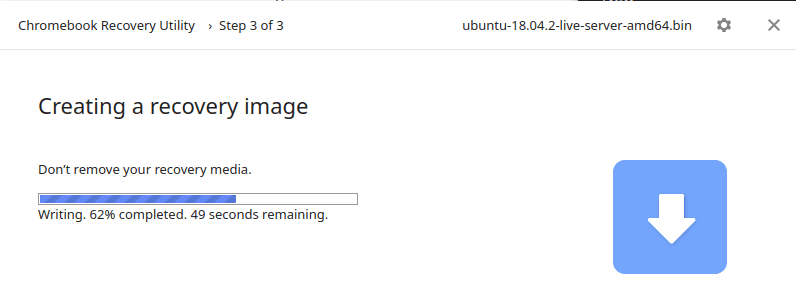
Burning Image to a USB drive
Once the process is complete, you will see the Success message.
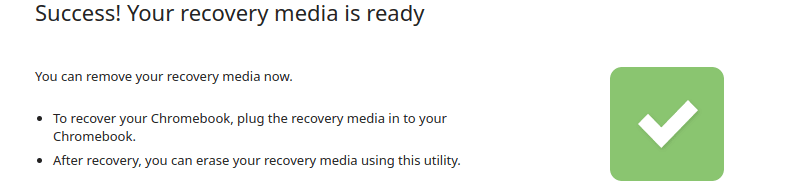
Successfully burned image to USB
Click done and eject your USB drive.
Congratulations! You have successfully created a bootable USB drive on a Chromebook. You can now use your bootable USB drive to install a new operating system or run live software.
11 comments
bro i suffered a lot i thought chrome os is better than windows 11 i installed it but it is waste i doesent have apps i downloaded iso file but i dont know how to burn it thanks for ur help
And this is a reason why people should research stuff before they upgrade OS
Try enabling Linux. There are tons of apps to run there. But too bad, no Wine in chromebook. It competes with Parallels, so they disable it.
No, Windows 10 is the best and most popular OS for desktop and laptops these days!, its only problem it wakes up automatically when put it in sleep mode even when i turned off automatic sleep in power options, this time ill not give up, ill tell more Microsoft about it till this issue is solved immediately! and in Windows 10 Enterprise LTSC Edition it shuts down automatically and Windows 10 Enterprise LTSC N Edition after setting it up it errors in setup then restart the computer!
No, Windows 10 is the best and most popular OS for desktop and laptops these days!, its only problem it wakes up automatically when put it in sleep mode even when i turned off automatic sleep in power options, this time ill not give up, ill tell more Microsoft about it till this issue is solved immediately! and in Windows 10 Enterprise LTSC Edition it shuts down automatically and Windows 10 Enterprise LTSC N Edition after setting it up it errors in setup then restart the computer! Windows 11 requires Secure boot and TPBM 2.0 for secure boot ur computer will be slow if u install windows 11 on it!
I have read this explanation on 10 different sites but not one of them tells you that….
YES you can burn it to usb but windows will NOT recognize the usb as a boot device.
Cheers! just what i was lookin to do!
I tried to reinstall windows 10 on an older dell this way and all it says is “no boot sector on usb” even though the whole operating system is there when I checked. I even changed it from bin back to iso on a different usb right before I made the 2nd so called bootable usb and it didnt work either. Maybe its the machine I don’t know but that old dell is going in the garbage. Ive tried everything I could find to get it going. NO hardware issues just cant get it going. Kind of a bummer I didnt realize chromebooks werent like other laptops until it was too late…
Thank you so much, just what I needed I have a bad old laptop that I tried to fix by installing Chrome OS. It did work and it did what i wanted it to its just Chrome OS flex isn’t for me, especially because i cant enable linux on it yet. Might go back to chrome OS once I can enable linux.
Outstanding explanation! I downloaded a Linux Mint iso.
Followed your instructions to the letter.
I have now installed Linux MInt on my old laptop.
Thank you
Tony
I successfully extracted a linux os variant today using this guidance EXCEPT that when you launch the recovery utility you click on the “star” icon in the upper right hand corner to choose “use local image” before proceeding. NOTE: I had to copy my iso (renamed to .bin) on my google drive to my local drive before proceeding.