Chromebooks are popular devices for both personal and professional use, offering a simple and secure way to browse the web, work, and play. However, sometimes you may want to block certain websites on your Chromebook to avoid distractions, protect children from inappropriate content, or improve productivity.
In this article, we’ll explore the different ways to block websites on Chromebook, so you can customize your browsing experience and stay focused on what matters most.
Understanding the need for website blocking
Before we dive into the “how,” let’s talk about the “why.” There are myriad reasons you might want to block websites on your Chromebook. Perhaps you’re like me, easily lured by the siren call of social media when you should be working. Or maybe you’re a parent or guardian looking to shield your young ones from inappropriate content. Whatever your reasons, knowing how to block websites is a valuable part of managing your digital environment.
How to block websites on Chrome
1. Using built-in Chrome settings
One of the simplest ways to block websites on a Chromebook is through the built-in settings in the Chrome browser. While this method doesn’t offer the most robust solution, it’s a quick fix that can help in a pinch.
- Open Chrome: Start by launching the Chrome browser on your Chromebook.
- Visit the website you want to block: Navigate to the website that you wish to block.
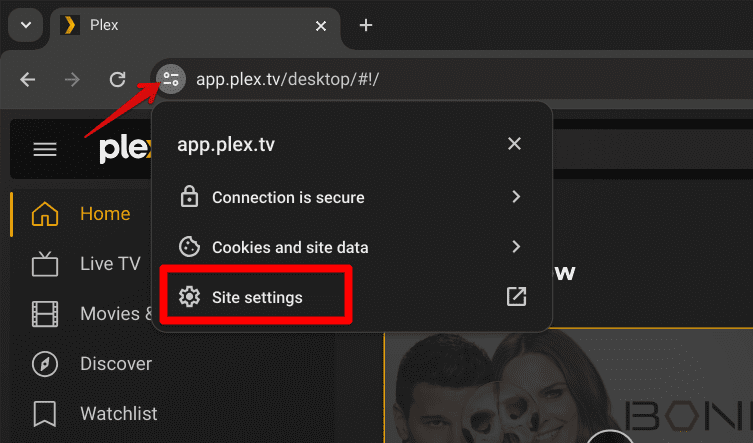
- Access the site settings: Click on the “Site information” icon next to the website’s URL in the address bar, then click on ‘Site settings’.

Chrome Site Settings
- Adjust permissions: In the site settings, you can adjust the permissions to block certain features of the site, such as notifications or pop-ups. While this won’t block the site entirely, it can limit its intrusiveness.
I must admit, this method is more of a band-aid solution than a full-on blockade. But sometimes, that’s all you need to stay focused.
2. Using Chrome extensions
For a more robust solution, I turn to Chrome extensions. Extensions like “BlockSite” or “StayFocusd” offer more control and flexibility in managing which websites are accessible on your Chromebook.
BlockSite Chrome extension
With over 1 million users, BlockSite is an extension for the Chrome browser that can be downloaded from the Chrome Web Store easily. It’s something that gets the job done, and judging from the plethora of positive reviews, one genuinely cannot go wrong with it. Let’s take a brief look at some of its well-grounded features.
- Open the Chrome Web Store: Launch Chrome, head to the Chrome Web Store, and search for a website-blocking extension. My personal favorite is “BlockSite” for its ease of use and effectiveness.
- Add to Chrome: Find the extension you want to use and click ‘Add to Chrome’. Follow the prompts to install the extension.

Adding BlockSite to Chrome
- Configure your blocked sites: Once installed, click on the extension icon in your browser’s toolbar and add the websites you want to block. With “BlockSite,” you can even set up work modes and block lists, which I find incredibly useful for managing my workday distractions.
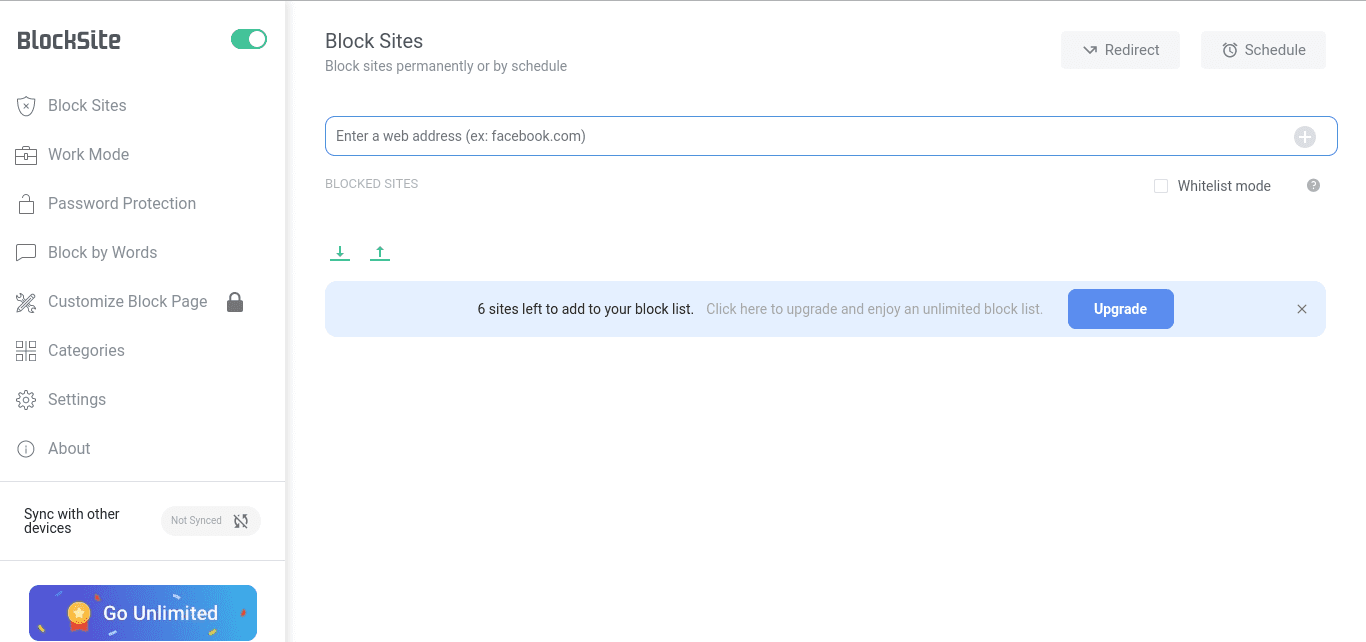
BlockSite’s working

BlockSite’s Working
Right off the bat, there’s an address bar that you can use to put in the URL of websites you wish to block. As you can understand by now, this function of BlockSite is fairly easy. Other than that, you have the “Work Mode” along with password protection. There’s also an option to sync with other devices.
To utilize the full potential of BlockSite, you’ll have to upgrade to its paid version. This will unlock more features, give you more websites to block at a time, and increase the overall functionality.
3. Other measures to pursue
Apart from a straight-up block, there are other measures to take for tailoring your experience to near-perfection online. Let’s see what they are.
Enabling Safe Search
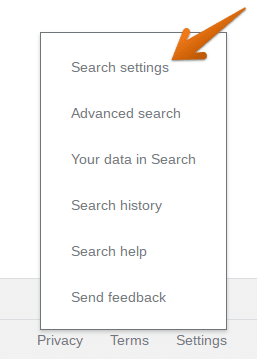
This option works only if you use Google as your go-to search engine. Beware beforehand; SafeSearch will avail you no benefit if it’s not being used on Google. That said, this function is built from the root up to provide filtered search results. It helps negate explicit content away, especially if we talk about search results related to pornography. To enable SafeSearch, go to this link and click on “Settings” in the bottom-right corner. Then, proceed to click on “Search Settings.”

Clicking on Search Settings
Once you do that, a new page should load. Right at the top will appear “SafeSearch Filters”. Check the box below the heading to enable this setting on your browser.

Turning On SafeSearch
4. Supervising a child account
For those looking to manage website access for children or students, setting up a supervised user account on your Chromebook is a great option. This method gives you more control over what content can be accessed.
Steps to set up a supervised user:
- Create a new user: Go to your Chromebook’s settings and create a new user account.
- Enable supervision: During the setup process, you’ll have the option to enable supervision for the account. This allows you to manage and monitor the websites the user can access.
- Manage permissions: With the supervised account set up, you can now manage which websites are allowed or blocked through your Google Family Link or the supervised user’s settings.
We have done a complete article on the subject, so be sure to read it for a thorough guide.
I appreciate this feature for its ability to offer peace of mind when it comes to online safety for kids. It’s a more involved process, but well worth it for the added security.
Conclusion
Blocking websites on a Chromebook is a straightforward process, whether you’re looking for a quick fix or a more comprehensive solution. Each method has its merits, from the simplicity of adjusting Chrome’s site settings to the robust control offered by extensions and supervised user accounts. Personally, I find the combination of using an extension like “BlockSite” for my work-related distractions and setting up supervised users for family Chromebooks to be the most effective approach.


