RAM is essentially one of the most crucial hardware components that need to be kept in check consistently. This is because all memory-related processes on your device power the system and ensures a smooth and fluid user experience. If not for RAM, multi-tasking wouldn’t be a thing, let alone any other executable task.
Coupled with all that is the fact that many Chromebooks today come in variants of 2 GB and 4 GB, except for some high-end, expensive models whose RAM’s go up to 8 GB. As you can presume, even the most top-notch Chromebooks cannot compare with other PCs, so you’ll have to be cautious about your memory usage on these lightweight devices.
If you clog your system with an insane amount of downloaded data, the system will begin to make space on its own and delete what it could find. This poses a risk of losing something valuable to you, so ensure that Chrome OS doesn’t have to come to this. We’ve written a complete article on the subject, so do give it a read to know how you can make the best out of your Chromebook’s memory.
For now, let’s get into checking the available RAM on your computer.
Checking the RAM on Your Chromebook
First off, the available memory of your device will be quite obvious at the time of purchase since RAM and storage both fall under the hardware specifications of a computer, and it’s hard to miss those. Now, if you’ve been using your Chrome OS for a while now and wish to know how much memory is still left to be used, we’ve got you covered.
Using Cog – A Handy Chrome Application
For this purpose, a simple Chrome app called Cog is arguably your best bet. It actually utilizes the APIs that have been added to Chromebooks as part of their build. An API is a collection of processes that allow an app to view or access an operating system’s important data. Without further chit-chat, let’s get into installing Cog.
Installation
1) To begin, click on this link to get straight to the download page on the Chrome Web Store. When you’re there, click on “Add to Chrome” to continue.

Adding Cog to Chrome
2) Once you do that, the Web Store will ask for final confirmation before it proceeds with the install. Click on “Add app” here to begin the download.
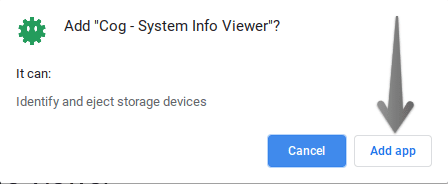
Confirming the Install
3) Cog is pretty minimalistic – both in design and size. Therefore, it’ll only be a matter of seconds before it’s fully installed. Check for the app in your Launcher after you’ve been prompted that the download has been finished.
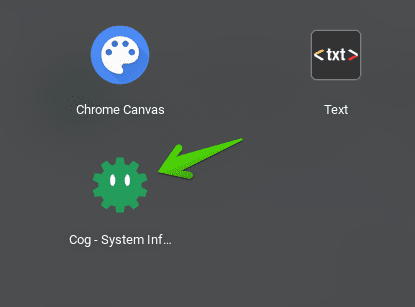
Cog Installed
That’s it! Time to fire it up, and let’s see what this cute little guy is packing.
Cog’s Working
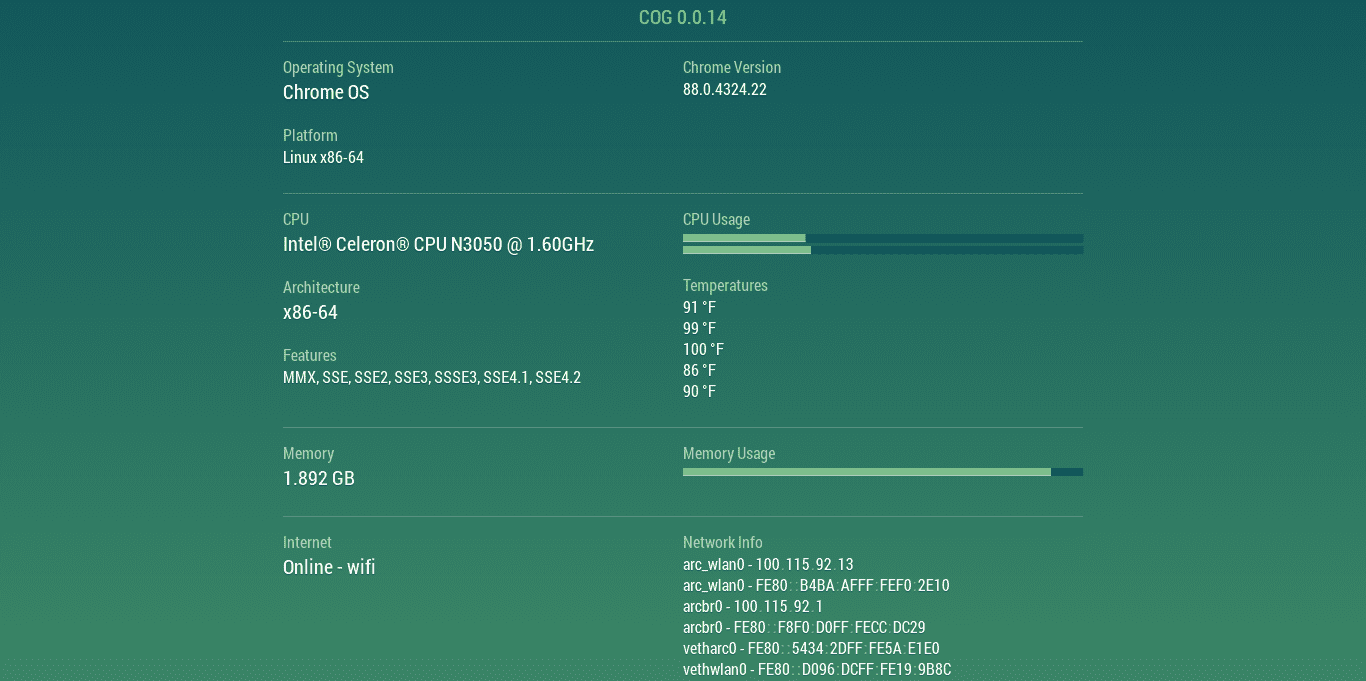
Cog in Action
Upon launching Cog, you’ll be surprised how well it manages to present you your system’s information. This application has everything you need to view your Chromebook’s specifics, from RAM and CPU usage to your internet status and device temperature. Other details such as remaining battery timing, screen resolution, and installed plug-ins are also shown on Cog’s interface.
Now that we’ve gotten the major method down, let’s get onto another way you can view your device’s RAM.
Using the Task Manager
The Chrome browser contains a tool called “Task Manager.” A shortcut to access it would be pressing and holding the “Search + Esc” keys together. This would make a new window pop-up on your screen, and from here, you can easily evaluate what’s eating away your system’s RAM. Take a look at this utilitarian below.
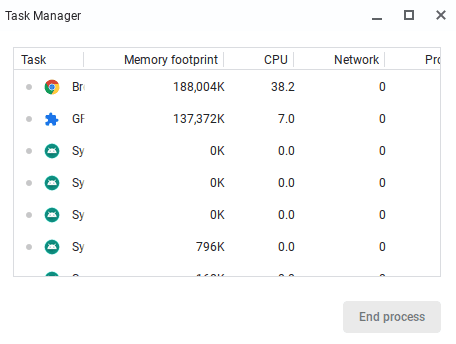
Task Manager
The Task Manager is designed to make the user know all processes using the system’s RAM contemporarily. Moreover, this tool can also be used to “End process”, as depicted above. This would terminate whatever you choose and thus, free up some RAM on your system.
The Task Manager, therefore, is a good way of checking what’s using up your RAM. However, it does not, by any means, show you the amount of memory left on your device, rather the processes that are utilizing it.
Another Way to Access Storage
Alongside RAM, your device’s total storage capacity is also significant when it comes to holding downloadables and files of heavy size. Chromebook, quite fortunately, has a section where you could check out your storage and also the applications that are filling it up. To do that, follow the steps below.
1) Go to Chromebook’s Launcher and open “Files.”
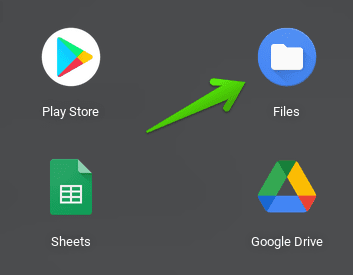
Opening “Files”
2) Once you do that, you’ll see a new window appear on your screen. This will be your “Files” section. Next, observe the three vertical dots in the upper right corner of this window, and click on it to reveal more options.
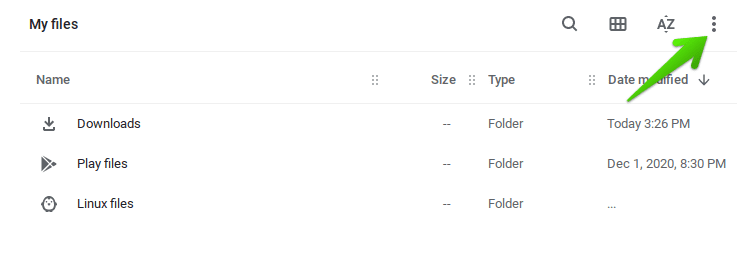
Clicking on “More Actions”
3) This drop-down button should lead you to several more options. Out of these, you’ll observe an option representing the amount of storage left on your device. Click on it to get to the next step.
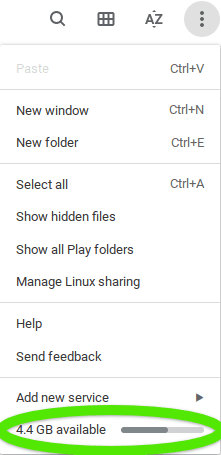
Accessing Storage Settings
4) Once you do that, the “Settings” of your Chromebook should open up, leading you to the “Storage management” section.
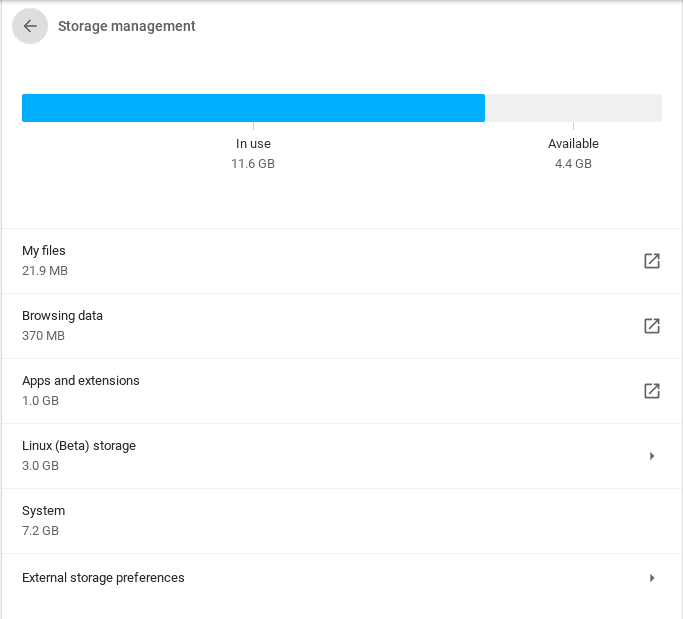
Storage Management
As you can see, this is a complete breakdown of the processes that are occupying your system’s storage. From your downloaded files and browsing data to apps and extensions, a detailed report is given. The section also shows you how much storage is left.
Furthermore, this is where you can manage “External storage preferences” if two or more than two hard drives or USBs are attached to your Chromebook.
Conclusion
Viewing your system’s RAM on Chrome OS might not be as simple as you think. With the help of Cog, however, the process has been much more simplified. Keeping track of your system’s memory is eminent if you want your device always performing at its very best. Alongside that, make sure not to forget your storage capacity! A spacious breathing room for both of these components is equally integral.
