ChromeOS is a popular operating system for Chromebooks, providing users with a simple and secure way to browse the web, work, and play. However, sometimes users may encounter the error message “ChromeOS is missing or damaged” which can be frustrating and disruptive. In this article, we’ll explore the causes of this error and provide solutions to fix it, so you can get back to using your Chromebook smoothly.
Causes of ChromeOS Missing/Damaged Error
First things first, let’s understand what this message means. In layman’s terms, your Chromebook can’t find its operating system. This could be due to a few reasons like a failed update, corrupted files, or, heaven forbid, a more serious hardware issue. But let’s not jump to worst-case scenarios just yet!
Fixing ChromeOS is Missing or Damaged Error
Creating a recovery media
If the above steps didn’t do the trick, it’s time to create a recovery media. You’ll need another computer and a USB stick or SD card (with at least 8GB of space). Here’s how:
Step 1: Download the Chromebook Recovery Utility

Chrome web store – Chromebook Recovery Utility
- On another computer, open the Chrome browser.
- Go to the Chrome Web Store and search for the “Chromebook Recovery Utility” extension.
- Click “Add to Chrome” to install the extension.
Step 2: Prepare your USB flash drive or SD card
- Insert your USB flash drive or SD card into the computer where you installed the Recovery Utility.
- Ensure there’s nothing important on your USB or SD card because the process will erase all data on it.
Step 3: Launch the Chromebook Recovery Utility
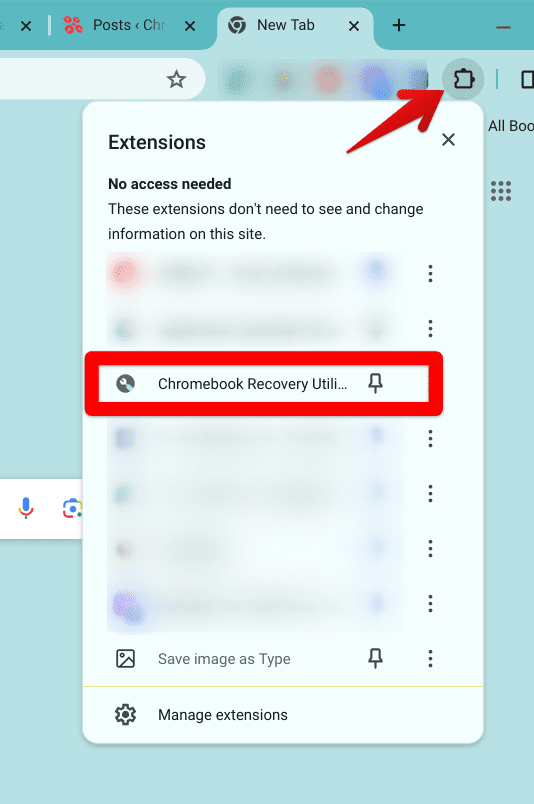
Launching Chromebook Recovery Utility
- Click on the “Extensions” icon on the top right corner of your Chrome browser.
- Click on the Chromebook Recovery Utility extension to launch it.
Step 4: Identify your Chromebook model

Chromebook Recovery Utility – Selecting Model
- The utility will ask you to enter the model of your Chromebook. For a PixelBook Go, you can either type “PixelBook Go” or look at the bottom of your PixelBook Go for the exact model number and enter it.
- If you’re unsure about the model number, there’s an option to select the manufacturer and choose your model from a list.
Step 5: Select your media
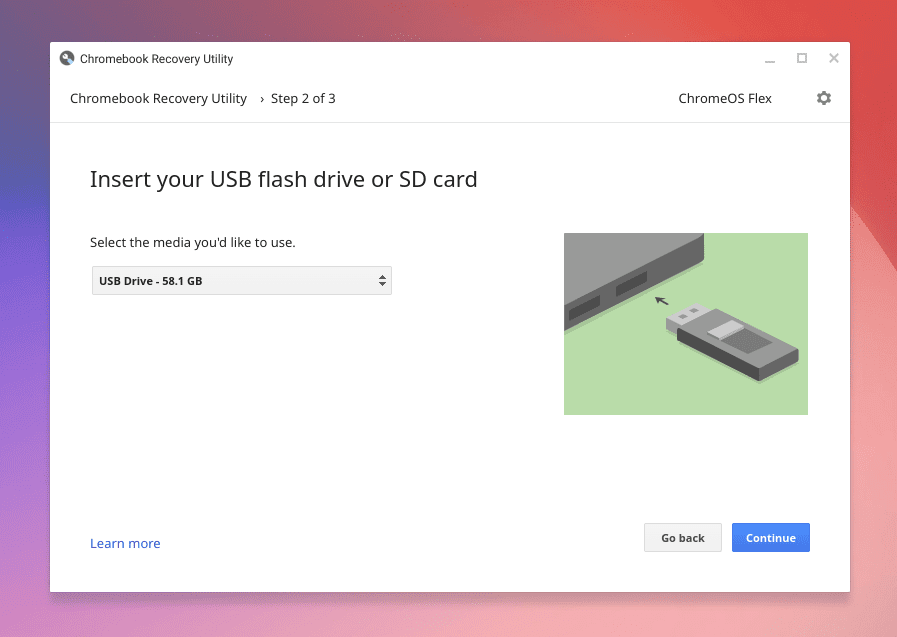
Selecting the USB drive
- The utility will then ask you to select the media you want to use for the recovery. Choose the USB flash drive or SD card you’ve inserted.
- Double-check to make sure you’ve selected the correct drive, as the next steps will erase all data on it.
Step 6: Create the recovery media
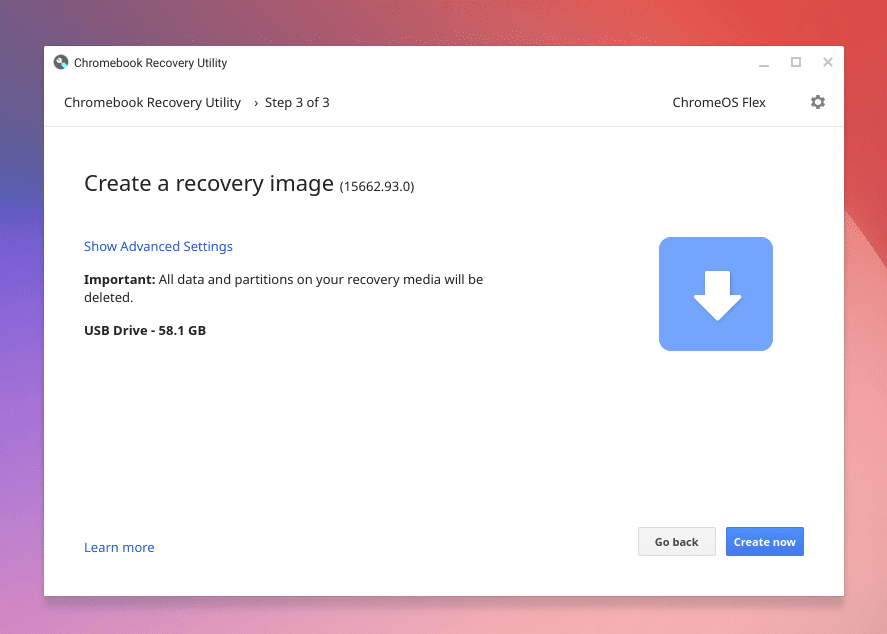
Starting the process
- Click “Continue” and then “Create now” to start the process.
- The utility will download the necessary ChromeOS image for your PixelBook Go and write it onto your USB flash drive or SD card. This process can take some time, depending on your internet speed and the speed of your USB drive or SD card.
Step 7: Wait for completion

In Process
- Once the process starts, it’s crucial not to interrupt it. Removing the USB flash drive or SD card prematurely can result in corrupted recovery media.
- You’ll see a progress bar indicating the download and creation process. When it’s complete, the utility will notify you that your recovery media is ready.
Step 8: Remove the recovery media safely
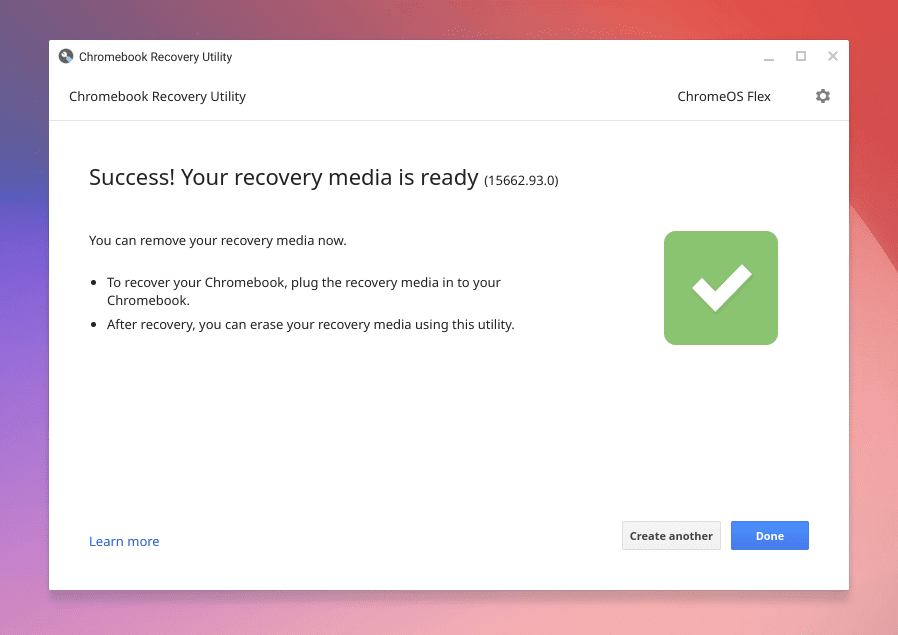
ChromeOS USB Drive Ready
- After the recovery media is successfully created, click “Done” and safely eject the USB flash drive or SD card from your computer.
Your recovery media is now ready to use for restoring your PixelBook Go in case of ChromeOS issues. Keep it in a safe place, and remember, this USB or SD card is now dedicated to Chromebook recovery, so avoid using it for other data storage.
Using the recovery media
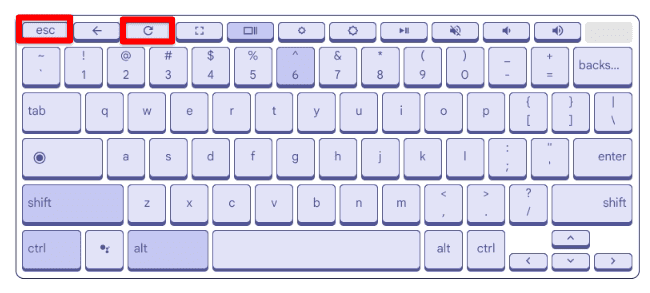
Chromebook recovery mode key combination
With your newly minted recovery media in hand, it’s time to revive your Chromebook:
- Insert the recovery media into your Chromebook.
- Enter recovery mode by pressing and holding
Esc + Refresh (F3)and then pressing the power button. - Follow the on-screen instructions to reinstall ChromeOS (excuse me for blurry pictures)
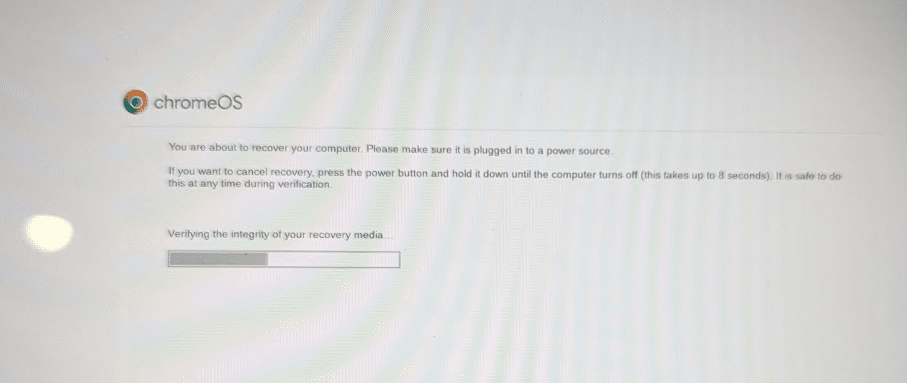
Chromebook Recovery mode start

System Recovery in progress

System recovery complete
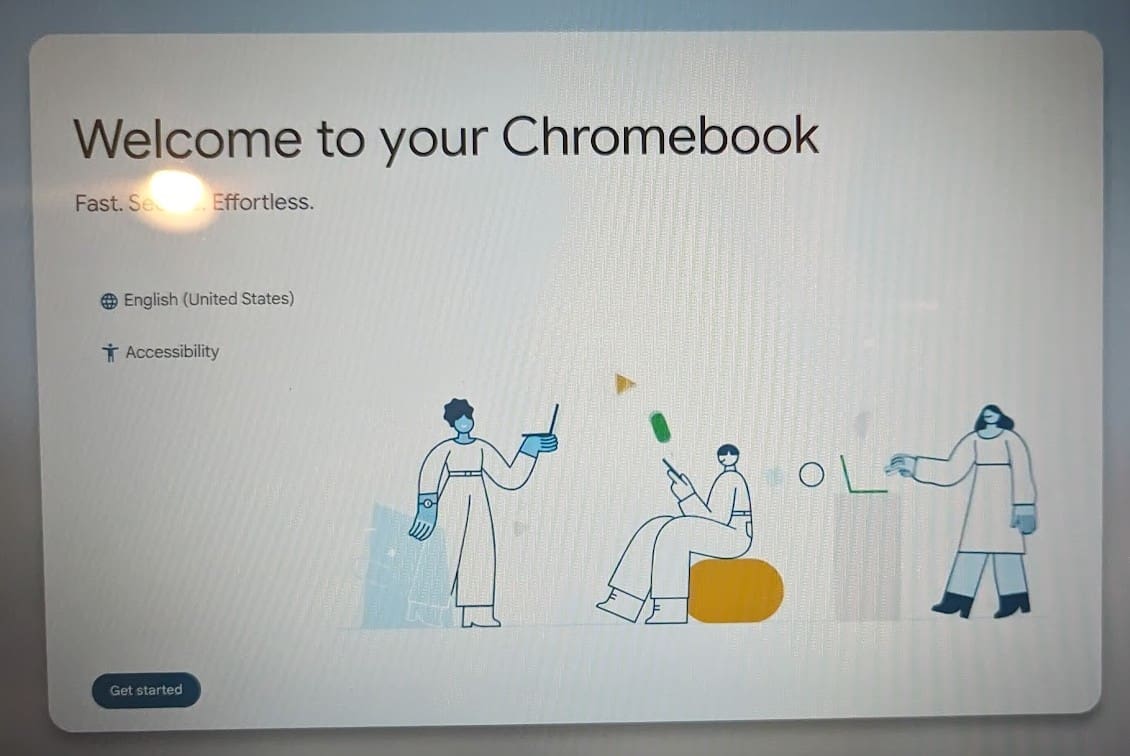
Chromebook welcome message
This step often feels like performing surgery on your beloved device, but the sense of accomplishment when your Chromebook springs back to life is unmatched.
Factory reset (Powerwash)
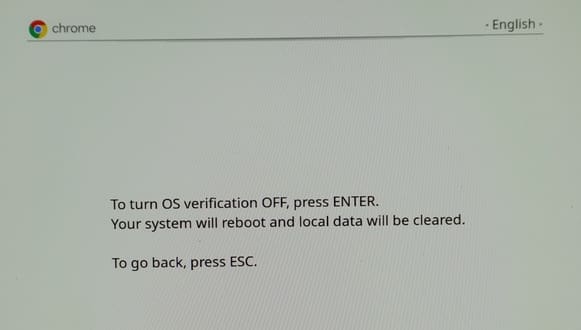
OS Verification Turned OFF
If you’re still staring at that dreaded error message, a factory reset, or as Chromebook calls it, a Powerwash, might be your next step. This will erase all data from your device, so consider this a last resort. To initiate a Powerwash:
- Enter recovery mode (as mentioned above).
- Press
Ctrl + Dto open the ChromeOS installation screen. - Press
Enterto turn OS verification off, then pressCtrl + Dagain to initiate the Powerwash.
It’s a bit like giving your Chromebook a fresh start, a clean slate if you will. While I’m not a fan of losing data, the smooth experience post-Powerwash is sometimes worth it.
When hardware fails..
If you’ve tried all of the above and your Chromebook is still giving you the cold shoulder, this could be a sign of a more serious hardware issue. If your Chromebook is still under warranty, contacting the manufacturer support should be your next step. They can guide you through additional troubleshooting steps and, if necessary, offer repair or replacement options.
Professional diagnosis: If you’re out of the warranty period, consider taking your Chromebook to a professional for a diagnosis. Sometimes, a component like the battery or the screen can be replaced, giving your device a new lease on life.
Weighing repair vs. replacement: Depending on the diagnosis and the cost of repair, it might be more economical in the long run to invest in a new device. This is especially true if your Chromebook is older and might not support the latest software updates for much longer.
Protecting your Chromebook in the future
To avoid future heartache, here are a few tips to keep your Chromebook in tip-top shape:
- Regular updates: Keep your device updated to avoid bugs and glitches.
- Back up your data: Use Google Drive or an external hard drive to back up your important files.
- Handle with care: This goes without saying, but treat your device with a little TLC.
FAQs
Frequently Asked Questions (FAQs)
Q1: How do I know if my Chromebook’s issue is software or hardware related?
A1: Software issues often come with specific error messages, are intermittent, and can sometimes be fixed with updates, restarts, or factory resets. Hardware issues might be more consistent, affect physical components like the screen or keyboard, and won’t be resolved with software troubleshooting steps.
Q2: Can I create recovery media on a non-Chrome OS device?
A2: Yes, you can create Chromebook recovery media using any computer with the Chrome browser installed. Just add the Chromebook Recovery Utility extension to Chrome, and follow the steps to create your recovery media.
Q3: Will using the recovery media delete my personal data?
A3: Restoring your Chromebook using recovery media will erase all data on the device but not the data on Google Drive. This will return your Chromebook to its original state. However, if you have any data stored locally on your Chromebook, it’s important to back them up to Google Drive or an external storage device before proceeding with the restoration process.
Q4: What should I do if the recovery process fails?
A4: If the recovery process fails, first ensure that you’re using the correct recovery media for your specific Chromebook model. If issues persist, try using a different USB drive or SD card for the recovery media, as the one you’re using may be faulty.
Q5: Can a Powerwash fix hardware issues?
A5: A Powerwash (factory reset) can resolve issues caused by software glitches or corrupted files but won’t fix physical hardware problems. If a hardware component is damaged or malfunctioning, a Powerwash won’t resolve the issue.
Q6: What should I do if my Chromebook overheats frequently?
A6: Ensure that your Chromebook’s vents are not blocked and that it’s used on a hard, flat surface to improve air circulation. If overheating persists, it could indicate a hardware issue, such as a failing fan, and you may need to seek professional repair.
Conclusion
Encountering the “ChromeOS is missing or damaged” error on your Chromebook can be a frustrating experience. However, you’ll be relieved to know that this issue can be easily resolved by following the solutions outlined in this article. By performing a Recovery, checking your hardware components for any issues, and scanning for viruses or malware, you can restore your Chromebook’s functionality in no time. I’ve encountered this error on several occasions, and the solutions mentioned here have always proven to be effective. Give them a try, and hopefully, they’ll work for you too!
