What is an IP address?
An IP address (Internet Protocol address) is a numerical number assigned to every device connected to a network communicating using the Internet Protocol. There are two main IP address versions: the IPV4 (IP address Version 4) and IPV6 (IP address Version 6). The most common is the IPV4 – a 32-bit number, e.g., 192.168.1.25. However, the growth of the internet, e.g., IoT (Internet of Devices), has led to the depletion of IPV4 addresses. That led to the introduction of IPV6 – a 128-bit address capable of supporting more devices. An example of an IPV6 is 2001:db8:0:1234:0:567:8:1.
What is a MAC address?
A MAC address (Media Access Control address) is a unique identifier assigned to the Network Interface Card of every device for communications within a network segment. MAC filtering is a security technique applied on networks to prevent unauthorized connection. In such a case, you will need to provide the network administrator with your Chromebook’s MAC address so that you can have network access.
How to find IP and mac address of a Chromebook from the Settings window
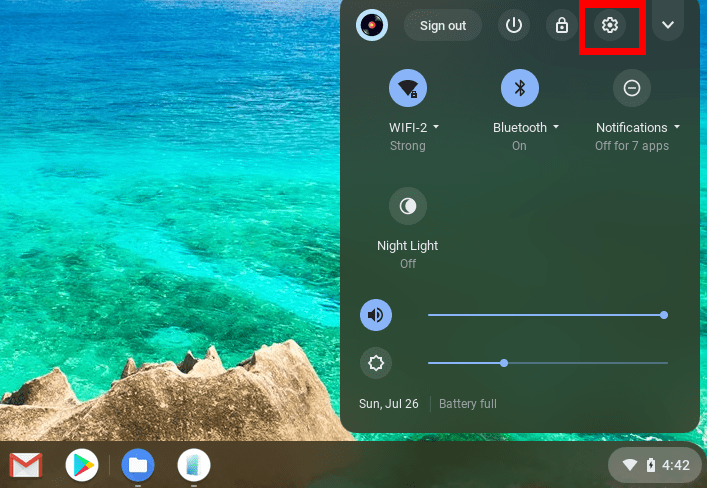
Step 1. Open the Settings window. You can easily do so by clicking on the Time at the bottom-right and selecting the Gear icon.

Settings button
Step 2. On the Settings window, click on the Network tab on the left pane. You should now see the WiFi network you are connected to. If you have a VPN connection turned on, you can see that here too. From the image below, you can see I am connected to the WIFI-5 network.

Network window
Step 3. Click on the WiFi network name.
That will display a new window listing your known networks, including the one you are currently connected to. Click on the name of your WiFi-network again to open the configurations window.

Known Networks
Step 4. On the Network Configuration window, you will see several options and Network information. One of the most notable is the IP address you assigned to your Chromebook.

IP address
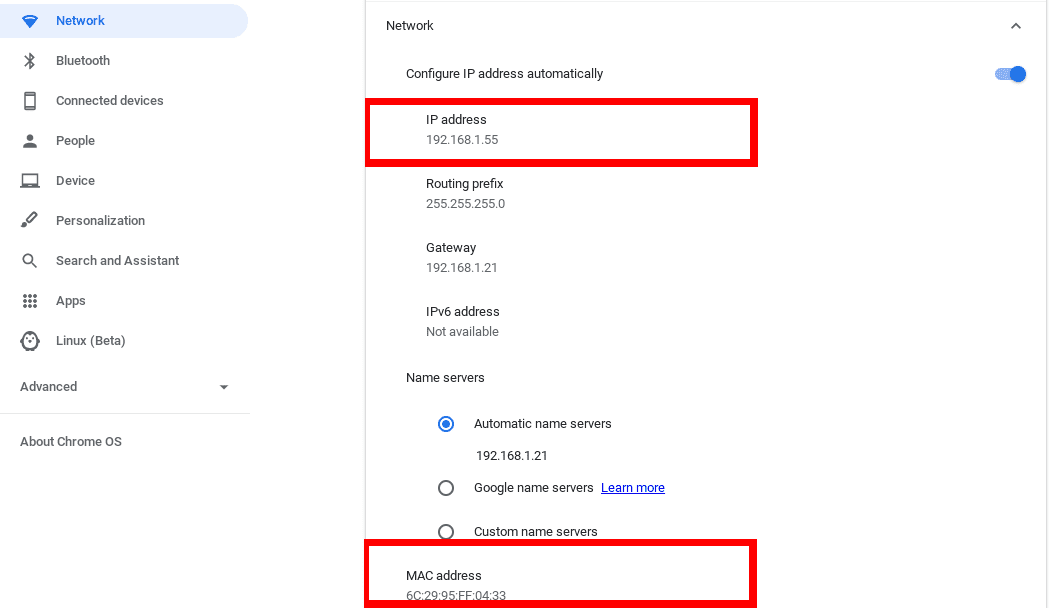
Since we are interested in both the IP address and MAC address, click on the Network tab below the listed IP address. Here, you should see the different network configurations, including your IP address and MAC address.

MAC and IP addresses
Finding the IP address and MAC address from the browser
Another exciting way to find your Chromebook’s IP and MAC addresses are using the browser.
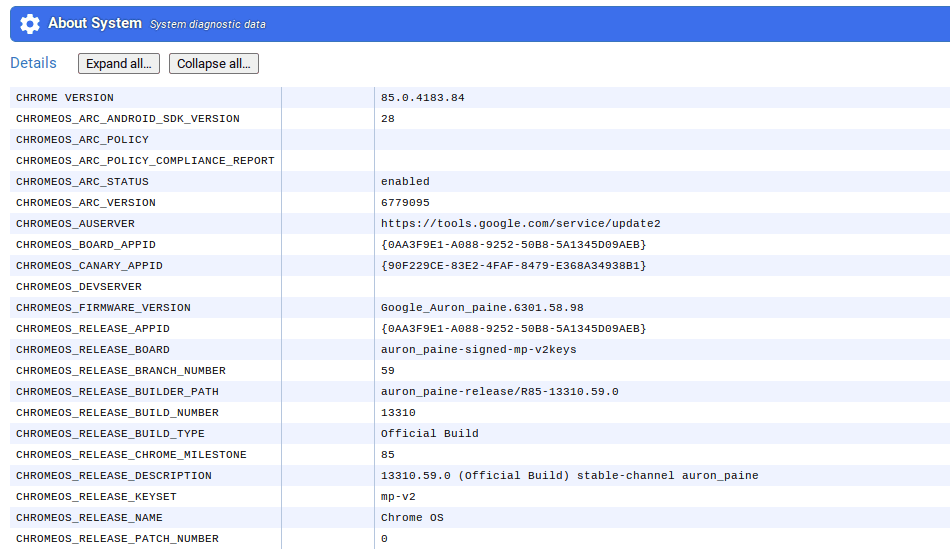
Step 1. Open the Chrome browser and enter the following URL – chrome://system. A page will load, displaying so much technical information. However, we are only interested in the ifconfig tab.

Chrome System page
Step 2. Scroll down and check for the ifconfig tab. Alternatively, hit the Ctrl + F combination to open the ‘Find‘ tab. Enter the word ifconfig and hit Enter. Once you have located the tab, click on the expand button to display all the contained information.

ifconfig tab
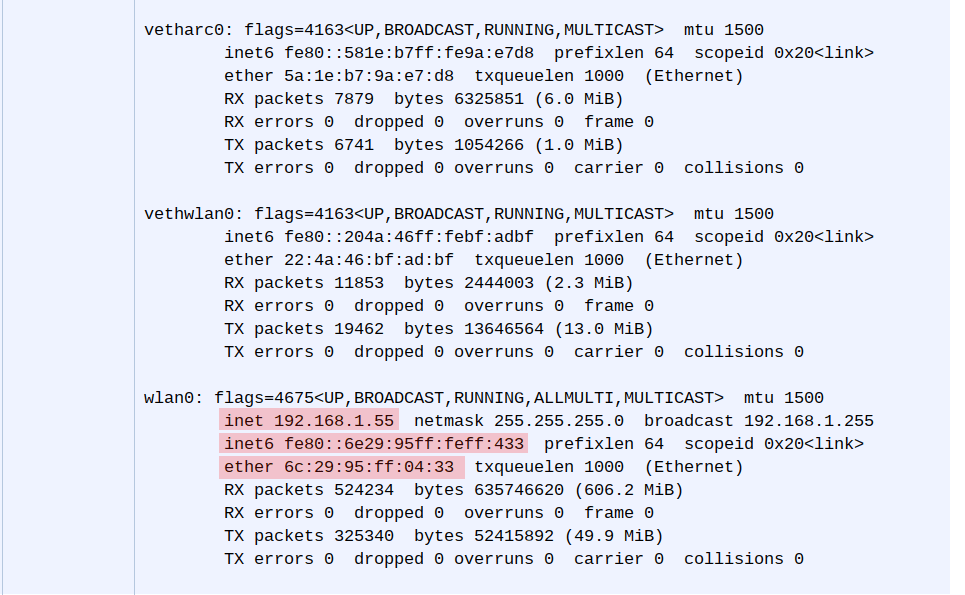
Step 3. Scroll down and see the Wlan0 section. You should see your IPV4 address next to inet, IPV6 address next to inet6, and your MAC address next to ether.

Network Addresses
Those are two ways you can use to get the IP and MAC addresses of your Chromebook. Feel free to ask any questions in the comments below.

1 comment
mac filter must be on. cannot hook up my hp printer. hp tech says i must disable my mac as it will not allow my printer to be installed. spectrum tech people know nothing about how to do that. i’m stuck now with a printer that cannot be installed.