As we work on our computers, the storage space available to us can quickly diminish due to the accumulation of files and applications. This issue is not exclusive to conventional operating systems such as Windows or macOS, but it is also prevalent in ChromeOS, particularly when using Linux. From my perspective, the combination of Linux and ChromeOS is intriguing as it enhances the complexity and versatility of the otherwise straightforward ChromeOS setup.
However, amidst the features and benefits, we stumble upon a roadblock, the tedious task of resizing the Linux storage size on ChromeOS. A task that initially seemed daunting to me but eventually turned into a road of discovery and learning. In this article, I will guide you step by step, sharing not only the instructions but also sprinkling in some of my personal experiences – the likes, the dislikes, and everything in between. So, let’s embark on this journey together.
Understanding the need to resize Linux storage on ChromeOS
Before we dive into the practical aspect, it’s important to understand why one would want to resize Linux storage on ChromeOS. It wasn’t too long ago when I found myself in a situation where I had to handle large datasets for a project I was working on. I realized that resizing the storage space was an unavoidable task, a necessary step to make room for more complex, space-consuming operations.
The necessity comes from the fact that Linux on ChromeOS, by default, allocates a limited amount of storage space which can be quickly consumed depending on your usage. Resizing it ensures that you can continue to install new applications and store files without worrying about running out of space.
Preparing for the resizing: Understanding your current storage situation
To begin, let’s assess the current storage situation. It’s essential to have a well-organized workspace. Start by removing any unused files or applications that are taking up space. It’s like uncovering hidden treasures while cleaning a room as a child. In the realm of ChromeOS, this might entail finding files or applications that serve no practical purpose and are just taking up space.
To check the current storage situation, you would want to:
- Open the Linux terminal on your ChromeOS.
- Type the following command and hit enter:
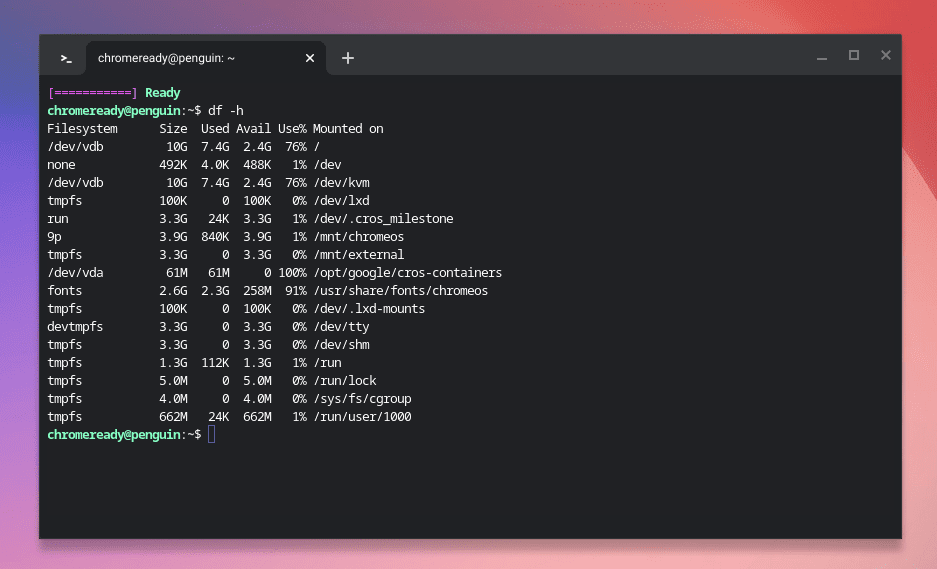
df -h

Checking space consumed by Linux on ChromeOS
This command will show you the amount of space available and used in a human-readable format. Note down the details as we would be referring back to them as we proceed.
Initiating the resizing process: A step-by-step guide
After understanding your storage needs, let’s move on to the main event: resizing the Linux storage size on ChromeOS. This is where my journey got a bit intricate and detailed. It felt like stepping into an artist’s studio, ready to mould my workspace to my preference, albeit with a bit of caution.
Step 1: Launching the Linux (Beta) settings
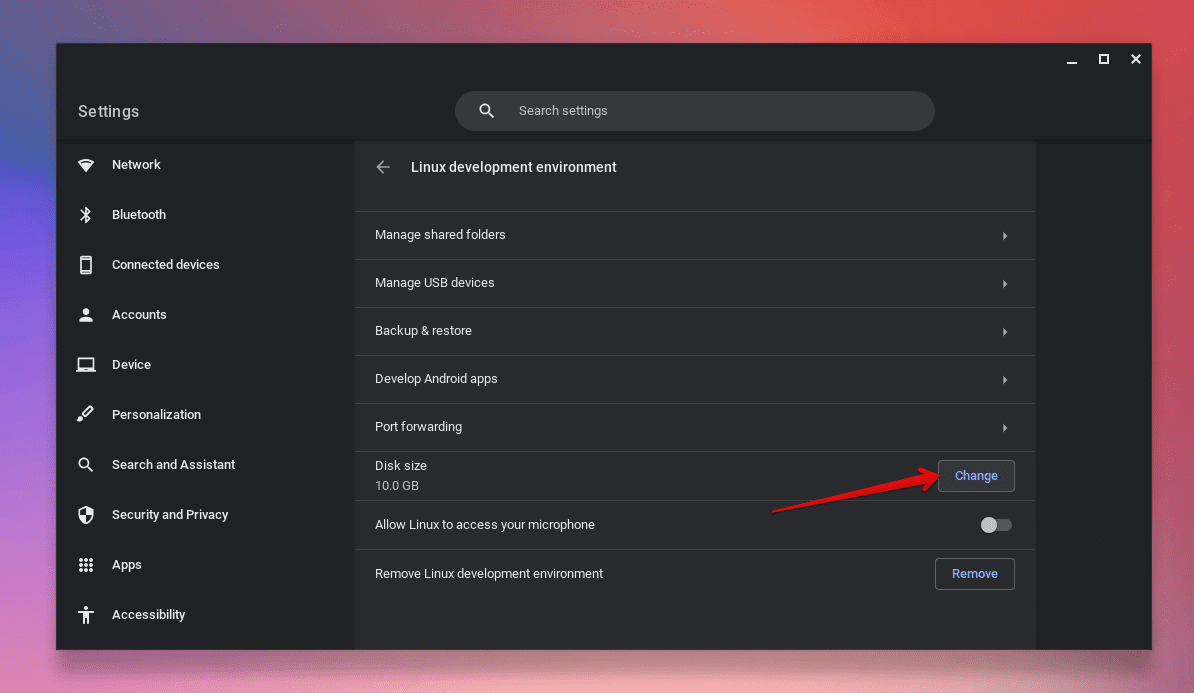
Once your data is backed up and safe, navigate to your ChromeOS settings. In the settings, look for the “Advanced”> “Developers” section and select “Linux (Beta)”. This is where we will find options to manage the Linux container, including resizing the disk size.

ChromeOS settings – Linux size
Step 3: Resizing the Disk
Now, this step felt like standing in front of a canvas, ready to paint my masterpiece. But before wielding my brush, I had to set the stage right. Similarly, before we resize the disk, we need to ensure that the Linux container is turned off. You can turn it off by clicking on the “Shutdown” button in the Linux (Beta) settings.

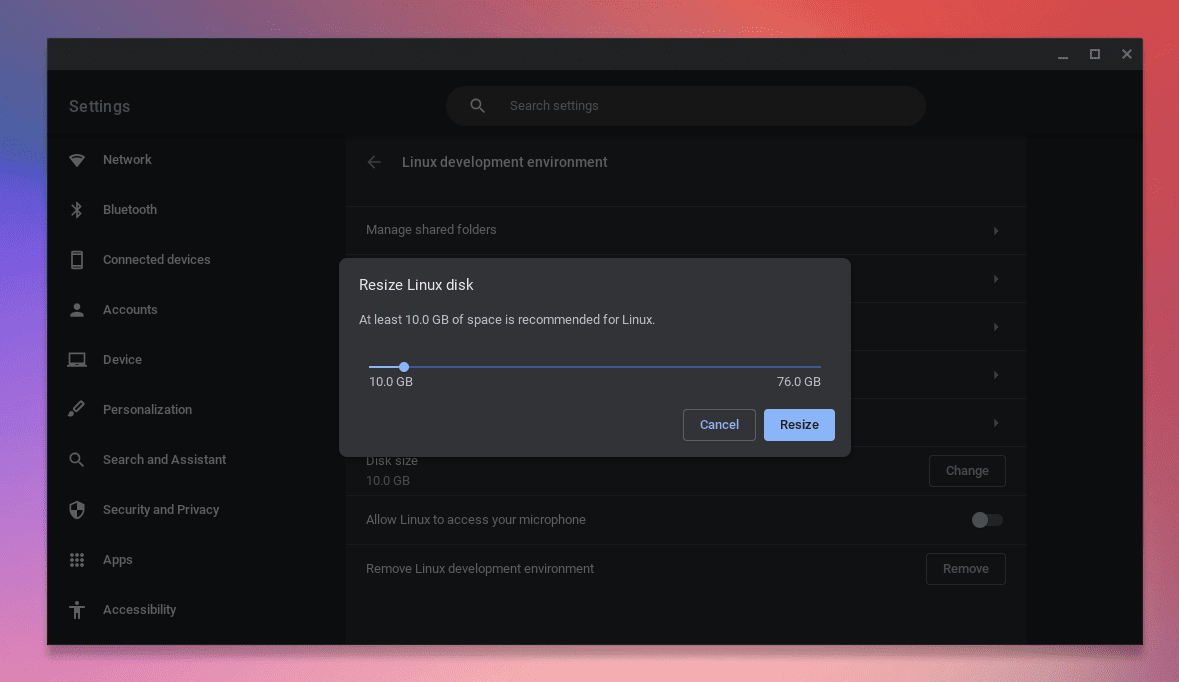
Asjusting Linux size on ChromeOS
Once the Linux container is shut down, you will notice the “Disk” section where you can adjust the disk size by moving the slider. Move the slider to allocate the desired amount of space. Remember, it’s always good to allocate a bit more space than you think you’ll need. Personally, I prefer having a generous amount of space so that I don’t have to go through the resizing process frequently.
Once you have selected your desired space, simply click on the “Resize” button to initiate the process. Please note that it may take a few minutes for the resizing to be completed. During this time, I experienced a mix of eagerness and expectation similar to that of eagerly awaiting a perfectly prepared gourmet meal.
Testing the new setup
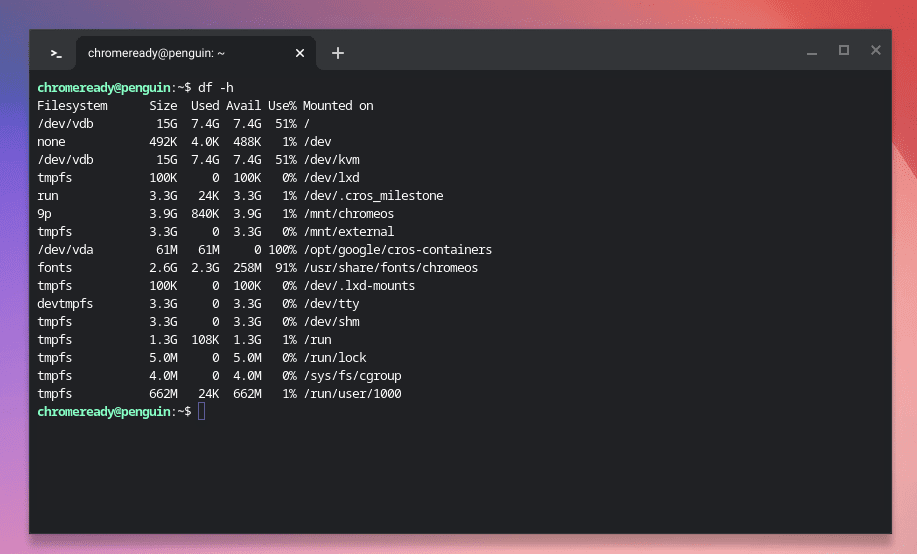
Once the resizing process is completed, it’s time to test the new setup. It reminds me of the joyous moment when I step back and admire my newly organized room, taking a mental note of the changes. Similarly, launch the Linux terminal and use the df -h command once again to check the new storage size. It’s satisfying to see that additional space, ready to house new applications and files. For instance, take a look at the screenshot below. I now have an additional 5GB of storage on Linux compared to the previous screenshot.

Checking disk space usage
Conclusion
When it comes to resizing, it is imperative to be meticulous and diligent. Although the procedure may not be overly complicated, it demands careful attention to prevent data loss or errors. It is advisable to allocate slightly more space than you anticipate needing to avoid having to resize again in the near future. This approach will not only save time but also shield the system from potential errors caused by insufficient space.
