Checking Available Storage
Data storage on a Chromebook is quite different from other computers. Since it is designed to perform most of the computing remotely, Chromebooks utilize local and online storage.
The local storage is an SSD that holds the operating system (Chrome OS) and stores downloaded files. The other storage is your Google Drive account. The online storage should store most of your data since the SSD might not be big enough. To check your Chromebook’s storage, follow the steps below:
Checking Local (offline) Storage
1. Click the launcher button or hit the search button to open the application menu. Click on the ‘Files‘ application.

Open the Files app
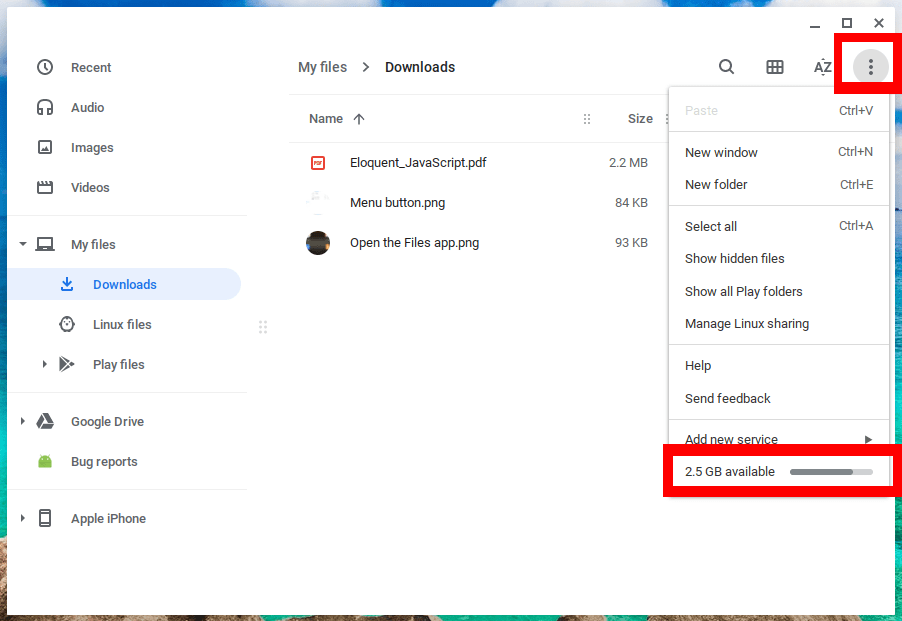
2. At the top-right corner of the ‘File‘ window, click on the three dots to open the drop-down menu. The last item on the menu will show the available space on your SSD.
Menu button
From the above image, I only have 2.5 GB of space left on my local storage.
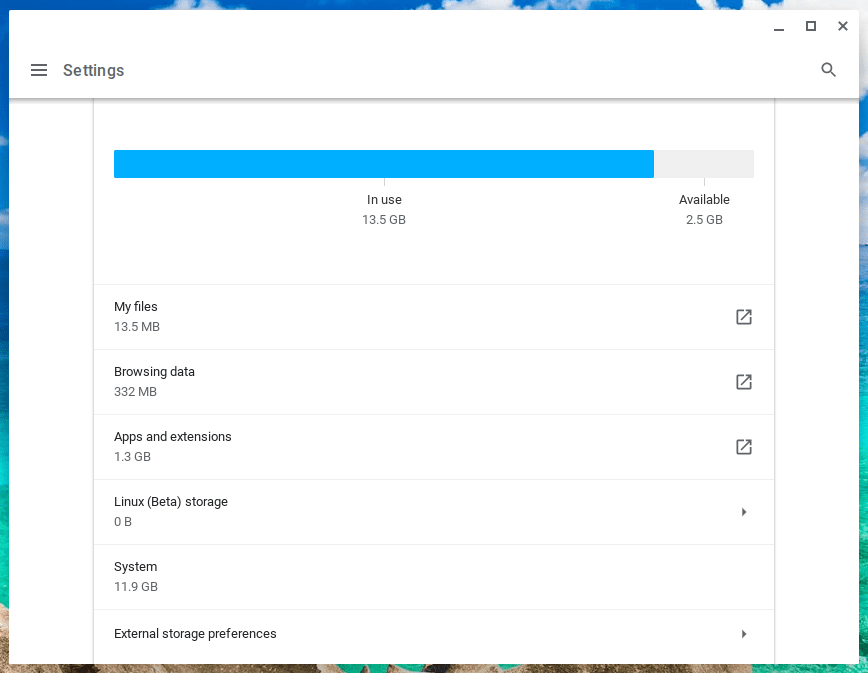
3. To get more information, click on the available storage to assess your storage management. A new window will open, showing your files’ total space, browsing data, apps and browser extensions, system, and Linux files. You will also see the external storage tab at the button. When you click on it, you will see any connected USB drives and Hard drives.
Storage management
Checking Your Online Storage
1. Click on the launcher icon to open the applications menu. Click on the ‘Google drive’ application to open.

Google drive
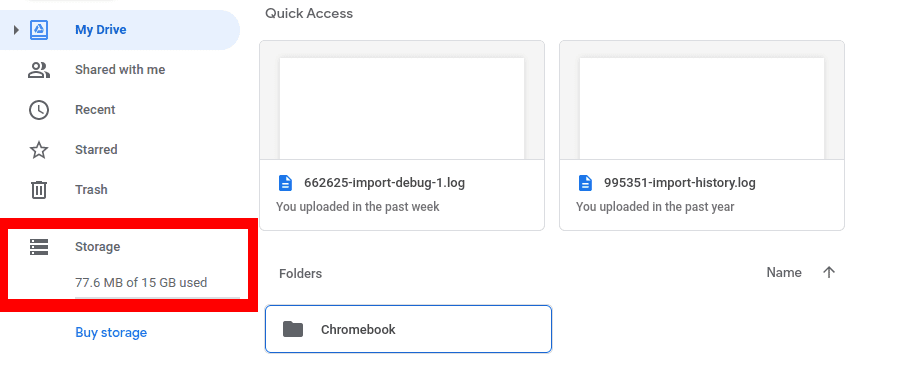
2. A new tab will open on your browser showing your google drive account. Note, this account is linked to the email registered on your Chromebook. On the left side, you should see the storage information at the bottom.
Google Drive storage
Tip: Another quick way to check the available space on your local storage is by typing the following URL on your browser address bar; Chrome://quota-internals/.
View Memory, CPU, and Network Usage
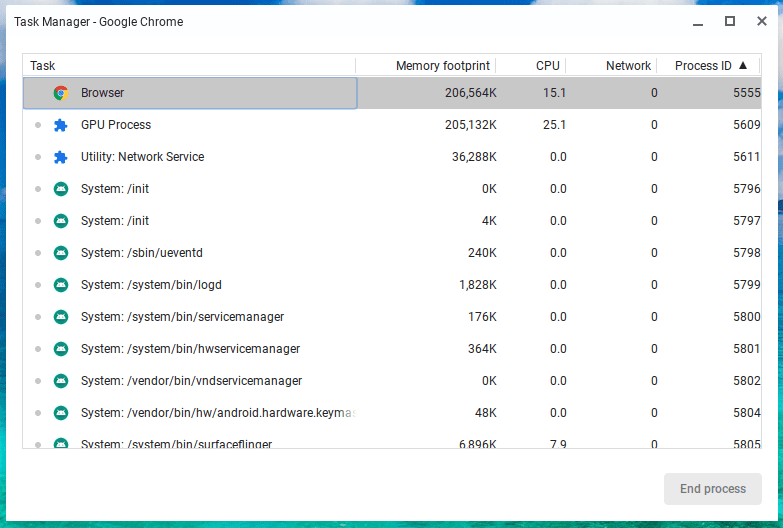
Like most operating systems, the Chrome OS comes with a task manager where you can view running processes, memory usage, CPU utilization, and Network usage. Follow the steps below to open the task manager,
1. On your keyboard, press the combination Search + Esc to launch the task manager.
Chromebook Task manager
2. On this window, you can view memory, CPU, and network usage. You can add more columns by right-clicking anywhere in the window and selecting the item you want to add.
Additionally, you can kill any troublesome process from here. You can read more on using the Chromebook’s task manager on our article on – Chromebook Task Manager – Here’s How to Use it.
Chrome OS Version Details
Another method you can use to get information about your Chromebook is through the system page. However, I wouldn’t say this is a very user-friendly way. That is because the page displays a long list of system specs than you require.
To open the systems page, type the following URL on your address bar – Chrome://system.
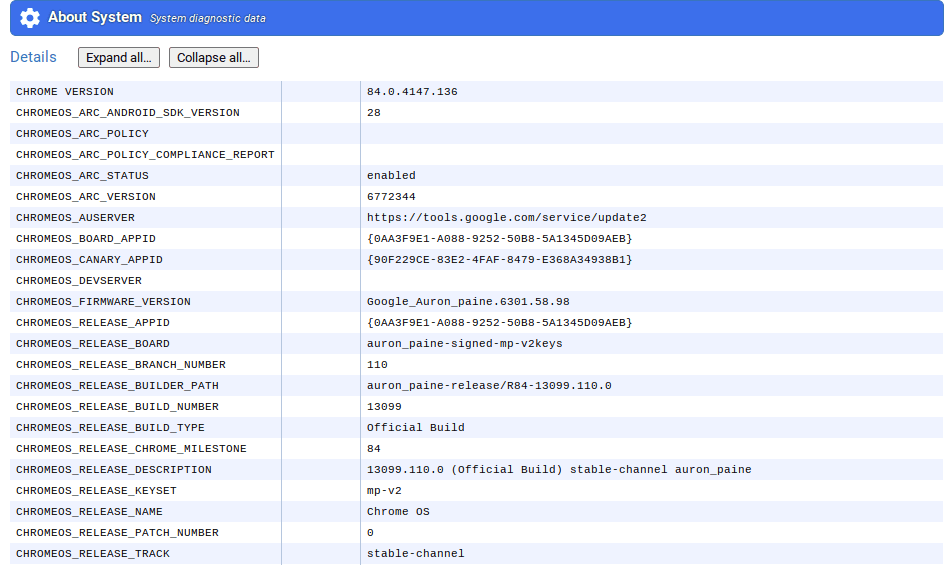
Chrome system page
Even though much of the information is too technical, you can still see detailed info like; Chrome OS release version, network information, disk usage, CPU information, hardware platform, etc.
View Network Connection Details
At times, you might need to know your connection information like – IP address, mac address, gateway address, and even WiFi networks available. Follow the steps below:
1. Click on the notification (bottom-left) area showing your battery information, time, etc. On the small window that appears, click on the ‘gear‘ icon to open the settings page.
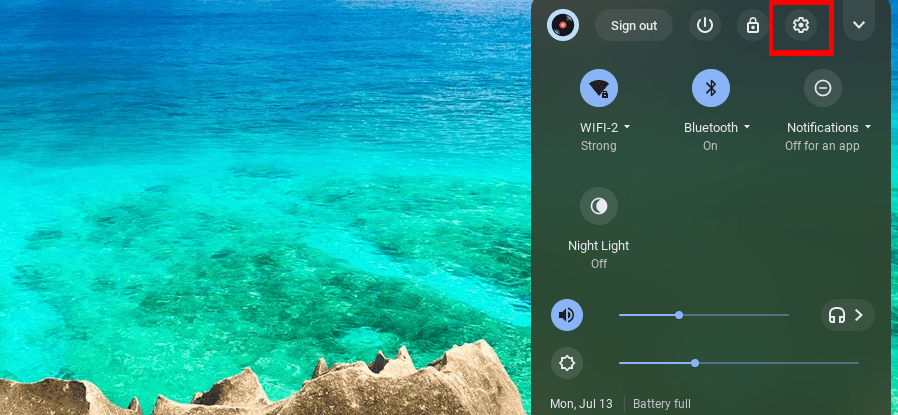
Gear Icon
2. Click on the ‘Network‘ tab on the left to view the Network information. Here, you will see the name of the WiFi to which you are connected.

Network Information
3. To view more information, click on the network name.
4. On the next window, you will see your connected network and other known networks. Click on your connected network once again to view the assigned addresses.
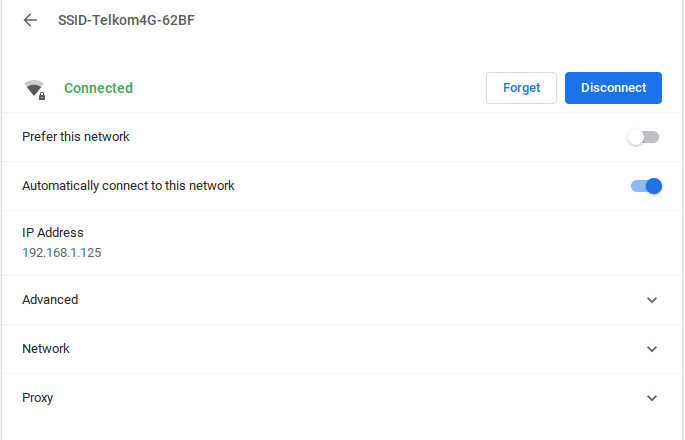
Network Information
5. Click on the advanced tab to view WiFi information like SSID, BSSID, Signal strength, Security, and Frequency.
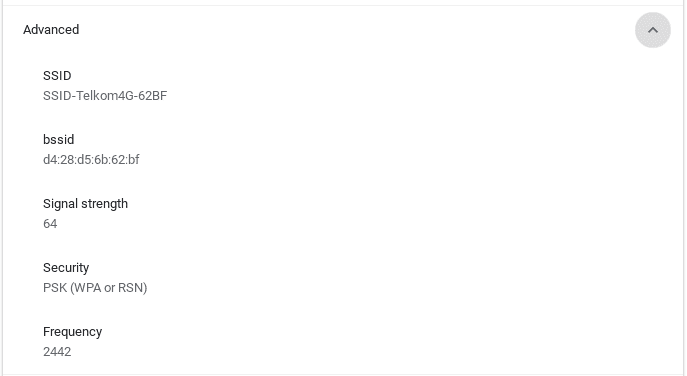
Network Information
6. To view network details like IP address, MAC address, Gateway, etc., click on the Network section.
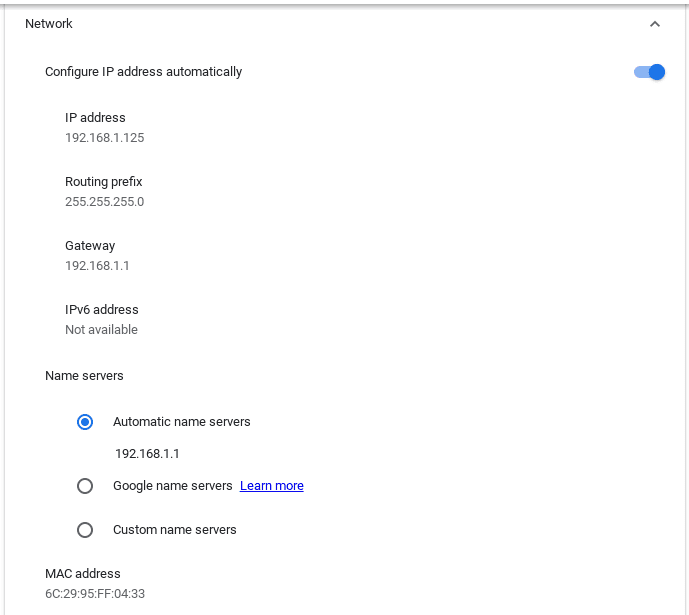
Advanced Network details
View Chrome OS information
If you want to have a peek of your Chrome OS information, the easiest would be navigating to the Settings page and clicking on the ‘About Chrome OS‘ tab at the bottom.
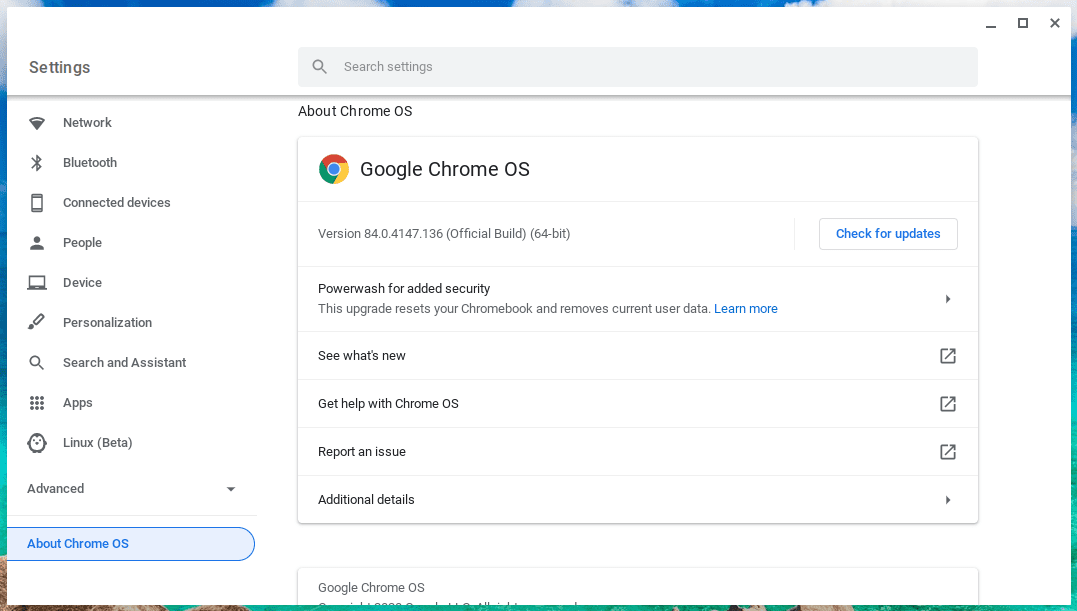
About Chrome OS
You can see information like; firmware version, platform version, Build details, and channel information.
Cog app to see the Hardware Details
If all these seem too much of hassle, you can install an application that will display all the hardware and system information you need to know. One of the best that I have used is the Cog – System Info Viewer. Follow the steps below to get started.
1. Download the application using this link.

Download Cog
2. Click on the ‘Add to Chrome’ button. You will see a notification showing you the permissions assigned to this app. Click the’ Add app.’

Add cog to Chrome
The Cog – System Info Viewer will be downloaded and installed in your system.
4. To launch the application, navigate to the applications menu and search for ‘Cog.’
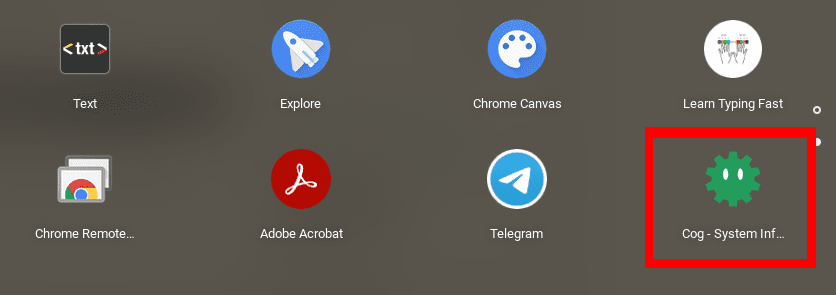
Launch Cog
The cog application window will open, displaying all the necessary information you need. That includes Operating system, Platform, CPU, Architecture, Memory size, Internal storage, Network information, etc.
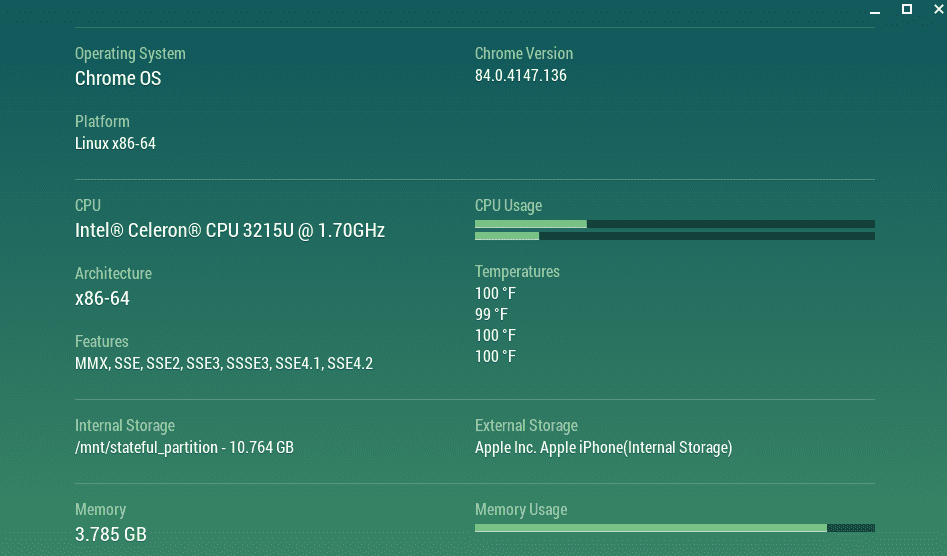
Cog application window
Conclusion
I believe this article has given you various ways that you can use to view your Chromebook’s system and hardware information. Besides the ‘Cog’ Chrome app, you can use the built-in features within the Chrome OS to see the various system details you need.
