If you’re like me, then the Chromebook touchscreen is your go-to device for work, play, and everything in-between. These nifty devices are like a fusion between a traditional laptop and a tablet. But when I first got mine, I was baffled by a simple function: taking screenshots! Turns out, Chromebooks have their unique way of doing it. And today, I’ll walk you through the step-by-step guide on mastering this skill.
Understanding the need for screenshots
Before diving in, let’s discuss why screenshots are vital in today’s digital age. We’ve all been there: browsing a website and stumbling across an interesting piece of information or seeing a funny meme on social media. What’s the first thing you would do? That’s right, take a screenshot. They’re useful for sharing, referencing, or just for personal keepsakes. On traditional computers and mobile devices, taking screenshots is a breeze. But on the Chromebook touchscreen? It’s a little different, but once you know how, it’s just as easy and perhaps even more fun.
The basics: Taking a screenshot
Chromebooks have a built-in method to capture your screen, and it involves using the keys present on the device. But wait, you might be thinking, “I have a touchscreen model!” Don’t worry; we’ll cover that in just a moment. Here’s how you can take a screenshot using the keys:
- Whole screen: To capture everything you see on your screen, press the
Ctrl+Show Windowskeys simultaneously. The Show Windows key looks like a rectangle followed by two lines and can be found just above the number 6 key on your keyboard. - Partial screen: If you’re interested in capturing just a part of the screen, press
Ctrl+Shift+Show Windows. Your cursor will change, allowing you to click and drag over the area you want to capture.
After capturing, the screenshot is saved automatically to your ‘Downloads’ folder. Easy, right? But here’s where it gets interesting for touchscreen users. Refer: The Ultimate guide to taking screenshots on Chromebook in 2023
Touchscreen magic: Using your fingers to take a screenshot on Chromebook
Some Chromebooks can be used either as a laptop or a tablet. If you have one of these models, the on-screen keyboard automatically opens when you flip the screen over the hinge.
- Take a screenshot: Press Power button + Volume down button.
- Take a photo with the volume buttons: When your Chromebook is in tablet mode, you can press the up or down volume button to take a photo.
- Turn off tablet or sign out: Press and hold the Power button until you see a menu to Power off or Sign out.
- Turn off display: Quickly tap the Power button and release.
- Use the on-screen keyboard: Tap any text box to show the on-screen keyboard. To hide the keyboard:
- Tap anywhere outside the keyboard.
- On the bottom right of your screen, tap Hide keyboard
.
A touch of personalization: Editing your screenshots

Annotation features of Monosnap illustrated
Once you’ve taken the screenshot, sometimes you might want to add annotations, crop it, or maybe add some fun stickers. While Chrome OS doesn’t come with a built-in advanced image editor, there are plenty of apps and extensions available on the Chrome Web Store. A personal favorite of mine is “Monosnap“. It’s user-friendly, allows quick edits, and yes, it’s free!
Organizing and sharing: Beyond the capture
Screenshots are fun, but they can pile up quickly, especially if you’re an avid capturer like me. So, here’s a quick tip:
By default, ChromeOS stores all screenshot images on the local Chromebook in the “Downloads” folder. However, these screenshots can be lost if you powerwash your Chromebook. To prevent this from happening, you can create a specific folder in either your ‘Google Drive’ or ‘Files’ app for storing screenshots. It’s a lifesaver when you’re trying to find that one screenshot from three months ago.
You can change the default save location for screenshots in ChromeOS. Here are the steps:
- Press Ctrl + Shift + Show windows.
- At the bottom, select Settings.
- Under Save to, click Select folder…
- Select the folder on Google Drive where you want your screenshots to be saved.

Change screenshots save location on ChromeOS
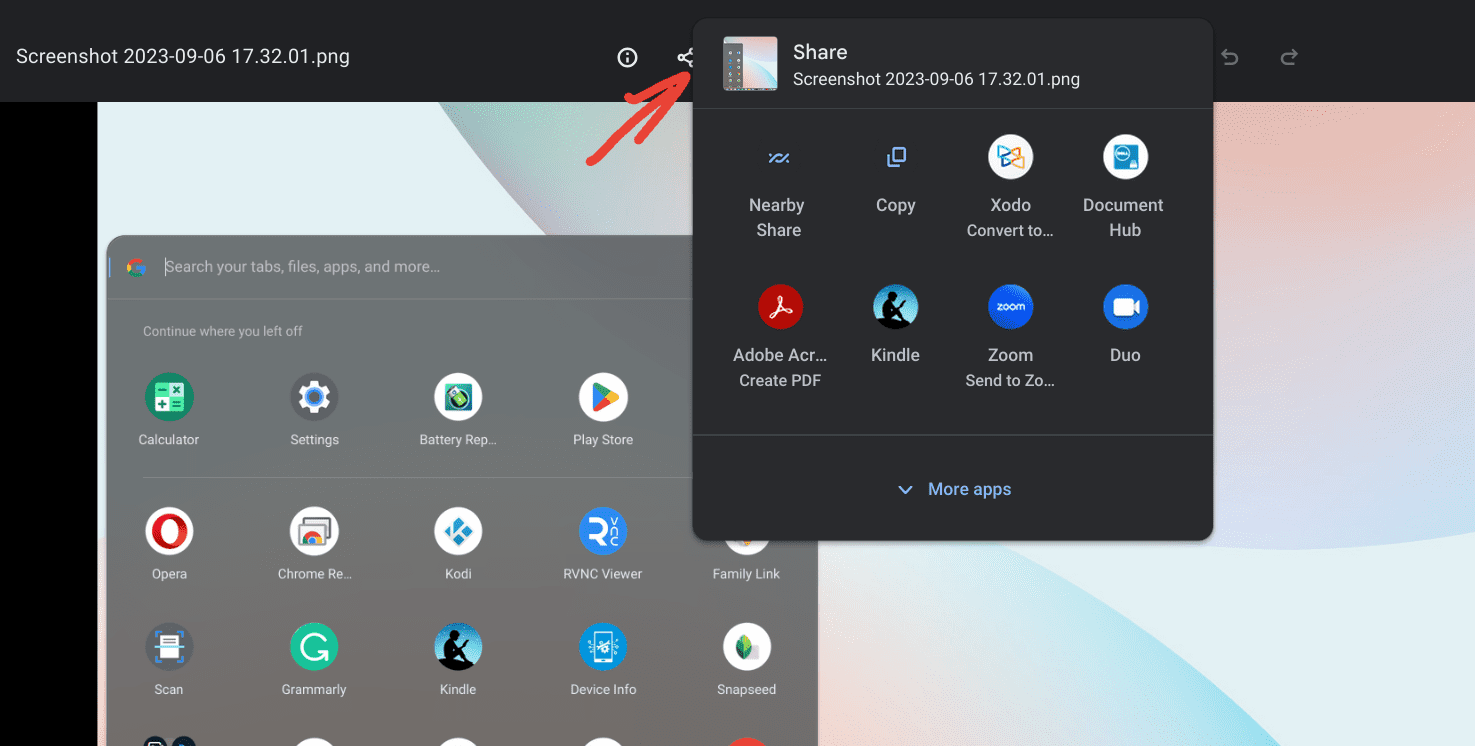
Sharing is as simple as right-clicking (or long pressing on the touchscreen) and choosing the ‘Share’ option. You can send it directly through various apps or get a shareable link if it’s on your Google Drive.

Troubleshooting: When things don’t go as planned
Sometimes, technology can have its mood swings. If you’re having trouble taking screenshots, here are some quick fixes:
- Update your Chrome OS: Always ensure you’re running the latest version. Outdated software can often lead to glitches.
- Check your storage: If your Chromebook’s storage is almost full, it might have trouble saving screenshots. Give it some space by deleting unnecessary files or moving them to the cloud.
- Restart: When in doubt, turn it off and on again. It’s the age-old tech mantra that surprisingly works most times.
Conclusion
While the Chromebook touchscreen might have its quirks, it’s a fun and efficient device once you get the hang of it. Taking screenshots is just one of the many cool things you can do with it. I hope this guide helps you capture memories, work snippets, and everything else in between with ease.
