Sometimes, in the ever-changing world of technology, we find ourselves at an impasse, unable to proceed with what should have been a simple task. Today, we are diving deep into one such irritating hitch that has bothered many – the “unable to uninstall Google Chrome” problem.
Just like you, I have found myself in this spot a couple of times. I must admit, while I adore the functionalities and features that Chrome offers, there are moments when it gets on my nerves, and I feel the need to uninstall it, for a fresh install later.
Let’s travel together on this journey to untangle this issue step by step.
When goodbyes are not easy: Understanding the problem
Before we set forth on our problem-solving journey, it’s essential to understand the nature of the problem we are dealing with. At times, Google Chrome seems to have anchored itself firmly onto your system, refusing to let go. It is moments like these that test our patience, isn’t it? Through this guide, I wish to bring to you an easy, comprehensive solution so that you would not have to spend hours fretting about it.
When I first met the issue
I remember vividly, it was a sunny afternoon, and I was trying to create some space on my system by uninstalling programs that I seldom used. To my surprise, when I tried to uninstall Chrome, it put up a resistance, refusing to budge. It was not just an error; it was a challenge thrown at me, and I was not the one to back down.
Setting the stage: Pre-uninstallation steps
Before you even attempt to uninstall Google Chrome, there are a couple of steps that you should undertake to ensure smooth sailing. You know, it’s somewhat akin to preparing the field before sowing seeds. Let’s delve into these preparatory steps that would set the stage for a hassle-free uninstallation process.
Backing up important data
First and foremost, ensure that you have backed up all the essential data. Trust me, nothing is more frustrating than realizing that you have lost all your bookmarks and passwords. I have been there, and it was not pleasant!
Creating a backup of bookmarks
Google Chrome allows you to easily backup your bookmarks. Click on the three vertical dots on the top right corner, select “Bookmarks”, then “Bookmark Manager.” From there, you can export your bookmarks as an HTML file, which can be imported later. This process has always been a savior for me, preserving my curated list of favorites over the years.
Saving passwords
Similarly, saving passwords is a straightforward process. Head over to “Settings”, then “Passwords.” Here, you can view and manage your saved passwords. Make sure to note down the important ones or use a trusted password manager. Refer to our detailed guide on importing and exporting your passwords in Chrome.
Signing out of your Google account
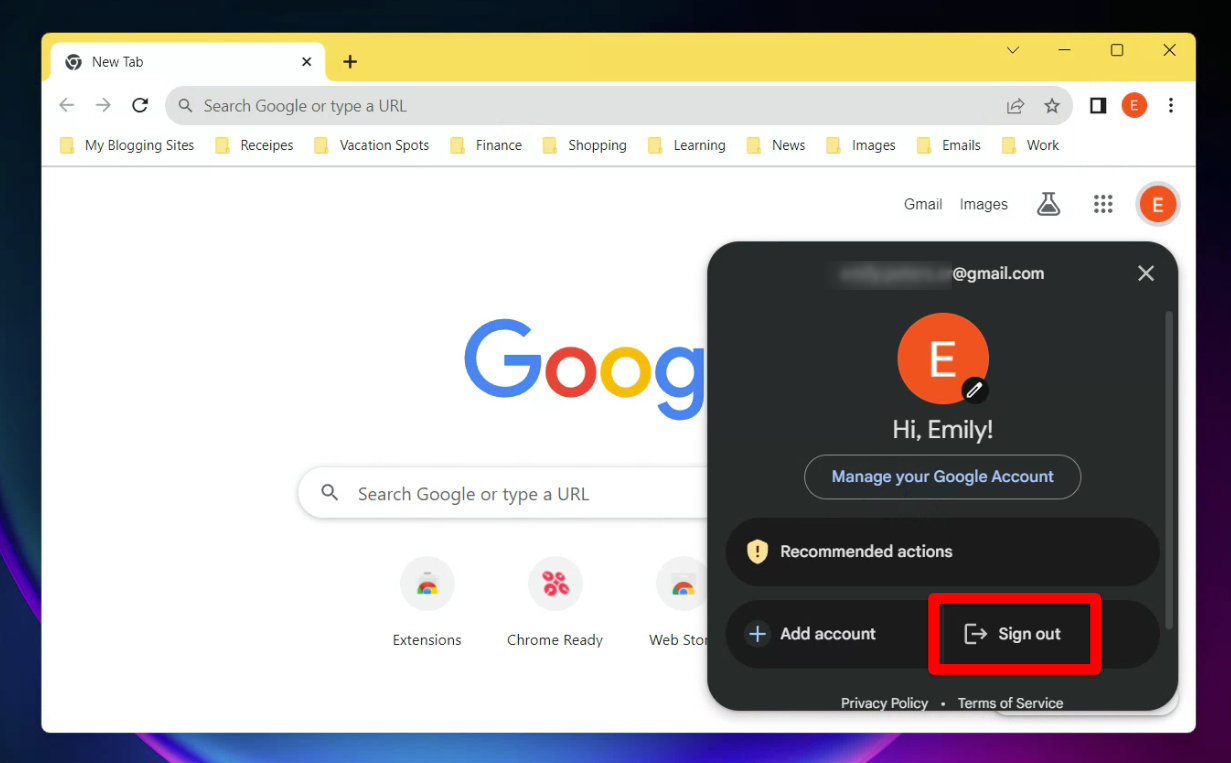
Before you go on to uninstall Google Chrome, it is advisable to sign out of your Google account to prevent any sync issues later. It’s like informing Chrome that you are about to take a break!

Signing out of Google Chrome
The moment of truth: Uninstalling Google Chrome
Once the stage is set, it is time to face the monster head-on. Uninstalling Google Chrome should ideally be a simple process, but sometimes it throws a curveball at us. Here, we would explore different methods to get rid of Chrome successfully.
Using the control panel
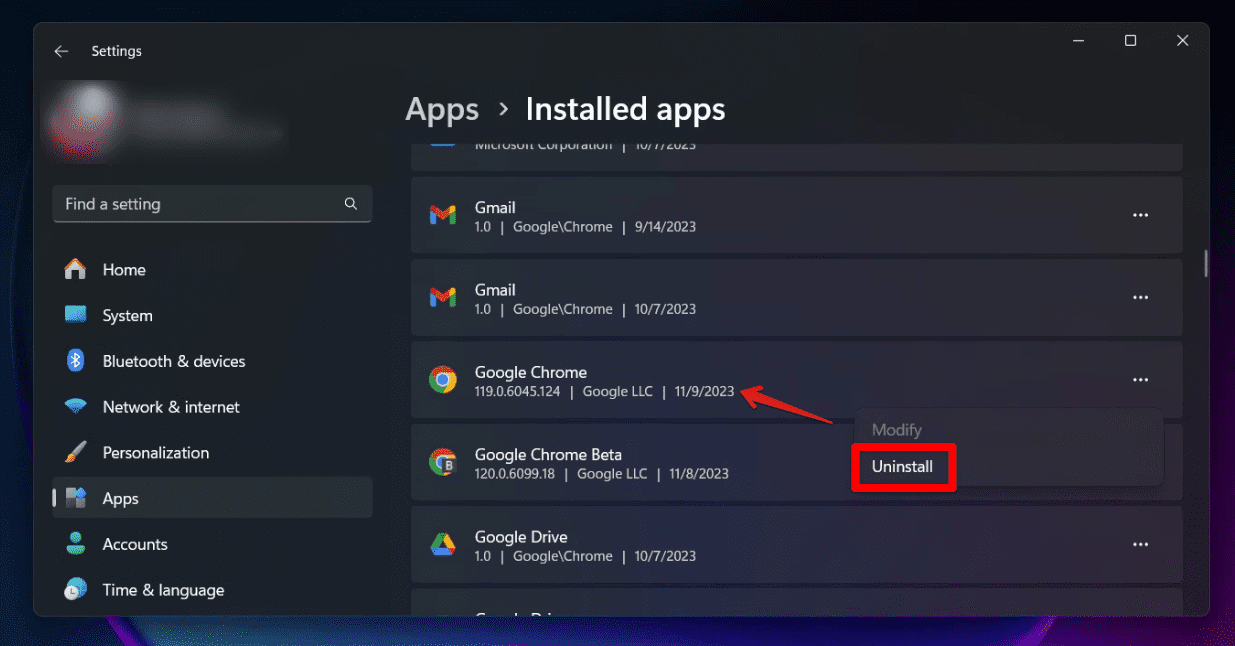
This is the traditional method that most of us are familiar with. Navigate to the control panel, find “Programs and Features,” locate Google Chrome in the list, and click “Uninstall.” Sounds simple, right? But sometimes, this straightforward approach doesn’t work, leaving us scratching our heads.
Addressing the roadblocks
Sometimes, you might encounter error messages or Chrome might not be listed in the “Programs and Features” at all. This can be frustrating, but do not lose heart. Sometimes, you need to dig a little deeper to find a solution, just like I had to during my first encounter with this problem.

Uninstall Google Chrome in Windows
Delving deeper: Alternative methods
If the traditional method fails, it’s time to explore alternative paths. Believe me, there’s more than one way to skin a cat, or in this case, uninstall Google Chrome.
Using a third-party uninstaller
When the going gets tough, third-party uninstallers come to the rescue. I have found that sometimes using a robust third-party uninstaller can help in removing stubborn programs. Tools like Revo Uninstaller or Geek Uninstaller can be quite handy in situations like these.
Manual removal
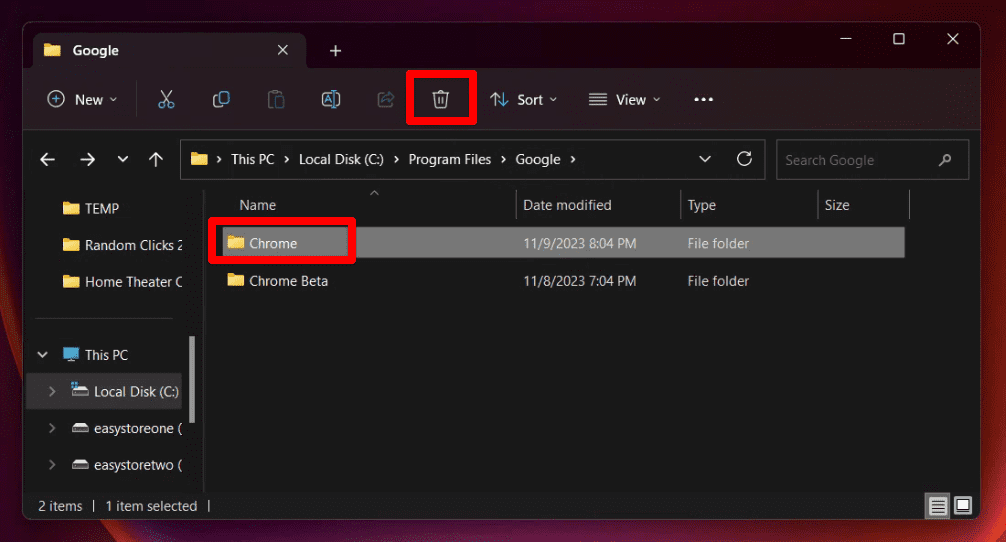
As a last resort, if everything else fails, you can manually remove Google Chrome from your system. Navigate to the installation folder (usually C:\Program Files (x86)\Google\Chrome or C:\Program Files\Google\Chrome) and delete it. But remember, this should be your last resort as it involves delving into system folders, and you need to tread carefully.

Deleting Chrome folder from Windows
Cleaning up the mess: Post-uninstallation steps
After you have managed to uninstall Google Chrome, your job is not over yet. There might be residual files lingering in your system, taking up space and potentially causing issues. Here’s how you can clean up the mess left behind.
Removing residual files
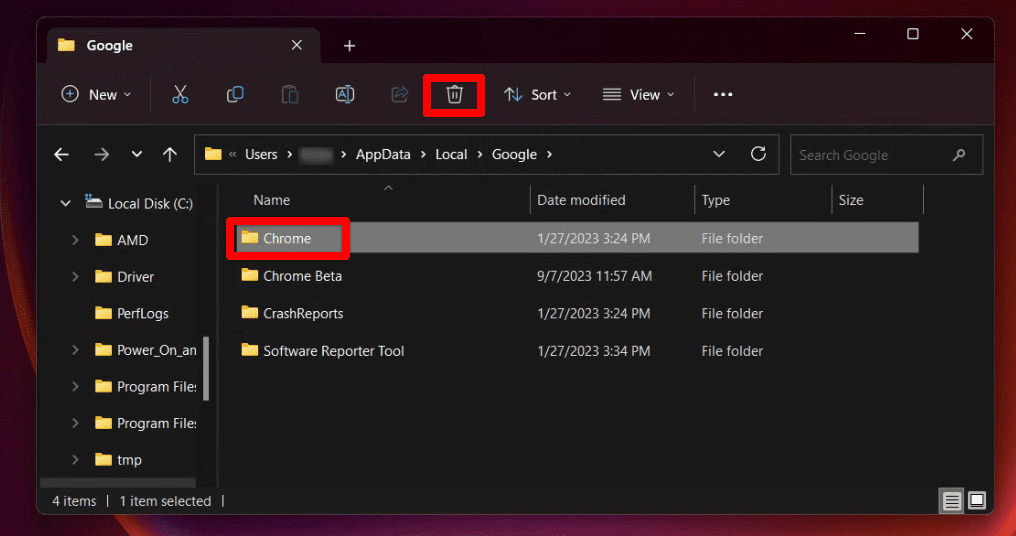
To ensure that Chrome has been completely removed from your system, you need to delete the residual files. These are usually located in the user data folder in the app data directory. Follow this path: C:\Users[Your Username]\AppData\Local\Google\Chrome\User Data and delete the “User Data” folder.

Deleting Chrome folder from Local folder
A fresh start: Reinstalling Chrome
After you have successfully removed Chrome and all its remnants, it might be time for a fresh start. If you still want to use Chrome, you can download a fresh copy from the official website and install it. Trust me, a fresh start can sometimes work wonders, giving you a glitch-free, smooth browsing experience.
Final thoughts: A journey well-travelled
Uninstalling Google Chrome can be a challenging task, but it can also be an enlightening experience. In this guide, we have explored various strategies ranging from the conventional approach of using the control panel to more intricate methods like employing third-party uninstallers and manual deletion. We have also emphasized the importance of pre- and post-uninstallation steps like backing up essential data and cleaning residual files to ensure a smooth process. This journey not only resolves the immediate problem but also enriches us with deeper insights into managing software on our systems. Remember, with patience and the right techniques, no technical hurdle is insurmountable.
