As someone who’s tinkered with a myriad of electronic devices over the years, I’ve always been a little curious. Knowing the specifications of a gadget feels like getting to know a friend on a deeper level. Now, when it comes to Chromebooks, I’ve noticed that this process isn’t as straightforward as one might expect. But fear not! I’ve traversed this path, faced the tiny hurdles, and I’m here to guide you through it.
In this detailed guide, I will walk you through the steps on how to find the computer specs of your Chromebook. And while I love the simplicity and efficiency of Chromebooks, I do wish they had made accessing some of this information a bit more intuitive. Let’s get started!
What are computer specs and why should you care?
Before diving into the “how-to”, it’s important to address the “why”. Computer specifications, or specs for short, give us a detailed rundown of the hardware and software capabilities of our devices. They inform us about the processor type, RAM capacity, storage size, and more. Imagine going on a blind date; wouldn’t you want to know a bit about the person beforehand? That’s how I view computer specs – it’s all about getting acquainted!
Knowing your Chromebook’s specs can help in various scenarios:
- Upgrades: If you’re thinking of adding more storage or making any other hardware modifications.
- Software compatibility: To ensure certain software or applications will run smoothly.
- Troubleshooting: Sometimes, issues can be linked back to hardware limitations.
- Reselling: Potential buyers would definitely want to know what’s under the hood.
Finding your Chromebook specs
Built-in features
Chromebooks come equipped with certain built-in tools and settings that let you peek into the device’s specifications.
System page:
- Open the Chrome browser on your Chromebook.
- In the address bar, type “chrome://system” and press Enter. This will lead you to a page that offers an abundance of information.
- While this page can seem a little overwhelming (it did to me the first time I saw it!), it contains nuggets of valuable info. You’ll find details about the CPU, memory, and more. If you click on any of the “Expand” links, you can see even more detailed data.
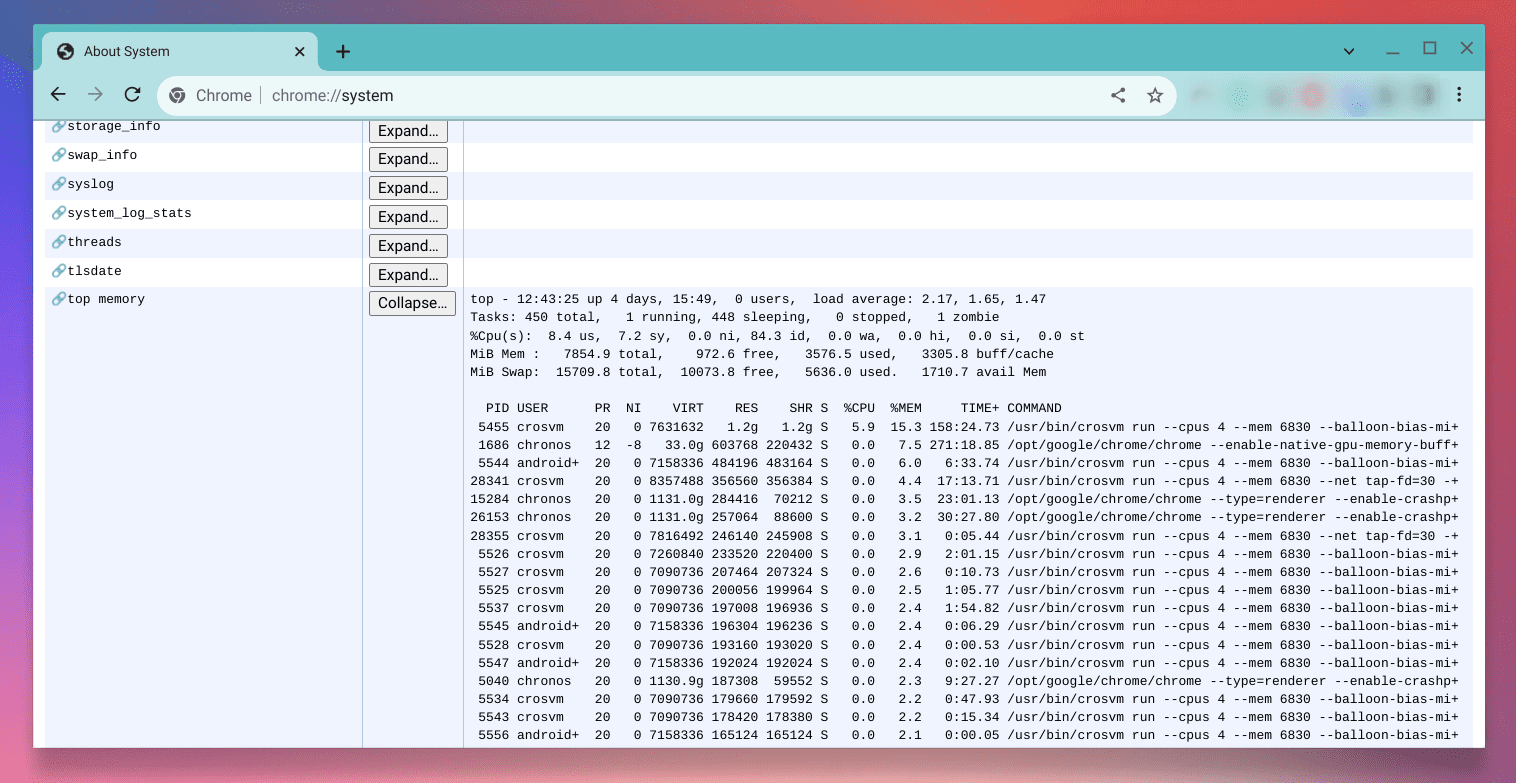
ChromeOS Specs
Personally, I adore the comprehensiveness of the system page. However, I’m not quite fond of the fact that it can be a tad too technical for the average user.
Using quota internals to check storage details:
While exploring various ways to gather details about your Chromebook, I stumbled upon an interesting tool built into the Chrome system called “quota internals”. Now, this might sound a bit too technical, but stay with me, as it gives a neat insight into your storage details. It’s a bit like having a sneak peek behind the curtain, allowing you to see what’s occupying space and how much of it is being used. Here’s how you can do it:
- Initiating the Process: Start by opening the Chrome browser on your Chromebook. This familiar territory is where we will begin our slightly deeper exploration.
- Navigating to Quota Internals: In the browser’s address bar, type “chrome://quota-internals” and press Enter. This takes you into a segment that offers detailed data about storage usage on your device.
- Exploring the Page: Once you enter, you will find information about quota usage, usage breakdown by various websites and apps, and an event log that tracks recent activities related to storage management.
- Analyzing the Data: Now comes the part where you put on your detective hat. Analyze the data to identify apps or websites that are consuming significant storage space. This information could be a revelation, helping you manage your device’s resources more effectively.
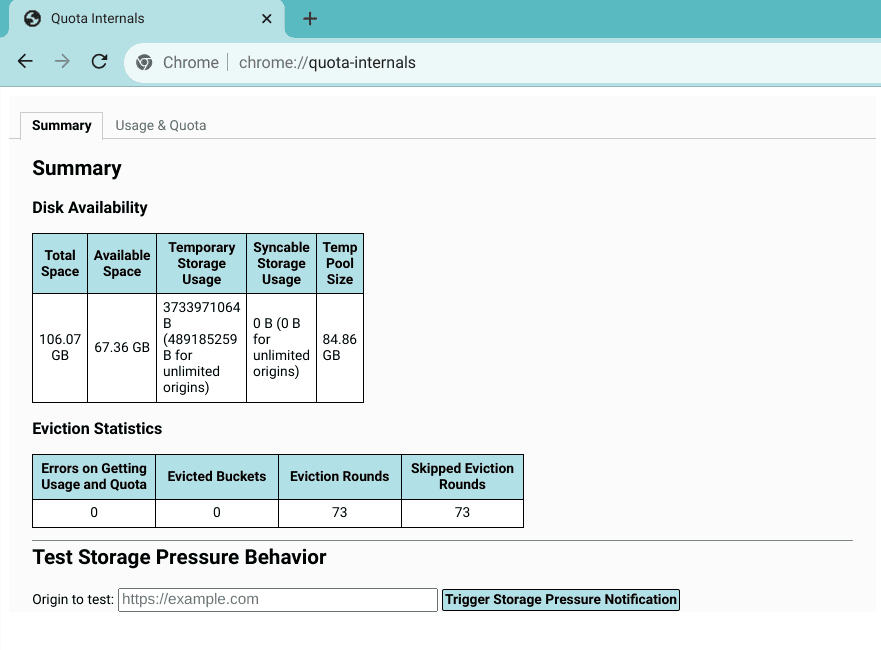
Quota Internals
ChromeOS Settings:
- Click on the clock in the bottom right corner.
- Go to “Settings” (resembles a gear icon).
- Scroll down and find the “About Chrome OS” section.
- Here, you’ll see details about the version of Chrome OS you’re running. Clicking on “Additional details” > “Build details” will reveal even more.
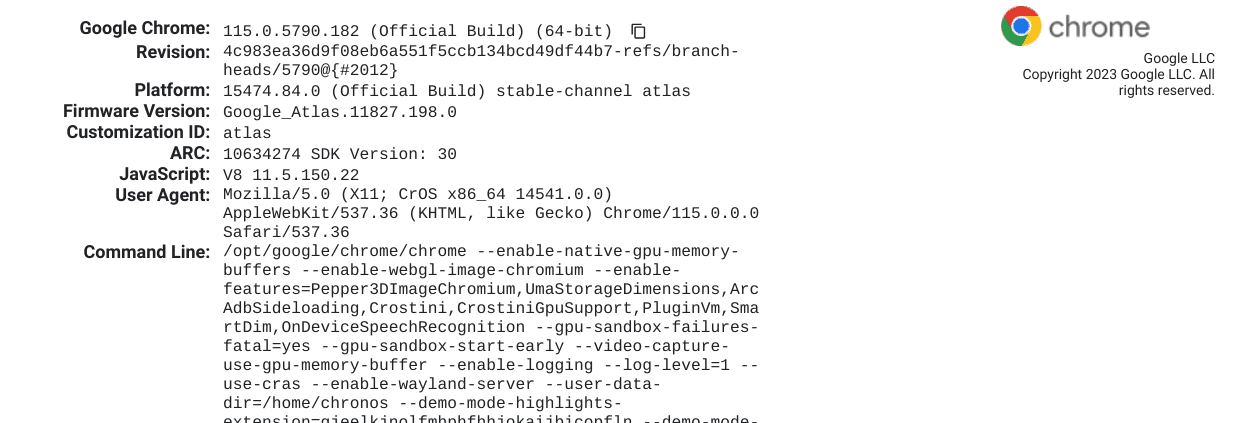
ChromeOS Build Details
I often prefer using this method for a quick glance because it’s straightforward. Yet, it doesn’t offer as much depth as the system page.
Utilizing the storage management tool in Chrome OS
Now, I would be remiss if I didn’t mention the wonderful storage management tool that’s baked right into Chrome OS. This has been one of my favorites because it doesn’t just tell you the specifics, it also helps you manage your storage efficiently. I have found this tool to be a savior, especially when my device begins to slow down and I need to free up some space quickly. Let’s dig into how you can find and use this tool:
Accessing the tool:
-
- Click on the clock in the bottom right corner to open the system tray and notification panel.
- Click on the “Settings” gear icon.
- In the left sidebar, select “Device”.
- Now, click on “Storage management”. This should lead you to a comprehensive view of your storage details.
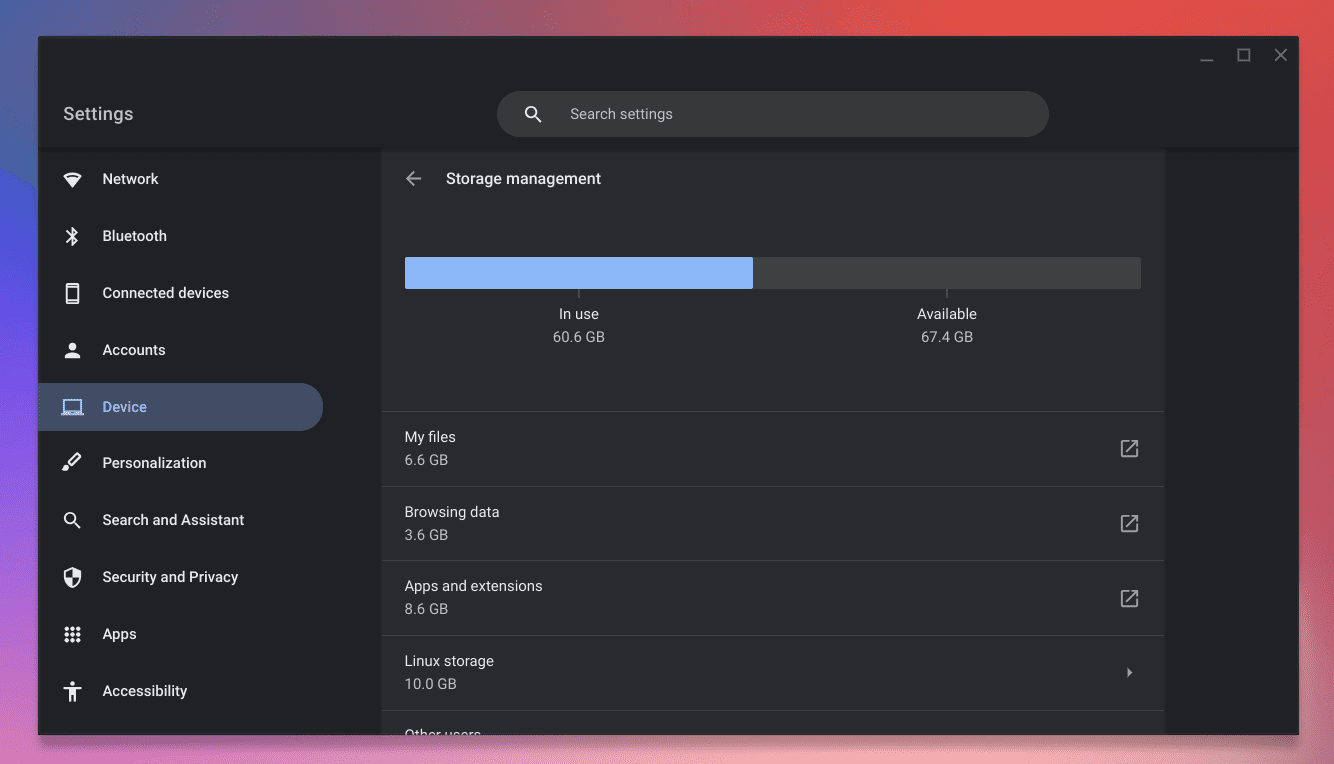
Storage management in ChromeOS
Understanding the storage breakdown:
-
- “My files”: This section contains files you’ve downloaded. Sometimes, I find myself surprised by the number of files that accumulate here over time.
- “Browsing data”: If you find that your storage seems inexplicably high, it might be due to cached data. Clearing this occasionally not only frees up space but can sometimes help your system run smoother. This has been a little secret weapon of mine to ensure optimum performance.
- “Apps and extensions”: Here, you will find details on the storage consumed by various apps and extensions installed on your Chromebook. I often review this section to keep a check on any apps that might be consuming more space than necessary. The beauty of this tool is that it allows you to manage your storage right from here. You can click on any section to view more details and remove files or uninstall apps that you no longer need. It’s like having a mini spring cleaning session for your Chromebook.
- “Linux storage” If you have enabled Linux on your system, you should be able to mange its storage from here.
Third-party tools
Now, if you’re like me and prefer a more structured and user-friendly interface, then third-party tools might be your cup of tea. I’ve tried quite a few, but here’s one that I particularly liked:
Cog – System Info Viewer:
This is a Chrome extension that I stumbled upon, and oh boy, was I pleased! It presents the specs in a neat, organized manner, making it a breeze to understand.
- Go to the Chrome Web Store.
- Search for “Cog – System Info Viewer”. Note that this is a Chrome app and not an extension.
- Install the app.
- Once installed, simply open it from the ChromeOS launcher to view your Chromebook’s specs.
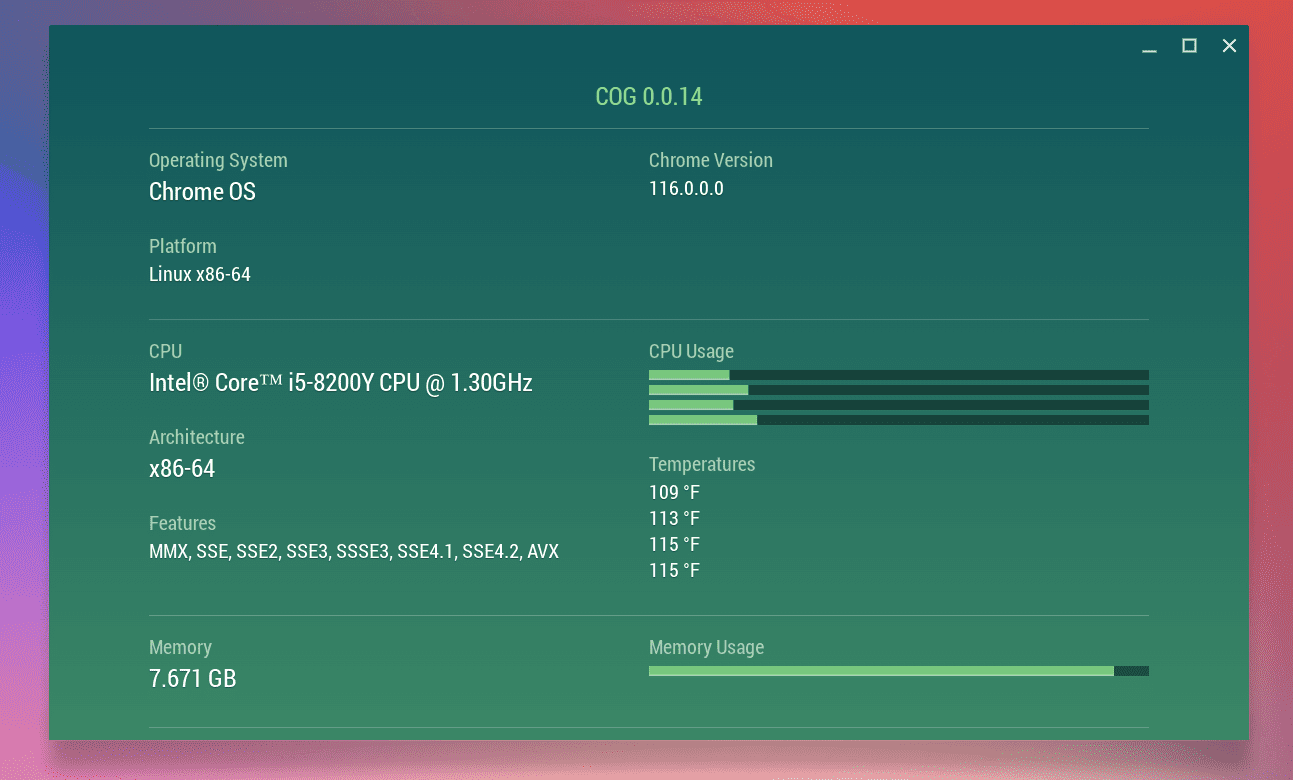
Cog system viewer
The ease of use with Cog is commendable. The only downside? Well, you have to rely on an external tool, but that’s a small price to pay for clarity.
Some specs to pay attention to
While it’s great to know where to find all this information, it’s also vital to understand what some of these specs mean. Here are a few that I believe are crucial:
- Processor (CPU): This is the brain of your Chromebook. The speed and efficiency of your device depend largely on this. Look for names like “Intel” or “ARM” followed by some numbers and letters, indicating the model.
- Memory (RAM): This determines how well your device can handle multitasking. The higher the number (measured in GB), the smoother your multitasking experience will be. If you’re someone who, like me, ends up with a bazillion tabs open, then RAM is something you’d want to pay attention to.
- Storage: This tells you how much space you have for files, apps, and more. With the trend of cloud storage, especially with Chromebooks pushing Google Drive, I’ve personally felt that I don’t need as much. However, it’s always good to know, especially if you’re offline often.
Closing thoughts
Finding the specs on your Chromebook is a bit like going on a treasure hunt. While the treasure (the specs) is invaluable, the journey (navigating through the settings) can be filled with a mix of curiosity and tiny frustrations. However, with this guide, I hope I’ve made your journey a tad bit easier.
Remember, knowing your device’s specifications isn’t just a geeky pursuit. It’s about understanding your device’s strengths and limitations. Once you’re armed with this knowledge, you can tailor your usage to get the best out of your Chromebook. Happy exploring!
