Most of us have a myriad of passwords for various websites and devices. It’s no wonder that sometimes, I just wish for a simpler way to access my device. This is where the PIN feature on the Chromebook comes in handy. I’ve recently started using this feature and thought of sharing the process with you. Combining the two, setting up a PIN for logging into your Chromebook ensures swift access while maintaining a protective layer.
Why consider setting up a PIN?
Before we dive into the steps, let me explain why you might want to consider setting up a PIN for your Chromebook.
- Convenience: While I love the security that a complex password offers, there are times when I’m in a rush and just want quick access to my device. With a PIN, it’s a swift and hassle-free way to unlock my Chromebook.
- Security: Even though it’s a shorter code, a PIN can still provide a decent level of security, especially if you keep it a secret and make it unpredictable. It’s a balance between safety and swiftness.
- Simplicity: There’s beauty in simplicity, and for those who aren’t tech-savvy (like my lovely grandmother), remembering a four to six-digit PIN can be easier than a complicated password.
However, it’s worth mentioning that while I love the PIN feature, it might not be for everyone. If you’re someone who often leaves their laptop unattended in public spaces or among nosy acquaintances, relying solely on a PIN might not be the best idea. You know your habits and surroundings best!
Getting started with setting up a PIN
Alright, let’s roll up our sleeves and get into the nitty-gritty of setting up that PIN. Here’s a systematic breakdown:
1. Make sure your Chromebook is updated
Before you start with the PIN setup, ensure that your Chromebook is running on the latest version of Chrome OS. Here’s how:
- Click on the clock located at the bottom right corner of your screen.
- Now, click on the gear icon (Settings).
- Scroll down and click on “About Chrome OS”.
- Here, click on “Check for updates”. If there’s an update available, your Chromebook will start downloading it.
- For details steps with screenshots, refer to our article: How to update Chromebook
This might seem like an unnecessary step, but trust me, keeping your device updated minimizes glitches and ensures you have all the available features.
2. Navigate to the screen lock settings
Once you’re sure that your Chromebook is up to date:
- Click on the clock again and then the gear icon (Settings).
- In the left pane, select “Security and sign-in” (or just search for “Screen lock” in the search bar at the top). Alternatively, look for “Security and Privacy” section and click on “Lock screen and sign-in”
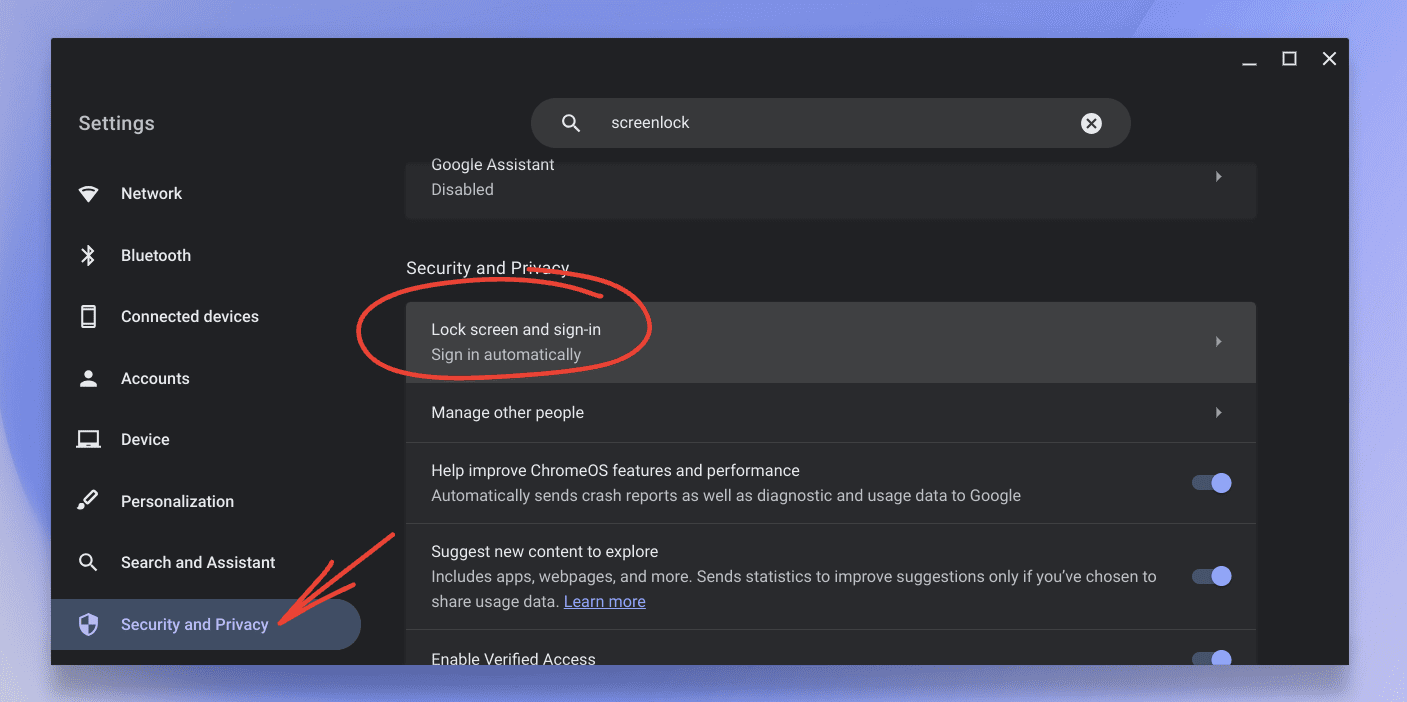
ChromeOS Security and Privacy Settings
3. Selecting PIN option
- Enable “PIN or password” radio button and then click on “Set up PIN” option.
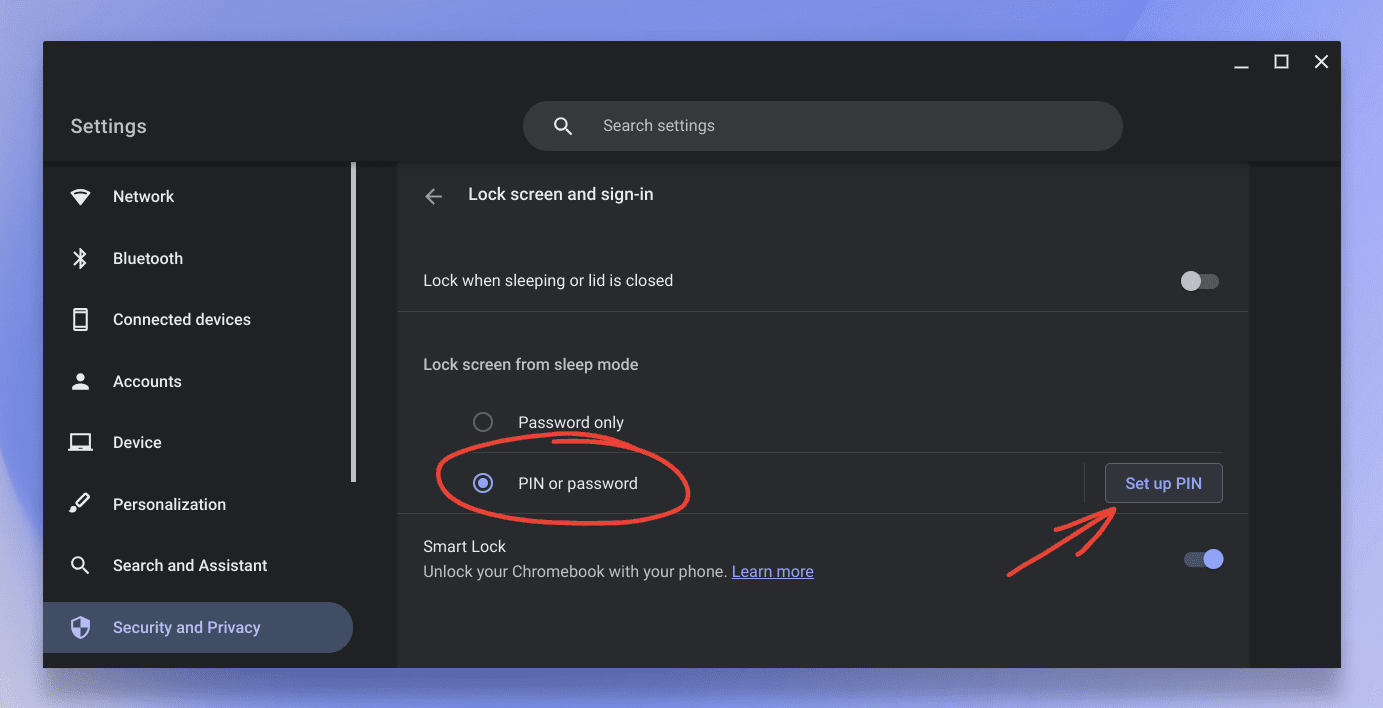
Lock screen and sign-in options
Now, you’ll need to confirm your identity by entering your Google password. I found this bit a tad annoying – especially because I use a long password. But hey, security first, right?
4. Choose a PIN
After entering your password:
- You will see an option labeled “PIN or password”. Click on it.
- You’ll now be presented with the choice to “Use PIN or password to unlock”. Switch this toggle on.
- A box will appear, prompting you to set your desired PIN.
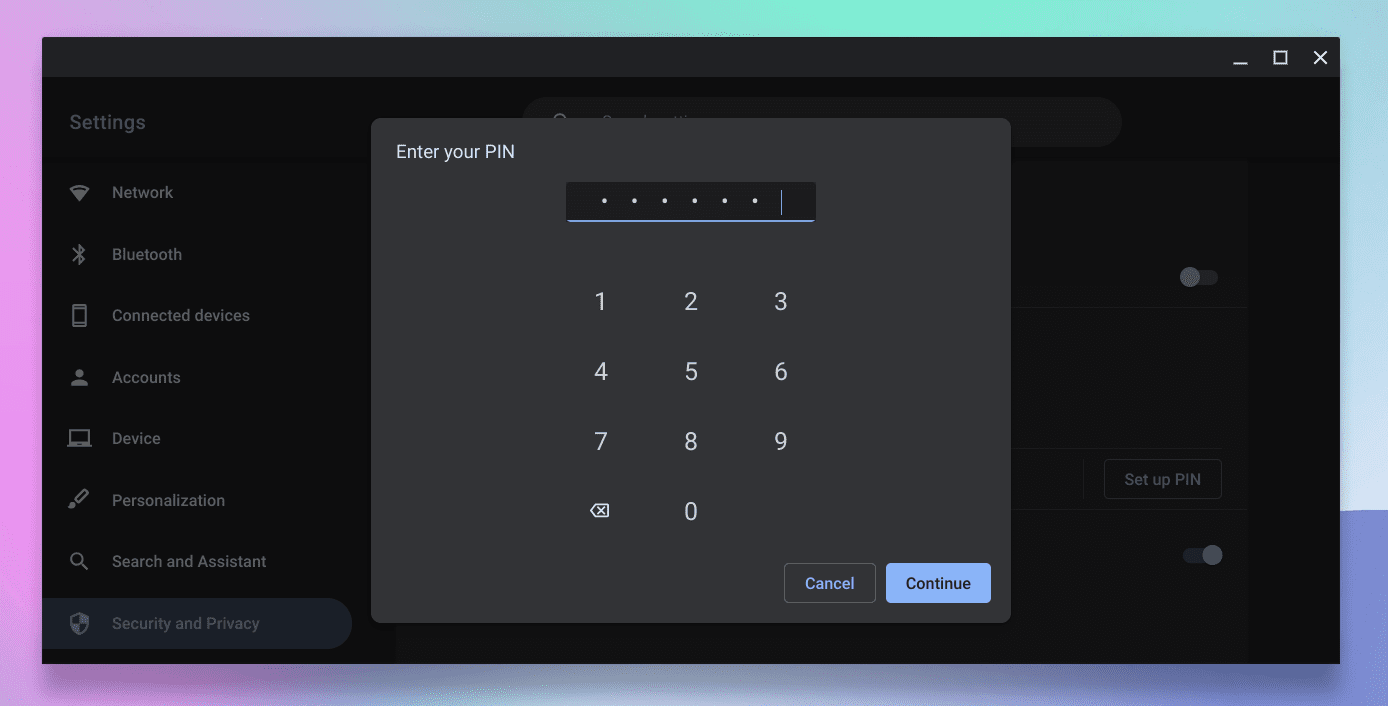
Setting up PIN on ChromeOS
Here’s a personal tip: While setting up your PIN, avoid using easily guessable sequences like “123456” or “000000”. Also, even though you’re keen on keeping it simple, throw in a random number or two to make it unpredictable.
5. Test your PIN
Once you’ve set up your PIN, lock your Chromebook by pressing the “Lock” icon located at the bottom right corner (near the clock). Now, try unlocking it using your new PIN. This step is to ensure that you remember the PIN and that it’s working smoothly.
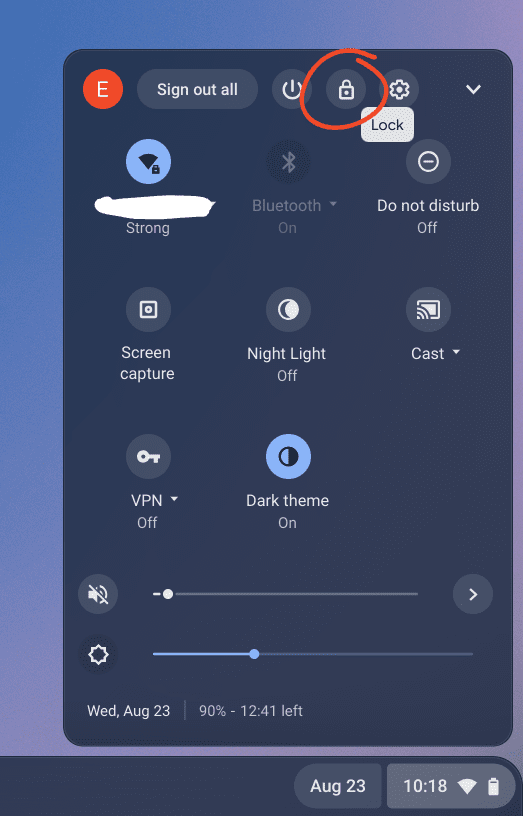
Locking in ChromeOS
Voila! You now have a PIN set up for your Chromebook. Wasn’t that easy?
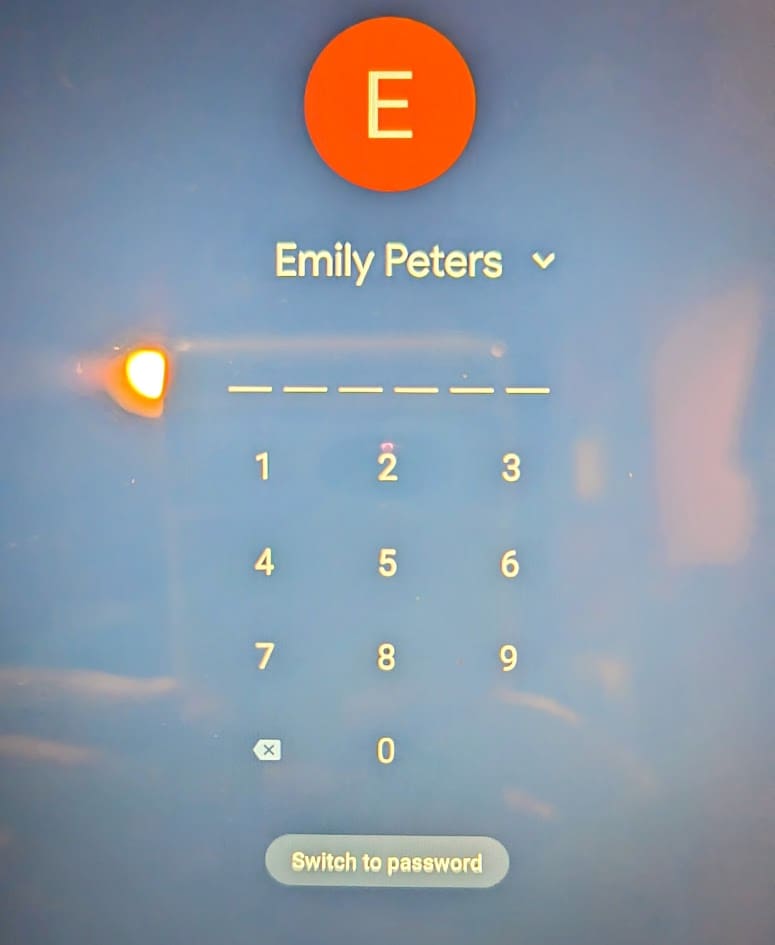
Logging with PIN in ChromeOS
When things go wrong
During my experience, the process was pretty straightforward. But technology can be unpredictable. Here are some common hiccups you might face:
- PIN not working: If you find that your PIN isn’t working, don’t panic. Enter your Google password instead. Once you’re in, you can reset your PIN.
- Forgotten PIN: Again, use your Google password. It’s the master key. Once logged in, head back to the screen lock settings to set up a new PIN.
- PIN option not available: Remember when I emphasized updating your Chromebook? This is why. If your Chromebook isn’t updated, some features, including the PIN option, might not be available.
A few parting thoughts
Setting up a PIN for your Chromebook adds a touch of convenience to your daily routine. And for someone like me, who’s always juggling tasks and constantly on the move, every saved second counts.
However, always weigh convenience against security. The PIN feature is fantastic, but if you’re working with sensitive information or often in public spaces, you might want to stick with a robust password or use both in conjunction.
Happy computing, dear ChromeReady readers! And until next time, stay curious and keep exploring the vast, fascinating world of technology.
