I fondly remember the first time I unboxed my Chromebook, taken in by its simplicity and speed. As with any gadget, however, there comes a time when we want to make it truly ours, and this often starts with tweaking the display settings.
Dive in with me as we explore the world of Chromebook display settings and uncover the wonders and occasional pitfalls within.
Understanding your Chromebook’s Display
Before we start tweaking settings, it’s essential to know what you’re working with. The display is essentially the window through which you interact with all the software in your Chromebook. It’s the canvas where everything happens – be it work, entertainment, or browsing.
Resolution: This refers to the number of pixels on your screen. More pixels generally mean a clearer, crisper display. But, on the flip side, everything appears smaller. I personally like a higher resolution because it offers me more real estate to work with. But if you’re straining your eyes, you might prefer a lower one.
Brightness: This is how much light your screen emits. While I love a bright screen when I’m working in a sunlit room, it’s a bit too harsh for late-night browsing.
Orientation: This refers to whether your screen is in portrait (vertical) or landscape (horizontal) mode. It can be fun to play around with, especially if you’re using your Chromebook for reading.
Accessing Chromebook’s display settings
Opening ChromeOS settings
Getting to the ChromeOS settings is a piece of cake:
- At the bottom right of your screen, click on the time.
- Then click on the gear icon to open the Settings.
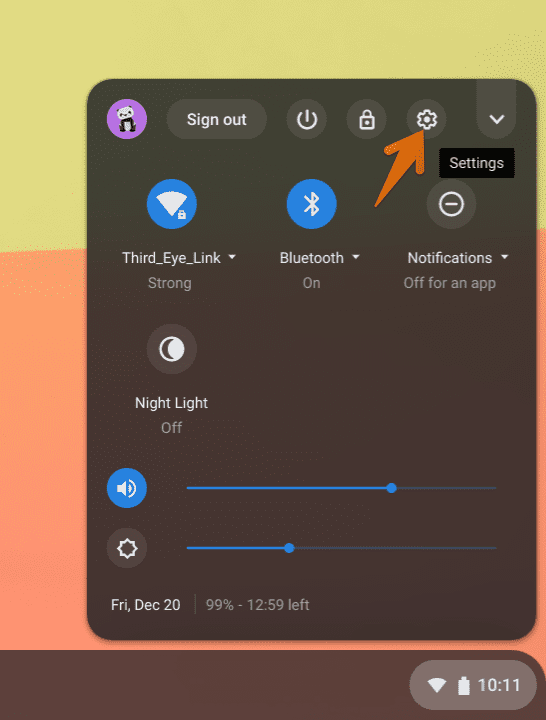
Launch Chrome OS Settings
Opening display settings
- In the left sidebar, click on “Device.”
- From the list that appears, select “Displays.”
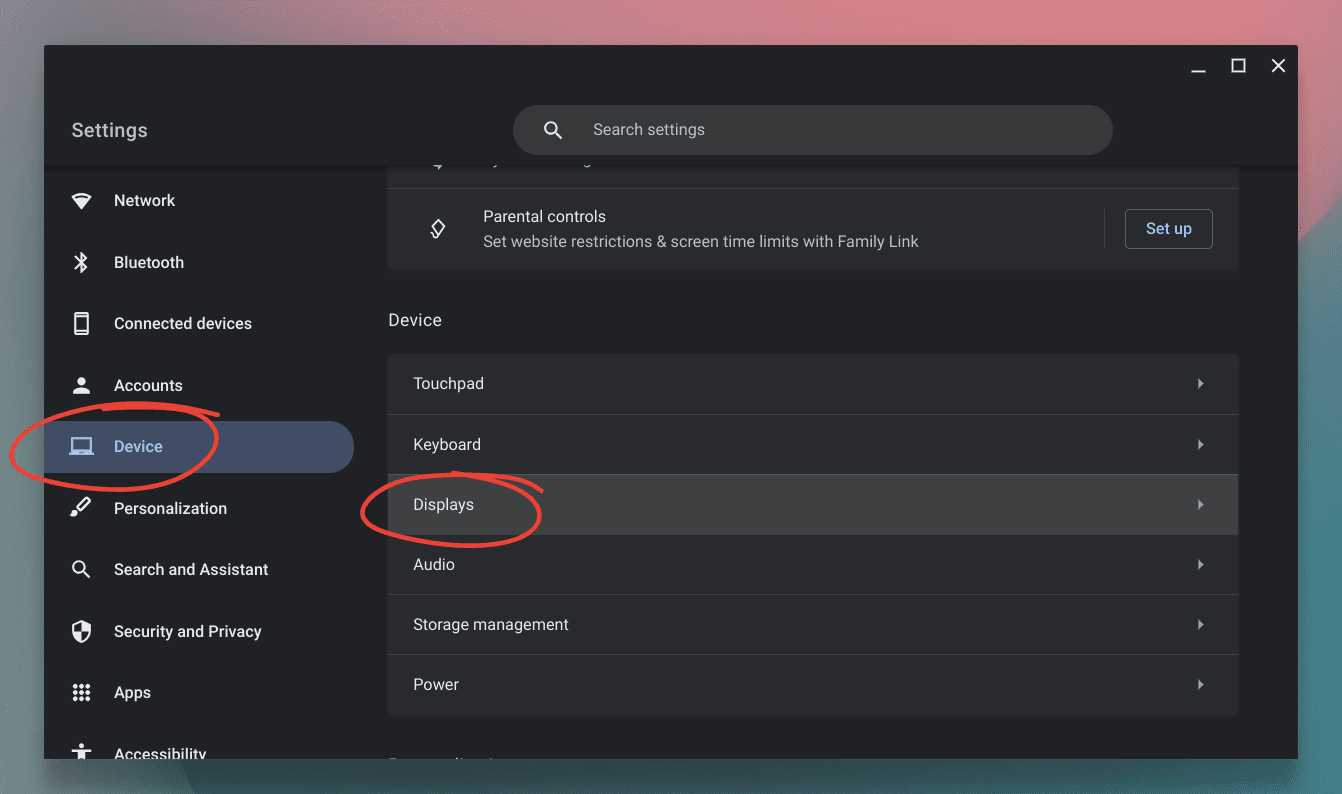
Accessing Display Settings
And there you are! Now let’s dive into the modifications.
Adjusting screen resolution
If things are appearing too small or too large on your screen, you might want to adjust the resolution.
- In the “Displays” section, you will see a dropdown menu under “Display size.”
- Here, you can select from the available resolutions.
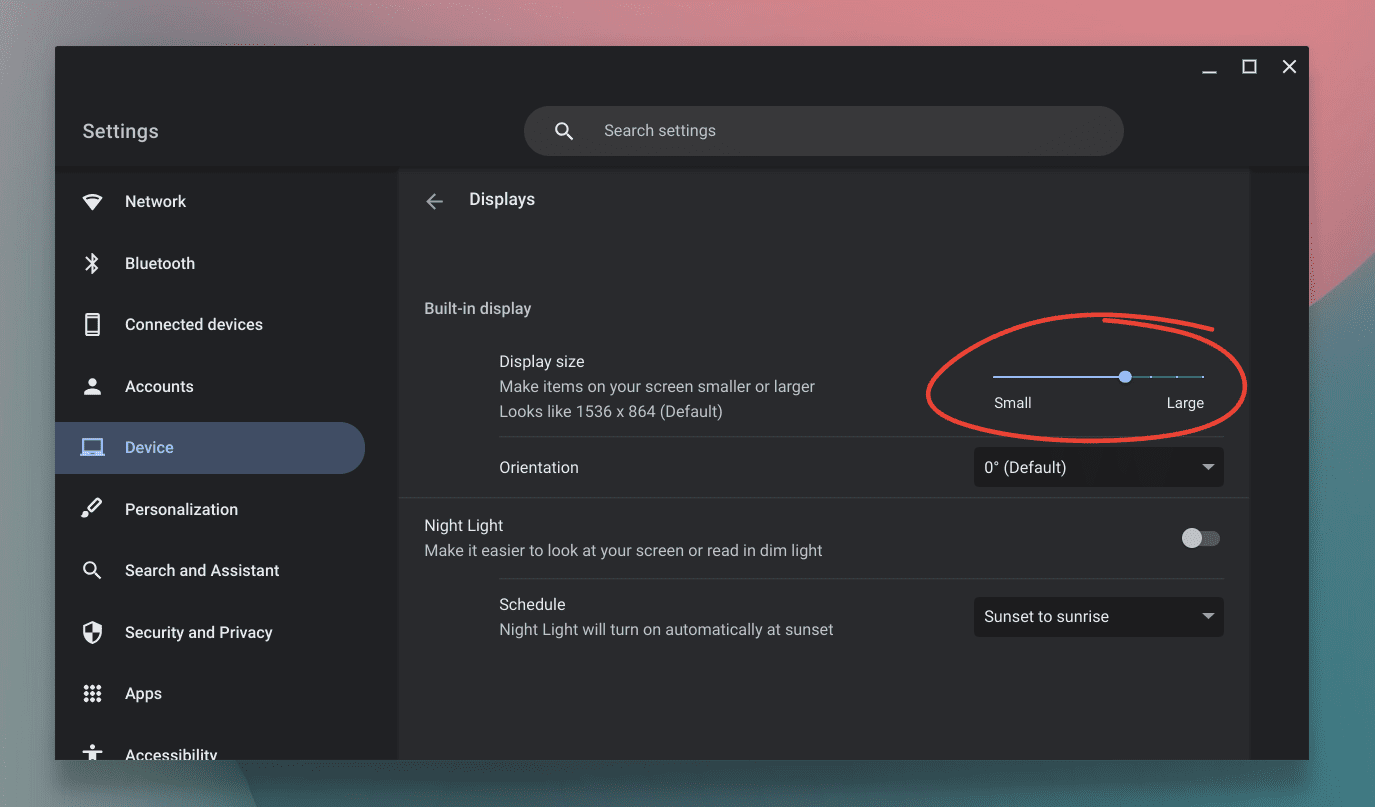
Adjusting ChromeOS Display size setting
Remember, moving the slider to the right increases the resolution (and makes everything look smaller), while moving it to the left decreases it. I sometimes lower the resolution when showing presentations, so everything looks larger for the audience.
Changing screen brightness
There are a couple of ways to adjust screen brightness:
Using the keyboard: Most Chromebooks have brightness keys on the top row of the keyboard. You can use these to increase or decrease the brightness.
Pixelbook Go display brightness control keys
Via the System menu
-
- Click on the time in the bottom right corner of your screen
- Look for the brightness icon. Slide to the left to dim the display and to the right to brighten it.
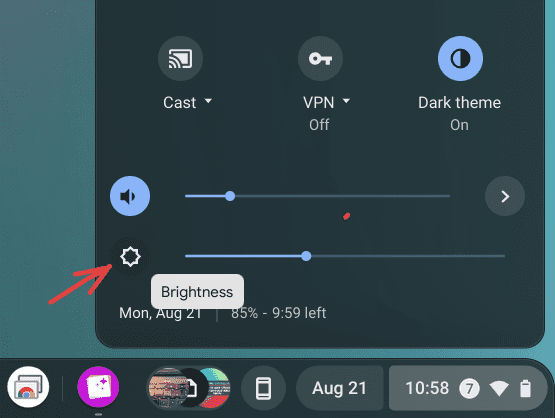
Adjusting display brightness on Chromebook
I often find myself adjusting brightness based on the time of day. During daylight hours and while being outdoors, I keep it high, but as night approaches, I dim it down to reduce eye strain.
Tweaking the orientation
This is where you can get a bit experimental.
- In the “Displays” section, locate “Orientation.”
- Using the dropdown, select from the options – “Standard,” “Rotate 90°,” “Rotate 180°,” or “Rotate 270°.”
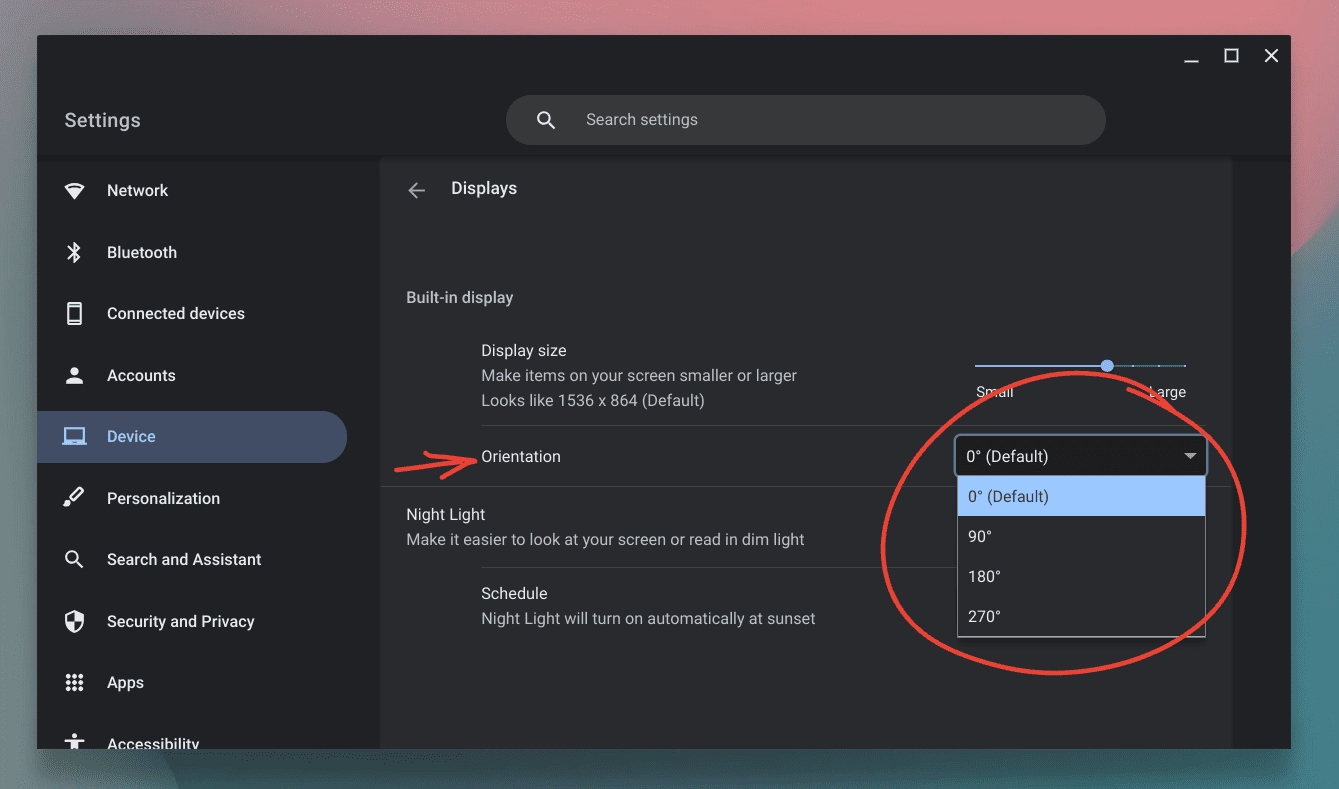
Adjusting display orientation on Chromebook
I’ve found the 90° rotation particularly useful when reading long articles or e-books. It turns your Chromebook into an e-reader of sorts. However, do remember to adjust the orientation back for typical tasks.
Night light
The Night Light feature is something I’ve grown to appreciate. It essentially reduces the blue light emitted by the screen, offering a warmer hue which is easier on the eyes.
- Under the “Displays” section, you’ll see the “Night Light” option.
- Toggle it on to activate.
You can also set a schedule for it to turn on or off automatically. I highly recommend using this feature in the evening to ensure better sleep quality. Check our step-by-step article: How to schedule automatic Night Light mode on ChromeOS
Conclusion
Your Chromebook’s display settings are more versatile than they might initially appear. With a bit of tweaking, you can optimize your screen for any task or environment. These settings have been designed to enhance your visual experience when you are engaged in activities such as presenting, working, reading, or browsing.
Over the years, I’ve realized the importance of personalizing these settings. It not only enhances your device’s functionality but also ensures that you’re comfortable during those long hours of screen time. So go ahead, experiment with these settings, and make your Chromebook truly yours!
