Chromebooks are speedy, stable, secure, and just about everything a person whose work is centered on the Chrome browser could ever need. However, not even ChromeOS is 100% exempt from system errors, bugs, and everything else. Acer Chromebooks are no exception either—no Chromebook is, may it come from HP, Asus, Samsung, or even Lenovo.
When the user interface starts giving you trouble, or you’re simply looking to wipe the device clean to sell it, a Powerwash is what you need to move forward with. Thankfully, the latter warrants you to follow just a handful of steps on an Acer Chromebook, which promptly leads the device toward a factory reset.
This guide will explain how to get that done with step-by-step instructions, so follow along with the write-up ahead and leave here knowledgeably well-equipped.
Factory resetting an Acer Chromebook – Explained
In the domain of ChromeOS, a factory reset is technically called a Powerwash. When you Powerwash your Chromebook, you restore it to factory settings, so the device turns out to be just how you powered it on for the first time. In other words, you wipe your device clean of any locally present data.
The good news is that factory resetting or Powerwashing your Chromebook is the same for all Chromebooks, including the ones made by Acer. All you have to do is follow a few steps, and you’ll be well on your way to reset the device so it behaves like brand-new again.
That said, before you permanently remove your personal contents from your device, knowing what a Powerwash erases and what it spares is worth knowing. Read the following subsection carefully for the best results, but if you’re already in the know, feel free to skip past it and get right down to the Powerwash instructions ahead.
What does Powerwashing your Chromebook erase from the device?
The Powerwash feature has been built into your Chromebook for many reasons. For starters, it’s the ultimate troubleshooting technique that can help you fix your device when things go incessantly awry. In other scenarios, reset it to the factory default if you’re selling your Chromebook.
That way, the next owner cannot access your files and paint their ChromeOS experience in their own colors. Every modern-day smartphone, tablet, and Windows laptop has this feature, and Chromebooks are no exception. You can rely on this tool when no other troubleshooting technique is helping you resolve an issue with the system.
Apps and settings reset
So, what is it precisely that Powerwashing your Chromebook does? When we say that performing a Powerwash restores your Chromebook’s original settings, all applications and games outside the system apps you installed from the Google Play Store or via sideloading will be deleted.
Locally stored files deleted
Moreover, the tweaks you made and the settings you altered will be set to default, exactly how a Chromebook is when you boot it up for the first time. Additionally, all contents of the “Files” system utility will vanish forever, so don’t expect to find them once Powerwashing has taken effect.
User accounts deleted
Lastly, the user account signed into the Chromebook will also be deleted, and all personal details that contributed toward the Chrome browser will be deleted. The latter includes browsing history, bookmarks, saved pages, theme, wallpaper, color, stored passwords, other autofill data, and, of course, the cookies that you’ve accumulated over time.
Therefore, it’s undoubtedly essential to consider searching every nook and cranny of your Chromebook to confirm whether there’s anything worth backing up to avoid important data loss later on. Let’s expand on this before we tell you how to Powerwash your Acer Chromebook.
How to recover some of your data even after a Powerwash
One of the best things that makes Powerwashing a Chromebook so quick, easy, and doable for the vast majority is that you can quickly recover a specific portion of your Chromebook’s data just by signing into your Google account. This, of course, does not include locally present data that was saved on the device in the “Files” app.
Turning to the Google Drive subfolder available in the “Files” system utility would be best. Simply copy whatever you wish to preserve and paste it into the Drive section. Please bear in mind, though, that this must be done before resetting your Acer Chromebook.
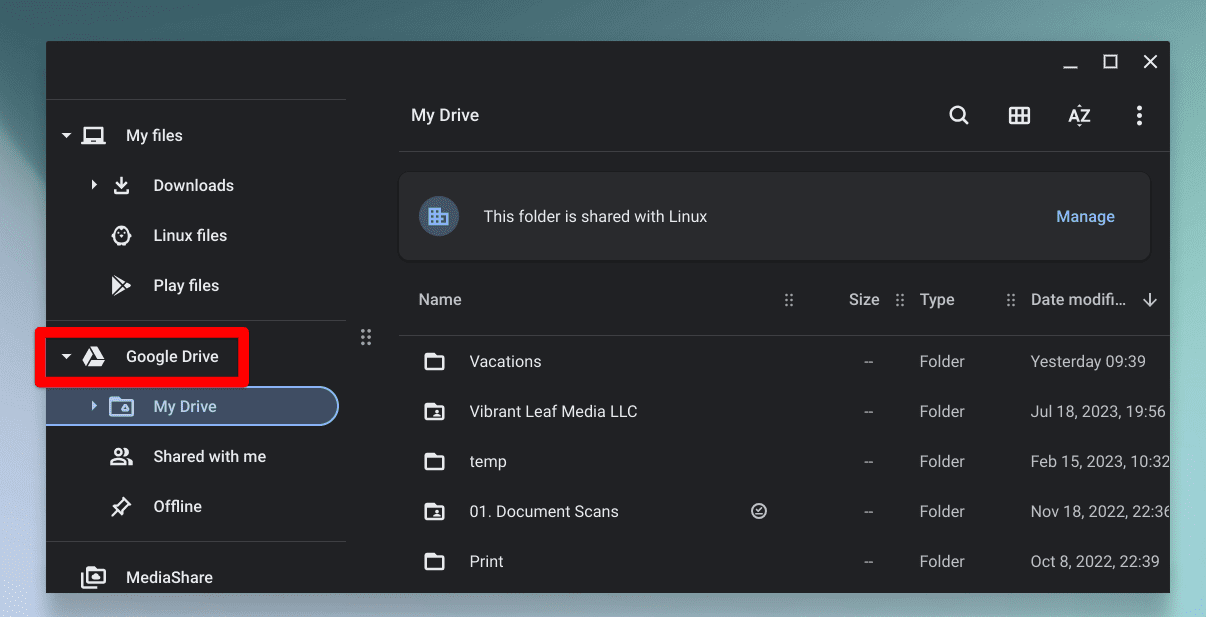
Google Drive in the Files app
Next, head over to your Chrome browser and ensure you’ve enabled the “Sync” functionality. That way, even after resetting the device, most of your settings and preferences, such as browsing history, saved passwords, elements of personalization, and other factors constituting your Chrome profile.
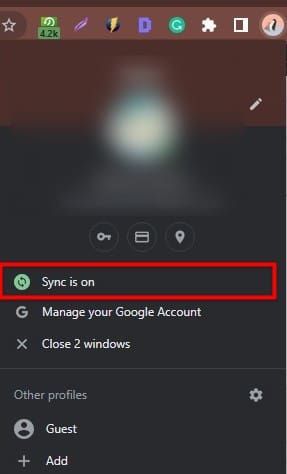
The “sync” feature in Google Chrome
The gist of it is that whenever you next sign into your Chromebook after Powerwashing the Acer device, the details, data, and preferences associated with your account are going to come back up instantly. That is the beauty of syncing your account information online with Google.
How to perform a Powerwash and factory reset your Acer Chromebook
Now that you know what a Powerwash is and what it can do to an Acer Chromebook, it’s high time to get into the details of the matter and talk about doing the deed itself. To reset an Acer Chromebook, follow the steps to get started.
1. Unlike other devices where resetting can be difficult, ChromeOS makes it simple enough to initiate a total reorganization of the device. Begin by opening your device’s “Settings” app. Look for it in the launcher section if you don’t have it pinned to the shelf already.
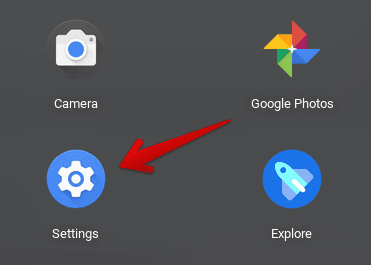
Opening “Settings”
2. The next step is to click the “Advanced” button on the side panel to the left while inside the “Settings” app. That should reveal more options on the screen for you.
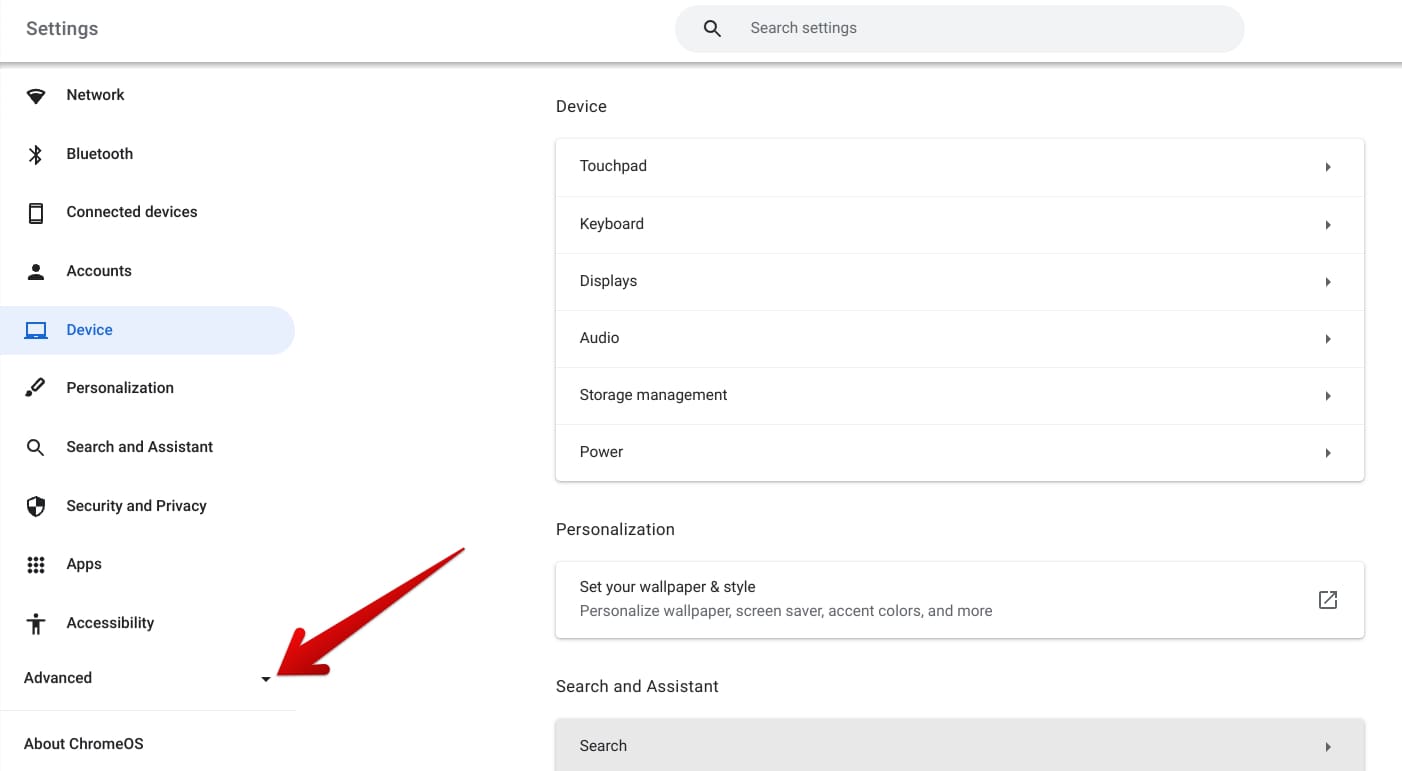
Accessing “Advanced” settings on ChromeOS
3. Next, click “Reset settings,” you should be redirected to the relevant department accordingly.
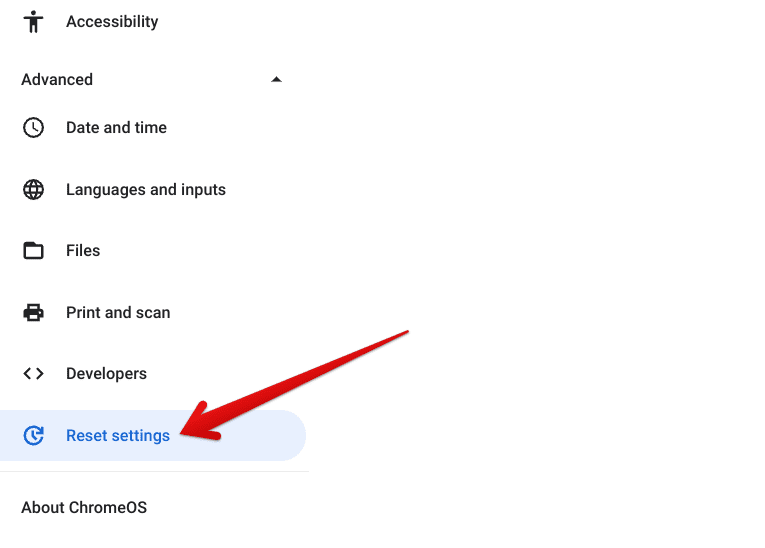
Clicking on “Reset settings.”
4. Click the “Reset” button to initiate the Powerwash process. At first, you’ll be prompted with a warning sign asking you to proceed by restarting the Chromebook. That way, the factory reset operation can commence.

Clicking on “Reset”
5. Click on the “Restart” button to kick things off with factory resetting your Acer Chromebook.
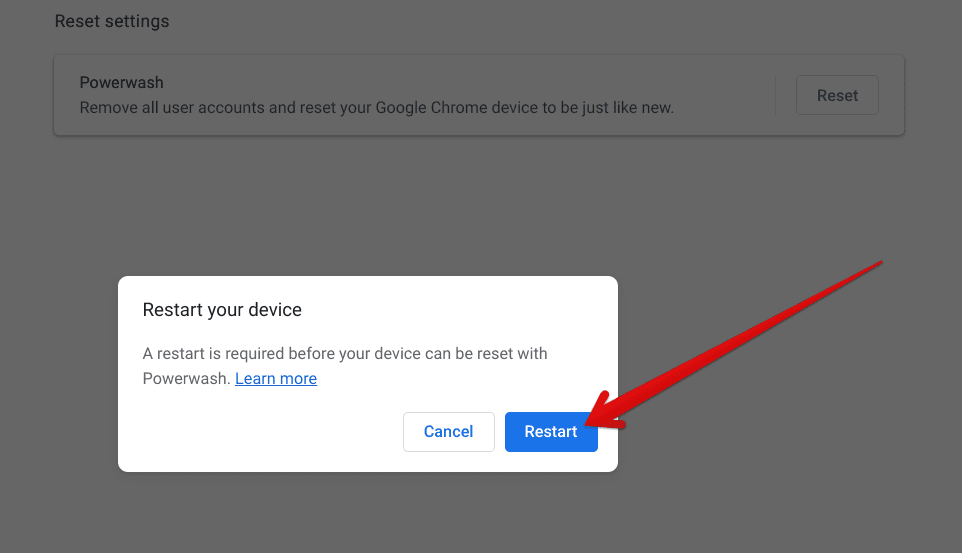
Restarting the device
From here on out, you must follow the on-screen instructions, and your Acer Chromebook will soon be reset to factory settings. Soon enough, the welcome screen will also appear, asking you to move forward with the device’s initial setup. Sign into your Gmail account and let things flow from there accordingly.
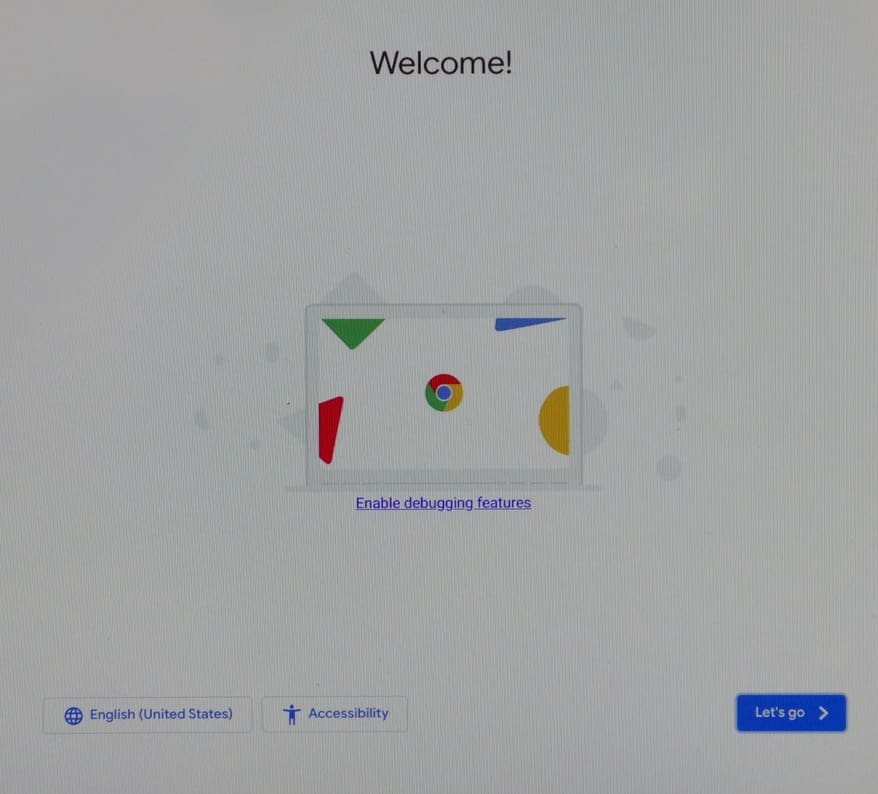
The ChromeOS welcome screen
That’s about it! You’ve learned that resetting an Acer Chromebook is only a bunch of easy-to-follow steps. Before we top the article off, though, here are some tips and tricks on resolving issues with your Chromebook and preventing things from escalating to a Powerwash.
Other troubleshooting measures to take
In cases where you’ve encountered a major glitch with your Chromebook or the device’s performance isn’t up to the mark anymore, one would usually think of a Powerwash before taking other measures. This approach is wrong and needs to be switched up in favor of a hardware reset first, followed by more effective troubleshooting steps.
Hard reset
A hardware reset differs significantly from a factory reset in the sense that it only refreshes your Chromebook’s hardware and doesn’t force the system to wipe away all present data. To perform such a reboot, press and hold the “Refresh” key on your Chromebook’s keyboard, which is in place of F3, followed by a swift press of the “Power” key.
That should get you out of all sorts of tricky situations, whether your Chromebook has frozen or stuck elsewhere and is no longer budging. Moreover, a hardware reset can also fix temporary issues with your device’s peripherals, such as the keyboard or the trackpad, so it’s certainly worth knowing about as an indispensable tool.
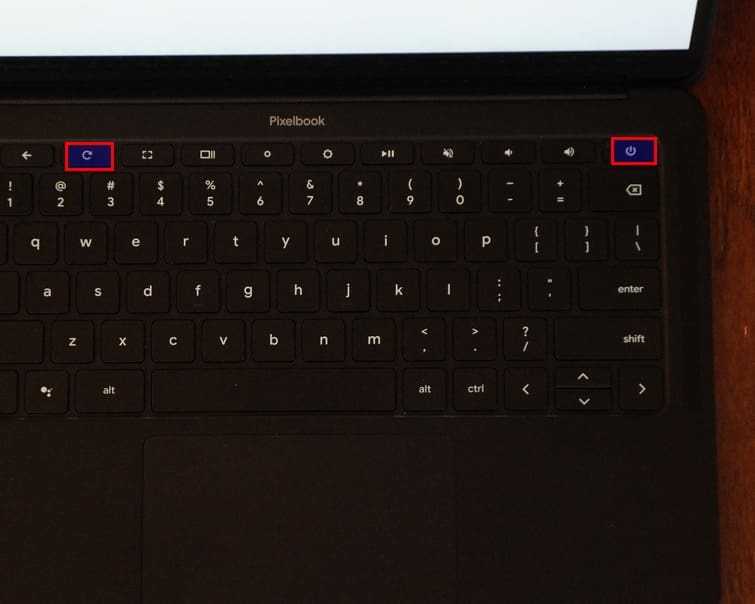
The key combination for a hard reset
Clear Chrome Cache
Next, performance-related pangs are likely resolved by clearing your Chrome browser’s history and cache. Often, the latter can gather up a mountain and inflict a lot of load on the Chromebook, especially if you’ve had your device for a while now. You better get to some spring cleaning that way and retrieve positive results.
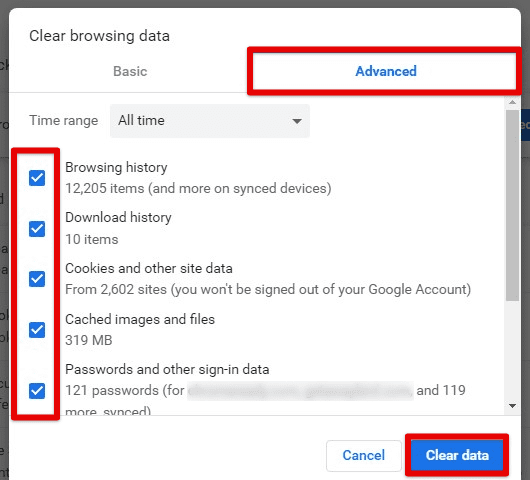
Clearing cache, cookies, and browsing history
Delete unnecessary apps
Finally, take to the launcher section, along with the Files application, and find out whether your RAM is being over-utilized. Pluck out apps, programs, photos, videos, and other types of files, hoarding up a ton of system memory and not doing anything special while sitting on your Chromebook. Delete such items to free up RAM and enjoy better performance. Also refer: How to halt unwanted background activities in ChromeOS
Conclusion
ChromeOS has long offered a speedy, stable, and secure work environment, and thanks to recent advancements, such as the promulgation of gaming-ready Chromebooks like the Acer Chromebook 516 GE, things are only going uphill for the operating system at hand. Look at the education sector in the US alone, and you’ll see which devices dominate.
With that said, routine issues such as performance-related problems and cases where you’re trying to fix a major problem with the device warrant the implementation of a Powerwash feature. In this guide, we’ve learned how to factory reset or Powerwash an Acer Chromebook specifically, although the instructions also work for other Chromebooks.
Do comment down below and tell us whether you found the guide helpful. As always, Chrome Ready wishes you good luck!
