The Chrome browser is one of the world’s most popular internet browsers, and many worldwide echo this statement for all the convenience this internet crawler brings into their lives. Personalization features are outstanding with Chrome, and there’s always the Chrome Web Store to help you on your way with the mountain of extensions popular among the community, such as add-ons dedicated to security, finance, and even digital nomads.
However, as practical as the Chrome browser truly is for millions across the globe, it comprises certain features that some users wouldn’t want to be turned on by default. One of them is Chrome’s automatic update download mechanism, which takes care of new releases on the fly without the user paying any attention to the matter. In some cases, however, such as when the developers accidentally release a faulty update, this can be detrimental.
This guide explains how you disable Chrome’s auto-update feature with step-by-step instructions. Make sure to read until the end for the best results.
Easy ways to disable automatic updates in Chrome
The good news is that there are various ways that can be utilized to accomplish the task at hand. But please be advised that the methods outlined are for Windows PCs only and work on both Windows 10 and Windows 11. You may proceed if you’re also on older iterations of the operating system. Now, the gist of it is that, unfortunately, there’s no built-in feature in Google Chrome that can allow us to shut down automatic updates.
To accomplish the task at hand, we will need to dive into the complexities of the Windows operating system to some capacity. The relevant instructions have been put in place for you to follow diligently. Let’s get started with the first strategy right away.
Method 1. Delete the “GoogleUpdate” file on your Windows PC
First off, there’s a relatively more straightforward way that you can use to get rid of automatic system updates on Google Chrome. This method revolves around a specific file on your Windows PC that can be deleted in just a few steps. Upon the successful deletion of the file, Chrome will no longer update. Should things go wrong, the method in question is recommended since there’s an easy way to revert it. To get started, follow the steps presented below.
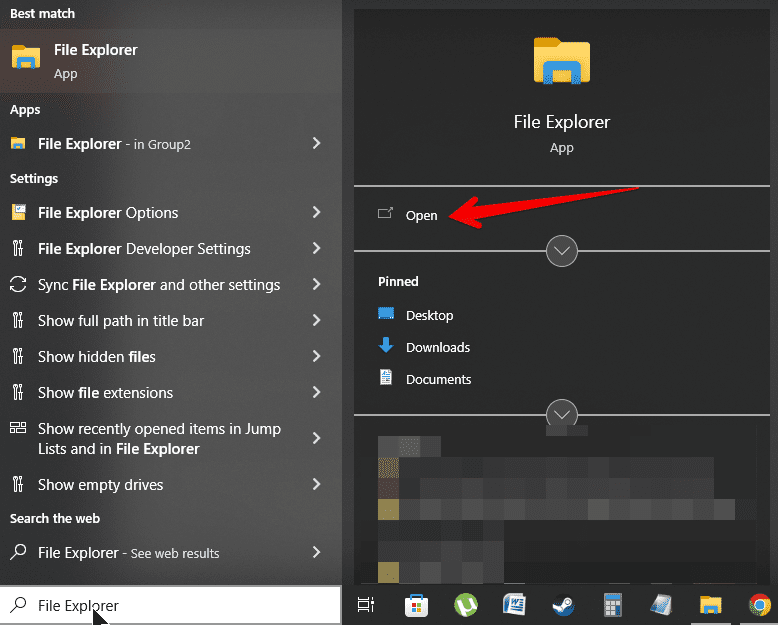
1. The first step is to open the Windows Explorer app on your Windows PC, which is your system’s file manager. Look for the system utility by pressing the “Windows” key and searching it by name.
2. After the “File Explorer” is up and running, click “This PC” on the sidebar to the left side of the screen. That should take you to a specific section within the file manager utility. Now, select the hard disk that contains the installation of your operating system. For most users, that is “Local Disk (C:).”
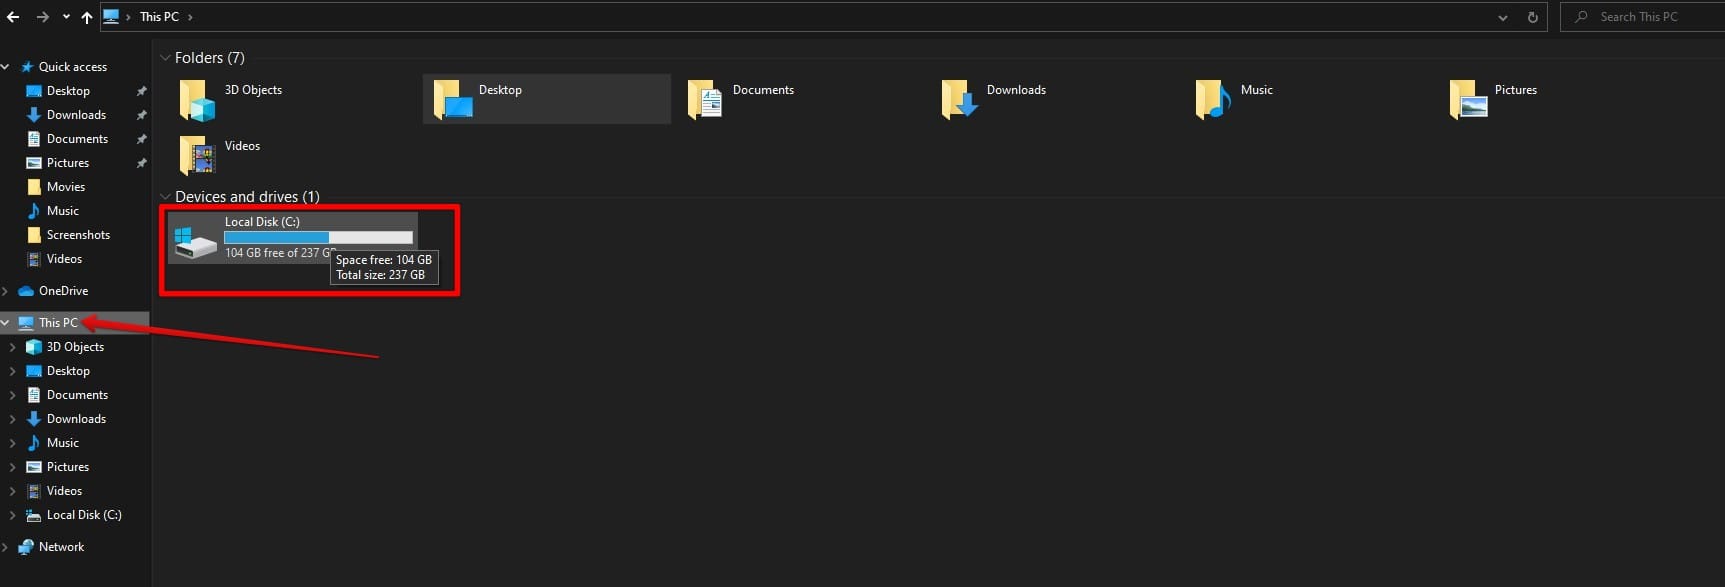
Entering Local Disk (C:)
3. As soon as you’ve entered Local Disk (C:), the next step is to choose the relevant folder. Your options are either “Program Files” or “Program Files (x86), depending on the type of operating system you’re using, whether 32-bit or 64-bit. The correct folder choice is “Program Files (x86) for the latter.
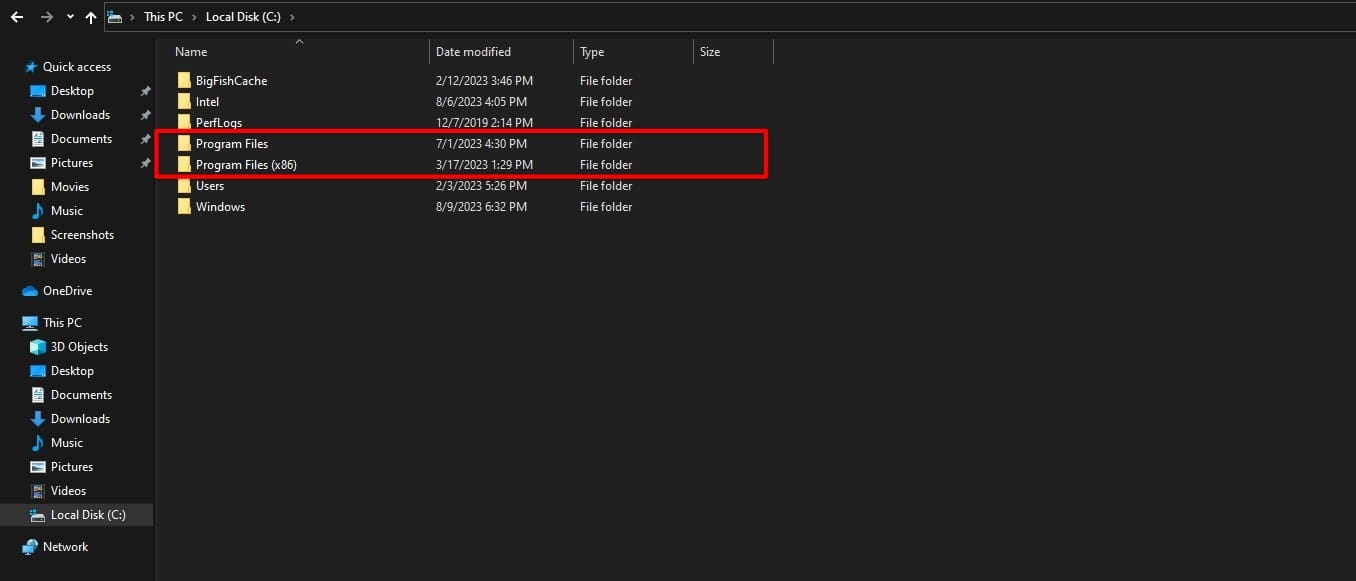
Choosing the relevant option
4. Once cleared, the next step is to enter the “Google” folder, which should be at the top of the page.
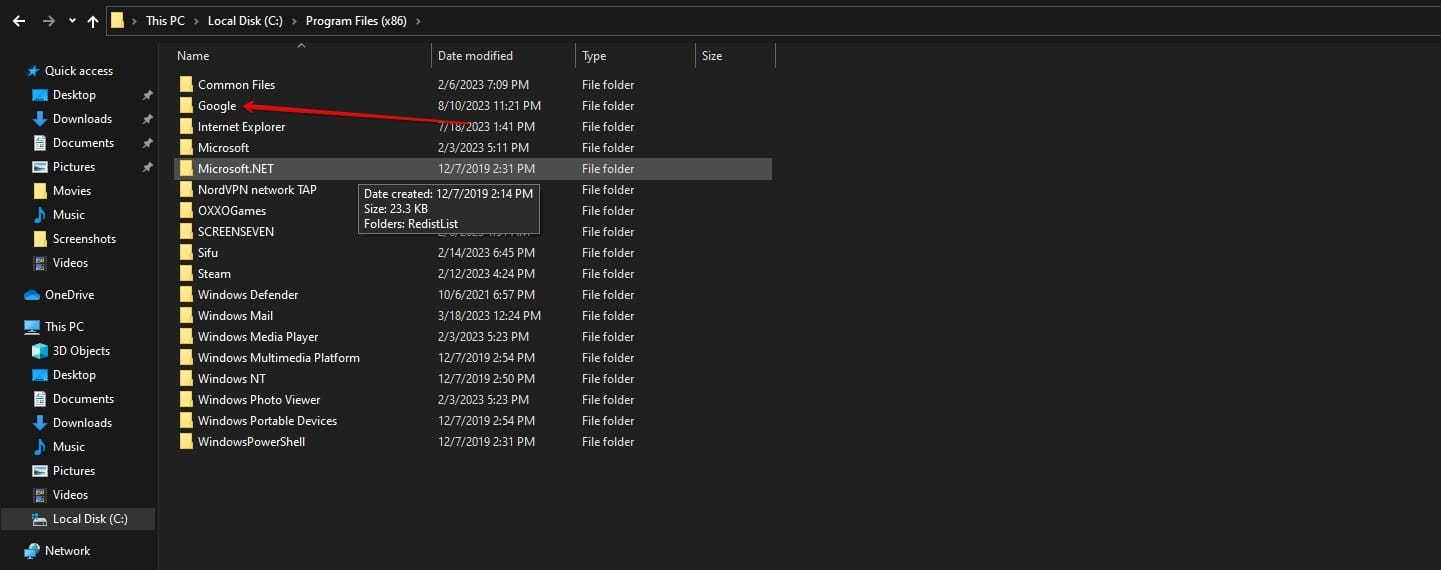
Entering the “Google” folder
5. Move forward by entering the “Update” folder next.
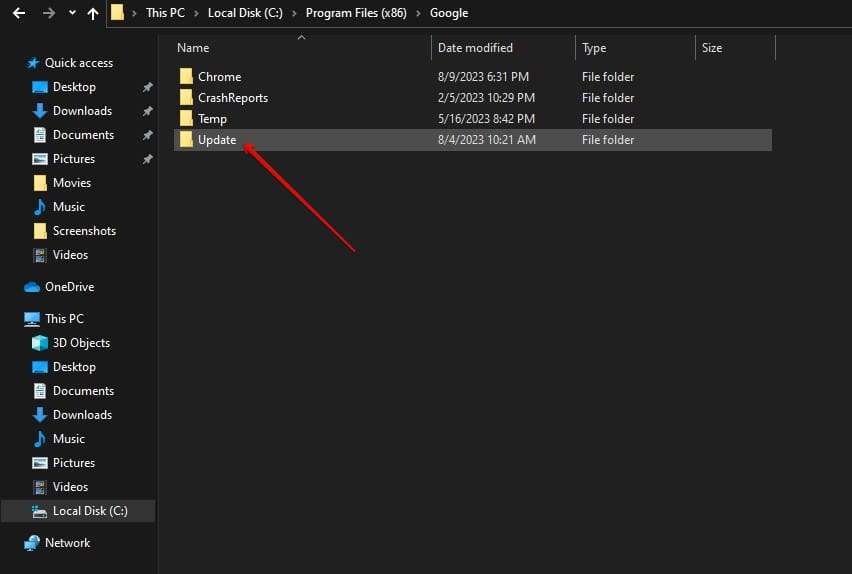
Accessing the “Update” section
6. At long last, you’ll now come across the “GoogleUpdate” setup file. The trick is to delete this item to get it out of the system. Right-click on the file, followed by clicking the “Delete” button. Do note that your PC will ask for permission before this can happen. Make sure to reply “Yes” to the subsequent prompt, and you should be good to go. Make sure to remove the file afterward from your Recycle Bin as well.
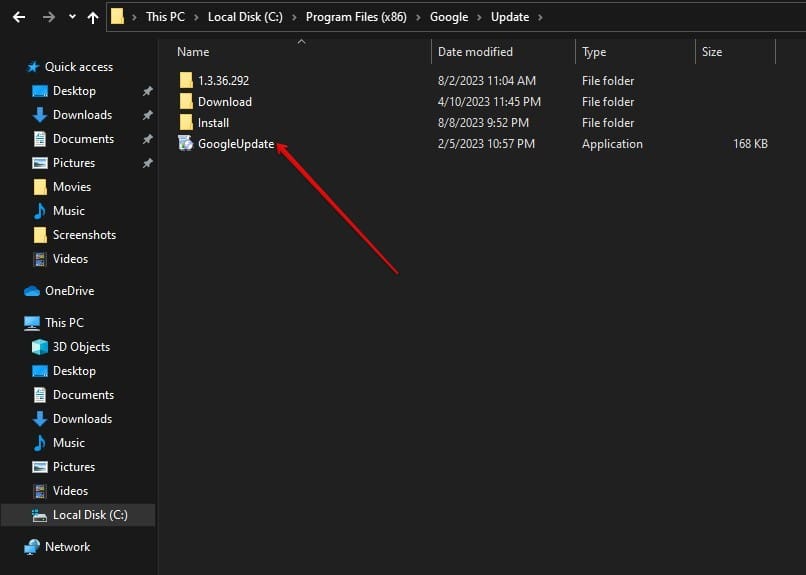
Deleting the “GoogleUpdate” file
After successfully deleting the “GoogleUpdate” file, make your way to the Chrome browser to see if it’s still putting up with automatic updates. You’ll find out that it’s not working in that respect anymore, and the update mechanism has been somewhat bugged. You’re on your own now as far as updates are concerned.
Method 2. Disable Google Update Service on Windows
The second prominent method that can help you eliminate automatic system updates is turning off a specific service in the “Services” application on your Windows PC. This is also reasonably easy to follow through with, but mitigating it later will differ from the previous strategy. Anyhow, it will also get the job done for you, as you’re looking for it, and Chrome will no longer update without your intervention first.
Follow the steps given ahead and learn how to get to the bottom of this method.
1. The first step is to look for the “Services” application on your Windows PC and launch it immediately. Again, press the “Windows” key to bring up the search bar and type in the utility’s name to proceed.
- Tip: You can also open the “Run” application on your device from the Windows Start menu and look for the app at hand by inputting the “services.msc” command.
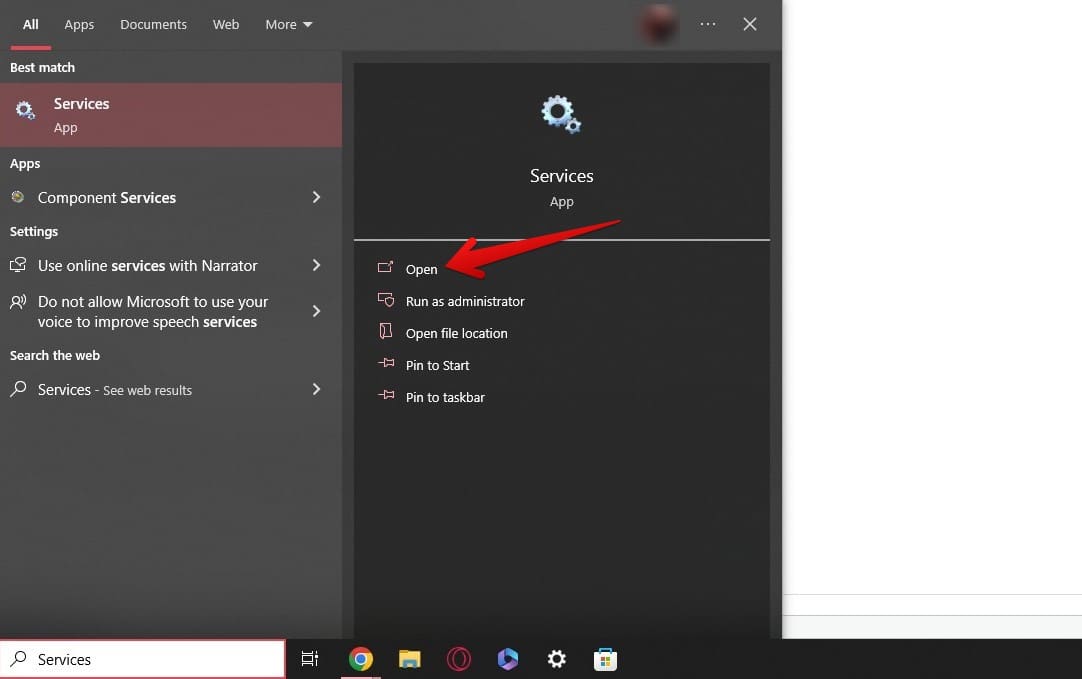
Opening the “Services” app
2. As soon as the “Services” utility pops up, scroll down the list of entries within the window and look for the “Google Update Service (gupdate)” service. Make sure not to opt for the other, similar-looking entry, which is “Google Update Service (gupdatem).” Once you find it, double-click with your cursor, which should open up another small-scale window on the screen.
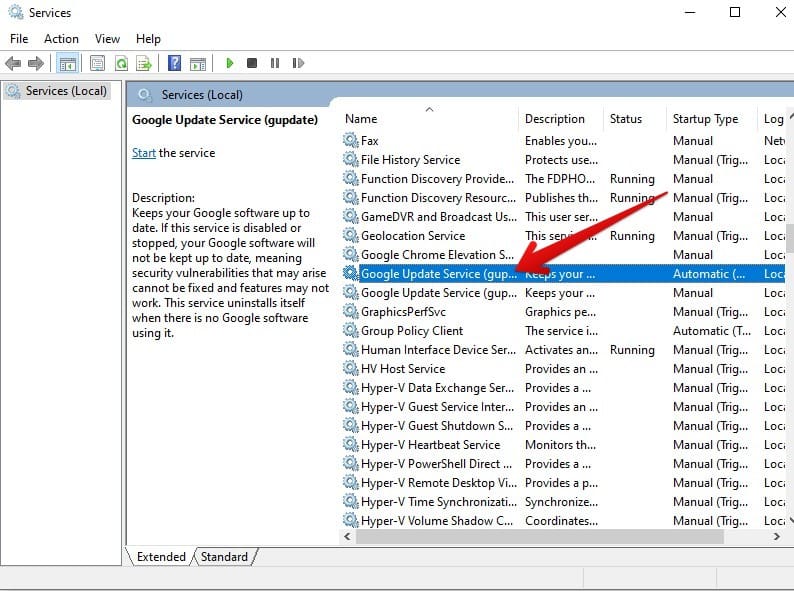
The Google Update Service in question
3. The newly surfacing window should take you to the “General” tab by default since you’re now within the “Properties” section of the service. The idea is to click on the bar beside “Startup type” and select “Disabled.” The gist of it is to switch off Google Update Service and prevent it from kicking into motion. Once you’ve done that, click the “Apply” button, followed by “OK.” Doing so will wrap up the operation on your end.
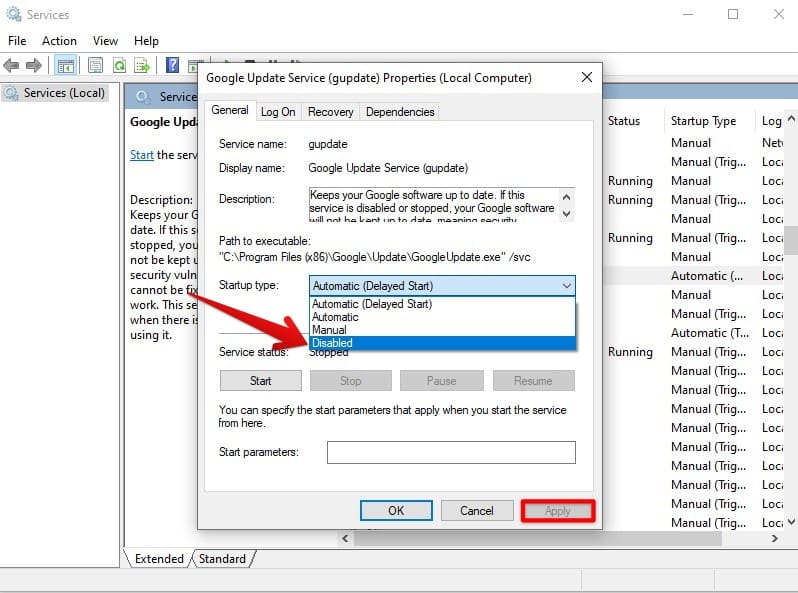
Applying the changes to Google Update Service
This is about it! If you’ve followed the two methods we’ve dished out above, Chrome will no longer update automatically. Before we conclude the write-up, though, here are some extra subsections to help you on your way.
How to revert the disabling of automatic updates
If you regret the decision to turn off Chrome’s automatic updates and you’d now like things to be the same way before, you can quickly revert the steps you performed above. For the first method, you delete the “GoogleUpdate” file within the “Update” directory. To get that file back, go back to the “Update” folder in your Local Disk (C:), and instead of repeating what you did previously, enter the “1.3.36.292” folder. The figures may vary depending on Chrome’s version.
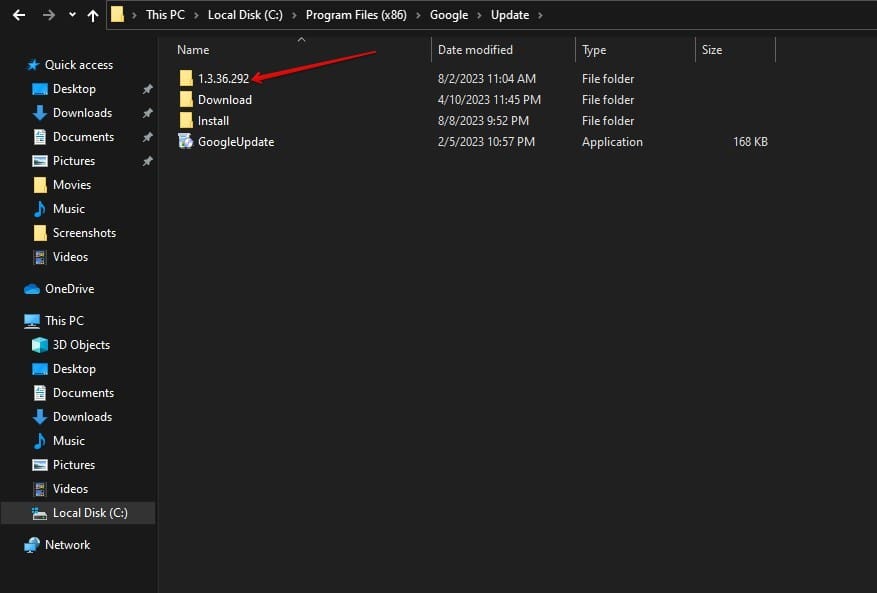
Entering the relevant folder
Once done, you’ll see that at the very top of the folder’s file containment, there will be another identical file called “GoogleUpdate.” Move it back to the “Update” folder by copying it from the right-click menu or clicking and holding the file, then dragging and dropping it into the desired directory. It’s as simple as that.
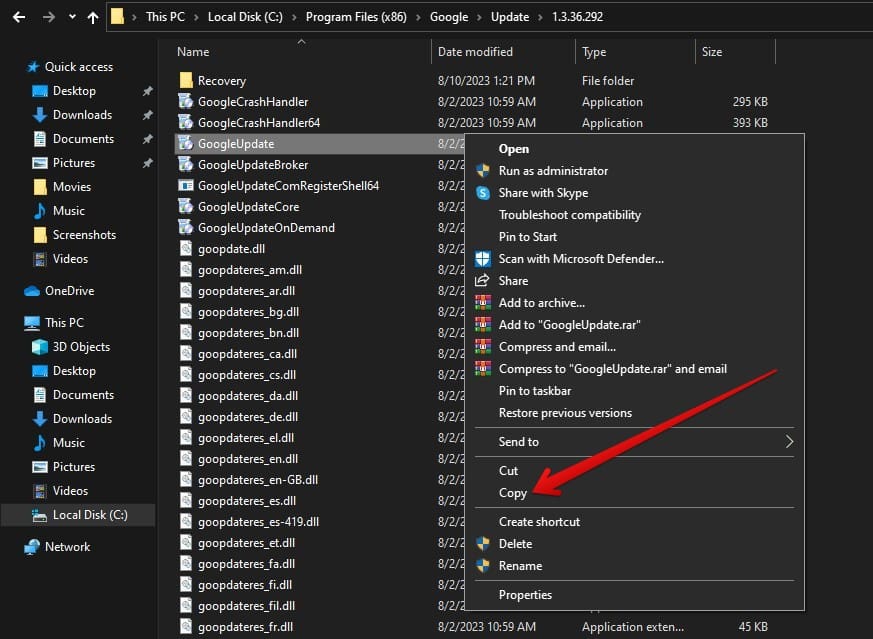
Copying the “GoogleUpdate” file
Finally, the same “GoogleUpdate” file will be sitting back in the “Update” folder unscathed. As soon as this process is finished, head to the Chrome browser’s “About Chrome” section and wait for the browser to check for updates. If a new release is available, it’ll automatically start downloading the relevant updates. If not, the browser will say that it’s up to date.
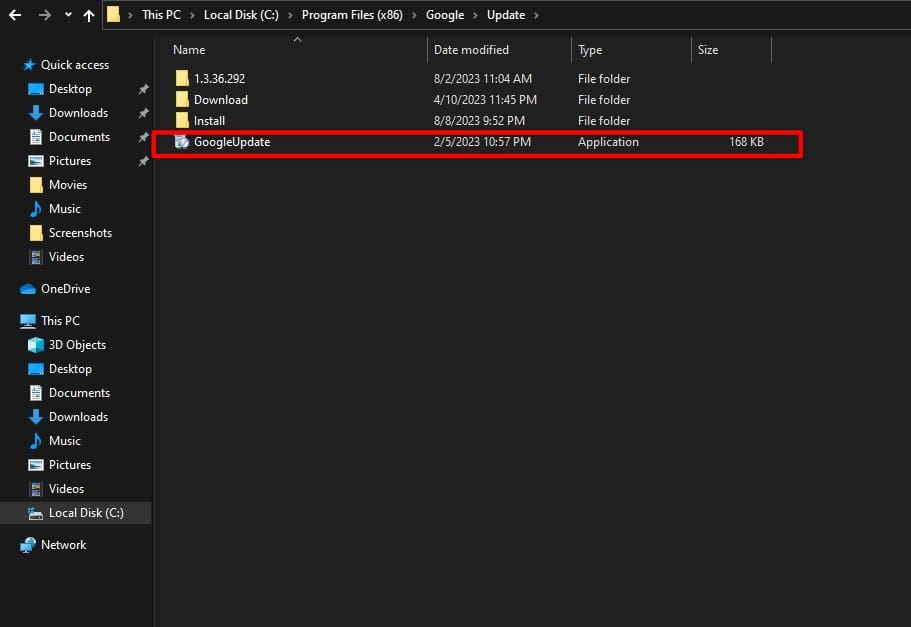
“GoogleUpdate” file reinstated
In case you disabled automatic Chrome updates using the second method, open up the “Properties” of the “Google Update Service” file again and set it “Startup type” to “Automatic (Delayed Start).” When you tried switching off Chrome’s automatic update downloading, you had tweaked the “Startup type,” so the service did not function anymore. Therefore, make this small change again, and Chrome will be updated as usual.
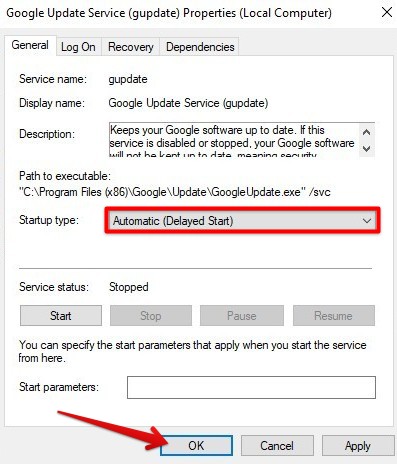
Optimal “Startup type” for Google Update Service
How to reinstall Google Chrome
If your issues with Chrome are more deeply rooted, turning off automatic updates won’t help. In some instances, you have to uninstall the Chrome browser from your Windows PC and then re-install it back again to troubleshoot the persisting hassle permanently. It’s one of the best ways to mitigate common issues with the Chrome browser, not to mention a recommended last-resort strategy for dealing with an unresponsive Google Chrome.
In our guide on uninstalling and installing Google Chrome on a Windows PC, we’ve laid out the fundamentals for you to replicate on your end. The gist of it is that you head over to the “Apps and programs” section of your PC’s “Settings,” followed by scrolling down the list of installed programs and then finding Chrome to uninstall it. Once done, you make your way to the official download page of the browser and fire away accordingly.
Conclusion
Google Chrome has remained an extremely effective internet browser for almost all of its life, starting from humble beginnings in 2008. Slowly but surely, Chrome has marked itself as the most capable internet browser on the planet right now, with the vast majority of the worldwide browser share going to Chrome’s name. The developers keep the internet crawler regularly updated, but that can be disadvantageous to users on certain occasions.
That is why we’ve written this guide on how to stop Chrome from updating automatically. Two different ways have been outlined in the write-up, so do feel free to opt for any of them. While at it, you may learn how to turn off Chrome’s notifications. Lastly, if the autoplay feature ever starts becoming a bother, you can turn it off too and proceed conveniently with your internet browsing.
Do comment below and share your thoughts on this tutorial. We would love to read your feedback!
