You might have already found your way to Chrome’s wallpaper and theme customization. Still, there’s another facet of modifying the Chrome browser’s appearance that most people haven’t yet gotten into. It turns out that you can change the aesthetics of the scroll bar that you see on the borders of the Chrome browser. It’s a great way to switch up the overall outlook of the browser since this is an aspect of Chrome’s appearance rarely anyone ever touches on.
However, the ability to get that done isn’t built right into the browser. You will have to take an alternative approach to accomplishing the task, which revolves around using a Chrome extension. We’ll walk you through changing your Chrome’s scroll bars step-by-step so you can replicate the procedure on your end painlessly. With no further ado, let’s get right into it.
Customizing Chrome’s scrollbars for an aesthetic appeal
It’s worth noting right off the bat that there’s no way for end users to modify the scrollbars in Google Chrome without seeking a third-party solution. Currently, Chrome lacks a feature that allows the browser to change the scrollbars’ colors, shape, or appearance natively, but this is no worry. Thankfully, the Chrome Web Store, being one of the best storefronts to revamp the base functionality of Google Chrome, has something to offer in the situation at hand.
Installing Scrollbar Customizer – A dedicated Chrome extension for optimizing the scrollbars of Google Chrome
A specialized Chrome extension called Scrollbar Customizer is precisely what we’re looking for here, supplying users with the ability to effectively customize the various scrollbars of the Chrome browser in multiple ways. The add-on is lightweight, works fluidly, and has been first-hand tested by us regarding its functioning. We’ll download the tool from the Chrome Web Store and proceed accordingly. The following steps are going to take it from here.
1. The first step is to visit the official app page of the Scrollbar Customizer extension. Feel free to use this direct link to get there faster. When you’re there, click the “Add to Chrome” button to get to the next step.

Adding Scrollbar Customizer to Google Chrome
2. At this point, you will observe a prompt surfacing at the top of the screen, confirming whether you’d like to proceed with the installation. Click the “Add extension” option, and you’ll be ready.

Confirming the installation of the extension
3. You should now have the Scrollbar Customizer extension installed on your PC anytime now, considering the trivial file size of the add-on. As soon as the process is wrapped up, a notification will appear in the top-right corner of the screen right below the extensions toolbar, affirming that the add-on has been loaded onto Chrome.
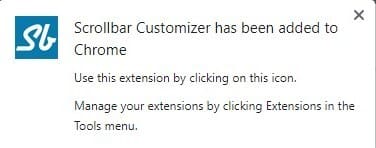
Scrollbar Customizer added to Google Chrome
4. It’s preferable to pin the Scrollbar Customize app before you start using it for easier access. To do this, click the “Extensions” icon on the toolbar and select the “Pin” icon beside Scrollbar Customizer. That should do it.
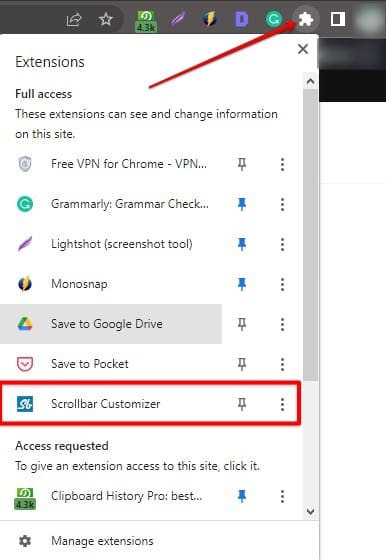
Pinning Scrollbar Customizer for easier access
This is about it as far as the initial necessary measures are concerned. It’s time to get into the extension and customize your scrollbars.
Modifying Chrome’s scrollbars with Scrollbar Customizer
Start by clicking on the extension icon, so you can launch it and get to work immediately. The add-ons interface, as you’ll see, is pretty easy to grasp and comprises three major portions. The portion at the top serves a previewing purpose, meaning that the changes you wish to make will appear here before they’re finalized and implemented. The second is the default scrollbar picker, comprising several options to check out.
Click on any of them to see how they look in the preview section. Your options range from Shine Grey, Shine Light, Shine Blue, and Edgy Blue to Thinfony Blue, Thinfony Red, and Thinfony Black. Each of the available preset options differs across the different types of scrollbars. For instance, the “Shine” preset boasts a rounded appearance and light-toned color application. “Edgy,” on the other hand, is darker, has a clear outline, and has square corners.
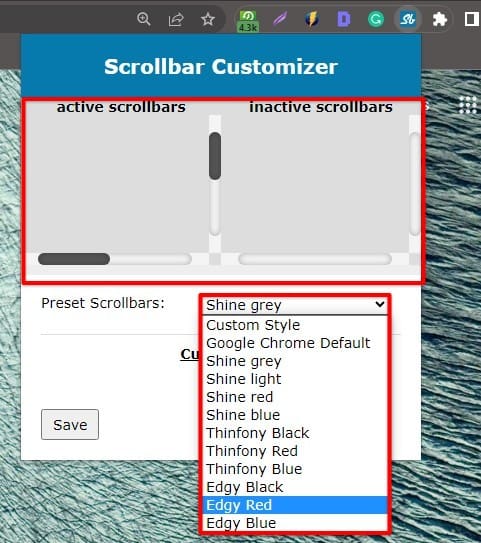
The user interface of the Scrollbar Customizer extension
Last but not least, the “Customize” area in Scrollbar Customizer also brings you all the freedom you need to create your very own scrollbar type, with adjustable height, width, and a proper color palette to choose colors from. To get going with the functionality, click on the button, and multiple options will appear below it. Starting with the “Scrollbar Style,” you can adjust the scrollbar’s width, height, and background color.
Experiment with different options and see what you can muster up. Next, the “Button Style” section pertains to the clickable buttons associated with each scrollbar, providing the user with a more manual approach for going up and down or left and right on a page instead of the regular drag-and-hold mechanic. Feel free to optimize the element’s width, height, corner shape, and background color before proceeding.
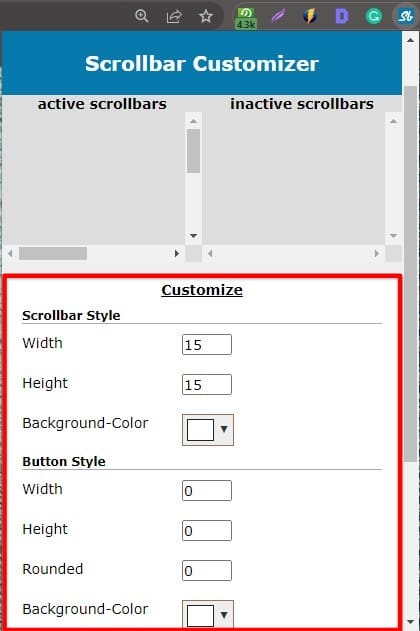
Customizing Chrome’s scrollbars with the extension
At long last, you have the final “Thumb Style” parameter to tweak as well, and this is what we gauge is the most crucial element to optimize for a clean, professional-looking scrollbar. Begin with the “rounded” blank, which dictates how round or square your scrollbar will look. Use the provided buttons to understand the difference between each point. In our opinion, “4” is the ideal choice to go with here, striking a good balance between a round and a square scrollbar.
Next, you’ve got the color style to mess with here, and there are three options to factor into account—”Clean,” “Linear,” and “Radial.” Each option boasts its style and is simply a personal preference here. Try out all three and see what you like more. Finally, the “Color” option should be the last metric to tweak. A color palette will appear upon clicking on the provided button, allowing you to sift through the innumerable options painlessly.
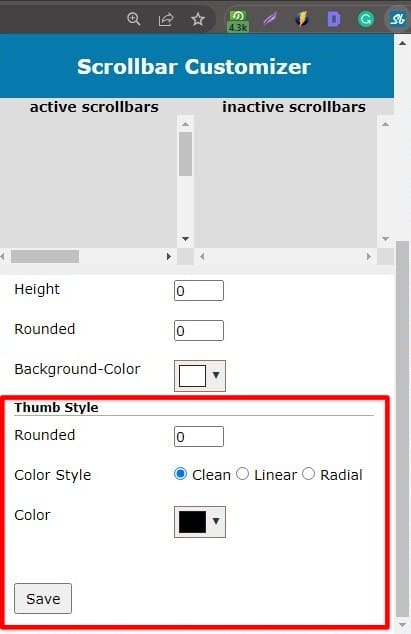
Customizing the thumb of the scrollbar
That’s about it! You’ve now successfully learned how to customize Chrome’s scrollbars with the help of the Scrollbar Customizer extension. On our end, we tried blending the scrollbar with our browser’s theme, and this is what we got, thanks to the “Radial” color style. Don’t forget to click the “Save” button once you’re done making changes, or the final results won’t appear otherwise.
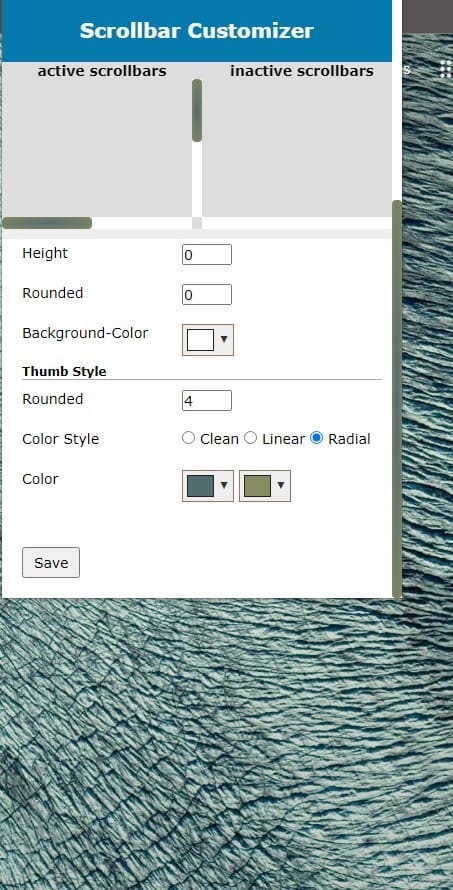
Scrollbar customized
Some other prominent ways to customize Google Chrome
The scrollbar present on one side of the Chrome browser and other areas on websites look great when they’re all decked out with customization, but they’re not the only thing you can modify and make the internet surfer stand out as a whole. Performance tweaks and settings aside, if we’re to look at this from a purely cosmetic purpose, it’s possible to change Google Chrome’s appearance in a variety of ways.
One includes altering the browser’s theme so the toolbar and top bar at the upper extremity get slapped with a different coat of paint. Not just that, but using a new background for the Chrome browser, which is essentially its wallpaper, is another terrific way to pimp out the web surfer meticulously. To do all this, select the pencil-shaped icon on the New Tab page in the bottom-right corner, and you should be able to get started.
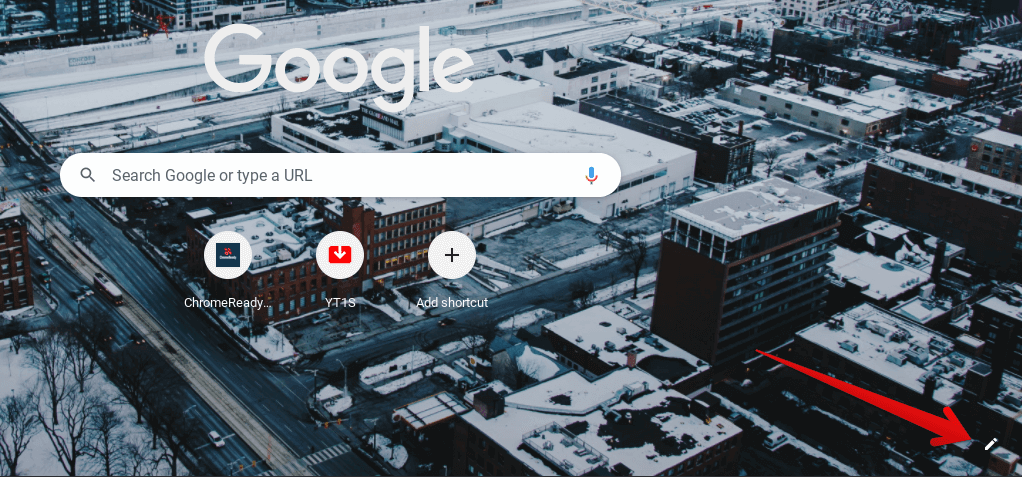
Customizing the Google Chrome browser
We’re not done yet, because the toolbar in Google Chrome is yet another facet that falls within the scope of customizability. It’s relatively easy to make changes to how your toolbar looks in Chrome, which is divided into the bookmarks bar toggled on by pressing “Ctrl,” “Shift,” and “B” together along with the extensions toolbar. You can optimize these sections by removing or adding entries however you prefer so the user interface of the internet crawler looks clean, clutter-free, and organized.

Chrome Toolbars – Extension Toolbar (Red) and Bookmarks bar (Green)
Conclusion
Google Chrome is home to billions of users and is recognized worldwide as a highly accessible internet browser that prioritizes speed and simplicity over other parameters. Along with the fundamentals of the browser that have allowed it to prosper all these years, the developers have shifted focus toward the customizability of the internet surfer as well, so it can stand out across a range of different audiences who love working on the aesthetic appeal of the products they own.
In this guide, we’ve highlighted a relatively niche element of the Chrome browser’s graphical user interface—the scrollbar that you see on one side of Chrome along with other places on websites—and have shown you how to customize it effectively with the help of a specialized Chrome extension. In the comments section ahead, let us know whether you got what you came looking for in this write-up. We would love to read your feedback!
