It’s common knowledge that the websites we visit while working with the Chrome browser sometimes use trackers that analyze our browsing patterns, so the site can feed us curated ads that might drive up the conversion rate. Those who are overly cautious about their privacy don’t risk revealing their private browsing data to the online world, hence the usage of VPNs and other security measures to keep things privatized.
One of the features that users can potentially enable to tell other sites how they do not want them to invade their personal space is the “Do Not Track” functionality present within the Chrome browser’s settings. In this guide, we’ll explain how to toggle the tool in question and its function, so you can hold realistic expectations from the feature. Without any further delay, let’s get right into it.
What is the Do Not Track feature in Chrome?
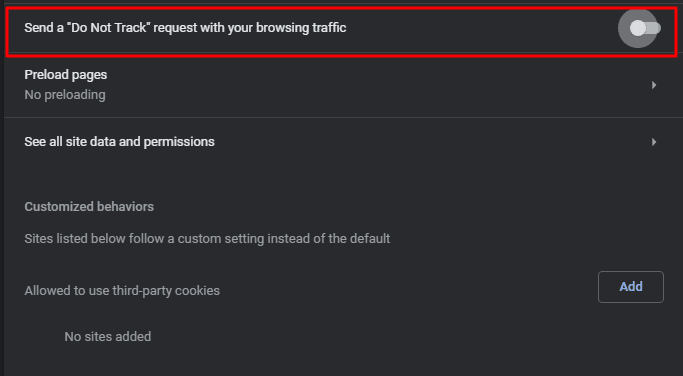
The Do Not Track feature in Google Chrome
The idea behind the Do Not Track feature has great potential, but it’s not as effective as it should be. The core purpose of this functionality is to add a message to your browser’s header that will deliberately request the websites you visit, not track you. Now, whether the site on the other end decides to acknowledge the request or ignore it that’s another story, but the Do Not Track functionality is supposed to do its part timely.
Another point that you have to understand here is that all of this game hinges on cookies. No, not the ones our grandmothers cook for us every holiday, but the small-scale text-based bits of data stored in our browsers that help other domains gather information about our browsing habits. With the help of cookies, sites can find out where you’re located, the type of stuff you like to click on, and other facets of your online profile.
This isn’t all that dangerous, though, as far as your security is concerned while browsing the internet, but you still shouldn’t look the other way toward the matter at hand. It’s recommended to put other practices to good use here, such as using a VPN, browsing the web in Incognito Mode, hiding your IP address, and swapping it for another. With that out of the way, let’s explore some other details you should know about the Do Not Track functionality on your end.
What to know before toggling Do Not Track
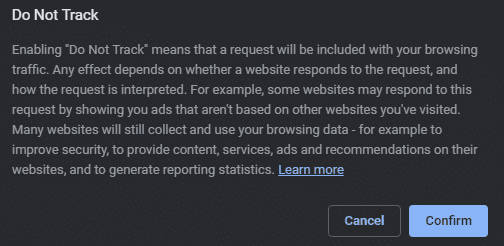
Google on the Do Not Track feature in Chrome
The Do Not Track feature comes from an honest background, but there are some specifics relating to it that you should know about. First, the functionality does not ensure that other websites won’t track you. The tool itself is a signal that gets attached to your browsing traffic. The result depends on the behavior of the site that you’re visiting. Some sites will entertain the Do Not Track request and halt their operations.
Others, however, won’t acknowledge you and keep sending the trackers. In most cases, though, you are liable to have your data collected, so the sites you visit can personalize advertisements for you based on your interests, and go on to generate reporting statistics, as Google informs us. Keeping that in mind, you may proceed and learn how to enable Do Not Track on your end.
Enabling Do Not Track in Google Chrome
It’s pretty easy to toggle the Do Not Track functionality in the Chrome browser. All you have to do is enter the “Third-party cookies” section of Chrome’s “Privacy and security” settings, and the option should be right there to help you accomplish the task at hand. The steps outlined will offer a deep dive into successfully completing the procedure.
1. The first step after opening the Chrome browser on your end is to click the “Customize and control Google Chrome” button. Doing that will reveal a menu in that section, allowing you to click “Settings” afterward. Alternatively, press “Alt” and “E” together, followed by pressing the “S” key to complete this step the quicker way.

Opening Google Chrome’s “Settings”
2. The next step is to click “Privacy and security” in the side panel to the left of the screen. That should take you to the relevant section right away. Here, click on “Third-party cookies,” and you should be able to continue.
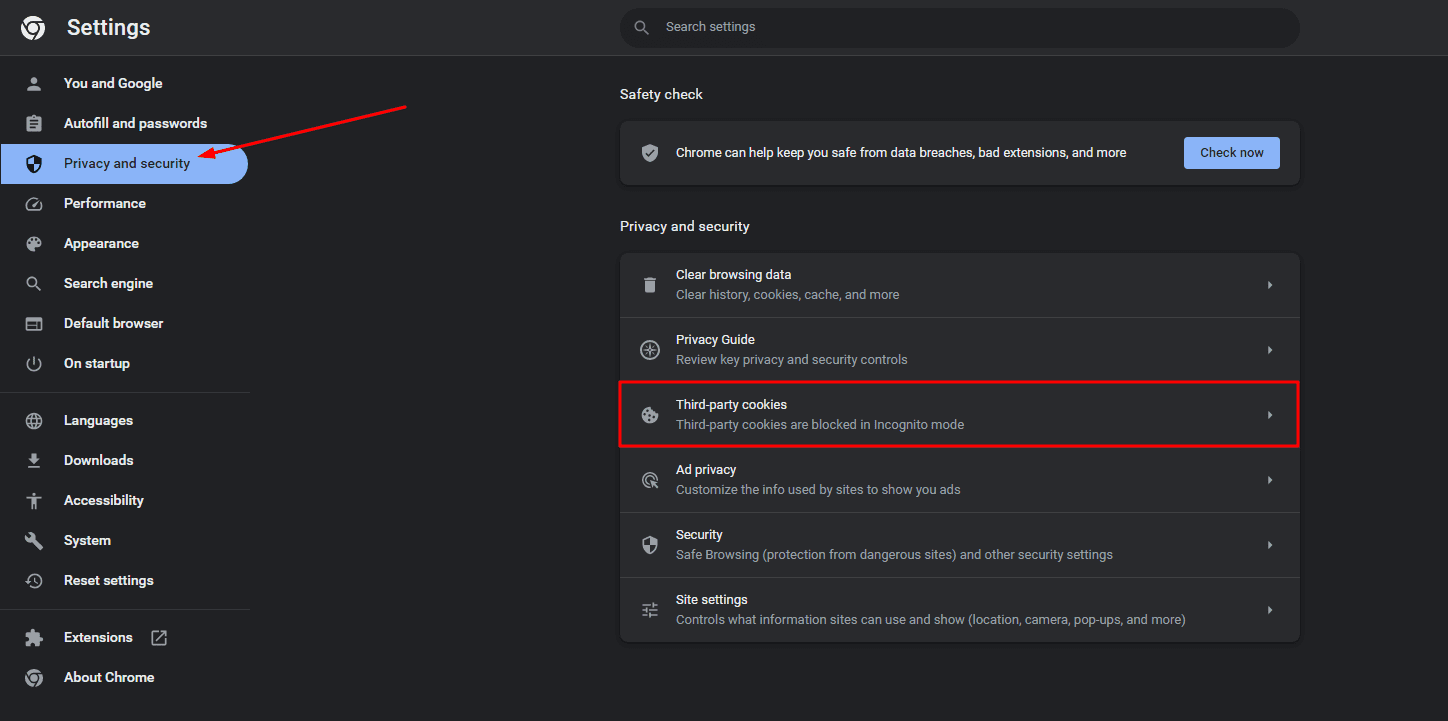
Entering the “Third-party cookies” section
3. The “Do Not Track” feature will now appear on the page after completing the previous step. Click the toggle beside it to move forward.
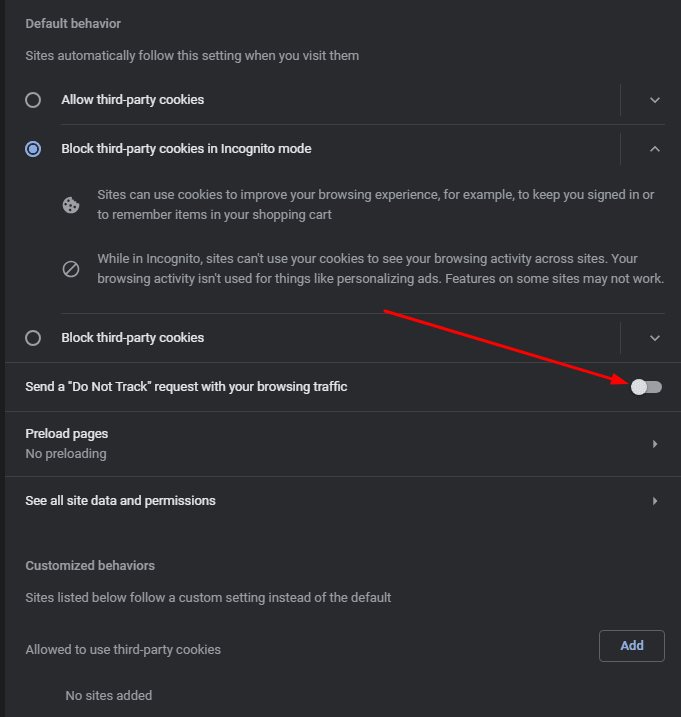
Do Not Track request toggle
4. A confirmation prompt will surface on the screen, detailing the specifics of the Do Not Track feature while asking you for confirmation whether you wish to enable the functionality or not. Click on “Confirm” to finalize the process.
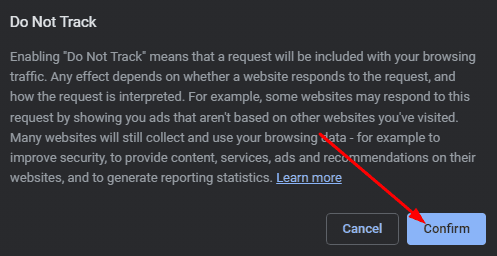
Confirming the selection
That is about it! The Do Not Track request feature should now be toggled on in the Chrome browser. While this functionality is a step in the right direction, other approachable measures can safeguard your privacy online. The Guest Mode is one of them, not to mention these great Chrome extensions for browsing safely online.
Conclusion
Google Chrome is an all-inclusive internet browser recognized worldwide for its ease of use, widespread add-on compatibility, and unrivaled popularity. Chrome has had more than 110 major update iterations, and with each stable release, the internet crawler is slightly improved compared to before. However, specific privacy concerns have troubled the otherwise content user base of Google Chrome, one of which pertains to sites sending out trackers.
That is why you should know how to tune the Chrome browser’s privacy and security settings for maximum transparency. Alongside that, you can toggle off the Do Not Track request feature to privatize your browsing even more. In the comments section ahead, let us know whether you found this article useful. We would love to read your feedback!
