Word processors are a great tool to build upon your creating and editing methods, but typing errors can be a frustrating distraction from this process. Fortunately, Google Docs includes autocorrect and text replacement features to help users save time and improve typing accuracy. These can be customized to suit individual preferences and typing styles, enabling us to create more efficient and error-free documents.
This article will explore how to customize autocorrect and text replacement settings in Google Docs, including step-by-step instructions and best practices for effectively using these features. If you have ever created a long-form document in Google Docs, you know how challenging it can be to navigate it quickly for creators and readers. Learn how to create a table of contents in Google Docs.
Autocorrect & text replacement in Google Docs
Autocorrect and text replacement are two unique features in Google Docs that can help save time and improve typing accuracy. Autocorrect automatically corrects misspelled words and typos as you type. It can also suggest corrections for grammatical errors and commonly mistyped phrases. This can be particularly helpful for those struggling with spelling or frequently mistreating words.
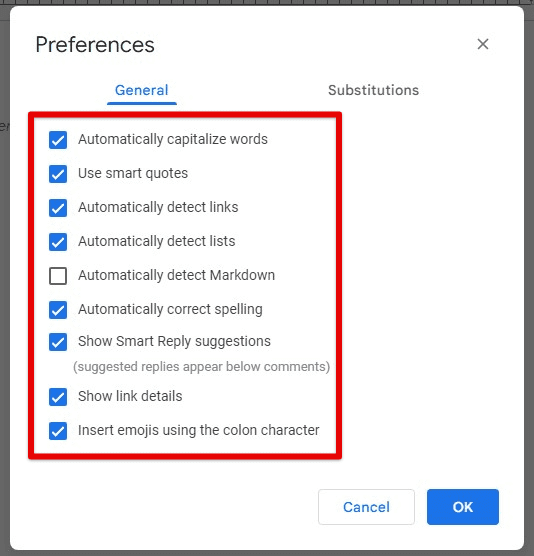
Autocorrect
Text replacement, however, allows the creation of custom shortcuts for frequently used words, phrases, or even entire paragraphs. This can save significant time when typing long documents or repeatedly using the exact phrases. For example, you can create a shortcut like “wbr” to automatically insert the phrase “with best regards” or “tp” to insert your complete contact information.
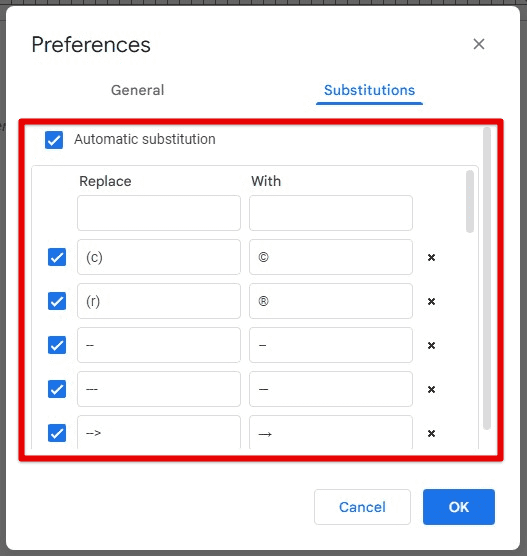
Text replacement
Both autocorrect and text replacement are customizable to suit individual preferences and can be a significant time-saver for people who frequently work with text documents. In the following sections, we will look at how to customize these features in Google Docs and provide best practices for using them effectively.
Setting up autocorrect in Google Docs
There are different types of autocorrect options available that can be enabled or disabled based on user preferences. Open Google Docs and click on “Tools” from the menu bar. Select “Preferences” and click the ” Automatic Substation” tab.
Check the box next to “Automatically correct spelling and capitalization” to enable basic autocorrect. It is also possible to select other autocorrect options, such as “Capitalize the first letter of the sentence” or “Correct accidental usage of Caps Lock key,” based on your requirements and formatting preferences.
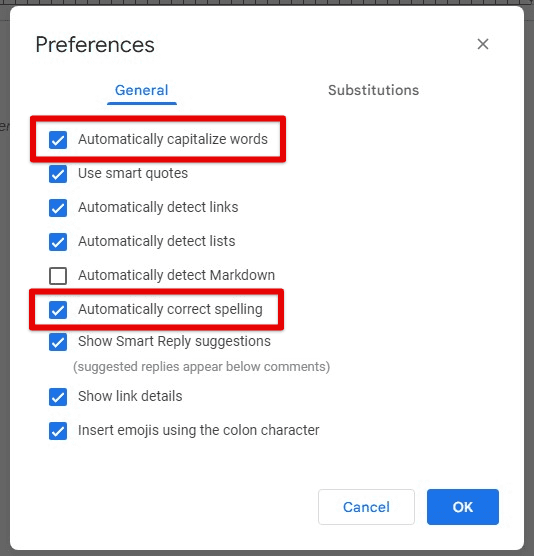
Automatically correct spelling and capitalization
Add your own autocorrect rules by clicking on the “Add” button and typing the word or phrase you want to correct in the “Replace” field and the correct word or phrase in the “With” field.
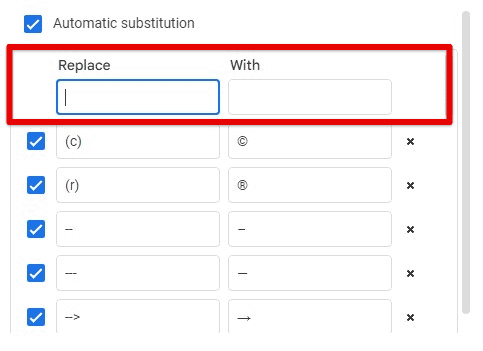
Adding your own autocorrect rules
Using these simple steps, you can set up basic autocorrect in Google Docs and customize it accordingly. Enabling autocorrect saves a considerable amount of time and improves the accuracy of your documents. It is important to note that while autocorrect can be a helpful tool, it is not foolproof and may not catch every typing mistake, especially semantic ones. Therefore, always proofread your documents carefully before submitting them.
Creating custom text replacement rules
Several text replacement options can be created and managed in Google Docs. Open Docs and click on “Tools” from the menu bar. Select “Preferences” and click the ” Automatic Substation” tab.
Click the “Add” button to create a new text replacement rule. In the “Replace” field, type the shortcut or abbreviation you want for the text. In the “With” field, type the full text with which you want to replace the shortcut. Click on “OK” to save the rule and finish the process.
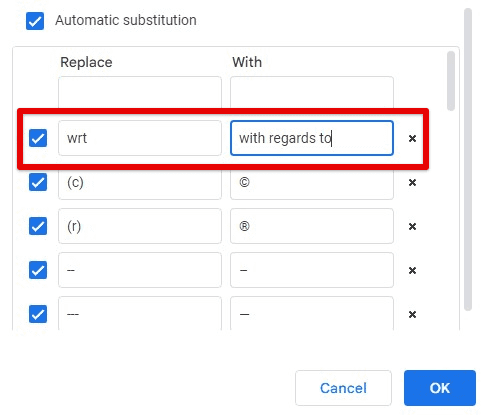
Creating custom text replacement rules
Creating more complex replacement rules that include special characters or multiple lines of text is also possible. For example, you may make a rule that inserts your complete contact information in various lines whenever you type a specific abbreviation, as described earlier.
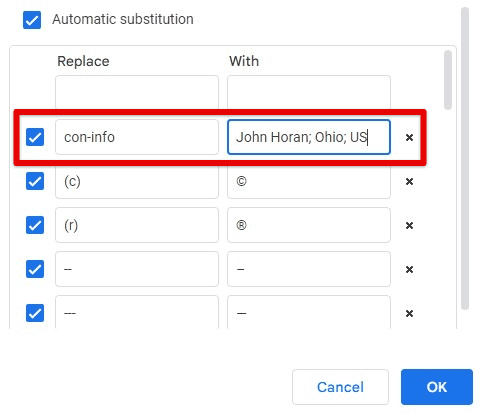
Creating complex replacement rules
To manage existing text replacement rules, open Google Docs and click “Tools” from the menu bar. Next, select “Preferences” and then go to the “Automatic substitution” tab. Next, choose the rule you want to modify or delete. To modify it, edit the “Replace” or “With” fields and then finally click on “OK” to save the changes. To delete a rule instead, click on the “Remove” button.
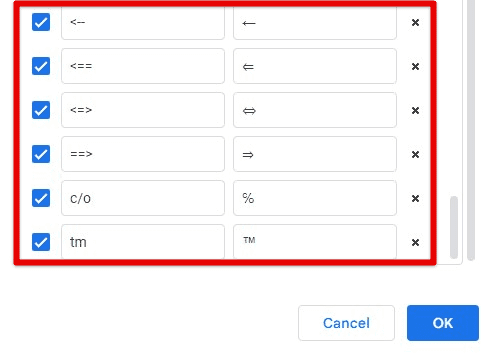
Managing existing replacement rules
With that, you can create custom text replacement rules in Google Docs and customize them according to your preferences. These replacement rules can save a lot of time and typing effort, especially if you need to repeatedly use the same chunk of text.
Using autocorrect for multilingual documents
Using autocorrect and text replacement for multilingual documents can be of significant importance. It is particularly true for those who work with multiple languages regularly. Google Docs allows users to set up different autocorrect and text replacement rules for various supported languages that can help improve typing efficiency and translation accuracy. Following are the steps to set these features up for multiple languages in Google Docs:
Open Google Docs and click on “Tools” from the menu bar. Select “Preferences” and click the ” Automatic Substation” tab. Click on the “Add” button to create a new rule. In the “Replace” field, type the word or phrase you want to correct or replace. In the “With” field, type the correct word or phrase in the corresponding language.
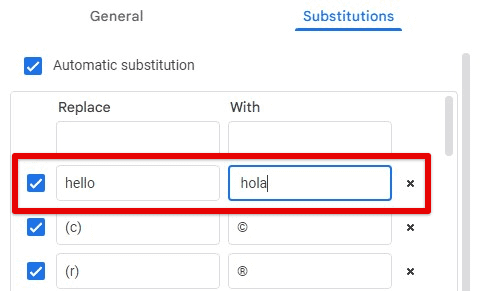
Using autocorrect for multilingual documents
Choose the language you want to apply the rule by clicking on the “Language” drop-down menu. Finally, click “OK” to save the rule and finish the process. Doing so, you can now create multiple autocorrect and replacement rules for different languages and apply them to your documents as needed.
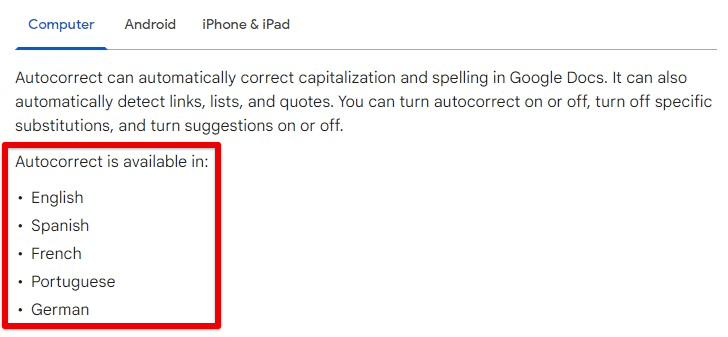
Supported languages for autocorrect
Let us consider a specific use case. For someone who frequently types in both English and Spanish, autocorrect rules for common misspellings or typos in both languages are nothing short of a lifesaver. They can also create replacement rules for frequently used phrases or special characters in each language. The user might want to create a rule for “¡Hola!” that automatically replaces “Hello!” with the proper upside-down exclamation mark (¡) and “Hola” (without the mark).
Managing autocorrect across multiple devices
Managing autocorrect and text replacement settings across multiple devices can be necessary for many users who must work on various devices and switch between them. These devices might include a desktop computer, laptop, or mobile phone. Google Docs allows syncing its autocorrect and replacement settings across all these devices, making it easy to use these features consistently all day. Following are the steps to manage these settings across multiple devices:
Open Google Docs on the device you want to sync your settings to. Click “Tools” from the menu bar and select “Preferences.” Next, click on the “Automatic substitution” tab. Make sure the toggle button next to “Settings” is enabled.
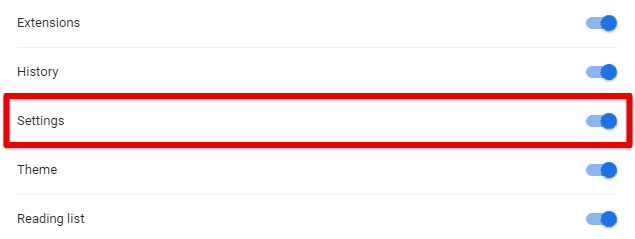
Syncing Google Docs settings
Repeat these steps on each device you want to sync your settings to. When users enable the option to “Sync settings,” their autocorrect and replacement rules are saved with the Google account and can be accessed from any device that signs in to that account. Sometimes, you may encounter issues with syncing these settings across devices. Following are some common issues in that regard and how you can resolve them:
Settings not syncing: If autocorrect and replacement settings are not syncing across your devices, ensure you are signed in to the same account on all devices and that the “Sync settings” option is enabled in each instance.
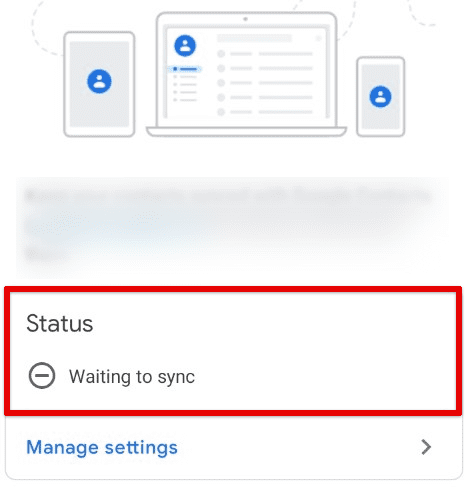
Settings not syncing
Duplicate settings: Sometimes, you may see duplicate autocorrect or replacement rules. To fix this, delete the regulations on one device and wait for the settings to sync across the cloud.
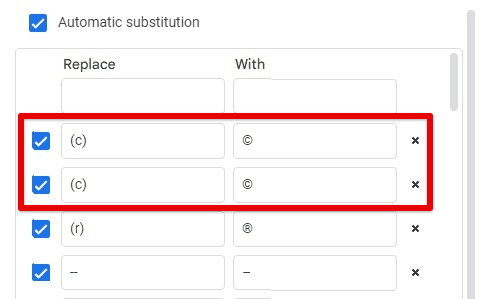
Duplicate settings
Missing settings: If some rules are missing on a specific device, ensure the device is connected to the internet. Once an active connection has been established, relaunch Google Docs and check for the missing rule again.
Advanced text replacement settings
In addition to basic autocorrect and text replacement, Google Docs offers some advanced settings that can help further customize the experience. These settings can be handy for those with specific typing needs or who frequently work with specialized language or terminology. Let us have a look at some of these advanced settings available in Google Docs:
Case-sensitive text replacement: By default, text replacement rules are not case-sensitive, meaning they will be applied regardless of whether the typed text is capitalized. However, checking the “Automatically capitalize words” option may enable case-sensitive text replacement when creating a new rule.

Case-sensitive text replacement
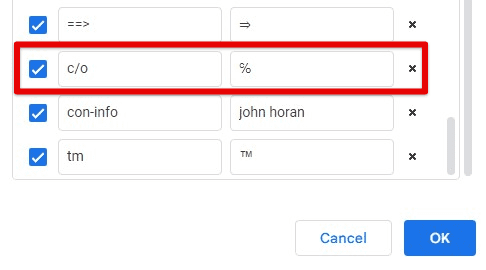
Wildcard characters: Wildcard characters are special characters that can be used to match any text in a replacement rule. For example, the asterisk (*) character is used by many to match any number of characters in that rule. This helps in creating rules for long or complex phrases.
Wildcard characters
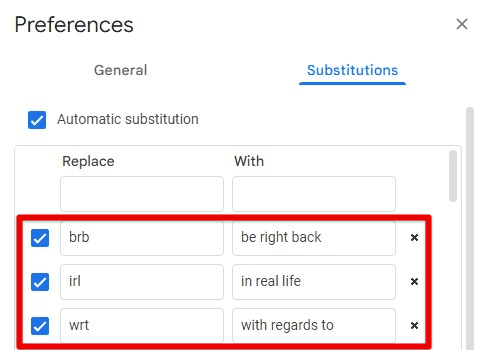
Regular expressions: Regular expressions are phrases that help match and manipulate text inside Google Docs. It supports some limited expressions that can be used in all replacement rules applied in a single account.
Regular expressions
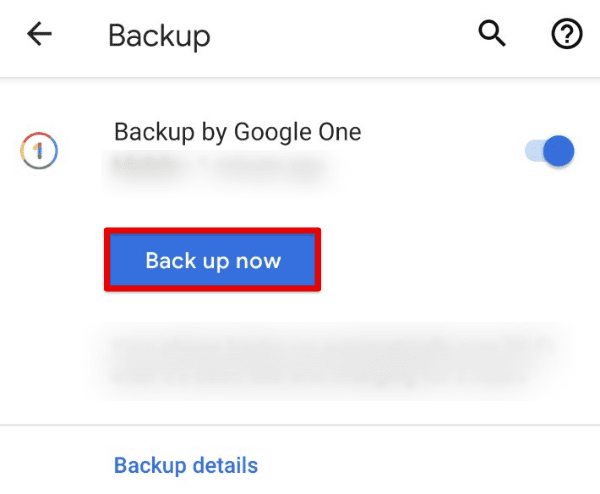
Backup and restore: It is also possible to back up and restore your autocorrect and text replacement rules using a simple JSON file format. This method is handy when transferring your settings to a new account or creating a backup in case of data loss.
Backup and restore
Troubleshooting: If you have encountered many issues with these replacement rules, reset their settings by clicking the “Reset” button in the “Preferences” menu. You may also check to see if the settings are enabled in the first place and do not conflict with other configurations, plug-ins, or add-ons.
Tips & tricks
Autocorrect and text replacement are great on their own, but if you learn how to use them effectively, they can be a game changers. Here are some tips and tricks for making the most of these replacement options.
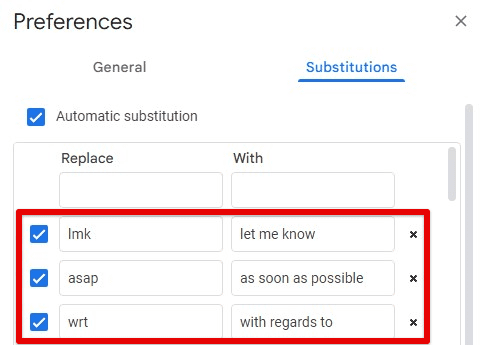
Use standard abbreviations: If you type the exact long phrases repeatedly, consider creating an abbreviation for them. You need to type “with regards to” in your documents frequently. Then, you could create a replacement rule that automatically replaces “wrt” with “with regards to”. Similarly, you can replace all such phrases with standard abbreviations.
Using common abbreviations
Be specific with your replacements: Be as straightforward as possible when creating text replacement rules. If you make a rule that replaces “i” with “I,” it will also replace any instances of “i” within a word (such as “it” or “in”). To avoid this, create a rule that only replaces “i” when it appears at the beginning of a sentence, or maybe avoid such generic rules in the first place. Enabling or disabling case-sensitive replacements might also resolve this problem.
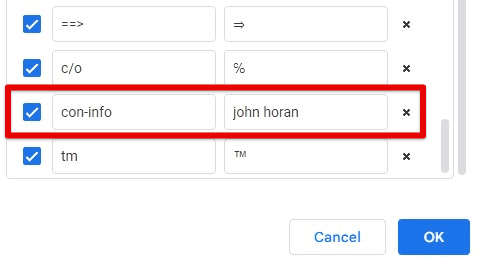
Specific replacement rules
Edit your rules regularly: Over time, your typing habits may change, and some of the rules you created previously may become less useful. Therefore, reviewing these rules periodically and making adjustments when required is a good idea.
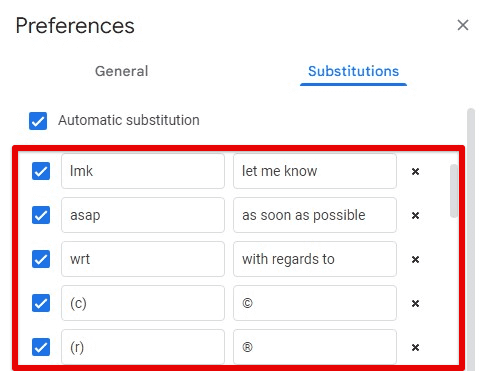
Editing existing rules
Think about your workflow: When creating autocorrect rules, think about how you work and the frequent errors you make. If you often mistype your email address, create a rule that replaces a common misspelling of your address with the correct version. Want to learn a whole new way to deal with documents in Google Docs? Our detailed article on managing and editing documents hands-free using voice commands.
Autocorrect in other word processors
While Google Docs offers robust autocorrect and text replacement features, this is not new. Other popular word processors also have similar features. Following is a comparison of autocorrect features in other word-processing software:
Microsoft Word: MS Word’s autocorrect capabilities are similar to Google Docs. It can automatically correct common spelling and grammar mistakes, and you can create custom rules for common typos and other errors. However, unlike Google Docs, autocorrect and text replacement settings in MS Word are not synced across devices by default, so you’ll need to manually set these up on each machine.
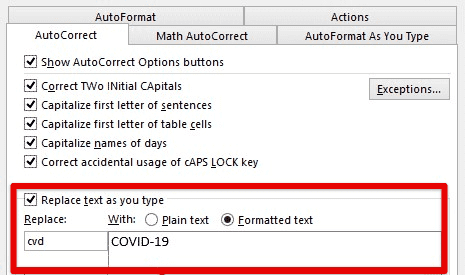
Autocorrect in MS Word
Apple Pages: Apple Pages also offer to correct spelling and grammar mistakes and replace text. However, Pages don’t offer as many options for customizing these replacement rules as Google Docs or MS Word. You cannot use it to create rules that apply only to specific document sections. Moreover, like Word, Apple Pages does not sync autocorrect settings by default.
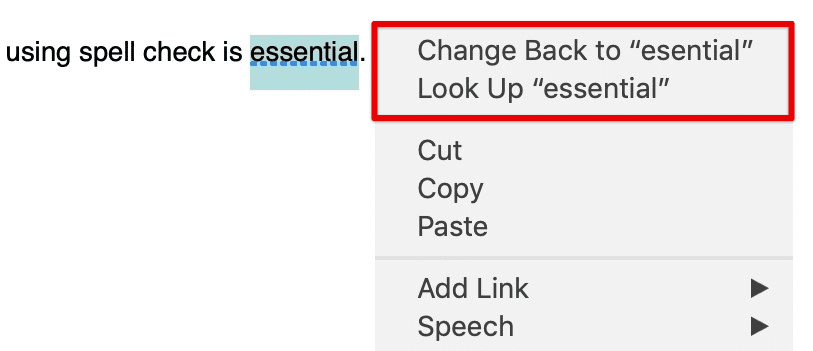
Autocorrect in Apple Pages
LibreOffice Writer: LibreOffice Writer is a free and open-source word processor that boasts autocorrect. It can automatically sort out common spelling mistakes but fails to deal with more complex ones. Its replacement options are limited and fail to compete favorably with Google Docs.
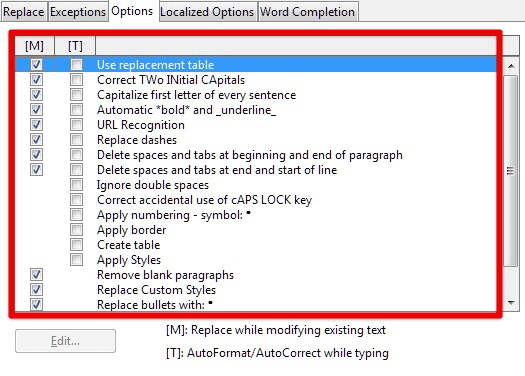
Autocorrect in LibreOffice Writer
Advantages and disadvantages: Each word processor has strengths and weaknesses regarding autocorrect and text replacement. Google Docs offers the most robust set of features for customizing these replacement rules, and its settings are synced across devices by default, which is a great addition. However, other processors may be more suitable for those who prefer a more straightforward, streamlined experience or do not require as much customization. Ultimately, the best features for you will depend on personal preferences and needs. It’s a good idea to experiment with different services to find the one that works best for you.
Handling incorrect replacements
Autocorrect and text replacement are handy tools, without a doubt. However, they may not always work ideally or how you expect them to. Following are some common issues that you may encounter when using these features, along with troubleshooting tips:
Incorrect replacements:
One of the most common issues with autocorrect is incorrect replacements. You may find that a word is replaced with a different word or phrase you didn’t intend. If this happens, there are a few things you may try:
Check your autocorrect settings: Make sure the rule you created is correct and doesn’t conflict with any other rules. If you find a conflicting rule, delete it or change its priority.
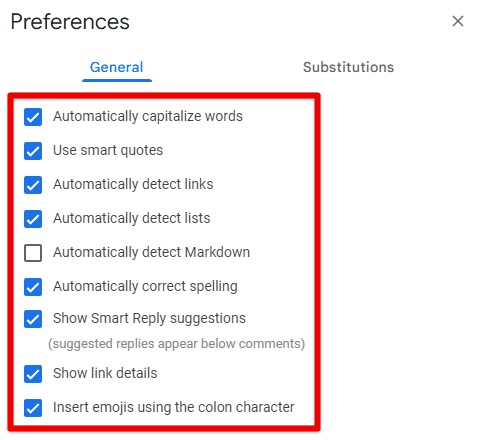
Checking autocorrect settings
Add exceptions: If there are certain words or phrases you don’t want to replace, add them to your exception list. This will prevent autocorrect from replacing them in the future.
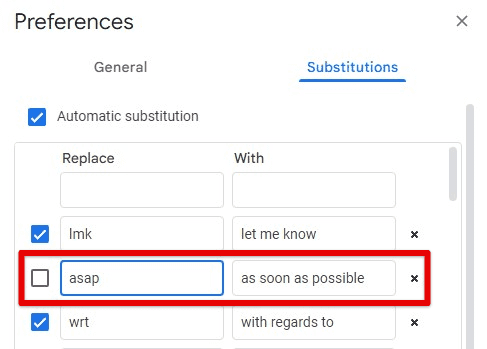
Adding exceptions
Train the autocorrect algorithm: If you consistently type a particular word or phrase that is being replaced incorrectly, train the autocorrect algorithm by adding the correct word or phrase to your custom dictionary. This will make the algorithm start treating it as a common word in the English vocabulary.
Slow Performance:
Another quite common issue is slow performance when employing autocorrect. This can be frustrating, especially when trying to work through documents quickly. Following are some things you can try to improve performance in such cases:
Disable unnecessary features: If you’re not using certain autocorrect or text replacement features, consider disabling them. This can help speed up performance in many cases.
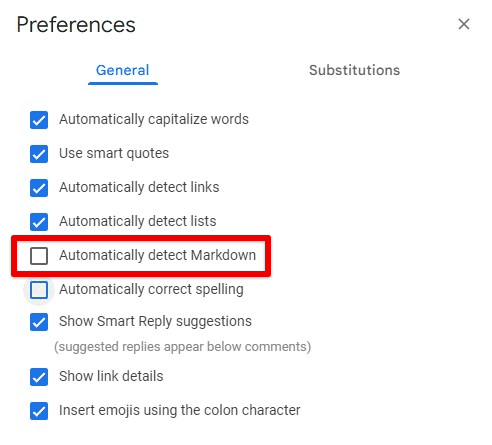
Disabling unnecessary features
Clear your cache: Over time, your browser’s cache can become cluttered, slowing down performance irrespective of any issues with the autocorrect feature. It is recommended to clear your cache every few days, even if there are no apparent issues with your browser or Google Docs.
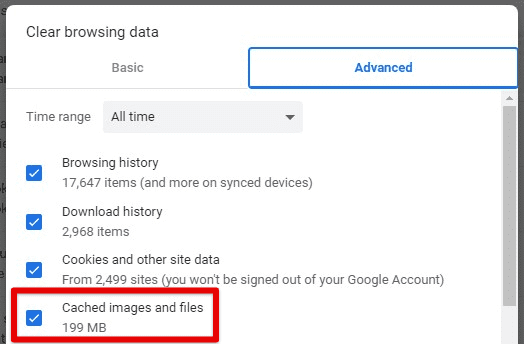
Clearing browser cache
Check your device’s resources: If your device is running low on memory or processing power, autocorrect may not work as quickly as you’d like. Consider closing unnecessary programs or applications running in the background.
Conclusion
Autocorrect and text replacement are excellent productivity tools for saving time and improving typing accuracy on any word processing software. In Google Docs, you can set up these features and customize them according to specific preferences based on regularly used words or phrases. Text replacement rules streamline your workflow and reduce the error likelihood across all new documents. Additionally, by using these features for multilingual documents and syncing settings across devices, Docs lets you further improve overall productivity. Want to take your Google Suite customization journey to the next level? Learn how to create custom templates in Google Docs, Sheets, and Slides.
