If you’ve been dealing with online app purchases for a while now, then you’re probably aware of what Google Pay is. For the uninitiated, this application is Google’s in-house payment platform that lets users track their payments, assess their budgets, and secure their credit cards.
The functionality is pretty popular on Android, but few know that Chromebook users can effectively utilize Google Pay on their end as well. This guide will aim to walk you through setting up Google Pay on ChromeOS so you never have to lose track of your purchases again.
Let’s dive right into the guide with no further ado.
Setting up Google Pay on ChromeOS
Unluckily, the top-rated Google Pay app on the Play Store has not yet made its way onto Chromebooks, which can be found ubiquitously on Android and iOS smartphones. With that said, ChromeOS users have a workable alternative to approach here, and it rotates around seamlessly utilizing the web-based version of Pay.
The mobile payment service, therefore, can be taken full advantage of through your Chromebook’s Chrome browser. If you’ve ever purchased on the Play Store or anywhere else using a Google service, the card you used will be saved to Google Pay, negating the tedious need to type in your extensive account information ever again.
Once you’re trying to pay, an alert will be sent to your smartphone for verification. A simple tap on that front will make your buyout ready to go. On the contrary, traditional methods include waiting for an OTP to arrive and then typing it in, not to mention pulling out your card and entering the credentials.
To get started with Google Pay on your Chromebook, head to the official web handle on your end. If you’re using Google Pay for the first time, you may need to add a card so it becomes affiliated with your account. Then, switch to the “Payment methods” tab and select “Add payment method” to continue to the next step.
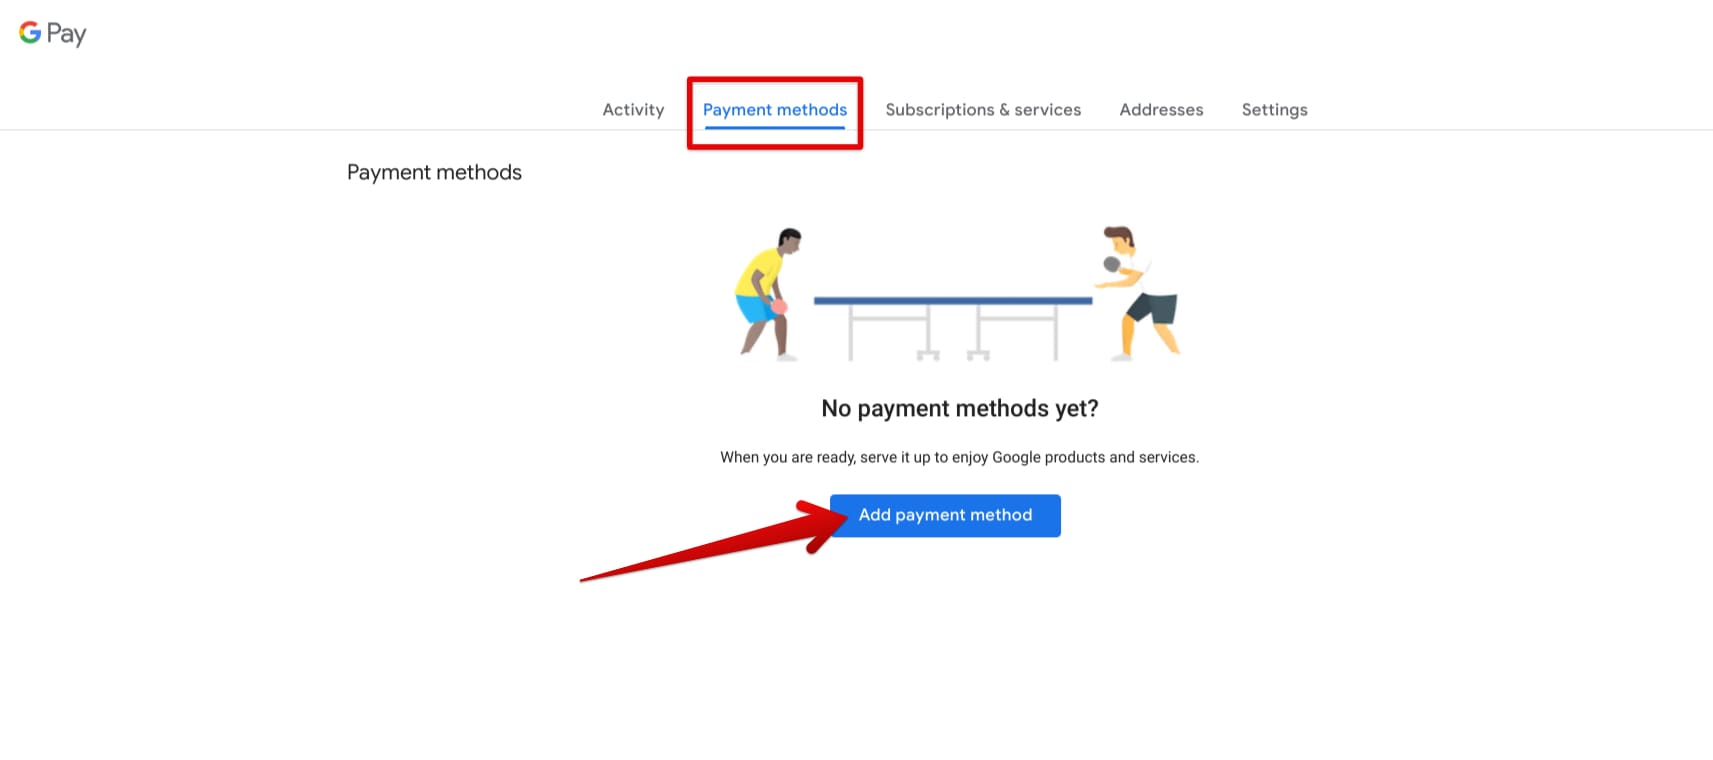
Adding a payment method to Google Pay
You should now be able to enter your card details, starting with the card number and wrapping things up with your billing address. Go through the required fields carefully and ensure not to enter incorrect information for possible results. Click the “Save” button when you’re done to move forward.
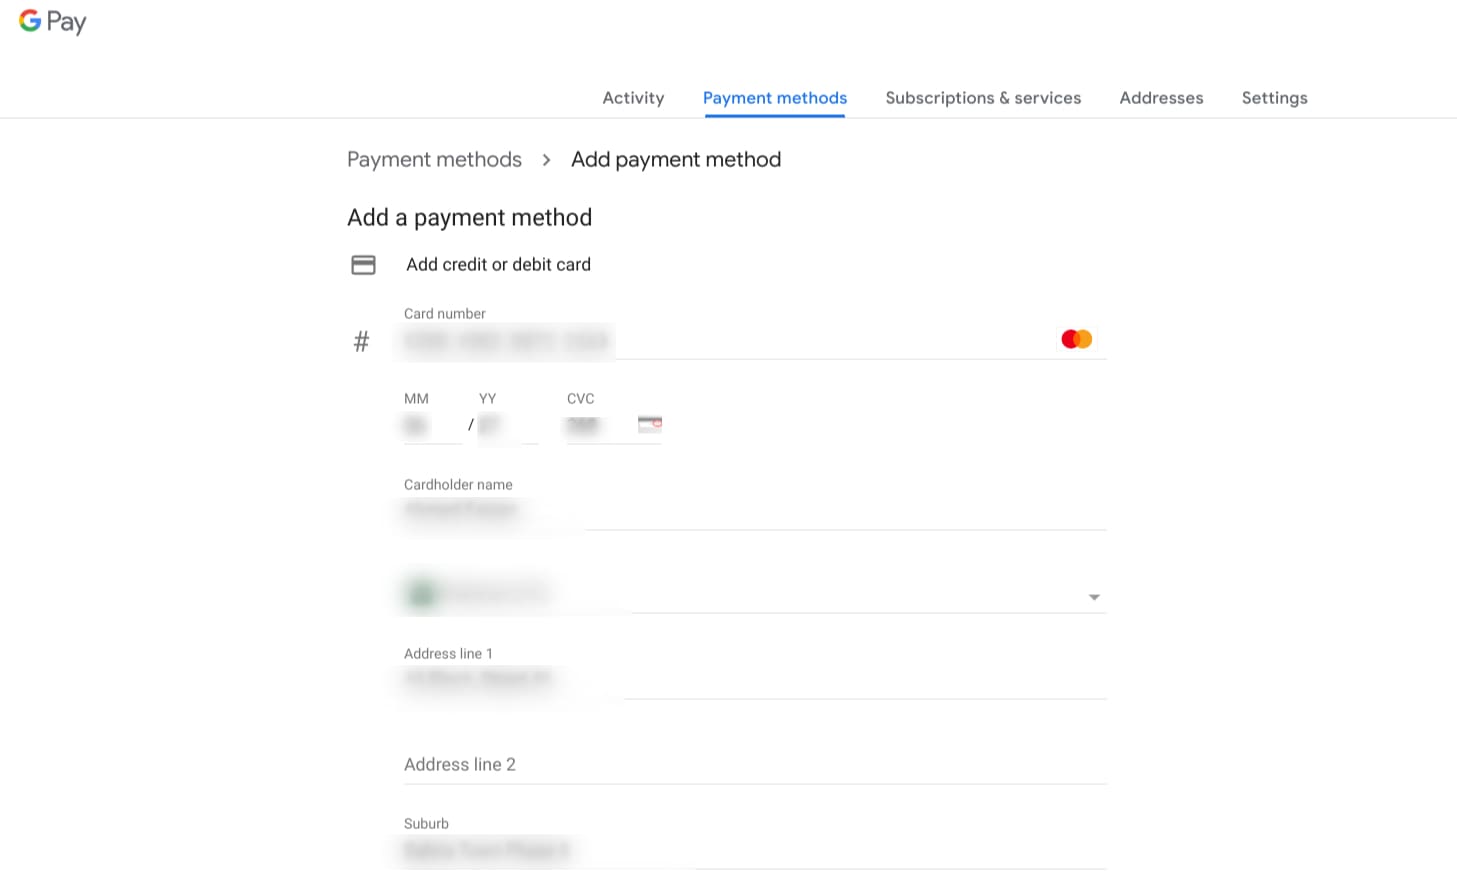
Filling out the credentials of the payment method
It would be best if you now had your card saved and ready to go through Google Pay. Do note that five debit or credit cards belonging to authentic banks can be added to the payment platform, so there’s always the option to get more of your cards on Pay’s system and streamline things even more for you.

Card added to Google Pay
How Google Pay integrates with your Chromebook
After adding a payment method, as we showed you above, head to any site or app asking you to enter your credit card information to catch Google Pay’s integration with your Chromebook in action. Now don’t go ahead and get yourself scammed—we’re talking about a reputable source of purchase here, such as Netflix.
Tap on any empty bar when you arrive at the relevant fields demanding your card number or billing information. You should be able to visualize a pop-up on your end from Google Pay, allowing you to fill in the required fields with just a single tap, provided that you have already set up a Pay account on your end.
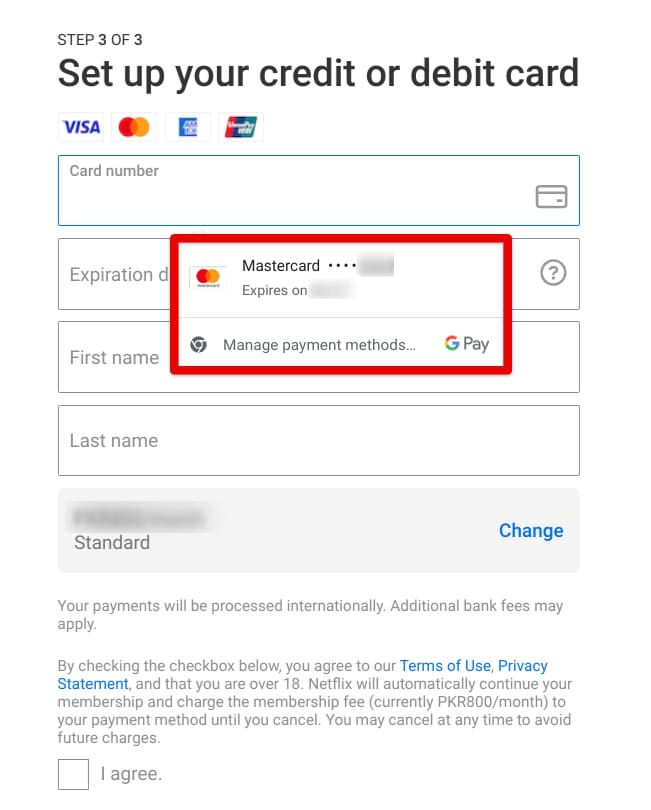
Google Pay integrating with ChromeOS
It’s as convenient as that to make Google Pay step into your online life and make your purchases painless from there on out. Since the Chrome browser also records your payment methods, it establishes a link with Google Pay. The Google Pay pop-up comprises a button to help you “manage payment methods.”
If you click on it, you’ll be taken to a dedicated portion of Chrome’s “Settings” page. Here, you can add more payment methods and manage your existing ones. Do note that the cards you add here using Chrome’s “Settings” won’t be a part of Google Pay. You need to visit the latter’s official website, just like we showed you in one of the sections above.

The “Payment methods” section in Google Chrome
How to track activity and manage subscriptions with Google Pay
Google Pay is not just a convenient way to make online purchases. The service can help you track your online purchases and manage your active subscriptions to Google services. Switching to the “Activity” tab on the Google Pay home page will enlist your purchases.
The relevant details associated with each payment will also be available, such as the amount paid, the date the buyout occurred, and the store, retailer, or service you bought from. The section will be empty for those new to Google Pay who haven’t purchased anything yet with their set-up bank card.

The “Activity tab” in Google Pay
Furthermore, the “Subscriptions and services” area next highlights the Google services you’ve purchased, such as YouTube Premium or Google One. Under each entry, you’ll be shown the date you subscribed and when the subscription will end unless you subscribe again.

The “Subscriptions and services” tab in Google Pay
How to remove or edit cards in Google Pay

Removing or editing a card in Google Pay
Google Pay makes it easy for users if they ever want to remove their existing payment methods or update them with new information. Speaking of which, some banks may also support an automatic updating feature for your cards in cases where you get issued a new one as a replacement to your currently added card on Google Pay.
However, this depends from bank to bank and the region you live in, so double-check your credentials and the relevant information manually. If you ever want to update your card information or somehow use the wrong parameters, head to the “Payment methods” tab on the official Google Pay website.
As soon as you’re there, click “Edit,” An overlay will appear on the screen, letting you improve the card’s current status and switch up the expiry date, CVC, your name, and address if needed. Using this section, you can also set a nickname for your card to make things easier to grasp when you’ve added multiple debit or credit cards to your Pay account.
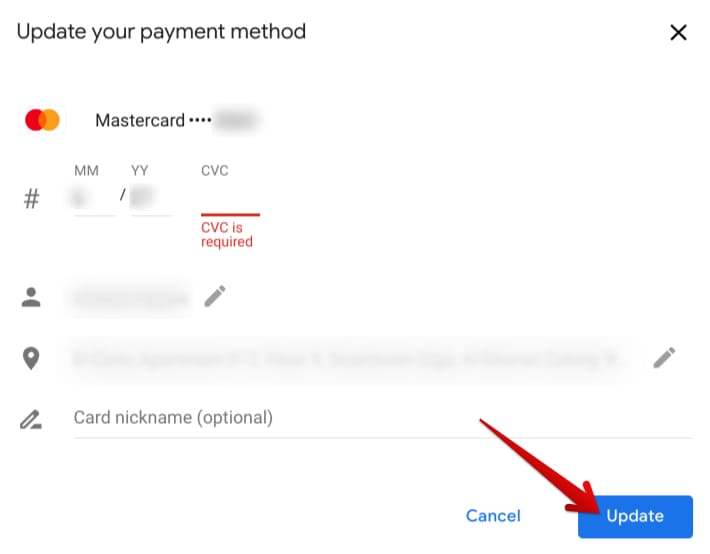
Updating a payment method in Google Pay
To remove a bank card from Google Pay, return to the “Payment methods” tab and tap the “Remove” button. An overlay will also appear this time, allowing you to confirm the removal of the card from the system.
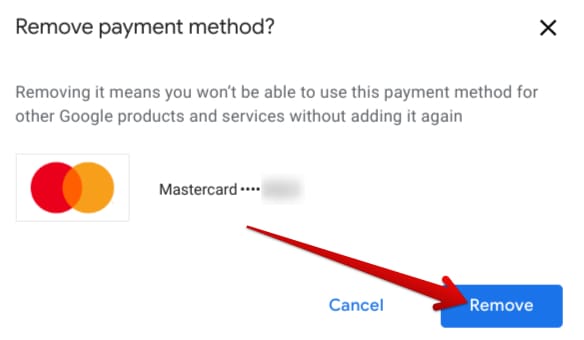
Removing a payment method in Google Pay
That’s all there is to know about setting up and using your Chromebook’s Google Pay integration. You’ve learned the ins and outs of the matter, so you can proceed swimmingly concerning payouts with Google Pay.
Conclusion
Chromebooks are some of the most interconnected devices on the planet at the moment, benefitting greatly from Google’s diverse ecosystem. ChromeOS integrates with Google Drive immediately, featuring direct access to the cloud storage service from its file manager app. Even more so, Dropbox, too, can be utilized in a built-in manner, should you get into it.
This guide closely examined what Google Pay is and how it can be used on a Chromebook. Although the Android app of the service is missing on ChromeOS, the browser-based iteration of Pay can help us get the job done effortlessly. Let us know in the comments section if the write-up above helped you.
As always, Chrome Ready wishes you good luck!
